

Version| Date purchased | Price paid
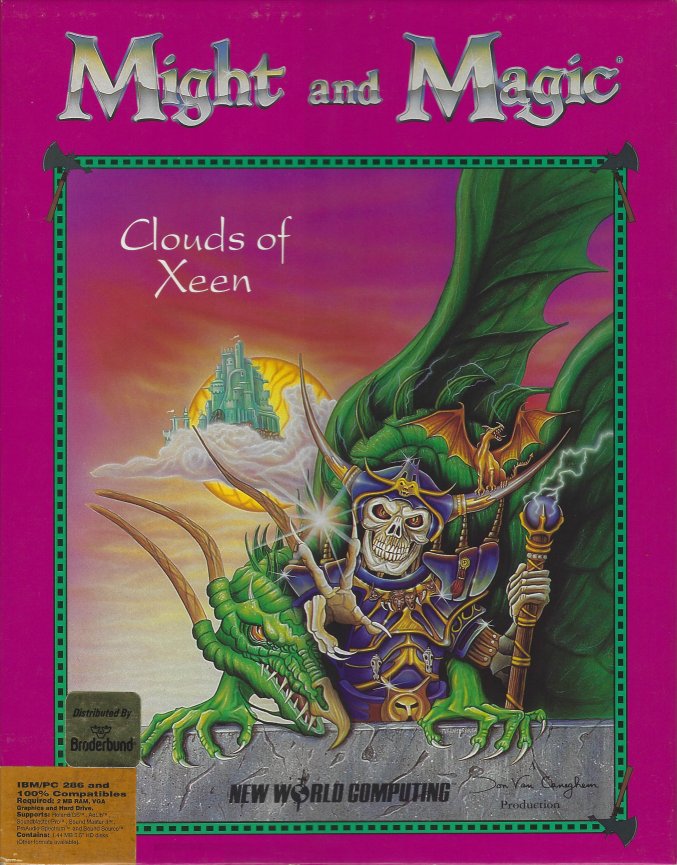
| Might and Magic: Clouds of Xeen | Oct. 29, 1995 | $19.99
| Might and Magic: Darkside of Xeen | Jan. 20, 1995 | $19.87
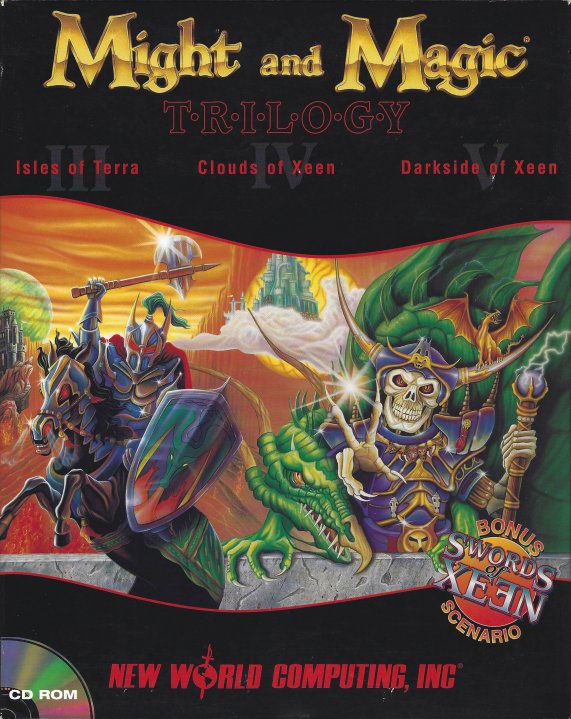
| Might and Magic Trilogy | May 3, 1996 | $24.99
| Might and Magic VI: The Mandate of Heaven Limited Edition (no box) | May 28, 1998 | $34.99
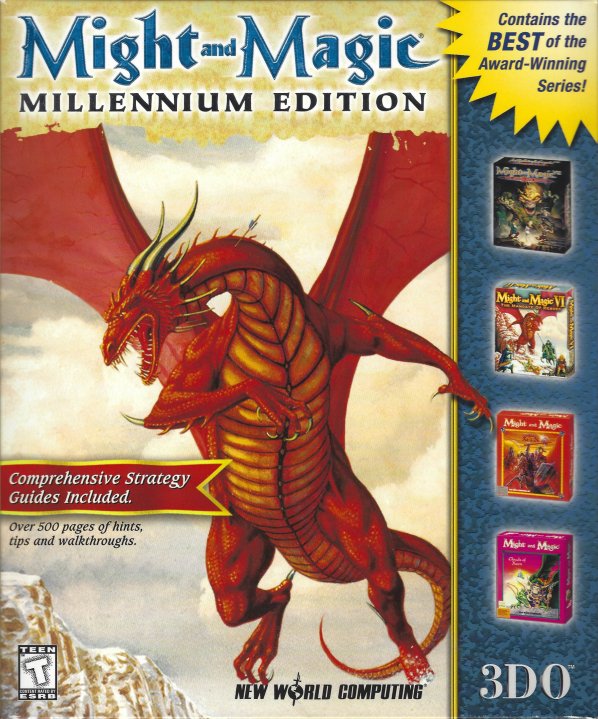
| Might and Magic: Millennium Edition | Dec. 8, 1999 | $32.95
| |
This will be my 4th or 5th time playing through this game since I bought it when it was originally released. I'm playing from my install from the Might and Magic VI Millennium Edition CD. DOSBox was needed in order to get by the company credit screen and actually start -- I couldn't find a sound card setup that was able to work.
Since I've already beaten this multiple times, all with the default party, I'll actually be creating a new party. I will also not keep reloading in order to get better stuff from chests (although I probably will in order to get a clean kill on the Mega Dragon simply due to Eradication effects). One thing I've been meaning to try is to not drink/touch/etc. any of the auto-Level Up items and see what level I can get to. I also won't be using the Work for ~100 years trick to get enough GP to fully level up (I'd always hex edited my file to get enough GP for those last levels).
Hello, Travelers indeed. This is my party, taking the first roll that satisfied the Class requirements:
| Sex | Race | Class | Might | Intellect | Personality | Endurance | Speed | Accuracy | Luck | |
| Galand | Male | Elf | Barbarian | 14 | 18 | 8 | 17 | 9 | 8 | 12 |
| Sir Felgar | Male | Human | Knight | 16 | 16 | 11 | 13 | 15 | 11 | 12 |
| Boudicca | Female | H-Orc | Paladin | 21 | 10 | 13 | 15 | 18 | 10 | 13 |
| Swifty | Male | Gnome | Robber | 14 | 16 | 10 | 9 | 6 | 12 | 15 |
| Serena | Female | Gnome | Druid | 7 | 16 | 15 | 6 | 13 | 8 | 14 |
| Cassandra | Female | Elf | Ninja | 14 | 19 | 14 | 15 | 15 | 13 | 20 |
I got some useless high stats for some classes and a couple slow as molasses characters.
Time to explore Vertigo with zero equipment. I wonder if I can even take out the Slime that greets everyone when starting a New Game.
Wow. A Speed of 6 gets you -2 AC.
My Druid started out with 2 HP, and since she can only wear Robes, it's going to be a real chore just keeping her alive.
Cleared out and fully mapped Vertigo. I picked up Cartography for one character -- I over-outfitted myself at the Blacksmith, forcing me to raid all the trees to get the 100GP fee. Completed the Town Quest which got me enough Exp to train everyone up to Level 4 with the exception of my Paladin. Also got Vertigo Guild Memberships for my two spellcasters. The best piece of equipment I found was a set of Plate Mail. I did end up finding 3 missile weapons (to go with the one Crossbow I bought), which is a good thing since I always like having my characters with ranged weapons ASAP.
Now I'm off to the great outdoors and the dwarves at the Red Dwarf Mines, whom Gunther the Mayor told me to help out.
Good thing my Clouds of Xeen manual was easy to get to for the copy protect to leave Vertigo. IIRC, that's the last time I'll need it for that purpose.
Headed outdoors -- the +5 AC and +25 HP wells nearby are very handy at this point in the game. Got the Phirna Root Quest (which I believe never clears from your log) and the quest to save Derek the Ranger's wife from the Zombies.
Cleared out Dwarf Mine 1. My Druid can now survive a bit easier thanks to all the permanent attribute boosts in the Mine. Opening the doors and grates provided a good source of Exp for my Robber and Ninja. I still remember the Mine Car codes to the lower sections from previous playthroughs, but won't use them at this point, opting to only use them when I get the clues during this playthrough.
Taking a break from the Mine, I explored a little of the Outdoors. One of my characters already has Spot Secret Doors, so that saves me 500GP as I would otherwise have paid to get it from the tent out here. Destroyed the Orc observatory post for 1k Exp each, some GP, and a handful of useless items (I had already picked up better equipment in the Mine) -- I've never tried to see if monsters will respawn if you don't destroy these places. The Insect Swarms are limiting my westward travels since I have a really hard time hitting them and their multitude of attacks per round endangers my party enough to wait until I've leveled up a bit more.
I'm heading back into the Mine to try clearing all of the surface sections.
Cleared out all the Dwarf Mines, including the Deep Mines, except for the part of Dwarf Mine 4 behind the water as I only have one character with the Swimming skill and haven't found the trainer for it yet. I made several trips back out to revisit the three wells (+5 Level, +5 AC, and +25 HP until you're over Max HP) since the Tiger Moles are a definite challenge without doing so. The Antidote Potions I got from trading the Phirna Roots came in handy since the Giant Spiders can inflict Poison, as well as the Gem yielding piles of rubble automatically Poison whomever searches. Deep Mine Omega was a real annoyance with all the poison gas traps right before closed grates and walls you can knock down, made more annoying since the Jump spell doesn't work. I never noticed before this playthrough that the experience gained from opening doors and grates is a base amount of exp multiplied by that character's Level.
Clearing the mines got some more permanent stat increases and well over 50k GP from all the gold veins. I also got 50k Exp each from the Vertigo Mayor for taking out the Clan King. I also finally got the best base armor for every character and finally started getting some Helms and Boots to start fully outfitting my party. I also picked up Direction Sense for free for the rest of my party (this wasn't needed since my Druid started with it). So until I find the Swimming trainer, I'm done with the Action-Packed, Treasure-Filled Mines of the Red Dwarf Range.
My party is all Level 7 except for my Ninja (Level 8) and Robber (Level 9). IIRC, the Vertigo Trainer caps at Level 10, so I'll be needing to find the next town relatively soon. I'm now off to save Derek the Ranger's wife from the zombies south of Vertigo as that's the only concrete task I have to accomplish right now.
I forgot that you can lower or raise the CPU speed in DOSBox via Ctrl-F11 or Ctrl-F12, respectively. I increased the cycles from 3000 to around 6500 and it runs much, much better.
In order to more quickly map out the woods, I decided to get the Path Finder skill for two characters. Instead of the 2500 GP advertised price, it actually only costs 2000 GP, so that saved me 1000 GP.
While trying to complete Derek's quest, I ran into the hut with Valia in it after passing by the first major outdoor structure I've encountered in the Tower south of Vertigo. She gave me the Crystal Key to the tower and wants me to find the Alacorn for Falista the Unicorn. Also while searching for Celia, I came across 2 dungeon entrances among the woods, both of which need stones that I don't have to enter. I also came across the +25 SP well by Pitchfork Creek. I finally got to where Celia is tied up a couple map sectors to the east, a bit further than expected, and got 5k Exp per character for my troubles. I also desecrated a shrine to the Undead in the woods for another 5k Exp each. Upon returning to Derek, he gave my characters another 20k Exp each, and 2k GP. So that turned out to be a nice little Exp boost at this point.
I next tackled Witch Tower to find the Alacorn of Falista. Maybe this was supposed to be done a bit earlier because the lower levels are full of extremely weak Goblins which usually fell to my 5 ranged attackers and rarely got into melee, and even then they were almost always one-hit kills. Freeing the four children from the cages netted my characters 20k Exp each overall. Also got a few permanent +1 boosts to all stats via some of the cauldrons. Picked up a handful of spells for a small amount of Gems, which will help with my GP saving strategy. Found the Alacorn behind the secret passageway, and got a very nice 60k Exp for returning it to Valia. The Wicked Witches and Head Witch did force me into actually spending money for something other than training as I had to UnCurse every character when I got back to town. My Robber hit Level 10, so he can no longer train in Vertigo. The rest of my party is at least Level 8.
Looking at the map, my next destination will either be the town of Nightshadow (through the Killer Sprites) or Castle Burlock (through the Insect Swarms). That'll have to wait for next weekend.
Current party stats:
| Sex | Race | Class | Might | Intellect | Personality | Endurance | Speed | Accuracy | Luck | |
| Galand | M | Elf | Barbarian | 18 | 18 | 10 | 17 | 15 | 12 | 16 |
| Boudicca | F | H-Orc | Paladin | 23 | 12 | 17 | 15 | 18 | 12 | 15 |
| Sir Felgar | M | Human | Knight | 17 | 17 | 12 | 14 | 16 | 14 | 17 |
| Cassandra | F | Elf | Ninja | 14 | 19 | 14 | 15 | 15 | 13 | 20 |
| Swifty | M | Gnome | Robber | 16 | 18 | 12 | 13 | 16 | 14 | 17 |
| Serena | F | Gnome | Druid | 16 | 21 | 16 | 13 | 16 | 13 | 15 |
I decided to go to Castle Burlock since it's on the way to Rivercity, which was mentioned by a Tavern Patron in Vertigo. Picked up the secondary skills Linguist and Astrologer (useful for my Druid) for free by reading a couple books laying on shelves. Also got four Quests -- find Crodo, recover Princess Roxanne's diamond tiara from Rivercity, the beginning of the Castle building quest by being told to acquire a plot of land, and find the Sixth Mirror for King Burlock. I mistakenly saved after opening one of the chests in the Royal Bedroom as my party is no match for the King's Guard that stealing the treasure summons (I was able to run away without getting anyone killed). The Castle Guards in the Castle's Dungeon are also too tough for my party, so I'll be coming back to clear out the dungeon and the other chest later. I don't know what the Well on the main floor actually does.
Along the route to Rivercity is the Merchant trainer. This is a must have Skill as it doubles how much the Blacksmiths buy your items for -- very quickly making back the 6000GP cost for the skill. I also came across the Spring Druid, which is in the middle of the Seasons Quest, who is in need of the Last Snowflake of Winter which I don't have. Since the only way to get to Rivercity at this point is by spending 100GP for the boat ride, I spent the cash. After dispatching the single Insane Beggar that greets the party upon landing on shore, I picked up the Swimmer skill, which is conveniently located right next to the dock, for the entire party and proceeded to start exploring the town. The only other skill I decided to get while here is the pricey Mountaineering (5000GP) for two characters so I can almost fully explore the outdoors. I passed up Arms Master, Body Building, and Navigation for now. The only other thing of note is getting the quest from Borak to retrieve his magic pendant from the Sorceresses in town. But since they are a bit tough to hit right now, I think I'll head over to Nightshadow as it's listed ahead of Rivercity in the list of cities in the Auto Notes.
Since I now am free to roam the outdoors, except for the deep waters, I went back to Vertigo and started mapping out what I couldn't access before. Going south, I found Orothin and returned his Whistle that I found earlier in E4, for which I got a nice 15k experience each as well as activating the two statues nearby to learn Cure Poison and Cure Disease for both of my spellcasters. I also picked up a couple Enchant Item Scrolls from the bottles in the rivers. Crossing the mountains to the north of Vertigo put me amongst a bunch of Orcs which, thanks in part to the +5 AC well, hardly hit me. I also pillaged a couple caves and a hut that are home to the Orcs for a total of 21k Exp each, a nice chunk of GP, and some pretty good equipment at this point. I went as far north as the lava floes and turned back, since those Lava Golems are WAY too tough for my party (plus they break weapons as their special power), basically staying south of sector F1.
I have been purposely ignoring the Pyramids to Darkside at this point.
Off to the town of Nightshadow to try my luck there.
Nightshadow was a bad idea. The Bat Queens are no problem, but the Gnome Vampires are a touch beyond my party's ability. So, I went back to complete Rivercity with a stop back at the +5 AC, +5 Level, and +25 HP wells outside of Vertigo -- the Travel Mirrors making this possible. With those buffs in place, I was able to take out the Sorceresses and pick up Barok's Magic Pendant. I also took out the band of Robbers and claimed Princess Roxanne's Tiara. The Yang Knight behind the Trainer is the only thing keeping me from fully mapping out this town. I decided to get the Body Builder (+1 HP per level) and Arms Master skills for my entire party.
Since I don't have a Sorcerer or Ranger, Barok's reward of teaching my party the Enchant Item spell went to waste, so the 80k experience was a good consolation. I headed back to Castle Burlock (which can be accessed via the Travel Mirrors) and got a whopping 200k experience each from the Princess, as well as a good amount of GP, Gems, and items. This was enough to Level everyone up to 10, and my Robber to 11. The Castle Guard is still too tough, so I still have clearing the Dungeon as a future task.
Since I can now traverse the shallow waters, I headed back to Dwarf Mine 4 to access the areas previously unreachable, which got me absolutely nothing. With Nightshadow still a little above my party's skill level, I'm off to take care of the only realistic Quest left -- finding Crodo in, as several letters in bottles in the river told me, Darzog's Tower, just south of Castle Burlock.
As I started off my travels to Darzog's Tower, I finally investigated the tent just outside Nightshadow, and picked up another quest from Mirabeth the Mermaid to retrieve an elixir which will restore her tail and beauty. She gave me the stone needed to enter the Ancient Temple of Yak due east of Nightshadow. Since it is so close, I took a detour and headed there first. After activating a few floor traps that damage the front two party members shortly into the Temple, I decided to head back to Rivercity and purchase the Levitation spell for my Druid (I was hoping to find the spell and get it for free). While in Rivercity, I headed to the well that got reactivated upon completion of Borak's quest earlier, and discovered that it gives +100 SP if you're not above max SP (my SP were above max previously, so I wasn't able to learn what it did).
With Levitation learned, I headed back to the Temple. The crates here are a bit more sturdy as my Paladin with Might of 23 wasn't able to open them, where previously she could. Good thing I had found an Ogre Pendant and my Barbarian with 26 Might was able to open them. Too bad none of them have anything useful, with most of them simply hiding three Skeletons, which were easily dispatched. The Yak Clerics and Priests did a little damage, thanks to their being faster than my party and the Priests' party based fire spell, but nothing major. I opened up all the secret passageways by solving the few extremely basic switch based puzzles. The major benefit to this dungeon is the pools that repeatedly add 5 to everyone's Personality and Endurance until each character is > 20. Well worth the Disease and Drunkenness that the pools inflict, especially since I had picked up Cure Disease a little while back. Drunkenness just eventually turns to Weak, then auto-heals at 8am. I also snagged a few spells that I'll probably never use (I already had Light) for free here. My party is no match for the Yak Lichs found in the coffins right now, so I'll have to come back for the Elixir later.
After getting what I could, I decided to try again to clear out Nightshadow. The Bat Queens respawned (IIRC, they are the only monsters that continue to respawn for the entire game), but they are easy pickings. The Gnome Vampires were much easier this time around -- I only had to make one trip back to the trio of wells near Vertigo. I got some decent items from the coffins that hold most of the Gnome Vampires. Two headstones in the northeast corner make it blatantly obvious how to solve the sundial puzzle needed to open the coffin in the northwest corner. I'm not sure if you have to try this at night (as the third headstone hints at), but it just happened to be nighttime when I did try. About as close as you can get to a boss in this game, Count Draco turned out to be a tough opponent. After a couple rounds of whiffs with physical attacks, I decided to use some of the multitude of wands, rod, and other items and it turns out that he is vulnerable to pretty much any spell you want to throw at him. In addition to the 70k party experience you get from defeating him, you get another 50k Exp each as if you completed a quest, plus 99,999GP and several decent items. Also as a result of defeating him, the well now grants +10 Levels, which makes it quicker to access than the +5 well outside Vertigo.
Now with Nightshadow taken care of, time to head back outside and slowly make my way to Darzog's Tower. Along my zigzag travels, I happened across the Wand of Faerie Magic, a Quest Item for a quest I don't have yet, and Ligono the Spirit who is looking for his lost skull. Since Darzog's Tower is on an island in the deep waters, I made a quick stop back in Rivercity to buy the Walk on Water spell (of course, this isn't necessary to get to the Tower since you can get there via the Travel Mirrors). So I finally reach the Tower only to be turned away since I don't have the Key. Looks like I have my first objective for next weekend. Or maybe find the Skull first.
I went back to zigzagging north and south, slowly heading west and ended up picking up Ligono's Lost Skull along the southern edge of the world, taking out a cave of Sprite eggs along the way for a little bit of exp, gold, and some items. Upon returning the Skull, once again the spell reward, Recharge Item, went to waste as I have no one that can learn it, leaving just the 40k Exp each as reward. Since I still haven't picked up the key to Darzog's Tower, I headed back to the Yak Temple, buffing myself with the +50 Speed well.
It turns out that I had overlooked a pathway and quickly found the Elixir of Restoration in a little alcove. While I was here, I decided to challenge the Yak Lichs in the coffins. While they have the ability to knock characters Unconscious, a First Aid spell is all that's needed to get any afflicted characters back up and running -- assuming anyone survives the battle. Opening the coffins inflicts a -5 Curse to whomever opens it, and they stack. I decided to not spread out the cursing and just have the same character open all of them. This brought my Druid down to 0 Luck, which I found out will cause that character to drop dead after a bit. I was able to clear out all the coffins except for the one that the Yak Master resides in. Its ability to inflict Death and it being just an overall much stronger Yak Lich has me leaving this monster until later. There also is a Pool that gives 25k Exp to one character, but Kills that character. This will be left for when I get the Raise Dead spell, which is cheaper than paying the Temple. Taking the Elixir back to Mirabeth outside Nightshadow got me 250k Exp each as well as +5 to everyone's Personality.
Back to exploring the Outdoors. I eventually made it to the Gargoyle Range. The gargoyles can be a struggle since they have a decent chance of Paralyzing your entire party, causing a Game Over and Skeletor laughing at you. In amongst the mountains, guarded by a couple gargoyles, is a chest containing the Scarab of Imaging, for which I had yet to acquire the quest. I also came across the Autumn Druid, which isn't the beginning of that quest, either. Shortly thereafter, I came across Danulf the Faery King who happily took the Wand I had picked up earlier, bestowing 45k Exp each and 25k GP. I then encountered Medin the Fisherman, whose quest I had already completed since I killed all the Water Dragons around Darzog's Tower. That netted my party 100k Exp each as well as my first piece of Obsidian equipment -- a cape.
Continuing along, I came across the castle for sale and fixing up, but I'll save the 50k GP needed to buy it for a little while. Completing another quest for which I already had the objective, I gave the Scarab of Imaging to Carlawna the Cleric in return for 75k Exp and the Moon Ray spell, which my Paladin can actually learn. On the edge of Ogre Hills, Captain Nystor has quested my party with destroying the Lair of the Ogres. After all that, I finally arrived at the 4th town: Asp.
There is very little to the town of Asp. The only shop is the Mage Guild. Talking to Adam and Eve, I learned that Asp is afflicted with a curse that turns the townsfolk into snakes. After making quick work of the Snake Men and Guardian Asps, I set the orbs as directed, destroyed the transformer for 50k Exp each and snagged the Crystals of Piezoelectricity for a future quest. With nothing else to do in Asp, it's back to the great outdoors.
Heading into the desert north and west of Asp, I quickly realized that I finally needed that Navigation skill. So, a quick stop back at Rivercity and 2000GP later, I can now traverse the desert with ease. On my way back south from Asp, I entered the tent of Falagar the Wizard and gave him the Crystals I found in Asp for 75k Exp and another spell no one can learn -- Megavolts. Moving along, I ran into Tito the Elf Priest who needs me to find their Holy Book -- a lot of simple fetch quests starting to pop up now. Having come across and destroying the Ogre Lair shortly thereafter, I headed back to Captain Nystor for a little exp (40k) and a tidy sum of gold (20k). Along my travels, I took out some Evil Ranger and Barbarian camps for some pretty good equipment -- the Barbarians themselves have given me quite a few really good equipment.
Heading into the snow-covered Troll Forest had me encountering a nasty little monster in the Ice Trolls. While they aren't a big hazard to my party's health, they have the special ability to fully recover their HP after every round of battle. When my buffs wear off, my party is right at the edge of being able to take them out in one round. While in this area, I found the Holy Book of Elvenkind and promptly returned it to Tito for 60k Exp and 25k GP. A bit west of Asp, I stumbled upon the Warzone and did the easiest battle I could just to get back out, taking out a single Doom Bug. I much prefer Might and Magic III's Arena to this with respect of it just automatically getting tougher with each successive trip, instead of having to choose how many enemies and what level of enemies you want to fight.
Picking up a couple more quests, I met Halon the Efficient who is looking for the Everhot Lava Rock (which was beyond where I was willing to go north of Vertigo) and Thinkbark the Civilized who tasked me with taking out the Troll Lair. Coming across one of the few caves in Clouds, I entered the Cave of Illusion. I only explored the 1st Level partly because the Water Golems are a bit tough, but mostly because I didn't have enough Gems on hand to feed all the skulls for the permanent stat increases. Note that you take zero damage from the corridor of spike traps by Jumping your way through it -- just don't do anything other than casting another Jump after you've landed in the square that should otherwise damage you. After leaving the Cave with its illusory swords, I took out the Troll Lair, returning to Thickbark for 75k Exp and Super Shelter, which again no one can learn.
Along the road to Asp, I met Kai Wu whose Pagoda had been taken over by the Ninja Clan. Just stepping inside the pagoda, which looks an awful lot like a simple hut, is enough to complete this quest and Kai Wu was so grateful that in addition to the 75k Exp, he kindly maxed out my party's food -- I have rested exactly once, very very early in the game before I had enough money to train to Level 2. Continuing along, I finally came across the Summer Druid to begin the Seasons quest, picking up the Last Flower of Summer to be given to the Autumn Druid.
Two more quests awaited me as I met Arie the Apprentice, who is in need of the Scroll of Insight from Castle Basenji, and Glom the Gnome King, who wants me to wipe out the Cyclops Lair. I didn't get to Castle Basenji, but I did take out the Lair, returning to Glom for 100k Exp and some items.
Adding to my future tasks, during this bit of travels I came across 2 Towers, 2 Dungeons, and the 2 Sphinxes, none of which I can enter at this point. I did remember that you can go to any location labeled on the map that comes with the game via the Travel Mirrors in the towns just by typing it in as labeled on the map (unlike M&M3 where they all had codewords).
With a couple options of what to do next, quest-wise, I headed to Castle Basenji (did you know basenji is a breed of dog? Neither did I until my 2nd or 3rd playthrough. This makes the werewolves found therein an obvious enemy type. http://en.wikipedia.org/wiki/Basenji). After dispatching the Werewolves and Wizards, in amongst the Scrolls that give Resistance and Stat upgrads (as well as some that kill whomever reads it), the Scroll of Insight was found. I promptly brought it to Arie for a nice 750k Exp each and the Amulet needed to enter the Northern Sphinx. I then decided to snag the Everhot Lava Rock, so headed back toward the lava floes in the northeast and the rock was laying a safe enough distance from any Lava Golems. Halon rewarded my party with 150k Exp each and a Widget, which I have no use for right now.
Now that I had enough Gems on hand (without needing to withdraw any from the bank), I headed back to the Cave of Illusion. I previously said that the spike traps could be Jumped through without taking any damage. More accurately, as long as the water covers the floor, the traps can be simply walked through with no damage taken. To get every stat upgrade, almost 2000 Gems are needed, as well as someone with the Teleport spell. Another 300 Gems are needed to obtain the Key to the Tower of High Magic. The drain plug turned out to be too stubborn for my party, as my Barbarian with 48 Might couldn't pull it.
I then headed back to Rivercity to have another go against the Yang Knights. Having the +10 Level buff from Nightshadow and all the other city well buffs, I was able to take down Captain Yang and all the Knights for some pretty decent equipment drops. Heading back outside to finish mapping the outdoors, I encountered the last of the four Seasonal Druids -- the Winter Druid. I also made it to the 5th and final town of Clouds, entering Winterkill. Since the Spirit Bones can't be damaged with physical attacks, I decided to put this town off a bit and finish the outdoors. In the NW and SW corners of the world are the very nice fountains that give 250 HP and SP, respectively, as well as a nice +30 AC fountain a bit north of the SP fountain.
Remembering that I hadn't explored the top level of the Witch Tower because it requires levitating, I went back there since my Druid now has that spell. Other than some Gems and pretty much useless weaponry, there is a little cloud island only reachable by the Teleport spell. Since that is too high level of a Sorcerer spell for my Druid, I went back to Vertigo to pick up the Sorcerer from the default party who is sitting in the Tavern. After signing him up for all four of the current Mage Guilds, it turns out that Teleport is sold in Winterkill. So, off to Winterkill with my normal party.
Back in Winterkill, I've been tasked by the Mayor to lift the city's curse by taking out the Spirit Bones. With Magic Arrow and Acid Spray, and the spirits' almost complete inability to damage my party, I was able to make quick work of them. With the order of tasks given by one of the little orbs scattered around the town, as well as how to activate the +50 Might Well, I was able to complete the first leg of the quest. Of course, the second two legs are the exact same, just with stronger enemies. I always forget to check my party's age, so I now need to find out how to reverse unnatural aging as that is the special ability of those ghostly enemies and they did connect a handful of times. Now that I've cleared Winterkill, I bought Teleport for my Sorcerer back in the Tavern, and found out that the little island above Witch Tower has a +1 Level statue. As per my plan, I reloaded in order to save all the auto-level ups for the end of the game.
Going back to the Cave of Illusion with Winterkill's Might buff, I was able to pull the drain plug. With the plug pulled, the safes became accessible. This netted some nice equipment and a decent haul in GP. It also summoned some extremely weak Guardians. With the Cave cleared, off to the Northern Sphinx.
Before heading to the Sphinx, I decided to try the Guards in Castle Burlock again. With all the town buffs applied, I was able to get through the King's Guards that I had summoned by opening the chest. They dropped some very nice equipment. Since I was able to handle them, I opened the other chest and repeated taking out the Guards, and the main floor became littered with them. Heading into the dungeon, the biggest challenge now became the single Fire Dragon. I also picked up a single Might boost. Now, I finally headed to the Sphinx.
The only real danger in the Northern Sphinx are several unavoidable (at least without Teleport, they're unavoidable) traps that curse and age the party. Found inside this dungeon are thrones that give 500k Exp to each Race, as well one for Robbers only (Ninjas don't count as Thieves). The sarcophagi take a very high Might to open, and my best of 65 wasn't strong enough, so that will force a return trip. After cleaning out what I could, I decided to Turn the Seasons by visiting the four Season Druids in order. Doing so removed the unnatural aging from my entire party, which I was at the early stages of have a pressing need to do as a couple party members were now in their 30s.
The only task left that I hadn't started on was using the Key to the Tower of High Magic that I spent 300 Gems to acquire. This tower has a big annoyance in that there are squares that drain your party of all SP and remove all buffs and party spells. While the run-of-the-mill enemies of Flying Feet and Sorcerers aren't difficult, there is one Fire Dragon that becomes a bit tough at Level 15. There are a decent amount of permanent boosts to Elemental resistances scattered throughout the tower. Most importantly, the Key to Darzog's Tower is found here. Once again, the Clouds above this tower will have to be revisited since it requires the Teleport spell to do much. With Key in hand, I'm off to Darzog's Tower to free Crodo.
If you don't want to be forced into Resting, and if you don't have Town Portal, Walk on Water must be cast before entering this Tower, and you will want to enter it as early in the day as possible. Much like the Tower of High Magic, there are squares that drain your party's SP. But that's all they do, as any buffs remain as well as beneficial spells, such as Walk on Water. You will also need to have the Teleport spell as there is a square that you cannot avoid without it which send you back to the beginning. Fortunately I had picked up an item which can teleport, so I'm able to use my normal party. The Darzog Clones aren't very difficult, but Darzog himself can turn the entire party to stone in one shot, making him a bit dangerous. It's probably best to hit up the +50 Speed well in addition to the town wells. There are some nice +20 stat boosts in this tower, but unfortunately only one of each (except Luck). After taking out Darzog, a few secret passages later I freed Crodo, for which my party is awarded ONE MILLION EXPERIENCE POINTS!!!!! (accompanied by the heavenly chorus). Seeing how that's not even enough to Level Up anymore, it's really not all that impressive. It turns out that I'm on the precipice of completing this game as Lord Xeen's castle is locating directly above in the clouds over this tower. Not so fast, though, as I now need to get a sword from the dungeon of the castle that I've been putting off buying.
After a stop at a Bank to get the 50k GP (waiting for a new week since I now have over 1M GP in the bank, earning 10k per week), I headed back to the decrepit castle due south of Rivercity and bought the Deed to New Castle (or Newcastle if you want to use the Travel Mirrors). Now that I own land, back to Castle Burlock to start fixing the place up. While at Burlock, I got the Excavation Permit from Artemis as further reward for freeing Crodo, and handed over 5 of the 8 King's Mega Credits I found in the Ancient Temple of Yak to Emerson in order to start repairs. Now I'm off to inspect the first round of repairs at Newcastle.
Arriving at Newcastle, I was given the Stone of a Thousand Terrors which the workers found. Entering the castle, I was greeted by nothing but the dirt ground as they had only worked on the castle's foundation. Other than a handful of items which would have been useful if I would have done this when it was first available and a well that poisons whomever drinks from it, defeating some Wood Golems is all there is to do here. Now that I have the Stone needed to enter one of the dungeons I was previously denied entrance to, it's off to the Tomb of 1000 Terrors just southwest of Newcastle.
This Tomb has quite a few permanent Stat boosts at the cost of Insanity. Spot Secret Doors fails to spot most of the breakable walls here, but it's pretty obvious which walls can be broken down. There are also several small experience boosts from having your party try out the manacles and stocks scattered throughout. The main things you will have to get are the King's Mega Credits -- like the Ancient Temple of Yak, there are 8 to be found. My two thieves were unable to pick the locks on a couple of the Iron Maidens, so I'll be coming back to try later on. Now that I have enough Mega Credits, it's back to Castle Burlock for the 2nd round of repairs.
After paying another 5 Credits, I headed back to Newcastle. Again, upon entry I'm given the Golem Stone of Entering, which was also found by the workers. Everything but the Dungeon has been completed and the well that was poison now grants +20 AC. Scattered around the castle are clues to the password to enter the dungeon, which is inaccessible due to rubble blocking the stairway anyway. Also found in the castle are a Blacksmith, Trainer (not sure what the level cap is), Temple, and Bank. If you are actually resting, there is no longer a need to buy food as a couple barrels will max out your supply for free.
A bit farther west of Newcastle is found Golem Dungeon, consisting of 3 puzzles. The first of the puzzles will require the Teleport spell since after cutting each of the six branches, you will need to Teleport out of the branch. So, after clearing out the Wood Golems in this section, I headed back to Vertigo, picked up my standby Sorcerer, completed the wood puzzle, and dropped him back off at the Tavern. I solved the stone puzzle by trial and error since I solved it before figured out exactly how it should have been done. That left only the iron puzzle. This is another simple puzzle since in most cases you can see whether or not the switch opened the pathway by looking at the Automap. Even for the ones you can't, it's not that far to get to the previous end of the path to see if you flipped the correct switch. The only things of note in this dungeon are more Mega Credits and a Diamond Golem, which is too tough for my party -- plus it breaks weapons.
Heading back to Castle Burlock, I handed over 5 more Credits to excavate Newcastle's Dungeon. This being the final round, I now have a completed Castle. Note that if you got all the Mega Credits from the Temple of Yak and Tomb of 1000 Terrors, you don't even need any from Golem Dungeon. Heading down into the dungeon after entering the password which is very easy to get, I looked around for the Sword needed to defeat Xeen. Again, Spot Secret Doors fails here, but it's not so obvious as to which walls can be broken down. The Xeen Slayer Sword was found in the middle of the dungeon. So, off to Castle Xeen above Darzog's Tower.
It's a good thing I have that item that can cast Teleport and a couple that can cast Recharge Item since I'm forced into using them here. Heading to the Clouds, I took out several Roc nests for a total of 350k Exp each. I also picked up a few very nice pieces of equipment scattered amongst the clouds. Entering Castle Xeen turned out to be undoable since I had to win each of four dolls but I didn't have enough GP or Gems to do so. So, back to Vertigo to withdraw funds and pick up my Sorcerer to Teleport to the small cloud islands to get all the offerings.
With Sorcerer in tow, and just enough to play the games, I cleaned out all the offerings, won all four Dolls, and traded the Dolls for the Cupie Doll needed to enter the Castle. After dropping the Sorcerer back off at the Vertigo Tavern, I made my way into Castle Xeen. Heading into the central room, I was turned back by elemental traps everywhere. Exploring the rest of the first floor, I was accosted by Xeen's Guards, which are pretty tough since they are very difficult to hit. I fought my way to the northwest corner and destroyed the Cold Generator for a nice 200k Exp each and more importantly shutting off the cold traps in the center room. I made it about halfway to the northeast corner before deciding I wouldn't be able to survive much longer and turned around and left the castle.
Getting as many buffs as possible, including the +50 Accuracy well a bit southeast of Winterkill, I made another foray into Castle Xeen. I was able to take out the other three Generators, two being in the SE & SW towers, I then turned my attention to the center room, which was now free of traps, and hunting down the Guard generator -- since they respawn, there must be a monster generator somewhere. And, lo and behold, in the top floor, there is the Guard Making Machine whose destruction netted another 200k Exp each. By this time, my party was hurting pretty badly, so I turned around and took one more leave of the castle, trained up my party, and hit all the buffs again.
Now that the guards don't respawn, it was clear sailing back to where I left off. Waiting for me in the next room was Xeen's Pet, as seen in the game's Intro. While it does have the poison breath attack, it was no match for my buffed up party, falling in one round. Getting past his pet, the only thing left was to take on Lord Xeen himself. After getting in a single hit on my Robber, being able to trade around the Xeen Slayer Sword meant I was able to defeat him in the first round. With Lord Xeen quickly dispatched, that only left inspecting the mirror in his room -- the Sixth Mirror that King Burlock was seeking. Inspecting the Mirror cues up the End Game FMV and it's Showtime. With Clouds done, it's on to Darkside.
My final score was 0087005133.
Party stats (with no equipment bonuses):
| Sex | Race | Class | Might | Intellect | Personality | Endurance | Speed | Accuracy | Luck | |
| Galand | M | Elf | Barbarian | 28 | 21 | 30 | 34 | 20 | 24 | 21 |
| Boudicca | F | H-Orc | Paladin 28 | 19 | 52 | 30 | 38 | 24 | 21 | |
| Sir Felgar | M | Human | Knight 27 | 22 | 27 | 34 | 26 | 24 | 27 | |
| Cassandra | F | Elf | Ninja | 26 | 19 | 29 | 45 | 22 | 21 | 20 |
| Swifty | M | Gnome | Robber | 38 | 38 | 29 | 33 | 18 | 34 | 22 |
| Serena | F | Gnome | Druid | 29 | 43 | 56 | 30 | 24 | 23 | 22 |
After being deposited back in Vertigo at the conclusion to Clouds, I headed to the pyramid just outside of the town gates and was greeted by Zelda the Herbalist who handed over the Dragon Pharaoh's Orb which she had found. Close by where I appeared in the town of Castleview is Miles the Cartographer, who posed a riddle. Digging out the map of Darkside that comes with the game, I easily solved it for a quick 100k Exp each. While exploring the town, I picked up my first quest from Nadia who had her Onyx Necklace stolen by the rats in the town sewers. Before tackling that quest, I realized I still had the Sixth Mirror quest in my log, so I made a quick trip back to Clouds via the pyramid in town and back to Castle Burlock, which got me absolutely nothing except an "Aw, shucks" from King Burlock and the quest clearing from my log.
Once back in Castleview, I instantly noticed a big improvement over Clouds in that it was playing different music from the first time I was in town. It turns out that there are a handful of different musical themes for each different location types, thus breaking up the monotony in that respect. One other note about the music -- the Tavern theme eventually becomes the Christmas carol "We Three Kings". Getting back to exploring the town, I picked up a couple more quests -- one from the Mayor to put an end to the Gremlins' mischief around town, and one to free Jethro the Mapmaker's brother Jasper from jail. I shortly thereafter found the jail and freed Jasper and eventually arrived at where the Gremlin King Gettlewaithe held court. After answering a couple questions from him, I easily took out the large group of Gremlin Guards he summoned. Heading back to his tent, I had the option of fighting him or just telling him to behave. Of course I fought him since he's worth experience. Either way, you get 3 Energy Disks in the end -- either by him giving you them or by searching his empty tent after killing him. Back to exploring, I finally arrived at Ellinger's Tower, which is where I was told to take the Orb, but was turned away by a female gatekeeper sporting the '80s big hair look since I didn't have the Key.
I headed back to Jethro and the Mayor for my rewards of 10k and 50k Exp each, respectively. Since Jethro mentioned he would help me out with any mapping needs I had, I purchased what obviously turns out to be a fake treasure map from nearby Joe the Mapmaker, took it to Jethro, and he gave me a real treasure map after laughing at me for buying the fake one. With those quests completed, I headed into the Sewers to find Nadia's necklace. Shortly after entering the sewer at the grate near Nadia, I met up with Valio, who wants me to take out the Queen Rat. Next to his bed is his chest that when you open it, you get to fight him. Leaving that for later, I headed off into the sewers to find the two objectives. Much like the Goblins and Gremlins in town, the Sewer Rats and Sewer Slugs pose no threat since I already beat Clouds. Before finding the Necklace, which is behind Rooka, the Queen Rat, I came across several Might and Endurance boosting barrels, which was very nice. With Necklace in hand and the Queen Rat defeated, I went back to Valio, collected my 25k Exp each, and promptly proceeded to open his chest and kill him for more experience -- after all, his diploma in the chest says he's an Evil Wizard. Upon returning the Necklace to Nadia, she rewarded me with 100k Exp each and the Key to Ellinger's Tower.
Shortly after entering the Tower, I was posed with a morality question. The answer given determines which path on the ground floor is opened. Answer with cruelty and you get the path with worthless items. The "correct" answer will net you some pretty good Boots. Moving up the tower, you get even more boots, including 2 pairs of Obsidian Boots. Also along the way are books that boost Elec and Fire resistance by 20 for all characters. In Ellinger's chamber is a Book of Sorcerer's Knowledge, which I can't reap any benefit from right now.
Going to talk with Ellinger (and getting 250k Exp for getting to him), he tasked my party with bringing Castle Kalindra back in phase with this world by bringing him Energy Disks, much like Newcastle in Clouds. I already have 3 of the 5 needed, so I'm off to find two more to complete phase one. He also made that one chest in town that keeps moving stop so I can open it. Heading over to that chest, I also knocked out the two Storage Room puzzles next to the roving chest for 50k and 250k Exp. With nothing else to do in town, I headed back outdoors.
While exploring west of town, I came across and picked up several Monga Melons as well as running into Falista the Unicorn, whose horn I had recovered in Clouds. Falista sets everyone's SP to their Max value, even if they are above the Max. Floating in the river is a message in a bottle pleading to save Queen Kalindra, who is being held in Castle Blackfang. I was able to go as far north as the edge of the Forbidden Zone since shortly into the parched earth, Gamma Gazers are ready to completely destroy my party. Turning back south and starting my zigzagging across the world, I came across the Great Western Tower, which I don't have the Key needed for entry. Moving along, I came across the first of many Gemstone Mine entrances. These Mines have a pretty neat layout in that each section of the same map is accessible only via its entrance, with only a couple being connected by breakable walls. Mining the veins yielded me several Ruby, Sapphire, Emerald, and Diamond Rocks. The major danger in these mines is the possibility of a gem exploding when mining, much like the cave-ins in the Red Dwarf Mines in Clouds. Other than that, the Beholder Bats are faster than my party and do a full party fire attack, and several of the piles of rubble hide 3 of them.
Back outside, I ran into Dreyfus the High Priest of Mok who was looking to get back into the Great Western Tower, but needs the Key to the Tower, which is actually in the Tower. Mentioning that the door to the Skyroad usually isn't locked, and that that could be an alternate way in. Ellinger's Tower also has an exit to the Skyroad, so that'll be my route. Along my travels, I burned a couple Barbarian camps for some nice experience, and came across the Gemsmiths camped around Acid Pond who will make jeweled weapons or armor in exchange for 5 of the matching Rocks and hundreds of Gems. Passing on the Gemsmiths, I moved along, meeting Luna the Druid, who is in need of the three Golden Statuettes that power her magic, allowing her to cure the wounds of the creatures that come to her. As I've arrive back at Castleview after going to the west edge of the world and working my way back east, I spent the 1000GP for the Pass to Castleview needed to enter through the front gate -- there is a sewer entrance across the river south of town, but this will just make it more convenient. At this point, the first time you try to exit the town again, you will need to get out the manual to answer the copy protection question.
Heading to Ellinger's Tower in Castleview, I ascended to the Skyroad and made my way over to the Great Western Tower, fending off some Medusa Sprites along the way. Inside the Tower, the only thing to do is search the bones in the small corridor and find the Tower's Key. I presented Dreyfus with the Key, and was told to meet him in the tower for my reward. There isn't much in the lower levels of the Tower other than some priests you can either kill or set free, which doesn't do anything other than chide you if you kill them and re-search their bed. The group of Mok Heretics on the higher floors were too much for my party to handle, so I cut this trip short and headed back to exploring the outdoors.
Heading east, my travels were limited by the Desert of Doom and the Iguanasauruses that reside in the western part. My party can take them out, but they do a lot of damage and I don't feel like healing up after every single battle. I got to a Barbarian fort and met their leader, Yog. The Ogres stole the Energy Disks from them, so the only thing you can get here is a full backpack of food. Fighting them is also an option, but I'll take out the Ogres first to see if anything changes by doing so. Moving on, I picked up another quest from Vespar the Wizard who has lost an Emerald Handle. I also started encountering the Troll Holes that dot the landscape. Heeding the advice of a Tavern patron, I had Levitate active at all times, which prevent falling into them. The map is set up like the Gemstone Mines where every Hole is a small section of one large map. Other than some chests with gold, there are barrels of Troll Juice (19 in all) that give +1 to all stats at the expense of poisoning that character.
Back on the surface, I destroyed a couple Barbarian camps for some experience and met Sharla the Sprite just outside of the Temple of Bark, who wants me to save her sister who was taken into the Temple. I don't have the Key to the temple, so I just kept progressing eastward. Amongst my forays into the Gemstone Mines, I came across the God of Minerals who, for a fee of 250k GP, will replenish the Rocks I've been mining -- no thanks. Nearing the southeastern corner of the world, I started coming across huts with baskets of Forbidden Fruits. Most of them give a single +10 stat boost (a second, and beyond, bite inflicting a status ailment), the rest doing 500 points of damage and inflict a status effect. Along the way, I came across the second of the 4 ordinal towers in the Great Southern Tower, which I don't have the key to. While I have left the domain of the Iguanasauruses, I still can't explore the Desert as the eastern section is populated by Vulture Rocs, which my party has no chance of defeating. I also came across a couple Ogre forts, which I burned down for experience, and their Chief, Graalg. Quickly dispatching Graalg and his minions, I recovered the 2 Energy Disks they had stolen from the Barbarians and returned to Kramer, whose caravans were being attacked by the Ogres. Taking my 150k Exp and 150k GP, I headed back to Nibbler since I had investigated the temple in Sprite Forest. Giving him another Monga Melon got my party another 10k Exp and the Key to the Temple of Bark, which is my next destination.
The Temple of Bark is not a very dangerous place, as the Orc Shamans only pose a minor threat. Just be sure you have someone with the Jump spell as it is needed to access the side rooms. If you are so inclined, there are some books with rather long entries about the religion of Bark, as well as the game's programmers as members of the faith. The many stat boost potions in this temple can be used 3 times. Note that when you search these potions, if you cancel at the character selection box, it counts as a use. In addition to the potions, there are barrels that boost all stats by 3 while aging that character 10 years. There are also a handful of prisoners to free from cages for 25k exp per prisoner. In amongst the prisoners is the sprite Sheewana. After freeing her, Shoalth the Orc King "invited" my party in for tea, poisoning everyone in the process. As usual, Shoalth was easily defeated and I headed down to the temple's 4th Level and a Dial puzzle. With the solution to the puzzle very near the stairs, I properly set the dials and headed toward the center of the floor, taking out several Orc Shamans surrounding the fountain mentioned in the solution. Drinking from the fountain made my characters Disciples of Bark and boosted all stats by a whopping 19. Leaving the Temple, I took one step to see Sharla and was rewarded with 250k Exp, 40k GP, 200 Gems, and 2 Energy Disks -- much better than if you fight.
Now it's back to see Ellinger and restore the first section of Castle Kalindra.
After handing over 5 Energy Disks to Ellinger, it's a short trip to Castle Kalindra. The first floor doesn't hold much beyond a couple free Secondary Skills I already have and tapestries hiding safes I don't have the combinations to. So, it's back to exploring the outdoors. I finally made it to another city in Sandcaster, but I don't have a Pass, so I can't get in. Just outside of Sandcaster, I started running into Armadillos -- tough little beasts that are pretty much unhittable except that they are extremely vulnerable (it seems to work 100% of the time) to the Beast Master spell, so I just wailed away on them while the spell had them frozen (which they hardly ever break free from). Yet another quest is gained in the snow-covered northern lands when I met Ector the Woodsman who lost his gold ring, most likely in a woodpile. Another border to my travels was created when I started encountering Griffins -- my party can take them out, but not without taking a lot of damage. The Giants that inhabit this northern area drop some pretty nice equipment. I destroyed a Giant's Lair for some decent experience and met the paranoid Dwarf King Bosco who is looking for the Royal Chalice of Protection which is said to neutralize all poison. To aid my search, Bosco handed over the Key to the Great Northern Tower.
Heading to the nearby Northern Tower, my stay was short-lived as the Slayer Knights are a little too tough right now to spent a significant amount of time inside. Back outside, I came across a few tents near the northern edge of the world. Slibo the Wizard being in the tent at the location on the Treasure Map I picked up in Castleview, he offered to buy the map for 2000 Gems. Gladly agreeing, he promptly ran off to the Desert of Doom as he already had the other half of the map. Scattered amongst the trees in the northern forests are many animal traps that damage everyone, providing a source of annoyance to my travels, and low branches in the southern forest knocking characters unconscious being another annoyance. Running into Leafpoint the Tree provided the second crossover benefit from Clouds, as having been dubbed Civilized Ones prompts Leafpoint to direct me to some hidden treasure, after telling a variation of one of Zeno's Paradoxes. Continuing on, I found the woodpile with Ector's Ring and returned it to him for 500k Exp and a VERY nice Obsidian battle axe. Nearing the eastern edge of the world, I finally explored all the Troll Holes and took out Hobstadt the Troll King, which doesn't yield anything special.
I finally located Vespar's Emerald Handle just lying on the ground, quite a ways away from his current location. Since he was so far away, I put off returning it to him. In the meantime, I came across Caleb the Inventor at the Crossroads, whose Magnifying Glass had been stolen by some Gargoyles. A few vendors selling overpriced items (20k GP for a Belt?) also had set up shop at the Crossroads. I continued on to the location Leafpoint told me to dig at for a cool 250k GP. Getting close to the northeastern corner of the world, I made my way around the Snowy River Rapids and came across Castle Blackfang. With no noticeable way in, I moved on and eventually arrived at Lakeside, which again I don't have a Pass to enter. Shockingly there are Octopods in nearby Octopod Lake which are too much of a match for my party, so I'll be giving them a wide berth. Coming across the Gargoyle's Lair, I destroyed it and found Caleb's Magnifying Glass. Finally arriving at Venom Pond, I spoke to Thadeus at the nearby fountain and was asked to recover the Jewel of Ages needed to restore the Fountain of Youth, giving me the Key to the Great Southern Tower in order to do so. Reaching the eastern edge of the world, I passed the Great Eastern Tower, and ran into Derek and Celia from Clouds who gave me a Gold long sword, which I'll be selling, as thanks for earlier. Along the eastern edge are a couple very nice fountains that give +500 HP and +50 AC. Now at the edge of the world, it's time to return the two quest items.
Shortly into my long trek back to Vespar, I dropped of the Magnifying Glass at Caleb's wagon for 500k Exp and 50k GP. Thanks to no monster respawns in this game, the trip back to Vespar was uneventful, and I got 200k Exp and most importantly the Pass to Sandcaster for my troubles. Being back in the western part of the world, I decided to try the Great Western Tower again. Having the extra 500 HP from the well did the trick and I was able to take out the Cult Leader and finally get my reward from Dreyfus of 500k Exp, 10k GP & 200 Gems. Now that I could explore the center of the tower, finding elemental resistance boosting fountains that can be used repeatedly until that stat is at least 25. More importantly, 2 Energy Disks and one of the 3 Golden Statuettes are found here. Leaving the Tower, I made a quick trip back to Clouds to turn the seasons and restore my characters' natural age.
Back in Darkside, now that I finally have the key, I headed over to the Great Southern Tower. Once inside, I did the old moth to an open flame and went for the big pile of treasure in the middle of the ground floor. This got my party surrounded by a whole bunch of extremely weak Rogues, which my party had absolutely no trouble with. After falling through one trap tile on the 2nd Floor, I cast Levitate and had no further issues with them. As Luna thought, a Ledger is quickly found which has the locations of the 3 Statuettes that were stolen from her, as well as the Jewel of Ages needed to restore the Fountain of Youth. After finding the solution to the Gong puzzle, I rang them the correct number of times to open up the entire tower (not sure what the first Gong you come across does, though). Also found here is the Master Book of Thieves which gives a nice 500k Exp to any Ninjas and Thieves. On top of that, if your Robber had obtained the title of Prince of Thieves in Clouds, the Prince Book will give 5 Levels to that character (which I'm saving for end game). I also picked up two more Energy Disks. Now that I have another 5 Energy Disks, I headed back to Ellinger's Tower and he restored the 2nd Floor of Castle Kalindra.
With the Pass to Sandcaster finally in my possession, I headed over there. As soon as I entered, I realized that I had neglected to go to the 5th, and bottom, Floor of the Temple of Bark, so I headed back there instead of exploring the new town. Quickly descending to the bottom floor, taking one step forward greeted my party with what needs to be done to appease Barkman (and every time you enter that square, it is repeated). Since I want to defeat Barkman, I obviously did what I wasn't supposed to do and fed the branches (by donating 5 Gems to the talking skulls) instead of the roots. Barkman turns out to be too strong for my party, so I took the 2 Energy Disks found here and left. I put off my exploring of Sandcaster for a bit longer by heading to Castle Kalindra and the freshly restored 2nd Level.
Since all my characters already had the Astrologer skill, this freebie was of no use, much like Arms Master and Danger Sense on the ground floor. Ignoring all the safes on this floor, too, the only thing of note is the Captain of the Guard, Dmitri, and his daughter Megan. Seems Dmitri is beating himself up about letting down Queen Kalindra, so Megan asked to find a songbird in the dungeon on the Isle of Souls which should lift her father's spirits and handed over the key to the dungeon.
Finally deciding to tackle Sandcaster, I made one small detour outside and battled Yog the Barbarian to the death, easily triumphing. Soon after entering Sandcaster, I entered the tents of James the Merchant and Edmund the Weapons Forger and solved a couple easy math problems for 250k Exp from each of them. Talking to Astra the Good Sorceress, I find out that the town guilds had been taken over and it's now my job to restore them by defeating their two leaders. Mowing my way through a bunch of busty Enchantresses and Sorceresses, I defeated an equally busty Morgana, leaving only the Wizard Xenoc.
Hunting down Xenoc, I came across Digga the Vendor selling Vulture Repellant for 25k GP. As tempting as that is given my troubles with the ones in the Desert, I passed. Heading into the Tavern, tucked away in a corner is Blastem the Wizard threatening to teach my party a lesson if we didn't bow down to his greatness. Deciding to take that lesson, my party had little trouble offing him. Our little tussle caused the rest of the patrons, who all happened to be Wizards, to gang up on me and thanks to their high Speed, did a little damage to my party. After hearing mention of a Natasha, who would enchant items for a hefty fee, it turns out that she'll only enchant a special item, which I don't have. With one area town left unexplorable, I headed into the Sewer.
Encountering Beholder Bats down here, now that I have a couple characters that are faster than them, they are much less dangerous. For some reason, a Gym has been established in a corner of the sewer, and with a steep 50k GP entry fee. Paying the fee, it turns out that I should have held off on buying the Body Builder skill in Clouds, as it's free in here. Also found in here are +10 Might and Endurance boosters that can be used 6 times each. So, I pumped up that stat on all of my characters and searched for the ladder up to the previously unreachable area. Before I found that, I found another ladder that accessed a little hidden cubbyhole behind a wall on the surface that I had overlooked. It turns out that there are three such hidden rooms, all of which hold +10 Speed and Intelligence boosters, which can all be used three times. Finally arriving at the ladder I was seeking, I waded my way through more Wizards and somewhat dangerous Master Wizards, and got to Xenoc, picking up several more stat boosts along the way. He turned out to be a bit of trouble, but my party was still in decent shape after the battle. Opening the chest in his room, I obtained the Key to the Great Eastern Tower. With both Morgana and Xenoc defeated, I returned to Astra for my reward of 2M Exp each, double what killing the end boss of Clouds gets you, and 1000 Gems.
Since I picked up the Key, I might as well head over to the Eastern Tower. Surprisingly, the standard enemies of Mystic Mages and Magic Mages are quite the step down from what is encountered in Sandcaster, considering you have to survive Xenoc to get access to the tower. The Jump spell is necessary to explore this tower fully. While Gamma Gazers make part of the 4th Level undoable for my party, I was able to explore enough of the tower to locate the Jewel of Ages. Another 2 Energy Disks are found here, as well as a fountain that gives a 1 Level boost while aging that character 50 years (convenient that the Jewel is also found here). There is also a fountain that boosts any stat that is below 50, I believe, but since every stat for every character is over 50, no benefit was gained. You can also read a book for 5 more levels, but you'll lose all Secondary Skills doing so. This will be a place to come back to later to get those level ups. Since I can't take on the Gamma Gazers, it's off to Venom Pond to return the Jewel.
Returning the Jewel to Thadeus netted me another 1M Exp as well as restoring the Fountain. Deciding to go after the Songbird, I made use of the +500 HP fountain and laboriously wiped out the Octopods in the lake, needing to make several trips back to the fountain to do so. Heading into the Dungeon of Lost Souls on the small island in the middle of Octopod Lake, I was quickly turned back by a Minotaur that no one could hit -- they really love making Minotaurs extremely difficult in these games. Since that's a no go, my next option is the nearby town of Lakeside. Since I had passed on the Pass, I went back to Sandcaster with the needed 5000GP -- what do you mean, not enough Gold in party! Well, it turns out that the actual price is 25k GP, so after a couple trips to the Bank in Castleview trying to guess what the actual price was, I brought 100k back and bought the Pass.
With Pass in hand, I entered the third town on this side of the world. The entire town is overrun with Witches, with pose little threat to my party. Freeing the 5 prisoners from cages netted my party another 1M Exp. Also scattered around town are cauldrons, most of which give very nice +25 boosts to Speed (2 of them), Endurance, and Personality. Taking a second swig turns that character to stone, as well as the 2 bad batches that stone on the first taste. The only other thing of note in here, topside, is the Pass to Necropolis tucked away in a chest in the NW corner. There is also a free ride to the Isle of Souls in the NE corner. Getting everything possible from the surface, I headed into the Sewer. Other than being able to become a Prayer Master for 10k GP, the main reason for coming down here was to find one of the Golden Statuettes. With that easily done, I decided to try the Northern Tower again.
Once in the Tower, my party had very little trouble with the Slayer Knights and picked up a couple shields (including a very nice Ruby shield), and getting 500k Exp for solving each of the first two vowel-less riddles.. Thinking it would be an easy go, heading up to the 2nd floor quickly dashed that thought as two Death Knights greeted my party and made quick work of my team. With the higher floors out of the question, about the only thing left was to explore more of the outdoors. Looking at the map, Necropolis became my next destination. This meant going through Griffin Pass, which was an earlier barrier to my travels. Staying north of the Desert of Doom, and the Vulture Rocs and Iguanasauruses, I came across another Giant's Lair, destroying it for a little experience, and began picking off the Griffins, who weren't already in the mountains, from the mountains since they couldn't enter the mountains. For some reason, the Griffins really hate Knights and completely focus their attacks on any in the party. Only when all the Knights are Unconscious will they attack any other class. On the other side of Griffin Pass, I ran into Ambrose the Queen's Knight. Not knowing the answer to his question, I moved on.
On the edge of the Forbidden Zone is the town of Necropolis. For once, I can enter a town the first time I arrive. Entering, I'm greeted by several Greater Mummies, who have the annoying ability of cursing weapons. Getting by the first wave, there are several Volumes of the Book of the Dead (4 in the first area), each of which gives the reader 999,999 Exp and aging them 25 Years. So, this means that I'm reading a couple volumes, then making the loooooong trek back to the Fountain of Youth (since I don't have a Sorcerer, and thus no Lloyd's Beacon spell), and then back to Necropolis. After the first 5 volumes, it ups the ante and Vol. 6-8 age the reader 50 years for the same 999,999 experience. But before getting to the later volumes, seated in a stone throne, Sandro the Lich needs your help reuniting his body with his heart, the result of an attempt to cheat death. After talking to him, he will attack you. If you're able to defeat him before he attacks, you could keep defeating him for as much experience as you want, as he'll give 200k exp to the party every time you defeat him. You'll have to defeat him once to get the quest in your log. Two things to come back for are Vol. 9 of the Book of the Dead, as no one is Intelligent enough to read it, and no one is strong enough to open the several coffins in town. Heading into the Sewer to find Sandro's heart turned out to be a very short trip since leaving the square with the ladder puts you right into a lava floe. Since I don't have the spell Protection from the Elements, this will be a return trip.
Since there isn't anything else that I can easily accomplish quest-wise, this seems a good time to try exploring the Desert of Doom.
Heading into the Desert of Doom, I was greeted by a Vulture Roc. Able to defeat it without taking too much damage, I can see pressing onward being very doable. As I moved along, I remembered that I had left Gurodel The Giant alone earlier, so I made a little detour north and, instead of just asking for what turns out to be 2 Energy Disks, I got him and his Giant minions to attack, taking the Disks from his now empty throne. Heading back into the Desert, I started coming across several Genie Lamps which give you the option of experience, gold, or gems in return for freeing the Genie. Taking heed of a comment overheard earlier in one of the towns mentioning that taking a Genie's gold is bad, I always opted for the experience (500k to the character that rubs the lamp for all lamps except one which gives 2M). The Desert also turns someone into a stoner, as at a few places, someone will get the munchies and eat all the food (not like you need food anyway, but if you do, you can always go back to Newcastle in Clouds and fill your packs for free). If you do need to rest, dotting the desert are several oases (which will appear on the map after you visit that square) which allow it. The best thing about the Desert is the Enchanted Boulders which, after answering the simple riddle, will give Obsidian equipment -- one of everything except for a missile weapon. Also found in the Desert is a shrine that grants a temporary 15 Levels, which is very useful. With the Desert of Doom mapped out, I headed back to Ellinger's Tower to restore the next section of Castle Kalindra.
Handing over another 5 Energy Disks, I am now able to explore the dungeon of the castle. Soon after entering the dungeon, inside one of the cells is found Guido the Convict. As reward for setting him free, he gives the combination to the harder safes. With combination in hand, it's time to start trying to open the safes. It turns out I could have been opening some of them on my earlier trips, as my thieves "get feelings" about what the combinations are, which turn out to be correct on most of the ones I've already encountered. A few in the dungeon do need Guido's combination, and they hold some pretty nice equipment. The main floor turn out to be downgrades, so will be sold off when I get back to town. The 2nd floor safes still prove to be too tough to crack, so I'll try them again when I fully restore the castle. Back to the dungeon, I headed into the Maximum Security wing and took out the few Lichs in the first couple cells. Ignoring the warning not to let out Scraps, I promptly got completely destroyed by him -- the other inmate, a generic Dragon Mummy was also way too much for my party. Hitting that wall, I headed back to Castleview to buy the Protection from Elements spell, for my Paladin, needed to safely explore the Necropolis Sewer and find Sandro's Heart.
Testing to see if I was fully protected from fire with the spell, I was a little under-leveled to avoid all damage, so I made a quick stop at the +15 Level shrine which is not too far into the desert from Necropolis. With the +15 Level buff, my Protection level was now over 100, so I took no damage from the lava floe. One thing to note about lava is that you don't want to fight on it, but rather draw the enemy onto solid ground. The reason being that when the battle finishes, you will take 100 points of physical damage "falling" (I guess) into the lava. Taking care of the Lava Roaches, I found Sandro's Heart in a box in a little alcove. Also located down here are 7 barrels of Dead Food which gives whomever eats it 1 level and does 3000 points of damage. Leaving those for the end game, I took the Heart back to Sandro. Being overjoyed at finally being able to leave his cursed existence, and giving 2M exp, he allows you to take his prized Golden Statuette and hands over the key to the Dungeon of Death, which is on the Clouds side. With all three Statuettes in hand, I headed back to Luna and was rewarded with 5 Levels -- nah, I'll just reload and hold onto them for now.
Other than the Forbidden Zone, the only place left to tackle on Darkside is the rest of the Great Northern Tower and finding the Chalice of Protection. With a stop at the +15 Level shrine, as well as the +500 HP fountain, I headed back to the N. Tower. The Death Knights still did a little bit of damage, but not enough to worry about. Death Knights also will sometimes drop Obsidian equipment, making them very valuable enemies. Soving the vowelless puzzles along the way, only getting tripped up on one because of the misspelling of "beggars", I made my way to the top floor taking out a single Doom Knight, which can kill every character in one attack if you get really unlucky, standing in the way of my goal. Entering the main room on the 4th Floor, several Emotion Thrones greet my party, as well as a Euphoria Throne. Sitting on each of the four Emotion Thrones inflict various status ailments which are all cured by the Euphoria Throne, which will also grant +2 Levels and +5 to all Stats. Again, I'll be leaving this for the end game. Around the edge of the room are beds with all the answers to the riddles, in case you were stumped (I'd never heard of a few of the sayings before the first time I played this game). At the back of the room is found the Chalice, obtained by solving one last riddle. The congratulatory message also has the first Star Trek reference, and might cause a Leonard Nimoy fan to tear up a little. Two more Energy Disks are also found here. This makes me one short of the final count needed to fully restore the Castle.
Since I haven't been giving what Level my characters have been at, I figure this is a good time to update my party's stats. All characters are at Level 36 (I evened them out in order to make figuring out how much gold I need to train a single level easier). Some of my enemy troubles are most likely due to my not fully training, so I'm quite a bit lower level than I could be -- a consequence of my money saving strategy. I believe I was around Level 16-18 when I finished Clouds, and 20 is the level cap if you do not visit Darkside.
| Sex | Race | Class | Might | Intellect | Personality | Endurance | Speed | Accuracy | Luck | |
| Galand | Male | Elf | Barbarian | 70 | 73 | 57 | 81 | 92 | 61 | 48 |
| Boudicca | Female | H-Orc | Paladin | 72 | 73 | 116 | 104 | 67 | 53 | 56 |
| Sir Felgar | Male | Human | Knight | 75 | 75 | 55 | 82 | 74 | 57 | 55 |
| Cassandra | Female | Elf | Ninja | 74 | 67 | 57 | 83 | 75 | 54 | 48 |
| Swifty | Male | Gnome | Robber | 72 | 72 | 53 | 77 | 92 | 58 | 51 |
| Serena | Female | Gnome | Druid | 78 | 77 | 95 | 79 | 73 | 52 | 46 |
Leaving the Tower, I handed the Chalice over to Bosco and was rewarded with 1M Exp each and 100k GP. This is the first monetary reward I've gotten in quite a while, which is probably a big reason why you'll start running out of money at around this point if you've been keeping your party fully trained. Deciding to knock out what I had left behind on Clouds, I headed back through the Castleview Pyramid to tackle the NE corner, where the Lava Golems proved too tough for my party before finishing off that side. Since Protection from Elements is 100% effective when the caster is at Level 48, and there is only a +10 Level well on this side of the world (in Nightshadow), I trained my party up to Level 38. Heading to the Lava covered corner of the world, the Lava Golems, as well as the Acid Dragons, proved no match for my party, so it was safe travelling, with daily stops to Nightshadow to re-buff my party. In the middle of a lake of lava, I stumbled across Volcano Cave and entered.
Inside the cave is a safe path through the lava found here, only requiring the pulling of some switches and Jump spell to completely stay out of the lava. Finally encountering the Devils and Demons seen in the ending to Clouds, they also proved no match, and the only real danger is the exploding treasure chests. On the upper levels, the only things of note are a couple skulls found by exploring the lava that each give 250k Exp for smashing them. The real point of this cave is the bottom level -- Shangri-La -- which connects the two sides of the world.
Arriving at the lowest level of Volcano Cave, I entered what amounts to a little town in Shangri-La. It has a Blacksmith, Tavern, Temple, and, best of all, Mage Guild with every spell available for purchase and with no entry fee. The Tavern has many useful game hints, so it's worth a visit. Also found here is Jack Alltrades who will teach you EVERY Secondary Skill for 100k GP. Since there is that Level boost that removes all Skills, this will come in handy for when I go back there. In the center of Shangri-La is a well that grants everyone 1 Level as reward for getting here. An added bonus is that Shangri-La is reachable via the Travel Mirrors in the towns. Leaving by the other entrance put me in Castle Alamar's Dungeon, where my party was, well, annihilated by the Annihilator waiting to greet me. Heading back to the surface, my exploration led me to Dragon Cave (or Dragon Lair if you want to use the Mirrors).
Heading into Dragon Cave, the end of the first corridor has an urn which demands you pay the Dragon Tax of 2000 GP and 20 Gems to pass. Not having any gold on me, I was ejected from the Cave. Since the urns will always take the tax, rather than drain my funds (or my item with the Teleport spell), I headed back to Vertigo to pick up my standby Sorcerer. After another stop back on Darkside to take advantage of the +1000 SP well, I ventured back into the Cave with more than enough SP to avoid all the strategically (or more accurately, annoyingly), placed urns. Not surprisingly, the several rooms in the cave are home to Fire and Frost Dragons, and a single Dragon King who can hit pretty hard with an all-party energy attack. Since I've been keeping track of how much experience all the enemies give, I came to find out that they will give different amounts of experience depending on each character's level. My Sorcerer, who was only at Level 14 with the Level buff, got twice as much experience as the rest of my party. I don't know at what level this happens, but my best guess is Level 20 since that's Clouds' level cap. After getting by the Dragons, rooms along the perimeter of the Cave hold piles of treasure with a good amount of gold, gems, and some very nice items. Also in these rooms are found 5 Volumes of Dragon Lore, each giving more experience and requiring a higher Intellect to read -- even at 70+ Int, only the first two volumes could be read by my entire party, and the final 2 need > 94 Int as my smartest character could read them. There is also a book on the Art of Taxation, which none of my party could read. With nothing else to do here, I left the cave.
Continuing my travels westward through the lava, I came across Dragon Tower in the middle of Lava Lake. Not having the key, I moved on. With nothing else of note in this area, my exploration of the outdoors of Clouds of Xeen is now complete. With the key Sandro gave me, I made my way to the Dungeon of Death near Pitchfork Creek, north of Nightshadow. Upon entering, a sign greeted me simply reading "Crossword Puzzle", which is all the 1st Level is. Turning to the right is a statue with a lengthy travelogue of Darkside with every answer to the puzzle highlighted. The travelogue provides a little levity to the game and is definitely worth reading through. I always get a laugh at the part about the witches in Lakeview. Be prepared to spend some time here as there are 89 clues and the puzzle itself forms a pretty good maze. There are no encounters on this level, so you can solve it uninterrupted. Answering correctly drains that clue's line of water, so it's easy to tell which clues you still need to solve by looking at the automap. Finishing off the puzzle, I started heading down the stairs, getting rewarded with 5 Levels -- er, reloading instead, I left the Dungeon.
Remembering the sarcophagi I couldn't open, I headed back to the Northern Sphinx. Now able to open them, all I got was one Cursed character and a bunch of ok items to sell. With that, there is nothing else I want to do right now on Clouds.
Of course, I meant Lakeside, not Lakeview, in the travelogue.
Heading back to Darkside, I bought the Town Portal spell for my Paladin. This allows me to take advantage of the +15 Level shrine near Necropolis that I'm going to need to tackle the Lost Souls Dungeon by Lakeside, as well as being able to use the +500 HP fountain while still Level buffed. The 5 Gem cost of Town Portal will make this shortcut a little expensive, but I haven't had any other need for gems up to this point, so I have quite the stockpile of them. Heading back into the Lost Souls Dungeon, I still can't do much damage to the Minotaurs, but I am able to defeat one or two before needing to rebuff. With the pure physical attack approach out of the question, I headed back to Clouds and to Shangri-la to buy Mass Distortion for my Paladin. With that, and Lightning Bolt that I picked up for free a while back for my Druid, I had a couple magical heavy hitters needed to address this dungeon. The nearby +1000 SP fountain is a must for this dungeon.
I'm not sure if flipping the 4 Hourglasses on the first level is necessary since it will allow you to descend if you just answer that you did flip them. I didn't take any chances and flipped them. The 2nd floor is a very good source of experience, besides all the Minotaurs, as after correctly setting the dials, there are 14 fountains to drink from, each giving 654,321 Exp to one character. I'm not sure if the Soul Water fountains in the center actually do anything. Proceeding lower into the Dungeon brings out the even tougher Gorgons (with their Stone special ability) which my party almost can't damage at all with physical attacks, so the 10 Gem cost of Mass Distortion is making a dent in my nearly 40k Gem stash. On the 4th Level, after pulling the levers to stop the conveyor belts, a corridor full of fire traps is opened up (my Protection from Fire is high enough to give 100% protection), at the end of which is a fountain that gives 7,654,321 Exp three times. Descending to the lowest level requires payment of 266k GP, which I don't have and don't plan on paying right now. So, this seems like a good time to try my hand at Barkman again.
Back at the lowest level of the Temple of Bark, I followed the directions and fed 5 Gems to each of the 4 southern skulls (the roots). This activated the 4 Fruit Room fountains, giving +50 to everyone's elemental resistances (Fire, Cold, Electricity, and Poison) -- very nice. I then ignored the directions and fed the 4 northern skulls (the branches) to open up Barkman's little room. With Protection from Fire cast, he did very little damage. After a somewhat lengthy fight, my party prevailed. At the end of the corridor he came out of is a chest with a few Obsidian items, and the two previously un-openable chests hold a VERY nice 2M GP and 25k Gems -- all in all, well worth defeating him. Since this puts me at about 6.75M Gold in the bank, I decided to work for a few weeks and use the interest earned to pay the fee to enter the lowest level of the Lost Souls Dungeon.
Back in the Lost Souls Dungeon, I paid the 266k Gold "to cover the Minotaurs I destroyed and the mess I made", and descended to the 5th Level. Luckily, it's only a one-time fee, so I was free to make as many trips out to the buffs needed to slowly clear the level of all the Minotaurs and Gorgons. Found on the right half of this level are several caged birds to free which give +6 to a single stat for everyone -- everything but Intelligence. The left half is devoid of monsters, so it's a relatively quick task to map it out and learn the actual name of Alamar, which is spelled out in the walls (I can't figure out how to get to the square inside of the A as neither Teleport nor Etherialize works). Also found on this half is the Songbird of Serenity. With no more Minotaurs (which cause Aging) to worry about, after leaving the Dungeon I made a stop at the Fountain of Youth due south before heading back to Castle Kalindra to present the Songbird to Dmitri and lift his spirits.
Back in Castle Kalindra, I headed to the 2nd Floor and presented the Songbird to Dimitri. As thanks for bringing him out of his doldrums, he gave me some Obsidian items, the combination to the safes on this floor, and to tell Ambrose (over by Griffin Pass) that he sent me. Taking one step to his right, Megan rewarded my party with 3M exp each and a whopping, um, 1000 GP. With combination in hand, I opened the safes which held one Energy Disk each (6 total). Since I only needed one more to complete the Castle's restoration, I now have an extra 5 Disks (good thing they don't use up inventory space). With nothing else to do here right now, I headed back to Ellinger to complete the Castle. Handing over half of my 10 Disks, Ellinger gave me one more task in finding the Key to the Pharaoh's Pyramid somewhere in Castle Kalindra. Heading back to Castle Kalindra, I explored the highest floor, finding a small town on the right half with a Blacksmith, Temple, Training Grounds, and Bank. The left half holds barrels which increase Might and Personality, a safe I can't open right now (although I did brute force the first 2 (of 3) numbers to the combination), and a device that activates the Travel Mirrors found in some of the towers. Feeling adventurous, I headed back to the dungeon to try my luck against Scraps again. Scraps wasn't too formidable, thanks to Mass Distortion, but the pair of Dragon Mummies in the final cell were a tough nut to crack -- having an item that can cast Dragon Sleep ended up being what I needed to be able to pick them off one at a time, since they have a high hit % and automatically kill that character if they connect. With nothing else to do here, I left the castle.
Heading back to Necropolis, my Barbarian with 194 Might was finally able to open those stubborn coffins. After taking out a single Power Lich in each, each coffin held an item which has a high chance of being Obsidian. With only that last Book of the Dead still unreadable, I headed over to Griffin Pass and told Ambrose that Dimitri sent me. In order to ride the griffin he caught, he is in need of enchanting the Bridle he has. Not having the time to do so, he gave me the Bridle and mentioned that I might be able to get it enchanted in Sandcaster. Heading to Sandcaster, I paid the 50k GP fee to Natasha to enchant the Bridle. Returning with the now Enchanted Bridle, Ambrose rewarded my party with 50k GP -- a convenient sum. With nothing else to do, I decided that I might as well attempt to survive the Gamma Gazers and explore the Forbidden Zone taking up the NW corner of the world. With ample use of Town Portal and visits to the +15 Level Shrine and +500 HP & +1000 SP fountains near Lakeside, I was able to slowly make my way through the Zone, with Mass Distortion being my friend. Shortly in, I came across the first of two Escape Pods (from Might and Magic III), whose entrance was blocked by the lava floe. Moving along, I came across and entered Castle Alamar. Note that you can fight on Castle Alamar's square without taking physical damage at the conclusion of the battle.
The only thing of note on the first floor is four active Elemental Fields which make the surrounding areas into conveyor belts, and thus impossible to walk on. The Annihilators found in the castle prove to be too much for my party if more than one is in battle. With nothing to do here at the moment, I left. Proceeding further north, zigzagging east-west, I started encountering large groups of Gamma Gazers, prompting more frequent trips back to the buffs. Arriving at the second Escape Pod, I entered and was met with some of my favorite music in the game. There are no monsters in here to bother exploration. Other than Phaser and Photon cannons to fire (just because) and a couple of dormant alien devices that look like Easter Island heads, there is a very lengthy journal that recaps the storyline of the first 5 games. With nothing else to do here, I headed back outside and reached the NW corner, completing my exploration of Darkside's outdoors.
Nestled in the far NW corner is a fountain that gives +2500 HP, which will become immensely important for me going forward. Without much left to do on the surface, I turned my attention to the Skyroad above Darkside. Found along this road that basically runs along the perimeter of the world, with a few inroads, are the entrances to the various structures of the world and the Elemental Planes in the four corners. Around the midpoint of each side is found a Merchant of the Element who will give 250k Exp if you can solve the riddle of what their cargo is. You may also run into some sky bandits who will demand 10k GP or you can fight 3 Cloud Dragons if you refuse -- these keep reappearing in the same squares, so you can use these to grind by just rotating in that square, which doesn't take any time in-game. Or, you can just avoid it altogether by not having 10k on hand -- I was traveling with 0 gold, so these encounters became a non-issue. Nearby where you can access the road via the hut with the rope north of Castleview is a skiff that will take you to the final town: Olympus. Unfortunately, my party wasn't worthy, so I was unable to board the boat. Remembering the lone Gamma Gazer in the Eastern Tower, I made a quick trip inside and defeated it, which didn't get me anything except some experience. Back on the Skyroad, I made quick work of the plethora of Sky Golems (especially around the NE corner), few Cloud Dragons, and several Griffins (somehow they can fly up here, but can't get into the mountains on the surface) and completed the circuit. Scattered around the interior of the road are little cloud islands which can only be accessed by Teleport -- which I will come back to with my standby Sorcerer as I believe many of them hold Genie Lamps for some good experience. Also found up here is the Mega Dragon guarding one of the structure entrances. Not having a Sorcerer in my party is going to make this fight very tough, if not impossible, for my party to win -- the Druid not having access to Mass Distortion being another factor. Giving the Mega Dragon one very unsuccessful attempt, I passed on that challenge. Near the NE corner is an entrance to the previously inaccessible Castle Blackfang, so I descended into it.
Entering via the Skyroad gave me access to the right half, or so, of every level of the Castle. Coming across several unopened coffins, I looted them (easily defeating the Vampires and Vampire Lords I disturbed) for several more pieces of Obsidian equipment. Unable to explore the rest of the Castle, I headed back to Castle Alamar.
The 2nd floor of Castle Alamar holds a very simple clock puzzle which is needed to be solved to be granted access to the 3rd Floor where Alamar resides. Not feeling like figuring out the path to him by trial-and-error, I headed into the castle's dungeon. Having gradually trained several more levels, I was at a level (with all the best Level, HP and SP buffs) sufficient to take on more than one Annihilator at a time. After a while, joining the Annihilators were Autobots, which my party found to be very hard to physically attack. Good thing both of these enemies are 100% vulnerable to Mass Distortion and Lightning Bolt, so I was able to make somewhat quick work of them. One of the statues located down here gives the safe path to Alamar. Also found down here is the Key to Dragon Tower, a skull which requires the proper I.D. (which I don't have), and the aforementioned exit to Shangri-la. Before heading to Dragon Tower, I foolishly made a quick visit to Alamar on the 3rd Floor, causing instant death to everyone -- I had forgotten what actually happens at this point.
With Key in hand, I headed back to the Clouds side to tackle Dragon Tower, one of the few remaining locations left to explore. If using the Travel Mirror in Vertigo, the closest location to the Tower that you can enter is probably Lava Lake. Saying "Dragon Tower" puts you in the middle of the Desert of the Sphinx, very close to the Northern Sphinx and quite a ways away from Dragon Tower.
Just inside the entrance of Dragon Tower is Alister the Druid who is looking for a Dragon Egg, but isn't strong enough to find it himself. As soon as I started climbing the tower via one of the three staircases, unsurprisingly I was accosted by some combination of Frost, Fire, and Acid Dragons, which proved no match for my party as most fell with a single blow. In alcoves in the two outer paths are found a two extremely nice +40 Endurance boosts, both of which can be used 4 times. Also along the outer paths are piles of treasure, each with a much needed 500k GP as well as 5000 Gems and items. Hidden among the Straw beds is found the Dragon Egg. A pile of bones also tells of the location of the Silver Key Card. After clearing the two outer paths, I headed up the central staircase, fighting more dragons along the way, reaching the top floor where several Dragon Kings await, which are just resilient enough to be able to survive long enough to get a single attack in, if encountered in pairs. A couple more treasure piles on this floor give 1M GP each as well as a couple Obsidian Items. At this point, my entire party have complete sets of Obsidian equipment, with just the gauntlets and ranged weapons being the main exceptions. Also found up here are two Tomes of Great Experience which each give everyone 10M Exp for reading. Three treasure chests are too tough for even my Robber with 194 Thievery to pick, so it's time to take the Egg to Alister. After getting 1M exp each for doing so, Alister promptly transforms into a Dragon King and attacks *yawn*. After easily swatting him aside, and with nothing else to do here except the Clouds above the Tower, I left and headed back to Darkside.
Since I was at Level 47 and full protection from Fire is gained at Level 48, I trained up one level just so I wouldn't need to get a Level buff to get that 100% protection. Heading back to Dragon Tower to try its Clouds, in addition to the tougher Cloud Dragons found here are even tougher Phase, Green, and Energy Dragons. While I was able to take the Cloud, Phase, and Green Dragons somewhat easily, the Energy Dragons were right on the edge of being too much to handle. Able to make it to one of the Orbs found up here, none of my characters were smart enough to survive looking into it (the smartest character having 94 Intelligence). So, I may need to return here with Well/Fountain buffs if I don't pick up any more Intelligence boosts in the remaining areas.
Remembering the large island in the Darkside Skyroad which I previously had only set foot on right before my Levitation spell wore off, sending my party plummeting back to the surface, and had never gone back to, I made sure it was early enough in the day to be able to start exploring it. Note that if you are nearing 5 a.m. when spells wear off, if you can make it into the lake, you can recast Levitate here without falling to the surface. Other than a couple messages in bottles floating in the lake which give locations of Genie Lamps, there are 4 merchants selling Scarabs that have the best elemental protection. Not wasting Gems on any of them, I left the Skyroad behind and decided to take out the Diamond Golems I wasn't able to defeat in Golem Dungeon on Clouds.
Now that I was about 30 levels higher than my previous attempt, as well as outfitted mostly in Obsidian, I made quick work of the Diamond Golems, finding quite a few more useless King's Mega Credits in the process -- I now have 15 useless Credits. Also found in the far corner of the Dungeon is a statue which grants +1 Level as reward for making it there. Racking my brain for where to go next, the only place I could think of was trying the front gate of Castle Blackfang. Not remembering if Ambrose said that that was where he was going after giving him the Enchanted Bridle, I was pleased to find him at the Castle, along with the only way in thanks to his griffin. Finally able to explore the rest of the Castle, I should be able to find Queen Kalindra somewhere in here as per her message in a bottle.
Entering Castle Blackfang thanks to Ambrose's griffin, I set about opening the many coffins and easily defeating the vampires I disturbed, only to find in the now empty coffins a bunch of accessories to sell. Reaching the top floor on this side of the castle, I then easily wiped out the Blackfang royalty, getting a few actually usable items from their coffins. After Jumping through the gamut of trap tiles, I eventually descended into the castle's Dungeon, which is completely under water and home to a bunch of Octopods. Much like the Diamond Golems, my much stronger party had no trouble this time around with the Octopods. Arriving at the SW corner, laying in a bed on the only dry spot in the Dungeon was Queen Kalindra, who has unfortunately been cursed and is now a vampire (as seen in the game's intro). Unable to face her subjects as a vampire, she suggests I visit Dimitri for a possible solution. Since I had satisfied that when I brought him the Songbird of Serenity, upon speaking to the Queen again, she gave the combination to the safe in her Castle (which I guess you can't brute force since I had tried the correct combination before). With a quick trip to her Castle to open the safe and obtain her Crown, presenting it to her breaks the curse, returning her to normal. As thanks, in addition to the 5M Exp each for saving her, she handed over the key to the Ancient Pyramid where the Dragon Pharaoh is, and returned to her Castle's throne. Paying her a quick visit yielded nothing, so I headed to the Desert of Doom and the Great (Ancient) Pyramid.
Inside the Pyramid are found more Cloud and Green Dragons, which were still a nuisance. After defeating all the Dragons on the 1st Floor, I solved a simple math problem and pulled a lever which opened up a path to a pile of treasure holding 2.5M GP, 5000 Gems, and some more Obsidian items -- I'm actually at the point where these items are of no benefit to my party. This treasure puts me at ~14.25M gold in the Bank. Pulling the other six levers grants access to the 2nd Floor, and at this point there are no more enemies in the Pyramid. Another math puzzle allows access to the 3rd Floor (if you happen to know the Registration Number of the Starship Enterprise, you already know the answer to this puzzle). With a staple of the Might and Magic games up to this point, with several Jump spells, I made it to the staircase at the center of the spiral hallway with the Dragon Pharoah just beyond. Other than the Pharaoh, the only thing in his room of note is a vat that Eradicates whomever drinks from it. Returning the Orb that my party was presented with when they first stepped foot on Darkside, the Pharaoh bestows another 5M Exp each, and tells of Alamar's plan to pilot Xeen back to Terra, thus killing off all creatures of the world. In order to prevent this, he cools the lava that was blocking entrance to Escape Pod 1, and directed us to investigate it.
Heading over to the somewhat nearby Escape Pod, it is laid out exactly the same as Pod 2, and like Pod 2, there are no enemies inside. In this Pod, you can activate the dormant Easter Island heads, but they did nothing for my party. Just like in the other Pod, I fired the Photon and Phaser cannons just because. As with Sheltem's log in Pod 1, the log found here will give quite a bit of the game's backstory. In what would most likely be the captain's chair is found a figure held in a stasis field. At the very front of the ship is a console which will deactivate the field by entering a code. With another Star Trek reference, if you know just about anything about the show, you shouldn't even need the help that's given to figure out the answer. With the stasis field deactivated, we meet our old friend Corak and get yet another 5M Exp each. While freed from the field, Corak will be unable to leave the ship without being detected by Sheltem without finding some means to transport him. With the Pod investigated, it's back to the Dragon Pharaoh.
Back at the Pyramid, my party filled in the Pharaoh with what was found in Corak's Escape Pod. Knowing what's needed to make Corak undetectable, the Pharaoh granted my party the title of Chosen Ones, allowing us to ride the boats on the Skyroad. By doing so, he granted access to the fifth and final town, Olympus, and handed over the Pass to Olympus. With Pass in hand, I headed to Olympus to find the Soulbox that the Pharaoh said should be somewhere in this town. Since Olympus is in the Clouds, I made sure to have Levitation cast before starting my journey. Found inside the town are answers to several puzzles earlier in the game, as well as statues in the town's corners which tell, in rhyme, of the progression of tasks that need to be accomplished to win the game. Not finding the Soulbox in the town's surface, I headed into the Sewer and found that I needed a password to fully explore it. Even though searching the drains provides the password, I spent the 100k GP and bought a Tribble -- yep, another Star Trek reference. Heading back to where the password is needed, I got through and found the Soul Box back on the town's surface in a room only accessible via that path.
With nothing else to do in Olympus, I headed back to Corak and presented the Soul Box, which Corak promptly got inside. That accomplished, I left the Pod and headed for Castle Alamar. Using the clue given in the Castle's Dungeon, I made my way along the safe path and arrived at Sheltem's door. With Corak safely hidden inside the Soul Box, it's time for the Showdown between Corak and Sheltem, and the ending that, ~20 years later, is still my favorite video game ending of all time.
My final score for Darkside is 1192411116.
All characters in my party are at Level 48.
My party's stats (with no equipment bonuses):
| Sex | Race | Class | Might | Intellect | Personality | Endurance | Speed | Accuracy | Luck | |
| Galand | Male | Elf | Barbarian | 92 | 73 | 69 | 139 | 104 | 73 | 60 |
| Boudicca | Female | H-Orc | Paladin | 94 | 73 | 138 | 162 | 79 | 65 | 68 |
| Sir Felgar | Male | Human | Knight | 87 | 75 | 67 | 140 | 86 | 69 | 67 |
| Cassandra | Female | Elf | Ninja | 96 | 67 | 69 | 141 | 87 | 66 | 60 |
| Swifty | Male | Gnome | Robber | 94 | 72 | 65 | 175 | 104 | 70 | 63 |
| Serena | Female | Gnome | Druid | 90 | 77 | 117 | 177 | 85 | 64 | 58 |
With Darkside saved, the Pharaoh sent my party back to Castleview and has requested that I visit him again.
Heeding the words of the Dragon Pharaoh, I headed back to the Ancient Pyramid to find out what's needed to unify the two sides of Xeen. The first task is to free Prince Roland from the dungeon of Castle Alamar so he can marry Queen Kalindra. In order to get to the Prince, I first need to gain the proper ID. Having made note of one of the skeletons of a deceased adventurer I encountered a little while back, I headed back to the Clouds above Dragon Tower to search for the Eye of the Dragon. While here, I decided to try to tackle the Energy Dragons which had previously stymied my party. Gradually leveling up in 5-level increments, around level 80 is when this becomes doable (which means that I leveled up to 65 and used the +15 Level shrine). The Eye of the Dragon (the clouds forming the shape of a dragon) ends up being a straight shot from the stairs across the clouds. In order to actually get the Silver ID Card, I need to find out what the Secret of the Dragon is, which requires a bit of exploration. Nestled in the corners of the area are books which require a rather high Intellect. Fortunately my smartest character, with 111 Int, was able to read them and after reading two of the four books, I was able to figure out what the answer is, thanks to remembering what a Tavern patron told me earlier. Now with Silver ID Card in hand, I ignored all the crystals littering the area which each give 3 to 5 levels, as well as the Orbs which I still can't read with my 136 Int Druid, and headed back to Castle Alamar.
Back in the Castle's Dungeon, I was allowed access to the next little room which required another set of credentials I didn't have. Fortunately, also in this little room is found the Key to Darkstone Tower, which is my next destination. Heading back to Clouds, I used the Travel Mirror to get deposited practically at the base of the Tower. Found inside are a some pretty tough Onyx Golems and some gongs which need to be banged in order to ascend the tower. Every time a gong is banged, Onyx Golems are summoned (1 on the 1st floor, 2 on the 2nd, and 3 on the 3rd). Also found on each level are four statues that play out like A Christmas Story and simply thank you for playing and plug the next installment in the series. Reading the final statue causes the game to start glitching sometimes if you scroll to the bottom of the AutoNotes, causing a random tile to appear and your party to all die when you press any key or actually causing the game to crash and kicking you out to DOS. Solving the simple math puzzle allowed me to obtain the Gold ID Card. Unable to climb to the Clouds above the tower thanks to an invisible seal on the stairs, I headed back to Castle Alamar.
Now with both sets of credentials, I was able to make it into the final room where Prince Roland was being held in a Stasis Field inside a coffin. After rewarding my party with another 5M Exp each, he gave me the Amulet of the Southern Sphinx. As with the Northern Sphinx, there are several sarcophagi which require some very high Might to open, in this case somewhere north of 191. Opening them curses whomever opens it a whopping -25, and then another -25 for searching it after defeating the Ghost Mummy that emerges. I got one character to -250 before heading back to a Temple to UnCurse him to prevent him from dying because of having 0 Luck. I did get some nice Obsidian items to sell, which was the first infusion of gold I've had in a while. Heading back to the Sphinx to clear out the remaining sarcophagi, there is a room full of swinging ax and guillotine blades which is large enough to where my party cannot survive the trek through (Teleport does not work). This room leads to the Dungeon with the clues to the password to climb to the 2nd Floor. In order to survive this trip, there are two candles which if you give each 2M GP (!), it will protect you from one of the types of blades -- another 1M will get you a clue (which I didn't pay for). Paying one of the candles allowed me to enter the dungeon almost unscathed.
Before I headed into the dungeon, there are a few barrels of Super Embalming Fluid which gives the drinker 2M Exp. The Sphinx's Dungeon (labeled Level 3 for some reason), is pretty heavily populated by Dragon Mummies, which still give my party issues, although they can sometimes survive a hit without being killed. Other than the password to reach the 2nd Floor, there are several bottles of Super Dragon Embalmer which gives the drinker 5 Levels. Unscrambling the six-letter password (as well as making sure no one was Cursed) allowed me to climb up and meet Picard the Aged. That Widget I picked up a long time ago finally bore fruit as I traded it for the Chime of Opening needed to reach the Clouds above Darkstone Tower. Heading over to the Tower, the Chime broke the seal and I traversed the long spiral path to another Pyramid in the center, passing several signs advertising other New World Computing games. Of course, I hadn't performed a couple needed tasks, so upon arriving at the Pyramid, the Dragon Pharaoh reminded me of what I needed to do and refused my party entry.
Heading over to the Clouds side of the world, I headed to the four corners of the world and teleporting to the small islands, activated the four Reflectors. With that done, I went back to Darkside and its Skyroad above. Heading into each of the Elemental Planes by simply stating the element, I started going about awakening the four Sleepers. Making the task a little difficult are Elemental beings to fight, with the Tidal Terrors (Water) and Whirlwinds (Air) being only vulnerable to spells. Found in each Plane are Tests of that element at shrines, which are needed to be passed (they simply do a good amount of damage) in order to open the lone treasure chest. The EP of Air also has the added annoyance of needing Levitation to be cast in order to travel in it. Being that it's an outdoor area, that means it will take a few trips to fully explore it.
With the Four Sleepers awakened, everything needed to finish the game is complete, so I headed back to Darkstone Tower and ascended to the Clouds above. Again making the long journey around the spiral path, the Pharaoh allowed me access to watch the wedding ceremony and Xeen's Genesis moment. I'm pretty sure that the floppy disk version has some bits of the World of Xeen ending that were cut out when they released the CD version.
Thus ends another playthrough of this wonderful game. Since I've beaten it and maxed out Levels multiple times, I'm not going to go back and get everything I passed up.
My final score for World is 1375111858.
All characters in my party are at Level 75.
My party's stats (with no equipment bonuses):
| Sex | Race | Class | Might | Intellect | Personality | Endurance | Speed | Accuracy | Luck | |
| Galand | Male | Elf | Barbarian | 92 | 73 | 69 | 139 | 104 | 73 | 60 |
| Boudicca | Female | H-Orc | Paladin | 94 | 73 | 138 | 162 | 79 | 65 | 68 |
| Sir Felgar | Male | Human | Knight | 87 | 75 | 67 | 140 | 86 | 69 | 67 |
| Cassandra | Female | Elf | Ninja | 96 | 67 | 69 | 141 | 87 | 66 | 60 |
| Swifty | Male | Gnome | Robber | 94 | 72 | 65 | 175 | 104 | 70 | 63 |
| Serena | Female | Gnome | Druid | 90 | 77 | 117 | 177 | 85 | 64 | 58 |