Version| Date purchased | Price paid
| Might and Magic VI: The Mandate of Heaven Limited Edition | Sept. 29, 1998 | $84.95
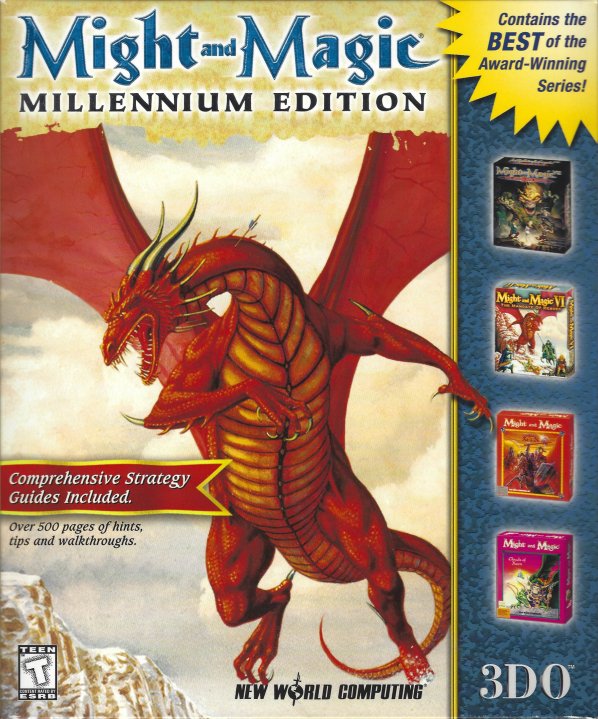
| Might and Magic: Millennium Edition | Dec. 8, 1999 | $32.95
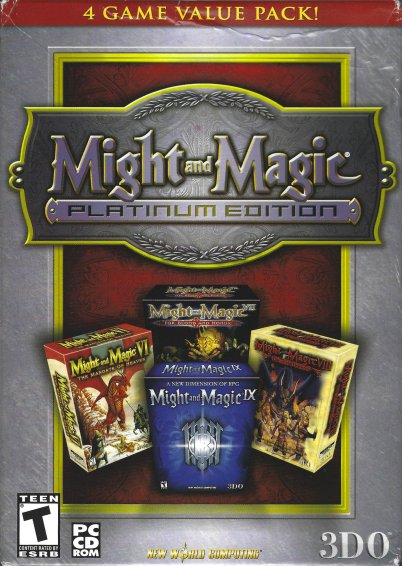
| Might and Magic: Platinum Edition | Aug. 3, 2009 | $99.94
| |
Regarding my copy of Might and Magic VI, I had bought the Limited Edition from an online merchant, but it did not come with the box. A friend had bought the standard release and didn't care about having the box, so he gave me it.
I’ve beaten this at least once before back when it was originally released. I’m playing from the M&M VII Millennium Edition CD on an old Gateway (remember them?) XP laptop. I originally bought the M&M VI Limited Edition release, so I have the very nice cloth map and holographic game CDs. Wow, even on a 10-year-old laptop, that loading screen is lightning fast compared to what I remember back on my, IIRC, Pentium II PC.
Since I’ve only beaten this once or twice, and it’s been a long time since I did so, I’m just going to use the default party. One thing I was disappointed in when I first played it is that the party size shrunk from the series’ staple six characters to four. So, my starting party stats are:
| Sex | Class | Might | Intellect | Personality | Endurance | Accuracy | Speed | Luck | |
| Roderick | M | Paladin | 17 | 5 | 15 | 15 | 15 | 13 | 6 |
| Alexis | F | Archer | 14 | 15 | 5 | 15 | 17 | 13 | 6 |
| Serena | F | Cleric | 11 | 7 | 17 | 5 | 13 | 11 | 12 |
| Zoltan | M | Sorcerer | 11 | 17 | 7 | 15 | 13 | 13 | 9 |
It would have been kinda cool to have had Serena’s stats match her stats in Might and Magic Book One of 12, 10, 15, 13, 10, 12, 14.
And so my expected 1-2 month journey begins at the entrance to New Sorpigal. I plan on buying zero items outside of magic spells. After learning the spells that everyone has in their inventory, mixing the available simple potions, and setting First Aid as Serena’s QuickSpell, it’s off to explore the town. The first things we come across are a couple Magic Horseshoes lying on the ground by the Stables, which grant 2 Skill Points to whoever uses one. Nice. Heading to the orchard in the southwest of town, we’re spotted by some Goblins that are hanging out by the southern bridge, initiating our first battle of the game – nice of them to not have their city wall completely enclose the city. Even with only Alexis having a bow, only two of the five Goblins get within melee range before she did enough ranged damage to have the others run away, getting trapped by the corner of the city wall, making it easy for her to finish off the job at range. It turns out there was a 6th Goblin, but he got separated by getting “trapped” behind the southern wall and was just running back and forth, unable to figure out that he could go around the wall.
With that over, I finish picking the orchard clean, more than doubling our supply of food. Near the bridge is a crate, but since no one has the Disarm Trap skill yet, I’m not going to risk trying to open it. Back into town, we come across a well in the northwestern corner that grants a permanent +2 Luck enough times to get everyone to 12 or 13. In houses around the perimeter of the west side of town are found Expert trainers in several Skills as well as the trainers telling us where the Master trainers in that Skill are located, all information I have duly noted.
Heading into the Town Hall, we pick up a couple quests: the one mentioned in the game’s manual about finding the combination to the lock in Goblinwatch, and rescuing Sharry from the Shadow Guild. There’s also a 1400 Gold bounty if we can kill a Queen Cobra by month’s end. Hmm, the Bank has someone walking around the 2nd floor balcony, but I don’t see any way to get up there. There’s also a tower with no entrance, as well as a button and keyhole, which display “Nothing here” when we search them.
Entering the tavern, we finally meet Andover Potbello, who we are to show the scroll the party picked up pre-game to for a reward. Collecting 1000 Gold for doing so, he has another quest for us: To bring the candelabra that was left behind by the Baa Cult as they fled the temple to the northwest of town. And thanks to Microsoft Word, I just learned that candelabra is actually plural for candelabrum.
Hitting up the houses on the east side of town, we buy membership to all the Guilds in town. We also get a couple more quests from the houses’ residents: Rescue Violet Dawson’s daughter Angela from the abandoned temple and kill the spider queen to put an end to the periodic plague of spiders the town gets, also in the abandoned temple. Finally heading north of town to the Temple and Magic Guilds in the hills, Alexis picks off some more goblins that are basically trapped on the balcony of the Guild of the Self, getting them low enough in HP to where they try to run away. With their escape blocked by the short wall, and unable to locate the stairs in their panic, we head upstairs and she finishes the job.
Waiting a few hours, via the very nice Rest screen, for the Buccaneers’ Lair to open at 6pm, the first Skill everyone buys is Merchant, which instantly makes all the other skills here drop from 150 to 135 Gold. With that 600 Gold expenditure using up most of our funds, the only other Skills we buy are Identify Item and Disarm Trap for Roderick, leaving less us less than 200 Gold. Now with Disarm Trap, it’s back to that crate, which only holds a health potion and a little over 300 Gold. A bit disappointing as I was hoping for some equipment. On the other side of the bridge is another chest, containing only a few hundred more Gold. Oh, well. There’s also a couple herbs lying on the ground before reaching the edge of this area. No, I’m not going to go to Castle Ironfist. With that done, I have two choices – Goblinwatch or the abandoned temple. I’ll follow the manual and hit Goblinwatch first.
Heading south of town towards Goblinwatch, we’re accosted by a contingent of goblins charging down the hill at us. Again, Alexis picks them off before they get in melee range. Approaching the building, serious clipping issues pop up as the goblins behind the outer walls are seen between the borders between the panels that make up the building. This also gives us the opportunity to hit them when their swords stick through the walls, which should be solid. Heading around the back, another chest is waiting which finally yields some equipment. Finishing off the rest of the goblins, we enter a “house” and meet Urok, who I’m guessing is the leader of the goblins, who only has some cryptic message about the goblins taking over the castle to watch over the humans. With that done, it’s time to enter through the front gate.
Entering the building, the sounds of goblins and what sounds like the scratching of rats and squealing of bats greet us. Following the tried and true “Follow the right wall” method of exploration, we quickly find ourselves in a room surrounded by goblins and goblin shamans. Taking a bit of damage, we have little trouble taking them out. With the map showing little cubbyholes behind all the red tiles on the walls, we search them, finding some locked chests, one of which holds the Goblinwatch Code we were quested with recovering. Serena’s 11 Speed is low enough to where even though she is showing a 0 AC, it’s actually negative since the cloak we found doesn’t raise her AC. Now I need to get Bow on the rest of my party to utilize the bow we found. Reading the Code scroll, our old friends, the Drawkcab Monks make an appearance as they came up with the combination for the Goblins, which makes remembering the combination a snap. With our party pretty beat up, we head back to town and utilize the HP and SP fountains to regain full health. Since it’s the middle of the night and the Town Hall won’t be open for several more hours, we head back to Goblinwatch.
Opening the series of doors thanks to the Code, we wipe out some more of the rat infestation, which finally gives us enough experience to train. Back in town, we wait a few hours for the Town Hall to open, receiving 2k Gold and 2k Exp each for bringing the Code and are given another quest: to rid them of the cult that’s moved into a temple to the west as they are robbing travelers to fund their operation, bringing back a Chime of Harmony as proof. Time to train. Only 9 Gold to train?!? That’s dirt cheap compared to the previous games. Eight days elapsed while training, so that makes that queen cobra bounty a bit tougher to get. Fortunately, finishing the quest gave us enough Exp to train two levels, saving 8 days. Time to decide what to spend the 10 Skill points on. Before doing that, we head over to Blades’ End and buy all the skills available for everyone, which just about wipes out our funds.
With the only place left to explore in Goblinwatch being down a hole in a large chamber, instead of finding out what’s in store for us down there, there are a few quests to take care of at the abandoned temple northwest of town, so we’ll head there. As soon as we enter, a handful of bats are seen. Taking them out, the foyer is littered with gold a useless belt, and a set of Plate Armor. Woohoo!! Now if I only had someone who could wear it. There is also a barrel filled with colored liquid. Following the same coloring scheme introduced in M&M3, Serena gets a permanent +1 boost to her Speed. Venturing further into the temple, a couple rooms at the end of wings off the hallway give us our first encounter with cobras, which gives me hope that there will be a queen cobra in here for the bounty. This place is crawling with monsters that can inflict poison, so until I can get Cure Poison, I’ll leave this place for now. I did get a nice pair of Gauntlets from a cobra. I’m not sure how exactly a cobra carrying around a set of gauntlets would work, but I’ll take it. Since New Sorpigal doesn’t have Cure Poison available, I think we’ll take a little ride to Castle Ironfist.
Two days, and 21 Gold, later, we arrive at Castle Ironfist. Like in New Sorpigal, the stables here have two Magic Horseshoes just lying on the ground. In a nearby house, Andrew Besper wants us to retrieve a harp of his that was stolen by some Dragoons. Next door to him is the Berserkers’ Fury where we can learn Bow and Plate Armor amongst other skills. So now we can put that bow and plate armor we found to good use. Yes! Cure Poison is available, but at a steep 1300+ Gold price tab. With the Guild memberships and skills, we don’t have nearly enough Gold left to buy it. Even though the Followers of Baa roaming around the area are easy pickings, the Lizardmen that are with them are a bit much for us with their ranged attacks. So, it’s back to New Sorpigal. Maybe a new week will bring the Cure Poison spell. With the remainder of the two dungeons on hold, it’s time to map out as much of the area as we can until Tuesday arrives and hopefully a new stock of spells with Cure Poison.
That turned out to be a good decision as there are some more permanent stat bonus barrels near the ship to places unknown. Wiping out the rather large group of mages on one of the small peninsulas, we meet up with Falagar (from the opening movie) again who instructs us to receive approval from the six High Council members in order to speak to the Oracle in Free Haven. Taking out a camp of goblins, the chests at both the mages’ and goblins’ camps supply us with quite a few nice pieces of equipment. With everything but a few unreachable landmasses mapped out, I guess I’ll press my luck in the abandoned temple.
Back in the temple, a couple rooms off the main corridor hold a bunch of spiders in one and cobras in another. Nothing of note in the spider room, but the cobras were protecting a chest holding the candelabrum. After selling off a bunch of extraneous equipment to open up inventory space, we head further into the temple and down a long staircase infested with bats. I just love the sound the bats make when you kill them. Now that we’re into the catacombs, the bats and spiders really blend in nicely with their surroundings with only their movements belying their positions. At the end of a corridor with a bunch of spiders, all that we find is a teleporter that sends us back to the first branch, which I missed when we first came through here. Heading down the small corridor we previously missed, we run into Angela Dawson, who automatically joins us since we never hired any NPCs. At the opposite end of the chamber where Angela was found is a hallway leading to a dungeon with long expired prisoners in cages. We can safely search the hanging cages, but are unable to avoid what turn out to be lethal traps in the cages on the floor. And just great, Angela takes 1 Gold when we collect each of the two small piles of Gold lying on the ground. Well, I guess we won’t be towing her around any longer and will head back to town to get our reward for finding her.
Back in town, it appears we’ve tapped out the healing powers of the main fountain as it stopped giving the 5 HP. Returning Angela to her mother, we’re rewarded with 10 Food and 1k Exp each. Hmm, still no Cure Poison. Since the book for it in the Guild at Castle Ironfist had a different design, I’m guessing that signifies a spell level and New Sorpigal doesn’t offer that level of spells. While here, we bought out all the remaining skills available in the Buccaneers’ Lair and trained everyone to Level 4. So, it’s back to the temple.
Well, we killed a King Cobra. Now we just need its queen. Really getting deep into the cavern, we reach a lowered area just teeming with cobras. Inching our way forward, the cobras come at us one or two at a time, making it possible for our two ranged attackers to finish almost all of them off before they get into melee range. Complicating matters is the wing off to the left having a handful of spiders that sneak up on us as we’re concentrating on the cobras. Heading down the corridor beyond the cobras, we get to a branch and a Queen Cobra comes at us from the left branch. Sweet! To the right is a chamber with a half dozen Cobra Eggs lying about. Wouldn’t it have made a bit more sense for the queen to be in that room protecting the eggs? Heading into the corridor the queen cobra came from, we’re besieged by spiders, including the Queen Spider. Snagging the queen’s heart as a trophy for defeating her, the opposite end of this chamber has a room with another set of Plate Armor lying on the ground and a chest, which held a couple very nice suits of Leather Armor. The teleporter found in this chamber sends us all the way back to the foyer, which is handy, as Roderick needs to be cured of poison.
We stop at the 24hr temple in town and hit the fountains, which once again have their healing powers. Since it’s the middle of the night and the Town Hall isn’t open, it’s back to the Temple to try to fully clear the dungeon. What turns out to be the final path to explore only holds a group of every monster found in the cavern with a chest holding some more nice equipment and a teleporter back to the spot the first one we encountered sent us to. Heading back to town to collect our rewards for the quests, the spider heart gets us 1k Gold and 3k Exp each, and the candelabrum gets us 1k Gold and 2k Exp each. Combined, the 5k Exp added more than 50% to our totals. The bounty doesn’t get us any Exp, but the 1400 Gold will be useful. Time to train up, which takes us to February and a new bounty: a Head Hunter. Alexis becomes our first Expert in anything with Expert Perception.
The only thing left to do in the area is finishing off Goblinwatch. We really could use another person to be able to wear Chain Mail since we just picked up a very nice set in a chest. Dropping down the hole we avoided, not much of note as it’s basically just a couple rooms with a bunch of goblins, rats, and blood suckers leading to the two long caverns that is the Maintenance area reachable by pressing M on the keypad where you enter the Code. Other than a large room with a lot of rats and blood suckers, the only things down here are a chest at the end of each cavern.
Now there is nothing left to do here, so off to Castle Ironfist. Dang it! The Stables are closed, so we have to go by foot, adding a few days to our travels. This is definitely one aspect I am not a fan of. As soon as we enter the area surrounding Castle Ironfist, a rather large group of Followers of Baa attacks. Easily dispatching them, we head towards Ironfist’s castle town. Being the middle of the night, nothing useful is open, so let’s go up the hill to the castle and deliver the letter we received in New Sorpigal. Residing in the castle, along with the young Prince Nicolai Ironfist, is Wilbur Humphrey, who will promote Paladins to Crusaders upon the rescue of a damsel in distress, mentioning that Melody Silver is being held captive on the Island of Mist. Showing him the letter, we receive 5k Gold and 3k Exp each. We are then asked to find information regarding the missing Lord Kilburn, who disappeared near Blackshire. If Lord Kilburn has been slain, we are to bring back his shield. Doing this will grant us Humphrey’s favor with the High Council. Talking to Prince Nicolai gets him to join the party since he’s so bored. He wants us to take him to the Circus. He also mentions that his Uncle Archibald was turned to stone and is being kept in the castle library – one of the connections to Heroes of Might and Magic II.
Running out of inventory space, we wait until the shops open. Nicolai is extremely impatient and left us while we were waiting. No big loss as we don’t know where the Circus is yet. There’s a teleportation device that puts us right in the middle of a bunch of Lizardmen, which is certain death. Soooooooo, we’ll be avoiding that. After buying every skill available, we decide to leave the castle and town, and explore the area, heading back to the southeast corner where we arrived. Nestled in a corner of the mountains, a chest finally yields us our fourth bow, so now everyone can attack at range. Also found around here is the entrance to the Dragoons’ Caverns. Let’s check it out as the objective of one of our quests is in here.
Well, these Thugs give up a decent amount of Gold. However, the Ruffians and Brigands are a bit too much for the party. So, let’s try our luck elsewhere. Heading down the road, we can see a stone building in the distance. Laying waste to more Followers of Baa and a handful of Lizardmen, we arrive at the Temple of Baa. Let’s see if we can survive this one. If it’s populated with the Baa Followers we’ve been mowing down, we should be all right.
Entering the Temple, we’re quickly in a very large room. In the middle is a square room with doors that zap us when we try to open them. Next to each door is a sign mentioning something about seasons changing. In each corner is a wide path, so I guess we’ll start exploring these, starting with the southwest path. Oh, boy! More spiders!! Making it to a very large chamber, the spiders and Acolytes and Priest of Baa wear the party down to where we need to rest up. But since we can train, that sounds like a better choice.
Back to the Temple, the spider grotto is too much for us thanks to all the ranged enemies, so let’s check out some other options in here. Heading through south door, in a statue at the end of the hallway is a Storage Room Key. Using it on the correct door partway down this hallway summons some skeletons and Acolytes of Baa. Inside the room is a chest with the Bathhouse Key. Time to find the Bathhouse. After clearing the southeast chamber of a horde of skeletons and a few Acolytes, it appears we can use the torches on the wall to act as a 100% effective defense against the Acolytes’ ranged attacks. So, back to the southwest chamber. Unable to lure them out from the back of the chamber, after a lot of running just in and out of range and first picking off the acolytes and then finally lucking out and having the priest stuck in the beginning of trying to climb the slope of the wall, meaning he’s focusing all his attention on trying to climb the wall while getting pummeled by our ranged attacks, the room is cleared of enemies. Good thing I have an Expert at Perception as Alexis is able to search the skull piles and be unaffected by whatever status ailment they would give. It’s just too bad all they hold are spell scrolls.
The eastern corridor doesn’t hold anything other than some annoying Acolytes. After clearing out each of the four chambers in the corners, they all hold resistance boosting cauldrons. The hallways at the cardinal directions are a sequence of open a room to find a key to open the next room, etc., each time summoning some skeletons and acolytes. I’m guessing at the end of this sequence, the center room will become accessible. Or maybe not. The doors just have to be attempted to be opened in a certain sequence. Opening the middle room reveals a chest containing a nice Elven Bow. Opening the chest summons a ton of skeletons and acolytes into the main room, surrounding us. Hightailing it to one of the corner corridors gives us a chance to start picking off all the enemies. Being able to outrun the skeletons makes it easy to repeatedly get some distance to shoot at them again. After finally defeating all the enemies, it’s back to Ironfist to train up a level.
Back at the Temple, a staircase to a large open area has either appeared in the east hallway, or I completely missed it. We also have a Secret Room Key and Treasure Room Key that I’m guessing will be used up here. Getting some serious exercise running around picking off all the acolytes and priests, we notice some hallways running along the edge of the room at a sort of mezzanine level. After dispatching the last of the enemies, on the altar is a gong, and approaching it floods the room with a horde of skeletons. Good thing that Secret Room Key opens a door directly behind the altar, which leads to the two high hallways. Since no skeletons appeared in the hallways, running to the high hallways allows us to methodically and safely wipe out most of the horde. With most of the heavy hitting skeleton lords and knights eliminated, we drop down and take down the stragglers. Vacuuming up all the skeleton corpses, we pick up about 2k Gold. Now to find the Treasure Room. The only clue is an unconnected room that somehow appeared on our map. It turns out that the wall sections at the end of each high hallway are actually doors. So there are two treasure rooms, as the first holds a chest with the Chime we’re after as well as the key to the other treasure room. True to its name the second treasure room is tiled with bags of gold, holding about 9500 Gold total. Avoiding the constant trap, we leave the Temple and head back to Castle Ironfist.
Looking at the Quest Log to refresh where we have to bring the Chime, it seems Prince Nicolai has run off and we have to find him. Heading to the castle, we can’t enter as they think he’s been kidnapped. While talking to the roaming NPCs, one of them mentions an obelisk puzzle that holds a riddle, which tells of a great treasure. After checking every building in the castle and town, Nicolai is nowhere to be found. Hmm. Heading into Lizardmen territory to the west of the castle, behind the tall spire is a sword in a stone. Of course, we can’t pull it out of the stone yet. Seeing a star-like building, we head up the mountain path and arrive at The Seer who tells us that March is the Month of Personality and we should take a pilgrimage to the Shrine of Personality to be rewarded. If only we knew where that was… He also tells us to perform the promotion quests for the six lords of Enroth. We already have one of them quested to us. We also tell him “I lost it,” but get nothing. But we really wanted a Xeen Slayer Sword!
Exploring the area, we find the Shadow Guild Hideout at the base of the mountain east of The Seer, Snergle’s Caverns just off the northwest road that leads out of this area, and The Will o’ Wisp pub on the road to Snergle’s Caverns. Following the road south of The Will o’ Wisp, the Shrine of Electricity is a little east of where the road ends. Something to keep in mind when its month rolls around. In the southwest corner of the large peninsula west of the Temple of Baa is Corlegon’s Estate. Perilously close to death, we head back to town and rest in the stables. Back at full health, we head back to finish mapping out this area. Returning to the peninsula, across the small pond east of Corlegon’s Estate, which has three buoys in it for some reason, is a building that looks like a little spaceship on the map. Instead of it seemingly being an end game structure, it’s the Temple Baa where you can heal for dirt cheap. Thinking that can’t be a good thing, and with our health being almost full, we pass, getting a sinister laugh as we leave. The final place to map out is the center of the peninsula.
Heading up the winding road up the side of the mountain, this turns out to be the place where you get teleported to in Castle Ironfist. That’s very interesting… I switched to turn-based, and one of the Lizardmen just kept walking up and over the side of the mountain. Well, that’s one less that I need to worry about. Charging in, bows a blazin’, we take quite a bit of damage before eliminating all the enemies to find a +10 HP fountain at the base. Also down here is the first obelisk, and the return of messages and interleaves (maybe?). With the area fully mapped out, and already getting a taste for what the Dragoons’ Caverns has in store, we head over to the Shadow Guild Hideout since that quest was given in New Sorpigal.
Entering the Hideout, there are only two doors, and the locked one has a trap tile in front of it. The room we can open has a handful of thieves, burglars, and rogues, all of which can steal something. After stealing a near worthless ring, we quickly leave and deposit everything we can in the chest at the nearby lizardman camp we wiped out earlier. I know I said I was planning not to buy anything other than spells, but since the Hideout’s enemies also hit pretty hard, and the shops at Ironfist had some very nice weapons and armor for sale, I’m heading back and stocking up.
Armed to the teeth, we head back to the Hideout. Defeating all the thieves, we hit the switch just inside the room, which opens a secret path nest to the trapped door. In a chest is a Letter from the Prince of Thieves, but we don’t have anything to connect it to yet. Searching a fireplace in one of the rooms, we find a Sparkling Ring of the Unicorn, which, in addition to +15 Luck, regenerates SP over time. Oh, yeah!!! Putting it on Serena, we now have a traveling HP fountain. We eventually find the key to the trapped door. Jumping over the trap tile in front of the door, we’re greeted by Sharry Carnegie. Since we have what’s needed for two quests back in New Sorpigal, it’s time to collect before heading back to the Dragoons’ Caverns.
The stables are going to the Arena this time, so, why not? Choosing the Page level, one of the enemies is a Head Hunter. Shoot! If only it was still February, that would have gotten us the bounty, if Arena enemies count for that. Exiting the Arena, we’re instantly back in front of the stables in Ironfist.
Now the stables go to New Sorpigal, so off we go. Getting a couple more Expert Skills, we hang out at the Town Hall entrance for a few hours until it opens. Returning with Sharry gets us 2k Gold and 10k Exp each. I wonder if the Letter we found in the Hideout is what Frank Fairchild would like to show Anthony Stone. The Chime gets us 5k Gold and another 10k Exp each. Very nice. March’s bounty is a Druid. That 20k Exp allowed us to train two levels, and starting with Level 10, we now get 6 Skill Points. After making the trek back to Castle Ironfist by foot, everyone becomes Expert at the bow. Now with Serena’s SP regenerating, it’s time to tackle the Dragoons’ Caverns.
The first room of any real note has a ramp circling down with a few enemies in the center at the base. Jumping off to the outside, while we can attack them on the other side of the ramp, they’re too stupid to attack back, but rather are trying to come around first. Searching every carving in the walls, the one just before the chest with the Flute in it does something, as the portrait of the character that searches reacts and sparklies rain down it, but I’m at a complete loss as to what. Utilizing the ramp again, we lure a handful of Brigands back to the ramp and perfectly safely hack away at them through the ramp. Entering a watery area, a bunch of Oozes, which can only be damaged with magic, are waiting. I guess we’ll have to go buy some spells. Before doing that, we’ll explore everywhere else in here. We find another letter, this one being orders to Damian from the Prince of Thieves. Arriving at a room with six chests, five of them randomly teleport us to another location while the sixth one contains the Harp we need to retrieve. With everything but the areas with Oozes in them explored, it’s time to get some offensive spells as well as sell off a ton of items.
Bringing the Harp, Andrew rewards us with 5k Gold and 10k Exp each. He also mentions how the Mayor of New Sorpigal would love to see what we found in the Caverns. Heading back to New Sorpigal, showing the mayor the proof gets us 5k Gold and 5k Exp each. April’s bounty is for a Skeleton Knight. And of course our killing many of them in March doesn’t count.
Playing around with mixing potions, since I didn’t feel like looking them up, I went through every possible combination (assuming anything mixed with black is a failure). I’m trying to figure out why anyone would every use Divine Magic or Divine Cure. I could see maybe if they permanently added +100SP/HP.
Now with some better offensive magic, it’s time to finish off the Dragoons’ Caverns. The 5-day trip to Castle Ironfist took from April 28 to May 5, so apparently all months have only 28 days. Instead of doing that, I’ll just reload and wait for the Town Hall to open for a new bounty, which is an Energy Drake. Um, yeah, I don’t see that happening since I believe drakes are in the dragon family. Well, doing that saved us almost 3 days since the stables are now making the trip. I guess I didn’t need to do that since Flame Arrow is still my best spell, and with Zoltan being an Expert at Fire Magic, and wearing the Unicorn ring, he’ll just whittle them down by himself. That was extremely tedious. For all the trouble of taking out about two dozen various Oozes, we get rewarded with a Spiked Club and some gold. Yeah, that was a complete waste of time. With the Caverns cleared, it’s time to again look for Nicolai. With Snergle’s Caverns and Corlegon’s Estate the only places in this area we haven’t explored, let’s start with the closer of the two and go to Corlegon’s Estate.
Oh boy! Ghosts and their kin! Hopefully they don’t age us like in previous games. While doable, I’d feel more comfortable with everyone gaining an extra level first, especially with the added benefit of new Plate and Shield Experts. It’s slow going when we get to the large room with a walkway far above the floor (come on, Corlegon! You couldn’t have invested in a railing?!?) as we lure out the ghosts one at a time. Unfortunately, Zoltan’s armor got broken and is too complex to repair by anyone. But we did get a nice +6 AC ring as a consolation prize. The severed head in a basket is a very nice touch. In one of the standing coffins, we find a letter written by Corlegon that explains why he chose to become a lich. So we pushed a switch. I thought it would have opened the door that wouldn’t budge way back at the beginning, but it didn’t. Hmm… I guess I accidentally hit it twice as I went back and hit it again, and it did open that door. Well, that extra trip did almost fully replenish Serena’s SP. Head on a stake. Nice. Jumping down the well into a trap of assorted ghosts, and then skeletons, we pick up a belt that regenerates SP. Sweet! Ok, there’s a switch we pressed and I can’t figure out what it activated. Ah, it’s gotta be that last corridor at the bottom of one of the rooms with extremely high ceilings. Since we’ve been wandering around in here for a LONG time, we’ve gotten weak, so it’s time to head back and train.
Back at the Estate, that switch didn’t open that path. Now to figure out what it DID do. There was a switch behind a wall that seemed to only come up to our waists (and we don’t have the ability to scale such a high wall). Maybe it’s that. It turns out that it is. I don’t remember seeing any other switches, so… Back to the room with the hidden hallway, and the wall has opened, giving us access. In a room at the end of the hallway is a Power Lich. Uh-oh. No problemo as it only has whatever the ranged magical attack it uses is and we get it caught on the other side of the doorway, meaning that it never can hit us, while all of us just hack away at it. Inside the room is a chest holding the Crystal of Terrax, which means the Power Lich was probably Corlegon. With that done, we’ve fully explored this place. So we’re off to Snergle’s Caverns.
Well, the Dwarf Lords in Snergle’s Caverns can break armor. Since no one is an Expert at Repair Item, which means no one can repair Noble Chain Mail, I guess we’ll move on to a new area. The ship can take us to Mist or Bootleg Bay. I think we’ll go to Mist.
As soon as we disembark in Mist, we have some Followers of Baa to dispose of. We pick up a quest from Kathleen Mester to rid the town of the Followers of Baa, activating a teleporter so we can reach their base of operations. Oddly, this quest doesn’t show up in the log. Picking up a couple more skills, including Body Building, we find there’s a castle in these parts, with Lord Albert Newton residing in it. He will promote Sorcerers to Wizards if we can find, and drink from, the Fountain of Magic. We also get quested with retrieving the Hourglass of Time so he can build a mirror to look back in time to remember things he’s forgotten. Doing this will win us his favor with the Council. So, that’s two of the six Council quests. The Hourglass is supposed to be in an old fort to the south. Seeing the teleporter just north of Castle Newton, we take it and start mowing down the Followers of Baa as well as some Catpurses. At the end of the string of connected islands, we find another obelisk. Teleporting back to the island with Mist on it, nearby where we appear is the Shrine of Intellect. Being the Month of Accuracy, praying here does nothing. As with New Sorpigal, there is a tower here with a button and keyhole that do nothing when searched. The only other thing on these islands, that we can see, is the Silver Helm Outpost just off the southeast corner of town. It even has a road leading to its doors.
The Outpost is populated by monks and swordsmen. In a chest we find an Enemies List, which places the mayor of Mist at number three. I guess we should have visited the Town Hall first. Let’s put that scroll back in the chest and go to the City Hall. Not surprisingly, we get a quest to storm the Outpost and bring back proof that the Fraternal Order of Silver has been slaying innocents. This month’s bounty is an Ogre. Back to the Outpost. Clearing out the Outpost, we bring back the scroll and receive 3k Gold and 15k Exp each. We also have a Key to Gharik’s Laboratory, which we’ve heard no mention of.
With nothing else to do on the Misty Islands, let’s head to Bootleg Bay. Immediately arriving in the area, we’re set upon by a bunch of head hunters, cannibals, and witch doctors. I guess we should have stuck to the road instead. Wiping them out, we find a couple bones lying on the ground in their camp. It appears this is one of the circus’s locations, but they aren’t here right now. The nearby signpost says that it’ll be here in Winter. Also in the southeast corner is the Hall of the Fire Lord. Since we don’t have any reason to explore it yet, we’ll leave it for later. Just to the west of the Hall is another obelisk. It’s a good thing we bought the Water Walk spell as there are some small islands with Lizard Men trying to pick us off. While we can shoot back, we wouldn’t be able to collect their loot. In the west end of the mainland part of this area is found the Temple of the Fist. In the little town here, we’re quested to destroy an evil crystal found in the Temple of the Fist by Winston Schezar, who was once a member of the Order of the Fist, in order for the crystal to not fall into the hands of the Temple of Baa. Now that we have a reason to go there, let’s head to the Temple of the Fist.
Dealing with more monks and rats (boy, do corners work wonders for blocking magic attacks while not impeding physical attacks), we find a correspondence from the Temple of Baa. Quickly finding the Evil Crystal in the smallest dungeon by far up to this point, we destroy it and head back to the little burg. Somehow knowing that we destroyed the crystal, Winston rewards us with 3k Gold and 10k Exp each.
With nothing else tasked for us here, it’s time to explore with the aid of the Water Walk spell. A small island in the east has a fountain that gives +2 Personality eight times, but only if that character is below 16, or maybe 15. Since Serena and Roderick can’t benefit, might as well take advantage of it with the two who don’t really need it. Spying a ship in the distance, we run over there and find the Temple of the Sun. Heading to the northern tip of this crescent shaped island, we see another ship in the distance. Arriving at that island, there is a small village along with the Temple of Tsantsa. We’re really racking up places to go that we have no reason to go to yet. An island north of the Personality fountain has the +2 Intellect fountain. A tiny island north of the crescent island has a Pedestal on it, which I’m guessing we’ll be placing something on in the future. The Temple of Might is found on a small island in the northwest corner. It turns out July is not the month of might, so this does nothing. These three islands plus the crescent island look like a distorted smiley face. With the area fully mapped, we might as well see what is in the two dungeons, starting with the Temple of the Sun.
Upon entering, we’re besieged by monks who do quite a bit of damage with their ranged magic. Surviving the barrage, a cabinet holds a Sacred Chalice, which we have no use for right now. The other path, which mysteriously opened up, has a Minotaur King. Based on previous games and how tough Minotaurs are, I’m not even going to try it. So, let’s see what the Temple of Tsantsa holds in store for us.
An empty foyer is a good start. Heading in, we face much more manageable cannibals and cobras. I do like the extremely narrow corridors found here. I wondered why we were taking damage in one room. It’s very subtle, but the floor does “move.” Hmm. I can’t find the key to the door that’s down the stairs past the large chamber in the center of the temple. One of the chests in the two rooms off the hallway was empty. Ah, that switch on the table opens it. I thought that was for the doors to the center room. On the other side of the door is Sherell Ivanaveh, who is being imprisoned here. We haven’t gotten a quest to save her yet. Since we haven’t received the quest, and I don’t want her sponging off the party, we’ll leave her here to rot a little longer.
Remembering that there’s a damsel in Mist, we head back to Ironfist since the ship there goes to Mist. Since we’re passing by, why not try Snergle’s Caverns again. With Expert Repair Item being able to repair everything we have equipped, we shouldn’t have too much trouble. It’s so nice being able to instantly repair anything during combat. Heading into a large room, there are several clumps of crystals scattered about. Crystals usually mean really good things, but occasionally really bad things. In this case, all but one are “Useless Crystals,” with the non-useless one being an amethyst we take with us. The group of dwarves in the room took quite a bit out of us, so after getting a few stat boosts, we leave to recharge. After spending a few hours outside to recharge our SP, we head back in. While keeping an eye out for enemies, I’d missed a couple gold veins along the walls to mine. Ooh, black liquid filled barrels! Dang. Just poison. It’s so nice that the enemies don’t think anything of their pals standing right next to them getting shot and wait until they are shot themselves before deciding to investigate. We picked up a Moonstone in another large chamber. Unable to find the switch that opens the door that blocks any further passage, we leave.
Sailing over to Mist, it’s time to look for that damsel. She must be on some island we couldn’t get to before since we didn’t have Water Walk. Or maybe not, as there are no other islands in this area. Apparently, we found the Fountain of Magic as we completed the Wizard promotion quest, getting 15k Exp each for our troubles. Zoltan also picked up some extra HP and SP as a result. We’re then given the Arch Mage promotion quest, which involves finding an artifact found in Corlegon’s Estate. I believe we already have that, as the Quest Log attests to. Giving him the Crystal of Terrax completes that quest and Zoltan is now an Arch Mage, and gets some more HP and SP. Woohoo!! The party also got 30k Exp each. Time to train. That 45k Exp got us 3 Levels, and starting at Level 20, we get 7 Skill Points. Hmm, can’t find Melody Silver anywhere. She’s not in the Silver Helm Outpost, and the only place we haven’t been to is that tower that we can’t access.
Heading all the way back to New Sorpigal, we get several more Experts. Using a Fly spell scroll we happened across, Zoltan is able to become an Expert at Air Magic, which means that being an Archmage, he can become a Master whenever we get back to Mist. Well, I now know one purpose of those towers: When we took flight, it started shooting fireballs at us. Taking this opportunity to finish mapping out the area, we search a cooking pot in the middle of the northeastern island and get surrounded by a horde of Mages and Goblin Kings. Throwing up a Protection from Fire, Zoltan’s Fire Ring is able to do some very good damage and we scrape by with everyone in critical condition, but not unconscious. Also on this island is Gharik’s Forge. While we can take out the Fire Beasts inside, I have a feeling we’re here way too early. Exploring some more, we come across another obelisk with a couple well-camouflaged Magic Horseshoes lying on the ground. On the island to the east of New Sorpigal is the Shrine of Luck. Dang it! Missed it by 6 days!
Making the 10-day trek west to the Mire of the Damned, we’re instantly set upon by ghosts and skeletons. Just north of where we entered the area is Snergle’s Iron Mines. This area is aptly names as it’s just wave after wave of undead. Being only skeletons at this point, Zoltan’s Fire Ring does wonders at causing mass destruction. In the northeast corner is the circus (kind of an odd place for a circus, but, hey, I guess the undead need entertainment, too), and it is open for business. In addition to the games to play, we find Prince Nicolai in the main tent. Returning with him to Castle Ironfist, we receive 7500 Exp each. During the trip back, it turns out I missed the 3 Magic Horseshoes lying on the ground next to The Will O’ Wisp.
Back in the Mire, we come across another obelisk in a path cut through a mountain just west of the eastern road. Running into a pack of harpies, the harpy witches not only can cast Mass Curse, but also can age on touch. Hightailing it back out of the mountain pass and fighting through more skeletons, ghosts, and harpies, we come across a fountain that does nothing. I’m guessing this is a stat boost fountain, but we’re all too high to benefit from it. Another Temple Baa is found on a peninsula in the southeast corner, along with a bridge that’s floating about a foot off the ground -- okay, that's just a glitch where it can't match up the bridge's base with the ground. Fighting though a good number of harpies, in the southwest corner is another empty pedestal. They must have loved their bridges in this area. Kinda overkill to have three bridges on one small island, especially when two of them connect it to the same landmass. A little northwest of the center of the map is the Shrine of Speed. Yet again, it’s the wrong month to reap any benefit from praying. Finding the town, which is overrun with undead, we instead finish mapping out the northwest corner of the area around the town. Doing so, we come across the Dragon’s Lair. Um, I don’t think we’ll go in there. At the top of the mountain just north of the town, with a very obvious invisible bridge, is Castle Darkmoor. Unlike the other castles so far, this one is a dungeon. Enough exploring. Time to head into town.
Darkmoor has a rather confusing layout. Terry Ros is worried that the Necromancers’ Guild has taken the Book of Liches into Castle Darkmoor and is going to do some foul deeds with the book’s aid. So he wants us to storm the castle and destroy the book. There are also a few Masters living here, but no one is close to meeting their requirements. Hanging out in the tavern is Avinril Smythers, who wants us to remove Snergle as the head of the Dwarves and reinstate Rocklin. As he is the Master of the Axe that we were told of, we won’t be able to get a Master in this art unless we complete his quest.
Heading to Castle Darkmoor, instead of going in, we head up one of the ramps to the side and there’s a second entrance up here. Keeping that in mind, we head back down and through the front door. Hacking our way through ogres and a few liches, there are some poison trap tiles, which are easy to avoid as there is a hissing sound preceding the trap. With all the various Eye monsters giving us all sorts of troubles, we try the other entrance, which… puts us at the same spot as the front door. This place is brutal. Our best chance is positioning all the Eye enemies along walls and hoping they don’t move away from it so all their shots hit the wall instead of us. There are a ton of them. They’re really hard to hit. They do status attacks. They have a lot of HP. And they can dispel all magic, seemingly even if they aren’t anywhere near us. We eventually got a clue about this place with a sign stating, “The crimson embers will lead the way.” Reading the sign, which is right next to a torch, lowers a little section of the wall, which hides a switch. Hmm… Since we can train, I think we really should do so before trying to go much further in here.
Since there is no training in Darkmoor, it’s back to Castle Ironfist. Passing by the Shrine of Electricity, we see if September happens to be its month, and it is! That got everyone +10 Electricity Resistance. Woohoo!! Back to the Mire, and since we’re passing by, let’s check out Snergle’s Iron Mine.
After taking out a bunch of Dwarves in a large room, we find a library with a bunch of spell books. Looks like we wasted a bit of Gold buying spells. Yay! More Oozes!! This time we’ve got Fire Ring, which makes pretty quick work of them. Inside a chest are orders from Snergle, who is looking for the precious metals stalt and kergar. Entering a room, we meet Ghim Hammond, who tells of a strange tower erected near the destroyed town of Sweet Water. Ghim was a steward for Rocklin and was imprisoned here by Snergle. He also has a key to Snergle’s private room, which he gladly gives us so we can end Snergle’s reign. I’m guessing this is the key to the door we couldn’t open in Snergle’s Caverns. So let’s head back there. Plus, we can train while we’re in the area.
Back in Snergle’s Caverns, heading to the locked door, the Key does allow us to open it. We are instantly surrounded by a horde of dwarves, including ones that teleport in behind us, which is too much for us to handle. So, I guess we’ll train first. Heading back, being able to find a spot where we can barely see through the crack of the door, we’re able to take down about 10 of the dwarves before opening the door. After that, we spent a lot of time running around the very large chamber, getting some distance, softening them up at range, along with Zoltan’s Fire Ring doing so good damage, and repeating. Taking down Snergle, we get his Axe. Picking up a nice +5 Might boost, touching some glowing dinosaur bones sends us back to the entrance. With Snergle’s Axe in hand, it’s time to head back to Darkmoor and present it to Avinril.
Getting completely lost in Darkmoor trying to find Avinril, we finally arrive at The Haunt tavern and we’re rewarded with 20k Exp each and he’ll train any Axe Experts to Master for no charge. Alexis is an Expert and becomes the party’s first Master. With that taken care of, we’re going to try Castle Darkmoor again. Well, that sucks. Since Alexis only needs to get to 30+ Luck to get Master Perception, I mixed up an Essence of Luck Black Potion, but it won’t work since she already drank one. That’s one more thing I gotta keep track of.
Back in the castle, instead of heading into the humongous room with all the Eyes and Ogres, we’ll try to find a more constricted entrance. Slowly making our way through, for the most part, Liches, we find a Deck of Fate on the ground. Granting a permanent elemental boost isn’t what I was expecting. These huge rooms full of ranged attackers are a pain to clear. After clearing one room, all we get for our troubles is a Diamond. What to do, what to do… Let’s go back to the one switch and flip it again and see if anything changed. That red chandelier-type thingy in that large room where there were a ton of ogres is now blue. So, since the starting color is blue, we’ll change it back to red. We examined it briefly once, but we only “touched” one side. “Touching” the bottom activated something. Ah, it lowered the wall directly north in the corridor to another humongous room with a bunch of Eyes.
Wow! This place is ridiculous!! Heading around the north side of the inner castle, clearing out all the Eyes that gather in threes only gets us an assortment of precious gems. At the end of the south side is a large congregation of Eyes. Finally figuring out a strategy to be relatively safe by strafing diagonally in and out (since we move like molasses in January while strafing directly left and right) of the edge of their attack range, we slowly take down the large group of enemies. One serious annoyance is that there are a few places where the Eyes inside the castle are seen (being behind a solid wall, we should not be able to see them), but can’t be hit, and they become the closest enemies, so we start shooting at them instead of the enemies we should be targeting. The Flying and Terrible Eyes aren’t so bad, it’s those Maddening Eyes that are the pain since we have no cure for Insanity, other than a potion that requires Phirna Roots, which we have none of, or resting. We did get a very nice collection of rings from the Eyes, including one that regenerates HP. We also have quite the collection of gems. After four or five days in here, we finally move onto the interior section of the castle.
Just getting to the great hall has us going through even more Eyes. Arriving in the hall, more Eyes and some Liches greet us. I never thought Liches would ever be my least concern. Since the monsters with ranged attacks always move in a circular pattern until they run into a wall and then rarely do anything but keep walking into the wall trying to complete their circle, we’re able to slowly pick off all of the monsters as they get stuck in corners. Walking between the pillars in the middle of the hall sets off an easily avoidable fireball trap. There’s another cube chandelier in the center that is currently blue. Touching it teleports us back to one of the large chambers in the opening section of this dungeon. I’m guessing there’s a switch that turns this one red, as well. And up a narrow ramp after getting by some ogres and liches, we find the hidden switch by another sign stating the same thing as before. You can fight liches to your heart’s content in a large room with floor tiles that make about a half dozen of them appear. If I ever need an empty bottle, I know where to come, as there is a room full of them -- except it'll take probably 10 minutes, real time, to run to this location to get them. Just on the other side of the room where you can teleport in liches is another large room with a bunch of liches and eyes, but for some reason they won’t attack while we’re standing on the ramp. Well, easy pickings for once. Ha! The Lich King just walked up to us, but because we’re on the ramp, he just stood there and took a beating without even attacking.
Making it through that relatively easily, we find another chandelier with the sign right next to it that activates it. There is also a Memory Crystal Delta in a little alcove on the wall. I wonder what that’s for. Heading back to the great hall, the chandelier here has turned red thanks to the switch we already flipped. That only seemed to open a path with some ogres and a bunch of empty chambers. What’s with all the bone cages and nothing in them??? Heading back to the last red chandelier, it teleports us into a small room with a very nice sword on the ground and the Book of Liches, which we destroy. There are also a few sarcophagi on the walls, which ask us if we want to steal from the dead. Of course we do! And they hold some very nice equipment. The only repercussion is that each one we open lowers our Reputation one rank, so we are now Vile. Oh, no! There has to be something else, like triggering some monsters to appear or something. I guess not. After spending five or six days (and probably 20 hrs of game time) in this dungeon, we’ve finally fully cleared it and taken care of the task we were sent here to do. It’s time to head back to Terry Ros and collect our reward, which ends up being 5k Gold and 50k Exp each. It turns out that stat requirements for Master training allow for items to boost that character to the required level, so Alexis has now Mastered Perception.
Heading to a new area, the stables take us to Free Haven. Arriving, we check and there are two Magic Horseshoes in these stables, too. The town also has an inaccessible tower. Free Haven is quite the large town. It even has a sewer, accessible from a number of houses. Southeast of town is the High Council, and it’s thumbs down for all. We pick up a quest from Zoltan Phelps to recover a powerful artifact, Mordred, which was stolen from his caravan by some raiders. They were last seen west of Castle Temper. I guess that Temple Gong we picked up a while ago isn’t that important as we sell it to one of the citizens for 2k Gold. Ooh! Ooh! Ooh! We want to be charter members of the Nicolai Ironfist Bridge Fellowship! We even have 50,000 Gold for the membership! Why aren’t we given the option to join??? Aw. Restocking our Quest Log, Gabriel Cartman is researching undead and wants us to bring him the remains of Ethric the Mad, the first lich. Just north of Gabriel’s house is the town’s Temple, which is in complete disrepair and has been abandoned. And for another quest, Carlo Tormini wants us to rescue his friend, Sherell, who we left rotting in the Temple of Tsantsa in Bootleg Bay. I hope she’s still there.
Ouch! Completing the promotion quest really jacks up the price for training as it costs Zoltan triple what it costs everyone else. All that time spent in Castle Darkmoor got us seven levels, and at level 30, we start getting 8 Skill Points. With Roderick becoming a Master at Identify Item as well as getting a few more Expert level skills for the rest of the party, we head out of town and explore of the area.
A little west of town is the Shrine of Accuracy, but its month has long passed. In the northwest corner, dug into a hill, is the Temple of the Sun. Between the Temple and Free Haven is the little burg of Rockham. Other than having the Body Builder Master, the only thing here that was useful to us was being able to unload all those bones we found to open up inventory space. Searching the well gets us ambushed by some Fire Archers. Lovely. Barely surviving that, we heal up a little and then stumble into a group of Apprentice Mages and Mages. Zoltan’s Fire Ring takes care of them and we head back to town to take advantage of the +25 HP fountain since we’re pretty low on SP. Southwest of town, at the end of the little river, is Ethric’s Tomb. Since we have a quest for this place, we enter.
Entering, we hear the familiar sounds of fireballs and skeletons. It’s a good thing we can “slide” down a wall and take no fall damage since picking the wrong elevator would normally put us in a perilous situation. Yay! Some hangings went on in here! This is fun just laying waste to all the skeletons. Making quick work of Ethric, along with some liches that just keep running against and shooting into the side of the standing sarcophagi while we just attack them through the sarcophagi, we get Ethric’s Skull. I would have thought Ethric would have been along the hallway behind the door that the fireball trap hits. Making quick work of the Tomb, we head back to town to unload some inventory and collect our reward. Returning to Gabriel, we get 7500 Gold and 15k Exp each.
Since we’re in town, we might as well explore the sewers. Checking the grates, we find a Sewer Key as well as a bunch of gold. Reloading to keep track of how much gold, it turns out that the first time you search any grate, you receive the Sewer Key. Oh, so you can search several times and keep receiving more gold! The small amount of damage is worth it. We also found some potions in them. Actually, it looks like there’s just a certain number of searches you can do, regardless of which grate, so you can just repeatedly search one grate and get all the gold to be found. Running into some Thieves, the stupid thing about their stealing an item is that that item just disappears, so if they do steal something, you won’t get it back after you kill them. Well, that’s annoying. One of the sewer exits puts you in a house whose sewer entrance is quite a ways away from where you exited. I can see the door that you have to actually get out the Sewer Key and use on causing some issues for people since every door up to this point has unlocked while its key was sitting in your inventory. Other than experience and items, we didn’t find anything important down here. Since we can’t benefit from any stat enhancing black potions anymore, it’s time to sell all our potions and leftover empty bottles and stop picking up any herbs we find as they do nothing but use up inventory space.
Exploring the south half of the area, we find another obelisk just south of Ethric’s Tomb. Nearby is a Mage camp, which we simply run into the middle of and have Zoltan just about obliterate them with Fire Ring. I really like Fire Ring. In the southeast corner is Castle Temper. Duke Osric Temper’s Council Quest is to destroy a Devil post in Kriegspire near the Sentinels and return with information about their strongholds and attack patterns. He also promotes Knights to Cavaliers, but since there are no Knights in our party, we can only become Honorary Calaviers by being nominated by someone in authority. He says we can find someone at a tavern in nearby Rockham. That seems easy enough. Heading west from Castle Temper, we come across the Dragoons’ Keep. One of our quest objectives is in here, so we enter.
This place is home to quite a few soldiers, with the veterans doing some decent damage. Again running out of inventory space thanks to finding a bunch of staffs and suits of chain mail, we head back to town. I just realize why Free Haven was giving me such trouble navigating: there are two stables, not to mention that Free Haven Travel West is east of Free Haven Travel East. Oops. Which means… Two more Magic Horseshoes that I missed. Since we’re up here, we head over to Rockham and its tavern where Chadwick Blackpoole, a former knight who fought in the Succession Wars, gives us his nomination. Heading back to the Castle, we’re all promoted to Honorary Cavalier. Well, that was an easy 15k Exp each. He next tasks us with defeating the Warlord northeast of Icewind Pass to be promoted to Champion. Now that we’re Cavaliers, becoming a Master of the Spear is open to us. Back to the Keep.
Man, I hate empty chests/cabinets/etc., and this place is full of them. What makes this a bit more dangerous than it would normally be is that the Veterans target Roderick, probably because he’s a Paladin. Pulling out a new trap, a time-released door traps us in a room with seemingly no way out. The lever does nothing. After a little time, some soldiers enter the room, which would seem to be our ticket out, and it is. Making it to the final switch locked room, we fight through a decent sized group of soldiers and find Mordred, which turns out to be a dagger, in a chest. Returning to Zoltan with Mordred, we get 30k Gold and 10k Exp each.
With nothing else to do here, we head back to Bootleg Bay to retrieve Sherell. Since we’re here, let’s try the Minotaur King in the Temple of the Sun. Throwing up Bless, Heroism, and Stone Skin, we take a good amount of damage but prevail, all the while avoiding his special attack. Him menacingly saying, “Die!” isn’t real comforting. He drops a really nice Supreme Axe. He was also guarding a storeroom filled with chests and stat boosting barrels. Well worth the trouble. With that taken care of, this dungeon is cleared and it’s off to the Temple of Tsantsa. Back in the Temple, Sherell has been a good little prisoner and not escaped even though the door was open. I guess she was chained or something. Plus, she apparently survived a few months without anyone feeding her since I had already cleared this place out.
I just noticed that the Months follow the attribute in the order listed in the Stat page, starting with Might in January and ending with Magic in December. That makes that easy to remember. Being almost the end of December, and not knowing where the Shrine of Magic is, we just have to kill a few days and then pray at the Shrine of Might in Bootleg Bay. Doing so gets us +10 Might. Sweet!
Not having noted where exactly Carlo is in Free Haven, we wander around the town, entering every house until we find him. Returning with Sherell, he rewards us with 1500 Gold and 10k Exp each. Hmm, we were told the Plate Armor Master trainer is near Castle Temper, but we can’t seem to find him. Wait. Seriously? He’s on the roof, which is only accessible with the Fly spell? Well, we haven’t been designated heroes, so no Mastery now.
Moving on to a new area, we hitch up the horses and head to Blackshire. Upon arrival, first thing’s first and we locate the two Magic Horseshoes by the stables. This town also has an inaccessible tower. Having bought membership to the Light and Dark Magic Guilds, we should be able to finally start learning those spells. We get a quest from Twillen the Gate Master to place various statuettes on pedestals around Enroth to reverse the effects of aging. Now we know the purpose of those couple pedestals we’ve already found. It seems the townsfolk here turn into werewolves and Maria Trepan wants us to put an end to the curse. Talk about short hours. The Light and Dark Guilds are only open 4 hours per day. Picking up yet another quest, Joanne Cravitz wants us to go to Star Island to find her husband, who hasn’t been seen in a few weeks. She won’t go because it’s rumored to be the home of medusas. Geez! It’s the middle of the morning and we’re getting attacked by werewolves in town. I don’t see a full moon out!! And just lovely. Greater Werewolves can one hit knock you unconscious.
Heading out of town, in the NW corner of this area is the Shrine of Magic. Dang it! Just a little late on that. More Food Trees that don’t yield any food. Heading east, we see circus tents, but they aren’t here now. Just south of town is the Lair of the Wolf. Several townsfolk think this is the cause of their curse, so we’ll check it out.
Oh, boy! More Oozes! Fireball is pretty useful at range against them as they all start out closely grouped together in one or two groups. Man, that’s a lot of skull piles. The Swordsmen are now going down pretty quickly. Duel wielding daggers and swords is really nice. After all, as Mel, the cook on “Alice,” says, “The best defense is a good offense.” At the end of one chamber off the main chamber, in the wall is the Ghost of Balthasar. He managed to hide the Pearl of Purity at the end of the chamber opposite to this one, which will destroy the Alter of the Wolf and lift the town’s curse. After that, we are to take the Pearl to Wilbur Humphrey. He also quests us with killing the werewolf leader and bring back the Pearl of Putrescence that it carries. Hey, that’s pretty good. I backed as far away as I could before the path bends away to where you cannot see that section of the wall, and Balthasar is still visible. And that’s quite a long way away. I do like the huge wolf head in the central chamber with the torch in the eyes. Making our way through a pack of Oozes, we automatically pick up the Pearl of Purity at the end of the opposite chamber. Heading back to the main chamber, touching the Altar “destroys” it and lowers the marble-like door at the back of the wolf head’s “throat”. A couple heads on stakes greet us as we pass by the lowered door. At several points, doors can be heard opening or closing. Once again needing to head back to town to unload inventory, it turns out that a few doors along the path we took have closed. Opening them unleashes quite a few enemies and now we need to get out of here just to survive.
Making it back to town, we stop by Maria’s house and collect our reward of 4k Gold and 20k Exp each. Heading back into the Lair, once inside the wolf’s head, whenever a wolf howl is heard, in the east path, about a half dozen werewolves and wolfmen spawn near the head’s entrance, while in the west path, doors close and mostly swordsmen appear. It’s good for experience, not for safety, and makes backtracking a dicey proposition, which means just leaving the Lair is difficult. Making it to the great hall, which is packed with more werewolves, we take out a good number of them. Unable to lure them out one at a time, we locate a way around to the opposite end. In a corner, which would have been an ambush if we went in the front way, is the Werewolf Leader. Killing him gets us the Pearl of Putrescence. Returning to Balthasar’s Ghost with the Pearl of Putrescence, we receive a paltry 5k Exp each, and Balthasar can move on and finally rest in peace, taking the Pearl of Putrescence with him. He also reminds us that we should take the Pearl of Purity to Wilbur Humphrey as it belongs to him. With this place finally cleared out, we explore more of the surrounding area.
A little southeast of Blackshire, we take out about a dozen werewolves and at the base of the hills is a chest containing Lord Kilburn’s shield, which we need to return to Castle Ironfist with. Traveling a bit further east, we walk across the water to a structure in the middle of a small island in the middle of what turns out to be the Star Lake we had been told about by several townsfolk. The building is the Temple of the Snake. Since we have a quest here, we’ll head in.
Okay, there’s a peasant in a room we can’t talk to. And another just wandering around a chamber with some medusas in it, who, of course, gets in our attack path. I chuckled a bit when we opened the chest to find it completely filled with herbs and empty bottles. And we run into our first dragon, a Gold Dragon. Woohoo!! No biggie. We’ll just stand to one side of the hall so the ice ball trap flies by and attack the dragon because it’s too big to fit in the hallway and, therefore, can’t attack us. Well, it was simple until we got it down to the HP level to where it runs away. With all these medusas, it’s a good thing we picked up Stone to Flesh earlier. These teleport tiles at the bottom of the ramp are extremely annoying. Making it to the main room, and after clearing out all the medusas and gorgons in here, we free Emmanuel from a hanging cage, along with a couple chests with some really useful equipment. Returning to Joanne with her hubby in tow, we receive 500 Gold and 20k Exp each. As expected, we now get 9 Skill Points at Level 40.
Getting back to exploring the area around Blackshire, there’s another Temple Baa just south of Star Lake. Climbing over the mountain range that horizontally cuts this area in half, there is a bunch of Lightning Lizards, which can break items, hanging around in the Dragonsand Desert. I think we’ll leave that area until later. Instead, we head north to Kriegspire.
Heading east, we arrive in the little town of Kriegspire. The well in the northeast corner teleports us into Castle Kriegspire, right in the middle of a pack of minotaurs. Yeah, no. Another fountain a little to the southwest eradicates the drinker. Ummm… Lovely town so far. The southern well exchanges 5k Gold for 5k Experience ten times. Picking up a quest from Emil Lime, we are to recover a jeweled egg from Castle Kriegspire. One of the citizens mentions pirate’s treasure buried by a tree on an island east of Free Haven. Hmmm… Of course this is coming from someone named Droppa MaPantz. Aw, no Magic Horseshoes by the stables.
Exploring the area, we decide to head up to the castle in the volcano, but the minotaur kings are too much for us, so we’ll pass on that. Off to the east, there is a small group of minotaurs, rock beasts, and earth elementals. Able to take them on, they are protecting the entrance to the Superior Temple of Baa. Since we’re not members, we can’t enter. A little to the north of the Temple is a fountain which grants +5 to all elemental resistances, but kills the character. Since Roderick doesn’t have Raise Dead yet, we’ll leave this for later. The monsters in this area are a bit too hazardous to our health, so let’s head east to the Frozen Highlands.
Scaling the mountains and arriving in the Highlands, it’s snowing. Greeting us are some female Magyar warriors who have no issues with the cold as they are wearing nothing but bikini armor. I have a feeling this is where we should have been if these enemies are indicative of what we’ll find here.
I’ve now put in 100 hrs.
On a snowy peninsula in the western part of this area, surrounded by quite a few archers, is Icewind Keep. We have no reason to go in, so we continue exploring. Getting tired of getting attacked by a group of harpies from above while fighting ground enemies, we head up the mountains and take the battle to them, eliminating the remaining two dozen or so harpies. On the other side of the mountain range, near the southeast corner, is the Shadow Guild. Again, we don’t have a reason to enter, so we don’t. Arriving in the town surrounding Castle Stone, one of the citizens mentions that the towers in the towns were built to protect against flying creatures. So that solves that mystery of why we were always being shot at by them while flying. Ok, now that a cartographer has also told us about the buried treasure, the story holds more water. Now we just need to find the treasure map. Heading to the castle, residing here is Anthony Stone, who wants us to arrest the so-called Prince of Thieves. He doesn’t know where this person is, but says there may be clues in Free Haven. He is also responsible for promoting Clerics to Priests, and in order for us to get promoted, we need to restore the Free Haven Temple, saying we’ll need a stonecutter and a carpenter.
Hiking to the northwest corner of the Highlands, we come across the town of White Cap, complete with a town wall. Finding the stables, we pick up another two Magic Horseshoes. Another deadly fountain is found in town, this one granting +5 Endurance. Due west of White Cap, we find Castle Stromgard. The Shrine of Endurance is found here. Behind the castle is another obelisk. Heading to the Castle’s throne room, we get an audience with Lord Eric von Stromgard. To gain his favor with the High Council, we need to put an end to the artificial Winter this area is plagued with. He tells of a hermit living on a mountaintop to the west. Lord Stromgard is also in charge of promoting Archers to Battle Mages and then to Warrior Mages. To get promoted, we need to bring back the key to the dragon towers so he can set them to only shoot at flying monsters. That’ll be handy. The key is located in Icewind Keep. Our first job is to find that hermit.
Hmm, the hermit isn’t on any of the mountaintops to the west. Maybe he’s in Kriegspire. Instead of heading over there again, we’ll try to recover the key from Icewind Keep. If ogres and guards are all that are in here, this place should be a breeze. It’s nice of that big gate to have a large hole that we can safely attack through. With only the large throne room giving us any trouble thanks to there being a horde of enemies in it, which Fireball and then Fire Ring make relatively short work of, we find the keys to the towers. Returning with the keys, Lord Stromgard rewards us with 15k Exp each and we’re now Battle Mages (which doubles Alexis’ training cost), or honorary ones. To get promoted to Warrior Mages, we need to go to all the towers and set them to only shoot at only large objects. There’s a tower in White Cap, so let’s start there. After taking care of that tower, we have yet to go to Silver Cove, so we head east.
Arriving in Silver Cove, we are immediately attacked by druids, with grand druids able to fully drain a character’s SP. It appears diamond gargoyles are immune to physical attacks. Heading to the southwest corner, we find The Monolith. With nothing to do there, we keep moving. Heading east along the southern shore, we arrive in the town of Silver Cove. Quickly finding the Merchant Master, we all take advantage. In the southeast corner of town is Castle Fleise, where Lady Loretta Fleise resides. In order to gain her favor, we need to get all nine shipping companies in Enroth to price fix their shipping rates. She is also in charge of the Druid promotion. To become Great Druids, we need to perform the Ceremony of the Sun at the Circle of Stone on any solstice or equinox. I guess I’ll jot down the dates. What luck! Tomorrow is March 20 and the Circle of Stone is just north of town. It’s nice of the Quest Log to point out the closest date. Now we just have to find the Circle and quick. We have just over 25 hrs to find it.
Luckily, there isn’t a horde of enemies between the town and the Circle as it’s on an island directly north of town. Also on this island is another sword in a stone. Serena’s Might of 65 is enough to pull the sword and we get a Champion Sword, which is actually a downgrade. Waiting about a half hour, just after midnight we head to the center of the Circle and perform the Ceremony with Loretta’s aid, receiving 15k Exp each and the title of Honorary Great Druid. Heading back to the castle, in order to be promoted to Arch Druids, we need to perform the Ceremony of the Moon at the Temple of the Moon at midnight during any full moon. But for this one, we’ll first have to fight our way to the location. Looking at the time, the moon is currently at three quarters, so the right time is approaching. Unfortunately, the Temple is near Free Haven, not Silver Cove.
Exploring more of the town, Eleanor Vanderbilt wants us to go to The Monolith and deface the altar, which is being used for dark rituals by the Celestial Order, which is headed by Cedric Druthers, who Lady Loretta says has taken over the Temple of the Moon. Knocking out a couple more steps to quests, we deactivate the tower and get the stables to fix their pricing, as well as picking up the two Magic Horseshoes. At Level 42, we’re too high of level to train here. This is the first Town Hall we’ve seen in a while, and the only thing at this one is a Bounty Hunt. Heading back out to explore the area, a little west of town is the Silver Helm Stronghold. We have no business here yet. In the northwest corner is the Warlord’s Fortress. We need to kill the warlord for our Champion promotion quest, so now’s as good time as any to try.
Entering, we run into thugs and the like, which are now extremely easy. This place starts out being a maze with fake doors and doors that teleport us to other doors. Ooh, Death Knights. Those might give us a challenge. And Cuisinarts make a reappearance. I haven’t seen those since Might & Magic II. Finding some discharge papers in a chest, it seems the warlord was incapable as a Knight of Enroth and Duke Temper had discharged him from his position. With the Timing Gems constantly being green, it looks like we’ve cleared this place out and I can only assume the discharge papers are what we need for the Champion promotion quest. Time to deface another altar, this time in The Monolith.
Shortly after entering, we find a scroll on the ground that tells us to look to nature for a power greater than man. The trees and rocks are all labeled as “Strange Tree/Rock” and searching the trees gets us a nice amount of gold. The rocks and trees also act as levers to open doors. Reaching a flooded chamber, we’re besieged by water elementals, which Fire Ring makes quick work of. In the middle is a Druid Statue, which simply opens the door. Moving along, we encounter a couple monoliths that curse us when we touch them. Making it through earth elementals and druids, we arrive at the main chamber and destroy the Evil Altar, getting Serena and Zoltan (cleric and sorcerer) +5 Personality to boot. With another dungeon cleared, we open a secret passageway behind the altar, take the shortcut back to the entrance and leave this place. Back in Silver Cove, Eleanor rewards us with 3k Gold and 15k Exp each, which puts us all just over the 1M Exp mark. Making camp in town, we head out to explore the rest of the area.
Just northwest of town, there is a field dotted with stones. Walking into the middle of them teleports us into the middle of a large group of druids. Unable to survive that, we instead walk around the area, picking them off one by one. Wiping out the large congregation of druids, we find another sword in a stone. Serena’s 65 Might isn’t enough to pull this one out. Accessorizing enough to get 104 Might, she is able to pull the Heroic Sword of Thunderbolts from the stone, which is a downgrade for sword-wielding Roderick. Hmm, I guess the months don’t follow the stats, as it’s March and the Shrine of Personality does nothing. Heading out into the waters north of Silver Cove, we find another sword in a stone on an island. Serena’s able to pull it with her 65 Might and we get a Lionheart Sword, which is an upgrade, especially being a one-handed sword. On the northernmost island, we find another obelisk, the eighth one we’ve found. This somewhat small island is also serviced by a ship and has a tavern for some reason. With nothing else to do here right now, the Silver Cove ship is sailing for the Eel Infested Waters today, so we set off.
Arriving at Island North in the Eel Infested Waters, while looking around the small village we dock at, we get attacked by Agar’s monsters. Contrary to what several townsfolk say, they are not immune to magic. At the opposite end of the short road through town is Castle Alamos, which we’ll pass up for now. Looming ominously on the horizon in the sea is a handful of sea monsters. We’re able to pick off a few of them from the shore, but the rest of them are too far out at sea and out of bow range. Another sword in a stone is found here, but even at 116 Might, the sword cannot be pulled. Since there isn’t anything else to do on this little island, we’ll see what’s inside Castle Alamos.
The first room we enter is chock full of Magyar warriors. While not difficult in small numbers, when about 30 of them all can attack, it does make for a somewhat difficult time. This castle is another dungeon with a bunch of ranged attackers, this time in the form of sorcerers and air elementals. This is definitely a place that tries to overwhelm you with numbers as every room holds a dozen or more Magyars and other enemies. I do really like the layout of this castle with the little hiding places in hallways, and windows overlooking large rooms on the floor below. With our inventories full, we need to take a break from this place and find a town in this area with armor and weapon shops. We’ve also been stuck at level 42 for quite some time since we have been too high of level to train at all the towns we've recently been to.
Exploring this area is slow going as the waters are teeming with sea monsters, which have a ranged attack. Plus, we have to keep an eye on how long Water Walk has left. What’s a bit annoying is that since all the enemies are in the water, they sink after killing them, so we can’t get any loot from them. Heading to the south and through sea monsters and water elementals, we arrive at a string of islands, and yet another seemingly random tavern and dock. Also on these island is the Shrine of Poison and our 9th obelisk. Now that we’ve found obelisks 7-15, I can tell that there will be no interleave for these. Making it to the northwest corner, all those sea monsters must be guarding something. Nope. This sucks, neither ship departs on Tuesday, so we have to hang around for an entire day doing nothing. Or Wednesday… Or Thursday………… Or Friday…………………….. Hey, the south boat operates on Saturdays. Aaaaaaaand it just takes us across to the north dock. Of course, neither operates on Sunday. So that was a completely wasted week, as we have to sit around until Monday to get out of this area. We really need Town Portal. We sail back to Silver Cove and won’t be coming back to this area to finish off Castle Alamos until we get Town Portal.
“Finest weapons in the land.” I really don’t think a simple Club is one of the “finest weapons in the land.” Since we’re back in Silver Cove, even though we haven’t been quested for the Silver Helm Stronghold, we’ll try to clear it out. That’s a lot of swordsmen! In a wall, which we missed the first time and noticed when we went back to reopen the door that automatically closes, is the Ghost of John Silver. He was killed by his second in command, Gerrard Blackames, at the order of the Temple of Baa. Gerrard’s brother, Marcus the Sorcerer, has been supplying the Silver Helms with equipment and is assisting someone in a forge on an island to the southeast. Silver’s niece, Melody, who knows he’s been murdered, has also been kidnapped and is being held in the Silver Helm Outpost near Mist. He also mentions Gerrard carries an ankh inscribed with his name that was given to him by the priests of Baa. All that, and no official Quest. Well, we got Gerrard’s ankh after killing a warlock. I wonder if that’s what we need to get into the Superior Temple of Baa. With the Stronghold cleared, we head back to town to unload our inventory. Since the ship is going to Mist, we’ll head back there since John Silver’s Ghost mentioned his niece being held there.
Back in Mist, we take care of the tower. Heading to the Castle, upon seeing that we didn’t find the Hourglass, forgetful Lord Newton remembers that the Hourglass is actually located in a Forge that the keys we found in the Outpost are for. Forge. Laboratory. What’s the difference? Being back in Mist, we’ll look again for Melody as that promotion quest has been lingering in our log. Since the only place that I can imagine she is is the Silver Helm Outpost, we head back there to see if we missed anything. Aha! A switch in the room by the mural that teleports back to near the entrance extends a ramp, which leads us to Melody and a treasure room. I guess rescuing her tripped a flag as using the mural to teleport back to the entrance no longer makes guards and swordsmen appear there. While in Mist, everyone becomes Master Meditators and Alexis and Zoltan Master Air Magic. With the boat sailing to Castle Ironfist on Tuesdays, we wait a few hours for it to open and weigh anchor.
Arriving at the castle town, we stop by the stables to get them on board with the price fixing scheme. Heading to the castle, presenting Lord Kilburn’s shield gets us 5k Gold, 40k Exp each, and Wilbur Humphrey’s favor with the High Council. The Pearl of Purity gets us another 10k Exp each. Finally, bringing Melody gets us 5k Gold, 15k Exp each, and promoted to Crusaders. Being Crusaders, we can now be promoted to Heroes, which requires slaying a dragon that has been given a name and return with a claw or tooth as proof. One such dragon is Longfang Witherhide, who lives in a cave behind Castle Darkmoor. Remembering the sword in the stone on the little island with the really tall spire, it turns out to be a standard great sword. Checking out the training grounds, we are able to finally train! It has been a while as we train up seven levels. With no tower here to disable, we sail back to New Sorpigal to hopefully retrieve that Hourglass.
It seems the monsters have respawned as we’re greeted by goblins as we arrive. The stat-enhancing barrels and chests have also respawned, which is nice. Heading into town, we deactivate the tower and get the stables to price fix. The horseshoes have also respawned. Woohoo! Flying the now friendly skies, we head to Gharik’s Forge.
With fire elementals in here, we throw up a Protection from Fire spell and enter. We eventually get to one of those annoying rooms with levers that open and close doors and move a bridge. Making it a bit tougher is that the doors are sections of walls so they’re pretty hard to tell if they are open or closed from a distance. With that accomplished, we venture further in. Inside a room full of sorcerers, we find a letter from Gerrard to his brother Marcus. It seems Gerrard has his sights on ruling Enroth and has enlisted his brother to provide him with weapons, using the forge of the recently dispatched Gharik. Also in here, just lying on the ground, is a Divine Dagger of the Dragon, which is the second best dagger we’ve come across, just below Mordred. An entry from Gharik’s journal talks about a crystal he left at Alamos when he moved to this place in order to supply Archibald with weapons for his army. So, I’m guessing that crystal is what we’ll be hunting for back at Castle Alamos. Hmm, taking the elevator down and opening the door at the bottom of the shaft does the portrait animation as if we gained or completed a quest along with the sound effect. Making it to the end of a sort of lava stream corridor and past a bunch of sorcerers and fire elementals, we find a handful of nice to sell equipment on the ground. Refusing to leave anything behind, we leave holding a set of Golden Plate Armor in front of us since our inventory is full. Returning to the Forge, we quickly make it to a library, take care of the handful of warlocks, and find the Hourglass of Time in a chest.
Being the middle of the night, and since everything has respawned, we head back to Goblinwatch. The guard is back at his post since we cleared the place out of goblins earlier. The monsters inside didn’t respawn, so we head back to the Mire of the Damned, stopping in Ironfist to train, now getting 10 Skill Points at Level 50. Arriving in the Mire, this place has also respawned. Stopping by the stables, we get them to fix their prices. Four down, five to go. With the aid of Wizard Eye, we find the two Magic Horseshoes we missed during our earlier visit on a ledge in the hills surrounding the town. We have a dragon to slay! So, into the Dragon’s Lair we go.
And as soon as we enter, Longfang Witherhide is waiting. That wasn’t so tough. We threw up Protection from Fire, Bless, and Heroism, walked right up to him and started wailing away. He did a good bit of damage, but nothing we couldn’t absorb. We pick a claw from his forepaw, grab the nine bones (presumably from unsuccessful dragon slayers) lying around the two campfires, and leave. With this place just one decent sized chamber, it turns into a quick in and out, taking a little over an hour of in-game time. Being the Month of Accuracy, we head to Free Haven.
Stopping in town, we pick up the Town Portal spell. Woohoo! Now we can go to Eel Infested Waters whenever we want. This place has all the high level spells, so we also snag Cure Insanity for both Roderick and Serena. There are two stables here to get to price fix, as well as a tower to deactivate, leaving one tower remaining. Hmm, we got Wilbur Humphrey’s favor with the High Council, yet Slicker Silvertongue still won’t give us his vote. Maybe we need to get all six before anyone will vote for us. While it is a Quarter Moon, we’ll clean out the Temple of the Moon just to make things easy for when it is a Full Moon and the right time for the Ceremony of the Moon, as well as unloading all the bones we found in the Dragon’s Lair on our way through Rockham.
Shortly into the Temple of the Moon, we can open up a snakeskin shop with all the cobras we killed off. In one chamber is an Altar of Luck, which does nothing but damage everyone. Maybe whoever touches it has to have a certain level of Luck for it to work? Another chamber holds an Altar of Speed, with the same result. Or maybe we have to perform the Ceremony of the Moon to get their benefit. I’m guessing there’s going to be one for each stat. The Altar of Life works and everyone gets +5 Personality. Ah. The plaque above the door in the main room gives the order to pray. So it’s Life, then Accuracy, Might, Endurance, Speed, and finally Luck. That was a nice +5 to everything but Intellect for everyone. With the altars prayed at in the correct order, the door opens. Finally clearing out the room with the Altar of the Moon, mostly through the crack in the door, we will have smooth sailing when we come back here during a Full Moon.
While we’re in the area, we head to Castle Temper and get promoted to Champions, getting 40k Exp each for doing so. We head back to the Mire of the Damned to place a statuette on a pedestal, plus it’s June, so maybe it’s the Month of Speed. It’s not the Month of Speed, so maybe Personality and Speed are switched. We make it to the pedestal and place the wolf statuette on it, freeing up needed inventory space. Now with Town Portal, Zoltan gets us back to Free Haven and from there we sail to Mist to have him become a Master at Water Magic, using up most of his Skill Points to do so as he went from Rank 4 to 12. Now we can go anywhere at anytime and not have to worry about travel time and cost. Being in Mist, and having the Hourglass of Time, we head up to Castle Newton. Giving him the Hourglass gets his favor with the High Council and 50k Exp each. Zooming to Free Haven, we now have one thumb up at the High Council, which is now bugging me since we should have two thumbs up. Perhaps Slicker is going rogue? It looks like we can’t go just anywhere, as some towns aren’t available, like Castle Ironfist and the one in the Eel Infested Waters. That’s a bummer.
Ok, so we’re in Castle Ironfist and we head to The Seer to see what month it is since we prayed at the Shrine of Speed and it did nothing. The Seer says that it is indeed the Month of Speed. Which means March was probably Personality, even though the Shrine didn’t do anything. So do we have to talk to the Seer first to activate the Shrine? I don’t remember doing that for the Month of Electricity. I guess we need Lloyd’s Beacon and set The Seer as a location if I feel like hitting up the shrines every month. Before heading to the Shrine of Speed, we trek north to Bootleg Bay to drop off another statuette, this one being the Dragon. That done, we head to the Shrine of Speed, and then Town Portal to White Cap.
Appearing in White Cap in the middle of the night, Serena and Zoltan fill out a big chunk of their Dark Magic spell books. We stop by the stables to get them on board with Loretta’s scheme. After selling off some inventory, we head to the Shadow Guild. Maybe we’ll find the Prince of Thieves there. Huh. The Guild’s description says it’s his home, so the prospects seem good that he’ll be here.
Quickly after entering, there are two doors, neither of which we can open. One has a red light next to it and stepping on some tiles at the end of the corridor the room with the door is off of turns it green, but still nothing. Checking my sanity since I don’t remember this happening on my first playthrough (something like that would stick out to me), I find out it’s a bug. So, I pull out my Might and Magic VI Limited Edition and install that, copying my save file over, and lo and behold, both doors open, the one without even needing to turn the light green. What I found says that version 1.2 makes it impossible to open these doors, but both of my mm6.exe files (M&M7 Millennium Edition and M&M6 Limited Edition) show them to be version 1.0.0.1 when mousing over the file names in Windows Explorer.
With that solved and now playing off of the Might and Magic VI Limited Edition install, using the M&M6 Play CD from the M&M7 Millennium Edition (either Play CD can be used with either installed version), we finally are able to venture into the Guild. What sucks is on a file reload, the door with the light is always closed and opening it does a good bit of damage to a random character. Finding a letter to the Prince of Thieves, it seems Lord Stone has sent his men after the Prince and the Prince has taken up refuge in the Free Haven sewers, which we already cleared out. Interesting. A spike trap opened up. Now for the circular room with the ice ball and Sparks traps. We got a “Click” and a “Ca-Click,” but what do they do? Since I couldn’t see anything that changed, we leave and head to Castle Stone. Presenting the Ankh we found gets us 5k Gold and 10k Exp each.
Heading back to Free Haven, it’s another trip into the sewers to find the Prince of Thieves. I guess we didn’t check the bed before, or we needed to be quested to find him for him to show up there. With the Prince in tow, it’s a quick Town Portal and flight over the mountains to Castle Stone. His capture gets us 10k Gold, 30k Exp each, and Lord Stone’s favor with the Council. Since it’s Monday, we Town Portal back to New Sorpigal and take a ride to Castle Ironfist to present our Dragon Claw.
Entering the throne room, we inform Wilbur Humphrey of Slicker Silvertongue’s refusal to vote for our cause. That’s a relief that the game didn’t glitch. Humphrey thinks Slicker’s investigation into the Temple of Baa has something to do with it and gives us a Baa cloak that was found in his room, telling us to check out the Temple’s headquarters near Castle Kreigspire. So, the cloak, rather than the ankh we already gave up, will gain us entrance to the Superior Temple, I’m guessing. Handing over the Claw gets us promoted to Heroes as well as 30k Exp each. Now Roderick can become a Plate Armor Master. Training up another four levels, we head to The Seer, who tells us it’s the Month of Luck, Portal to New Sorpigal to pray, then to Free Haven to get that Master, and finally to Blackshire to trek to Kreigspire to find Slicker’s cure. Before heading to Kreigspire, we fix the prices at the stables and disable the tower, which completes the tower quest. With that quest objective completed, a quick detour to Castle Stromgard gets us promoted to Warrior Mages and 40k Exp each. Now back to Blackshire and off to Kriegspire.
Finally back in Kriegspire, we stop by the stables, which is the ninth and last to get on board with price fixing. That taken care of, it’s off to the Superior Temple of Baa. Hmm, I guess the tower here takes its cue from the other towers, as there is no keyhole and button, which would trigger it to shoot at everything flying. Interesting: the experience fountain works again, but I’m not sure I want to part with the Gold to use it. With the Cloak of Baa in our possession, we’re allowed into the Temple.
Entering, we’re immediately shot at by some priests of Baa, but the façade acts as a very nice shield to their magic attack while not blocking our arrows. A podium in the first room gives the clue as to how to navigate this place. We all are Experts or Masters of Perception, so we should be good. Making it through a quite expansive corridor system, we arrive at a room with four Baa heads set in the walls, and what I believe is a Star Wars reference when we talk to them. Ha! Gotta love that train of fireballs trap!! Also gotta love how the Acolyte of Baa and Druid are able to take string after string of fireballs in their back and not even be phased. We really need whatever cloaks they’re wearing. Hugging the right wall, we completely avoid the fireballs and continue. After a while down this corridor of death, it sorta spirals around itself. So, this must be the spiral the podium was talking about. I’m guessing we did what we were supposed to because the chest on the table now opens. Inside is a letter from Zenofex to Slicker telling him to not vote for our being allowed to visit the Oracle. It seems our visiting the Oracle would awaken a Guardian, which is bad news for the Temple of Baa and their Plan for a New World. Before tackling the humongous room with a ton of enemies, we need to unload a bunch of inventory.
I have to laugh when a weapon smith’s special inventory has a standard Club mixed in. Heading back to the Superior Temple, we make a beeline for the huge room and Zoltan busts out Inferno. Along with Serena’s Power Cure to keep us healthy, one of the upper levels is cleared out, but not after severely damaging us. After slowly decimating the temple population, we head to the lower floor of the large room and get some nice Magic and Fire Resistance boosts. Talking to the Almighty Head of Baa gets everyone 50k Exp. Nice. With this place cleared out, we take our leave. Let’s see if we can tackle Castle Kriegspire now. Just making it up the road along the volcano is a chore with all the minotaurs, so let’s look for the hermit instead.
If the minotaurs weren’t bad enough, on the north side of the mountain range is a bunch of drakes, plus some earth elementals. With the drakes not being as tough as I thought they would be, we drop down the other side of the mountain by the Shrine of Cold. Just about dead center in the area, and on top of the mountain, is the Hermit’s Hut. The Hermit will break the enchantment that is causing the never-ending Winter without us needing to do anything. Since this area isn’t available with Town Portal, we’ll explore more before heading back to tie up a few quests. At the base of the mountain near the western edge of the area is the Demon Lair (upon mousing over the entrance), or Devil Outpost when you click on it. This seems like the place for Osric Temper’s Council quest, so we head in.
As soon as we step inside, several devil spawns and a Devil of Baa attack us. Well, that monster name is pretty telling. The Devil of Baa drops the devils’ battle plans when we kill it. Like the Dragon’s Lair, this is just a single room. Wiping out the rest of the devils, we leave. There’s supposed to be a pedestal in this area, so while we’re here, we’ll try to locate that. Just about directly on the other side of the mountains from the Devil Outpost is the Caves of the Dragon Riders. Since we’re just trying to find the pedestal and don’t have a reason to be here, we move on. Stumbling into a large group of minotaurs north of the mountains (grrrrrr….), we’re able to run far enough away to where they lose our scent and we are able to slowly draw them out one at a time, methodically wiping out most of the group. Cresting a small hill to get to the rest of them, there are three or four groups of Energy Drakes hovering right on the horizon. Just lovely. In the northwest corner is our tenth obelisk found. I’m guessing there are 15 total since there are 15 map sectors. Fighting through a mess of Energy Drakes (late in the battle, I discovered that you can “run” backwards just as fast as forwards while flying), in the extreme northwest corner is the pedestal we’ve been looking for. Placing the Bear Statuette on it, we head east to finish mapping out the area. A little east of the central northern section is Agar’s Laboratory. Our inventories are full and we have no quest here, so we keep moving.
Back in the Frozen Highlands, it has stopped snowing. After selling off a lot of inventory in White Cap, we head over to Castle Stromgard. Having ended the never-ending Winter, we gain Lord Stromgard’s favor with the Council and 50k Exp each. One Town Portal later and we’re in Silver Cove. Heading to the castle, we get 5k Gold, 25k Exp each, and Lady Fleise’s favor with the Council. Poofing over to Free Haven, a quick jaunt over to Castle Temper and we present the Devil Plans to receive Lord Temper’s favor with the Council and 20k Exp each. With the Plans, the enemy’s base is confirmed to be near the town of Sweet Water, which we have yet to visit. We also stop off and sell the eleven temple gongs we found in the Superior Temple. That was a lot of gongs. Hmm, we still have the High Sorcerer’s Key from there.
Figuring there should be a carpenter and stone cutter in the largest city in the land, we wander around Free Haven, talking to everyone and finally find them strolling about near the temple. Entering the temple, which I’m guessing is actually Temple Stone, they both leave the party to start restoring it. Returning to Castle Stone, we receive our Priest promotion and 15k Exp each. Now the High Priest promotion is open, and we need to retrieve the sacred chalice, which we’ve been carrying around for quite some time now, from the heretical priests on the islands east of Free Haven and place it in the newly restored temple. So, it’s back to Free Haven. Entering the temple automatically ensconces the chalice and it’s back to Castle Stone. That done, we’re promoted to High Priests and receive 30k Exp each. That just leaves the Arch Druid promotion, which we still can’t do, as it’s a Half Moon.
Heading over to Castle Ironfist carrying the orders from Zenofex to Silvertongue, Humphrey tells us to take the letter to the High Council to be rid of the traitor. That’s interesting, if you hit the Escape key instead of N or clicking on the No option when choosing to enter the Throne Room, you get an extra bit of speech. Since it’s the last day of July, instead of heading to the High Council in Free Haven, we’ll wait for August to seed the next shrine. Completing all those quests gave us enough experience to train a few more levels, and at Level 60 we start getting 11 Skill Points, as expected. Being High Priests, Roderick and Serena gain Mastery of Spirit Magic. Town Portaling over to Free Haven, heading to the High Council, we have 5 thumbs up and Slicker. Talking to him cues an, um, interesting little FMV with him vowing revenge. We can now enter the oracle.
Entering, we’re in front of a panel, which activates and deactivates the oracle’s systems, whatever they are. Placing the Memory Crystal we found back in Darkmoor on any of the four modules gets us 100k Exp each. I guess we have a few more Crystals to find to fully activate Melian. Heading downstairs and raising a 2001: A Space Odyssey-like slab, we are able to speak with the Oracle. We’re told the locations of the four Memory Crystals. The good thing is we didn’t miss any. We need them to activate the Oracle. Conveniently, one of the stables services Kriegspire today, so we head there to tackle Castle Kriegspire and finish off a quest and find a Memory Crystal.
I think that eradication fountain is SUPPOSED to give you a bonus as the sparkles rain down that character's portrait as though a bonus was gained, but none is gained.
Making it through the remaining minotaurs and rock elementals we hadn’t killed before, we finally arrive at the bottom of the volcano and pray at the Shrine of Fire to receive its bonus. That was a pleasant surprise. Before heading in, we notice some doors on the roof of the castle. Flying up there, we all become Master Bowmen. What’s with these only-accessible-by-flying houses some of these master trainers, and other people, are in? I guess that’s one way to avoid being bothered. With that taken care of, we enter the castle.
Fighting through some minotaurs, we come to a mural on a wall that will fully cure everyone for 10k Gold. That might come in handy. Taking out a couple cells full of minotaurs thanks to Serena’s magic bow of carnage that does explosive damage, we find the Jeweled Egg in a treasure chest. After clearing out the monsters that teleport into each of the four large rooms, we hit a switch in a tight area in the middle of the rooms. I think this caused the horizontal bars that we couldn’t get by earlier to open. In a cage in a room beyond that is a journal entry from King Roland, in which he says Archibald may need to be revived to stave off the threat of the Devils and not to trust someone named Sulman. A bit farther, a secret door reveals a small chamber with a beefed up minotaur king named Lurch that we fight. Okay. A little past Lurch, we jump through a large window and pick up Memory Crystal Epsilon. Taking out a pack of drakes, with a lot of help from those exploding arrows, we finally clear this dungeon and head back to Emil Lime and receive 5k Gold and 50k Exp each.
Finally catching a Full Moon, we Town Portal to Free Haven and head to the Temple of the Moon. Quickly making it to the Altar of the Moon, we wait a few hours and Loretta appears at the appointed time. We don’t have to face south to complete it, as she instructed us to do, as we’re facing east and are able to perform the Ceremony. For doing so, we’re promoted to Arch Druids and receive 40k Exp each. That completes all the promotion quests. Being in Free Haven, we stop by the Oracle and drop off the Crystal we just found for another 100k Exp each. Now to find the final two Memory Crystals and activate the Oracle.
Since we can no longer train here, the stables are going to Castle Ironfist, so we head there to train. Stopping by the Castle, we’re given free use of the royal yacht as reward for exposing Slicker Silvertongue, which can take us to Hermit’s Isle where we can find a Crystal according to the Quest Log. Being a new month, we head to The Seer, who tells us Archibald was behind the Oracle being out of service. Making a quick stop by the Shrine of Electricity, we only get +3 this time. Checking out the royal yacht, the Queen Catherine, it’ll take 21 days to get to Hermit’s Isle. Wow. Instead, we trek to the Mire of the Damned to pick up some skill masteries, then poof to Blackshire for another mastery and to complete mapping the area.
Cresting the mountains, we start wiping out the lizard population utilizing the speed moving backwards while flying to quickly get into range, fire off a volley of dual arrows, and then back out of range to recharge. Near the eastern border is our 11th obelisk. Just south of the obelisk is a dried up shield-shaped fountain. I wonder if that has any purpose. Finally seeing some semblance of civilization, we come across The Oasis tavern in the southwest corner along the only road on this side of the mountains. They are aware of their location, as their prices are rather exorbitant. With this area fully mapped out, we head south to Dragonsand, which we have yet to set foot in.
We enter Dragonsand via the road, as roads normally afford the safest entry into an area by foot. It’s a good thing since the northwest corner, where we would have entered, had a few dragons laying in wait. Flying is definitely the way to approach this area with how fast we can move backwards. This area is a trial in patience as it’s teeming with lizards, wyrms, and dragons. Just when we get the group of monsters down to one or two and think we can speed things up by moving into melee range, another group of enemies comes into range and we have to scrap that plan. The dragons do drop some really nice loot, but with the number of dragons here, we’ve filled up our inventory just in the northern third of the area.
Passing by the large pyramid, we follow the road south and eventually come to a desert oasis with a handful of buildings and tents. Abdul, whose name we’ve come across many times in our journey resides here and tells us his Resort and the Fountain of Youth is to the west. Also found in this little settlement is a pedestal, so we place the… It seems we can’t place anything on it. Hmm… Let me try something. Copying my save file to the M&M7 Millennium Edition version install and loading up that version allows us to place the Eagle Statuette on the pedestal.
After unloading a bunch of inventory in Free Haven, we picked up Lloyd’s Beacon and most of the other spells we were missing at the guilds and headed back to clear out more dragons. Near a little bay with an island in the middle, we run into a gaggle of dragons and start using Starburst to soften them up. One of the dragons dropped the Artemis bow. We’re finally able to get to the obelisk and read it. Twelve down, three to go. In the middle of all the dragons on land are a couple of treasure chests, one holding the rings Athena and Guinevere, neither of which is very useful to us. Finally able to make our way onto the little island with a structure that looks very much like the New World Computing logo, we touch a marble-like obelisk that is the Shrine to the Gods and receive +20 to all stats. Very nice. Searching the walls puts us in an area simply labeled as New World Computing.
Entering, we can hear what sounds like goblins grunting. There’s also some peasant wandering around that we can’t talk to. Searching a desk gives us four Phantom Cloaks. Hmm… Ah, I didn’t notice that the peasants are labeled as either NWC Employee or have names on the mouse over, so I’m guessing this is supposed to represent the NWC offices. Since we’re overloaded with inventory, before exploring this place, we head back to sell stuff and train.
Back near the offices, we decide to clear out the surrounding area first, finding another eradication well, this one giving a +10 to all elemental resistances. Well, that’s one way of getting an enemy back over land. Exiting the area and reentering regenerates all the enemies’ HP as well as seemingly placing them back at their starting location. There was one Blue Dragon whose HP had gotten low enough to make it run away, but it was over open water so it would have been extremely tedious to lure it back over land. It really pained me to lose dragon loot to the briny deep. Another fountain gives +10 to all stats and eradicates the drinker. At least there are some very nice bonuses for what it takes to make it through the area. Another fountain replenishes 50HP and the final fountain simply eradicates the drinker. With all the monsters cleared from the area, we head back to the NWC offices.
Trip Hawkins is a Goblin King that attacks us. I guess he was their boss or something. The various desks usually have some decent items. The pantry can get seemingly infinite food and can randomly inflict poison or drunkenness. Jon Van Canegham is a Goblin Shaman who attacks. Walking into his office makes everyone afraid, but leaving cures that. Searching his desk gives everyone temporarily extremely high stats of around 300 to 400 for everything as well as Lucky Day, Meditation, Precision, Speed, and Power cast at a level such that it lasts for about 2.5 days. Looks like I know where we’ll be setting a Lloyd’s Beacon. With the offices cleared of all the treasure lying about, we take our leave.
Remembering that I had defeated a Q the last time I played the game, I looked up where he is and headed to the Temple of the Snake near Blackshire. Searching every section of wall in the place, we eventually locate his hidden room. He automatically moved to one of the arms of his cross-shaped room, so it became an extremely easy fight. He ended up being around a corner, so we got close enough for him to be in melee range and able to see part of him around the corner, then entered turn-based mode. Since he only has magical attacks, all of his attacks hit the corner of the wall and we simply hacked away at him until he died, as he didn’t run away when his HP got down to the critical level. After about 10 minutes, real time, of battle, he ended up being worth a whopping 24 Exp each with Master Learning level 9. If he’s supposed to be this game’s Mega Dragon, that’s just wrong. He did drop the Horn of Ros, which shows enemies’ (and wandering NPCs’) HP in numerical form, so there’s that. There are also a couple chests here that seem to not have saving throws against Perception, as everyone automatically takes damage with no trap animation. If it were earlier in the game, the spell books found inside one of them would have been useful. The other contains a collection of really good wands.
Running out of places to go, even though we never got a quest for the Caves of the Dragon Riders, we head there anyway. This dungeon is simply several corridors off a central hub with Cuisinarts and Wyrms. One of the chests holds another relic in the ring Aphrodite. In another chest, we find a diary page about an attack the dragon riders made on Kriegspire, but nothing in it seems all that important. A couple cages with skeletons yield nothing. Clearing this place out and receiving nothing of note, we head back to Blackshire and complete our Dark Magic spell books. Just for fun and out of curiosity as to what Armageddon looks like, we cast it (after Saving) and our Reputation goes from Glorious to Notorious. Ha!
Deciding to get the crystal from Castle Alamos, we Lloyd’s Beacon over to the Eel Infested Waters as we had set one here when praying at the Shrine of Poison. Since we have the benefit of the NWC dungeon buff, pulling that stubborn sword is no problem and we receive Excalibur. After mowing down a bunch of Agar’s monsters, which had respawned, we enter the Castle.
You can definitely tell there’s a Crystal here since it makes a distinct sound. Deciding to jump headfirst into the horde of Magyars on the lower level, with all the bonuses and everyone but Roderick having weapons that drain HP, we make somewhat quick work of them. The trees hold the key to a riddle. I’m not quite sure how you drain HP from air elementals, but I’ll take it. We find a letter from Archibald to Gharik lying on the floor of a room. In this letter, Archibald wants Gharik to find out what the Oracle is keeping from him by researching whatever information the crystal has. This place is quite expansive with the multiple levels. It’s making exploring a challenge. More cages with nothing in them, and I can hear the wub-wub-wub… of the Crystal again. After a while, we find the Teleporter Key. Stepping on the teleporter does nothing. Finding the five trees with the clues to the password, we head back to where we had already been turned away. With the clues not spelling out a word, we try what the clues seem to spell out anyway and are correct. At the end of the hall in a small room is Memory Crystal Beta. Ok, so with the Crystal in our possession, the teleporter now sends us to Silver Cove. We head back to the castle since there is one door in the Castle remaining locked and we still have the Treasure Room Key. Let me try something. Yep, it’s another door you have to click on with key in hand as opposed to simply being in our inventory. Well, there certainly is a lot of treasure in this pair of rooms, but nothing useful.
With another dungeon cleared, and this one was a real doozy, we head back to Free Haven to place another Crystal at the Oracle. Selling off a bunch of inventory, including all those jewels that we’ve been carrying around for a while, we become millionaires! With that done, there are three map sectors left that we have to explore. One has the last pedestal (Sweet Water) and one has the last crystal (Hermit Isle). Instead of heading to either of those, we trek to Paradise Valley.
Entering the area by the road in the northwest of Blackshire, we can see a group of hydra in the distance. Getting shot at from the south, we fly up above the mountains and see a titan. Whoopee!! The titans aren’t tough as we easily pick them off from the sky and they don’t move very fast. Making it to the central part of the northern half of the area, we find our 13th obelisk. Due east of the obelisk is another Temple Baa. Southwest of the obelisk, we see a town, but some titans are standing like sentries in the town. There’s nothing of note in this little town other than a couple Master trainers. Cleaning out the titans from the surrounding area, we get another relic, this one being the cape Atlas. Making our way around to the southeast corner and through some dragons, we find a nice fountain that replenishes 100 HP and SP. With nothing much to do in this area, we train as much as we can and then head north to Sweet Water.
Heading due east after entering the area, we encounter no monsters and arrive at a fountain that gives a temporary +50 to all stats, which adds on to the NWC office buff. After traveling all the way across the map and back, we finally run into some monsters just north of where we entered as we take out a couple Devils. While those were easy, not long after that, we run into a few Devil Masters who can cast Meteor Shower. Along the lone road are the gutted out remains of a tavern, with only the stone outside walls standing. Along the western shore of a small lake in the center of the area, we find our 14th obelisk. At the northwest corner of the lake, we find the remains of what I’m guessing is the town of Sweet Water. Making it to the northwest corner of the map, we run into a bunch of Devils at the top of a mountain. What’s making this tedious is that there are Devil Masters and the mountain is higher than Fly can go. So, we have to lure out the Devil Masters so we can still be flying and move fast enough to avoid their Meteor Shower. Clearing out all the Devils, we arrive at the top of the mountain where a poisonous fountain and The Hive is waiting. Since we don’t have any reason to enter yet, we’ll finish mapping the area instead. Heading east, we find the final pedestal and place the Tiger Statuette on it, finally getting that out of our inventory. With all the statuettes places, we head back to Twillen in Blackshire and receive 75k Exp each, some items and gold from his chest outside, and Twillen leaves for Castle Ironfist to apply for a position as Court Magician. The only quest left in our log is finding the Memory Crystals, so we head to Hermit’s Isle.
Immediately upon entering, we’re attacked by a swarm of Hydras. Taking to the air, the northeast corner is teeming with them and it takes us a bit to find a safe place to start attacking from, finally getting south of them. Making our way through hydras and titans to a small square pond, we find the 15th and final obelisk. The clues must refer to that dried up shield fountain in the southeast section of Blackshire. Just to the east of the obelisk is a shield-shaped fountain, this time with black stones. This is the Fountain of Youth, which removes all unnatural aging. Beyond more titans, hydras, and now sea monsters roaming the waters, on an island that looks kinda like a running man in the southwest is the Supreme Temple of Baa where the final Crystal is supposed to be. Also on this island is a hollowed out mountain that I can’t figure out a way to get out of, if you venture into the middle, without magic. Before heading in, we finish exploring the area, receiving another artifact from a titan, this one the cloak, Pendragon. Killing every monster in the outdoors, and there’s a lot of them, we head back to the Temple. I like the floating skeleton arm in the pool in the location animation.
Entering, the first enemy we run into is… an Acolyte of Baa? We come across a Cylinder hanging from the ceiling that just comes short of touching the floor. This has to be something important. We then come across a small room with Altars of Pain, Fire, and Cold, each with a Temple Gong on it. The Altars do nothing but damage us and we have no use for the gongs. Moving along, we find the Shrines of Air, Earth, Water, and Fire, all of which say we’re not worthy. Maybe we have to actually take all the gongs and pray at the altars? Eventually making it to a huge multilevel chamber, we play the retracting bridge game, and arrive at the final Memory Crystal. Now to finish exploring the temple. Heading back to the beginning, we check out the cylinder again, and this time it raises up. Stepping onto the platform teleports us to the Free Haven Sewers. Hmm. Well, we don’t want to go there yet, so we step on the cylinder here and go back to the Temple. Going back to the altars and taking our slight punishment, but leaving the gongs since they just take up inventory space, we head back to the shrines. Ok, so the Shrine of Earth now gives the character who prays +10 Magic resistance. But it only works once. Air gives Electricity, Water give Cold, and Fire gives, well, Fire. Interesting. We cast Feather Fall and it doesn’t protect against dropping to the bottom of the large chamber. So, I guess we’ll just slowly slide down the central pillar. And who’s here at the bottom, but our good buddy, Slicker Silvertongue. Enjoy the afterlife. Ah, the floor is lava. Since I didn’t see any way out of the bottom of this room and moving is deadly, the only safe way out is via spell. So we Town Portal to Free Haven to place that Crystal.
With all four Crystals placed, the Oracle tells us our world has been invaded by the Kreegan and we will need extremely powerful weapons to fully defeat them. What we need is below, but we need to be in possession of a Control Cube to access them, and the only one in Enroth is somewhere in Dragonsand. It’s time to explore that Pyramid to see if it’s in there. Otherwise, it must be at where the obelisk clues point. Heading to the entrance, the place name matches the Quest Log, and we enter the Tomb of VARN. The Tomb of Vehicular Astropod Research Nacelle?
Heading into the Tomb, we quickly run into some Djinn. Shortly in, we’re in a humongous room with a couple Cleansing Pools, which don’t do anything. A hidden chest holds a Crystal Skull and the Captain’s Code, another Star Trek reference. Wizard Eye says there are a lot of enemies on the other side of the Flame Door, so we start attacking through the small space between the doors. With that not working, as they don’t get in front of the crack, we decide to try Ring of Fire. And it works through the door, wiping out most of the group of defenders of VARN. Taking what might be a shortcut, we notice some defenders shooting at us from a room overlooking the huge chamber. So we get above that and slide down the wall and enter that area. Heading down the corridor, we eventually find a Magic Lamp on the floor. I wonder what that can be used for. Clearing out one annoyingly designed room of genies, and picking up some more Magic Lamps, we find the Communication Officer’s Code in a library. I’m guessing they’re all going to be the USS Enterprise’s crew’s names in reverse. Also in here is the Engineer’s Code, several high-level spell books in the bookshelves, and a treasure chest we don’t have the key for. Ah, so that’s what the Crystal Skull is for. The large room we should have entered behind the Flame Door causes radiation damage and the skull can absorb it. Once we step foot in the room, we constantly take damage until we make it to a Cleansing Pool. One of the pools did ask for the Communication Officer’s code. Answering correctly removes that scroll from our inventory.
Did I say this place was huge? Heading back to the room with the pair of large Cleansing Pools (ah, there’s a plaque stating what they do), we go around the side of the inner pyramid-like set of platforms and arrive at the door to a Water Temple, which we’re missing the key for. Eventually we arrive at a large group of djinn just milling about in the corner of the ginormous cleansing pool. Methodically wiping out that group of enemies, we arrive at the Back Door to which we already found the key. This simply brings us back to the area we got to by dropping into the overlook. Exploring some more, we find a treasure chest with the First Mate’s code and the Water Temple Key. Nearby, we can see an odd-looking chamber, but are blocked by a partial wall covered in hieroglyphics. Making the long walk back to the Water Temple, we clear out the handful of enemies from the Lilliputian temple and find the Navigator’s Code, another crystal skull, and the Bibliotheca Chest Key. I’m guessing this key is for the chest in the library we couldn’t open? Bibliotheca, bibliography? Well, the back door looks like the faster route back there. Yep, that was the chest. Inside, we find the Doctor’s Code and the VARN Chest Key, which we have not come across yet.
With all the remaining scrolls, we head back to the main room and enter each in the pools, with Captain Kirk being the Pool of VARN. This caused the center section of the pool to open and we drop into the room we could see behind the hieroglyph-covered wall. This gives us access to the Control Room. After wiping out a few patrol units that greet us, as soon as we step in, the hieroglyph wall lowers. That was handy, as the only way out would have been via spell. I like how we can absorb HP from these mechanical patrol units. At the end of this little room is the VARN Chest and inside is some items, gold, and the Control Cube. Having cleared out this place, we Town Portal back to Blackshire to sell off inventory and train, rebuff at the NWC offices, and Town Portal to Free Haven to get those nifty weapons and armor the Oracle promised.
Speaking to the Oracle with the Cube gets us 500k Exp each. I wish I would have known that since we just trained. Now we need to find the Kreegans’ crashed spacecraft and destroy the main reactor using the ancient weapons in the Control Center below. But doing so will destroy this world, so we need to cast a spell to contain the explosion, and the only person we can learn the spell from is Archibald, who currently is a statue. Into the Control Center we go!
The motif in here is the same as that of the Control Room in the Tomb of VARN. Entering the first room to our left, after taking out the few patrol units, reading the terminal as part of our self-guided tour gives everyone the Blaster skill. Now we need to find some Blasters. The room opposite this one has one in a chest. In a room off the main meeting hall, we find two more Blasters and a Blaster Rifle, giving us a full compliment of weapons. Any more are just gravy, although it would be nice to have all Rifles. We pick up a full set of Memory Crystals and a Control Cube in a chest. Clearing out the main chamber of defense units and then a room with a bunch of terminator units that can eradicate, we find a secret room with a chest. Inside the chest is a bunch of Control Cubes and a scroll that proclaims us to be Super-Goobers!! No experience, but it does show up as an Award. Another chest has three full sets of Memory Crystals. I wonder if we’ll actually need them. Heading to the upper level of the main room, we find a Rifle for everyone. Yes! Now that we have the necessary weaponry, it’s time to become Masters at using them. So, back to New Sorpigal to become Experts, then to Paradise Valley to become Masters.
With everyone now Ancient Weapon Masters, it’s back to the Oracle to see if it has anything new to tell us. With nothing new to tell us, it’s off to Castle Ironfist to see about reviving Archibald. Since we have a Lloyd’s Beacon set at the door of The Seer, it’s a quick casting and we’re in the area. Hmm, The Seer thinks we lost King Roland’s shield and gives us another one. Heading to the throne room, Nicolai tells us we need the Third Eye to open the family vault to get the bell that’s needed to break the stone spell on Archibald, but he doesn’t know where the eye is. Great. Talking to him again, he thinks it hidden near the castle. There’s not much around the castle. Checking all the flowers yields nothing. We search the well northwest of the castle and what do you know, it’s the Eye! Bringing it back to the Prince, he runs off to the tomb and quickly brings back Tanir’s Bell and gives us it with a word of warning about Archibald’s treachery. Heading up to the roof and into the Library, we automatically watch Archibald become flesh again. You can watch it over and over if you want by not then choosing to release him. As thanks for releasing him from the spell, which he apparently he knew he was under, he gives us a scroll with the Ritual of the Void and then promptly vanishes. We also receive 50k Exp each. I’m pretty sure The Hive is where we need to go, so off to Sweet Water.
One Lloyd’s Beacon later, and we’re back at the foot of the mountain The Hive sits atop. The first enemies we run into are a Devil Spawn and Devil Worker, so we don’t need to equip those Blasters just yet. But, hey, they have a really fast recharge rate. Hmm, Flush Sequence Activated. Huh? Nothing happened. Maybe being on one of the “Protected” set of tiles made it a non-issue? Another Flush Sequence happened and we stayed off the tiles and it did about 20 points of damage to everyone. Not a big worry. Shortly after entering, we get to the edge of a large pit with a horde of Devils. The Blaster Rifles make pretty quick work of them, considering their numbers, and we drop down. In the center is a covered pit, which I’m guessing is important. We can’t open either door, so we’ll have to drop down one of the corner pits. In a little, easy-to-miss, spot off the southwest pit corridor is a keg, which seems to be an unending supply of +20 HP replenishment. That path ended up at one of the doors we couldn’t open, but we can from this side. Ah, taking the southeast pit and opening the secret door back to above the pit retracts the covering to the central pit. Well, it was open. By the time we got back to the pit, it had closed again. Ah, it’s a tile right in front of the door that opens it. We have one corner pit left to explore first. With all the switches thrown and doors opened, we arrive at a large chamber with the Reactor in the middle.
With only the reactor shooting at us, we easily circle around it while avoiding the single shot, unload a volley, and repeat until it goes down. Upon doing so, we’re fully healed and the outer wall lowers revealing the Demon Queen and the large chamber is filled with devils. It also debuffed us, and since Lloyd’s Beacon doesn’t work in here, Protection from Fire needs to go back up pronto. Running into the Queen’s little chamber to get away from the ambush, we rather easily take care of her and get a sting of ridiculous “We did it!” type quotes. We just can’t let all those Devils live, so we clear out the room. Neither the Queen nor the Reactor drop any loot. Bummer. We take the exit in front of us and we watch the rather short end sequence. Geez. Darkside of Xeen and World of Xeen had much more impressive endings. I wonder what we did to end with a Vile reputation. We didn’t cast Armageddon. Anyway…
Final score: 29396
In game time: 2 years, 3 months, 24 days
Playtime: 195 hrs, 57 min
All Level 105
Masters
Roderick: Sword, Bow, Blaster, Spirit, Plate, Identify Item, Merchant, Body Building, Meditation, Perception, Disarm Trap, Learning
Alexis: Axe, Bow, Blaster, Air, Chain, Merchant, Repair Item, Body Building, Meditation, Perception, Learning
Serena: Bow, Mace, Blaster, Spirit, Shield, Chain, Merchant, Body Building, Meditation, Perception, Learning
Zoltan: Dagger, Bow, Blaster, Fire, Water, Leather, Merchant, Body Building, Meditation, Perception, Learning
Final thoughts:
9.5/10 -- While it's an excellent game, I just didn't find it nearly as fun as any of the previous five entries. I really like the Expert and Master training for the Secondary Skills. The dungeon designs are spectacular. It's just that those places like Darkmoor Castle, Dragonsand, and Hermit's Isle are just so tedious that it sucks a lot of the enjoyment out of the game.