
Guide and Walkthrough written by Blaqthourne
© 2022
Disclaimer
This document may not be reproduced under any circumstances except for personal, private use. It may not be placed on any website or otherwise distributed publicly without advance written permission. Use of this guide on any other website or as a part of any public display is strictly prohibited, and a violation of copyright.
Humanity has been completely wiped out. Demons have awakened from the depths of Earth and it appears to be their time to rule the planet. However, aliens have begun colonizing Earth and give the demon monsters an ultimatum: Either comply or be destroyed. You take control of 12 monsters and battle the aliens to determine who will rule Earth.
This document contains Japanese text.
I am nowhere near fluent enough in Japanese to have translated the game myself. Therefore, I used the following online translators, and if they all matched up, I believe I can feel relatively confident that they are accurate enough to know the general gist of what is going on:
https://translate.google.com/
https://www.bing.com/translator
https://nihongodera.com/tools/kana-converter (this translates word by word, so it will not return complete sentences)
If I was having trouble with writing any kanji, I would use:
https://kanji.sljfaq.org/
Finally, since all the cutscenes are voice only, I could not have done them without:
http://www.moemoe.gr.jp/~yourtoy/last/index.html
It has most, or possibly all, of the text (all in Japanese) from the PC88 version. I'd say at least 90% of the two versions' event scripts are identical -- I did not compare the text on the slates.
After pressing RUN on the Title Screen, a 9 minute long introduction movie will start to play. Press RUN to skip the movie. You may find better results by holding RUN. The first 15-20 seconds will play regardless of how soon you press RUN. You will then be given 3 options:
最初から始める -- Start a new game
以前の続き -- Continue. Note that you can only have one saved game.
モンスター図鑑 -- Monster Encyclopedia
The Monster Encyclopedia shows all 156 monsters that can be used. It would require playing through the game a minimum of 6 times to view them all otherwise (technically 3 times, reloading after the 2nd merge to view each option's resulting monster). It is the only place where you will see the names of the 144 monsters that aren't their starting forms. While the monsters' appearances will change as you progress through the game, the names displayed will not. Selecting a monster will bring up its various attributes. See the notes below for details on the 6th and 7th lines.
1. 名称 -- Name
2. 種別 -- Classification
3. 身長 -- Height
4. 体重 -- Weight
5. 生息地 -- Habitat
6a. 一般的な性質 -- General properties
6b. 変身条件 -- Transformation conditions, i.e. the level the evolution happens at
6c. 合成成分 -- Synthesis ingredients, i.e. the monsters needed to create it
7a. 攻撃 -- Attack(s)
7b. 合成条件 -- Synthesis condition, i.e. the level the merge happens at
8. 特性 -- Special Abilities
Notes:
6a is for the 12 monsters' base forms.
6b is for the 3 evolved forms of each monster.
6c is for merged monsters.
7a is for the 12 monsters' base and evolved forms.
7b is for merged monsters.
Rather than having a single party, the 12 monsters are broken into 3 parties that will investigate the world depending on the time of day and what day it is. The daytime party is active from 10:00 to 21:59. The night party is active from 22:00 to 9:59. The third party is only active during Salvan's Crushing Day, which occurs on the first day of every month, and will be active for the entire day from 00:00 to 23:59. When a monster reaches the overall levels of 5, 9, and 13, it will evolve into a more powerful monster. The monsters that comprise each party are as follows:
Daytime Party
オーク -- Orc
スケルトン -- Skeleton
G.スネーク -- Giant Snake
ハーピィ -- Harpy
Night Party
ガーゴイル -- Gargoyle
ゴブリン -- Goblin
サイクロプス -- Cyclops
スライム -- Slime
Salvan's Crushing Day Party
ゴーレム -- Golem
ミノタウロス -- Minotaur
ドラゴン -- Dragonewt*
A・スフィンクス -- Andro-Sphinx
* Dragonewt is the full name of the monster, as seen in both the manual and the Monster Encyclopedia. All in-game references to Dragonewt use the shortened ドラゴン (Dragon).
Pressing the II Button while exploring brings up this menu.
ひこう/ちゃくち -- Take flight/Land (does not appear while indoors or if all monsters that can fly are dead)
みる -- Examine
だれをみますか? -- Who will you examine?
[Monster]のなにをみますか? -- What do you want to view regarding [Monster]?
ぶき -- Weapons* (an equipped weapon is denoted with an asterisk)
こうげきのうりょく -- Attack Abilities*
ぼうぐ -- Armor* (an equipped piece of armor is denoted with an asterisk)
ぼうぎょのうりょく -- Defense Abilities*
アイテム -- Items
こじんアイテム -- Personal Items*
きょうゆうアイテム -- Shared Items*
まほう -- Magic
パラメータ -- Parameters (see the Parameters section for details)
とくせい -- Special Abilities (see the Special Abilities section for details)
つかう -- Use
だれがつかいますか? -- Who will use?
[Monster]のなにをつかいますか -- What will [Monster] use?
アイテム -- Item
こじんアイテム -- Personal Items*
きょうゆうアイテム -- Shared Items* (only one usable item exists)
まほう -- Magic*
とくせい -- Special Ability*
わたす -- Transfer*
だれがわたしますか? -- Who will transfer
[Monster]のなにをわたしますか -- What will [Monster] transfer?
ぼく -- Weapon*
ぼうぐ -- Armor*
アイテム -- Item*
ジン -- Jin
もっているジンは -- The Jin carried is
xジン -- [amount] Jin
ジンをあつめる -- Gather Jin
[Displays the monsters and how much Jin each has]
ジンをわたす -- Give Jin*
すてる -- Discard
だれがすてますか? -- Who will discard?
[Monster]のなにをすてますか? -- What will [Monster] discard?
ぼく -- Weapon*
ぼうぐ -- Armor*
アイテム -- Item*
そうび -- Equipment
だれがそうびしますか? -- Who will equip?
[Monster]はどうしますか? -- What will [Monster] do?
そうちゃく -- Equip
ぶき -- Weapon*
ぼうぐ -- Armor*
アイテム -- Item (as far as I can tell, there are no equippable items)
はずす -- Remove
ぶき -- Weapon*
ぼうぐ -- Armor*
アイテム -- Item
ならびかえ -- Arrange* (change the party's order)
1ばんめは? -- Who is 1st?
2ばんめは? -- Who is 2nd?
3ばんめは? -- Who is 3rd?
4ばんめは? -- Who is 4th?
そのた -- Other (these settings are not saved and will revert to the default option upon reload)
メッセージそくど -- Message Speed
はつい -- Fast
ふつう -- Normal (Default)
おそい -- Slow
せんとうアニメ -- Battle Animation
OFF (this will only display the text box giving the result of each action taken during battle)
ON (Default)
セーブ -- Save
セーブしますか? はい/いいえ -- Do you want to save? Yes / No*
[If you choose Yes] セーブしました --- Saved (this is the only instance where a red dialog box indicates success)
* Notes:
If a monster, or the party in the case of Shared Items, does not have any of the chosen option, the following dialog box will appear: ありません -- Has none.
If the spell chosen cannot be cast, such as a battle spell outside of battle, the following dialog box will appear: いまはつかえません -- It can't be used now.
Weapons, Armor, Items and Jin cannot be transferred between parties.
If a monster with 0 Jin tries to transfer Jin to another monster, the following dialog box will appear: ジンをもっていない -- Doesn't have Jin.
The party's arrangement has no effect other than cosmetic. The sprite shown while exploring is the first party member who is not Dead.
Remember that there is only one save file. There is no follow up question to verify whether you want to overwrite the save file.
When you run into an encounter with the enemy, a screen with 獲物がいたぜ (There's some prey) will briefly appear while it loads the battle. Your party will fight between 1 and 8 enemies. For battles against 5 to 8 enemies, when a front line enemy is defeated, the enemy behind it will immediately slide forward to replace its fallen comrade. This is important, as if you choose a single enemy attack, you are not choosing an enemy to attack, but rather a position on the battle grid. So, if a monster is set to attack a back row enemy and the enemy in front of it is defeated before that monster acts, it will simply not act, as there is no longer anything in the position chosen. Likewise, if the monster attacks a front line enemy and the enemy is defeated before the monster acts, it will attack what was the back row monster, as it has now slid forward to replace the fallen enemy.
[Monster]はどうする? -- What will [Monster] do?
じどう -- Automatic*
せっきんこうげき -- Melee Attack
まほう -- Magic
とくしゅのうりょく -- Special Ability
くすり -- Medicine
ぼうぎょ -- Defend**
にげる -- Escape***
ていせい -- Revise****
* Everyone uses a melee attack and will progress down the screen, attacking the top row until all enemies there are defeated, then the 2nd row, and so on. Unlike with attacks that target individual enemies, the monsters will move on to the next row if the current row is wiped out during a round. This option will also override any individual order given prior to the round, so, for example, if you have the first three monsters defend and choose Automatic for the 4th monster, the other three will no longer defend. This will continue if left alone until the end of the battle. The II Button will cancel the auto-battle. The only way I was able to succeed at canceling auto-battle was to set the II Button's Turbo switch to max and hold down the II Button.
** Defending greatly increases a monster's defense power. Unless a monster has a very low Defense Power level, practically nothing will be able to damage a defending monster.
*** Escape has a very low chance of succeeding. The manual claims a higher Bad Luck level increases the chances of success.
**** Undoes the previous monster's action. It cannot be used to undo the 4th monster's action, since once the 4th monster is given a command and target, if applicable, the round's actions begin to be carried out.
Each monster has between 1 and 3 special abilities at the start of the game. The non-passive special abilities are used via the Use option in the II Button menu. The monsters do not naturally gain more of these, but will acquire those of the monsters it merges with. During the merge process, the special abilities of the monsters that are available to merge with are shown, so there is no need to try to memorize them. While playing, the abilities are given purely in hiragana, while the Monster Encyclopedia also uses katakana and kanji, as well as using slightly different terminology for some abilities. What is in parentheses is what the encyclopedia uses.
| In-game (Encyclopedia) | English | Who begins with it |
|---|---|---|
| ぶきさくせい(武器作成) | Weapon Creation* | Orc, Goblin, Minotaur |
| ぼうぐさくせい(防具作成) | Armor Creation* | Orc, Goblin, Minotaur |
| アイテムぐさくせい(道具作成) | Item Creation* | Skeleton, Gargoyle, A-Sphinx |
| ひこうかのう(飛行可能) | Able to Fly | Harpy, Gargoyle, Dragonewt |
| せきかしない(石化しない) | Can't be Petrified | Golem |
| どくをうけない(毒無効) | Can't be Poisoned | Skeleton, G.Snake |
| まひしない(マヒしない) | Can't be Paralyzed | Slime |
| みずにつよう(水に強い) | Resistant to Water* | G.Snake |
| みずによわい(水に弱い) | Vulnerable to Water* | Skeleton, Golem |
| ひにつよい(火に強い) | Resistant to Fire* | Dragonewt |
| ひによわい(火に弱い) | Vulnerable to Fire* | Orc, Goblin, Slime |
| まかいにかえる(魔界に帰る) | Return to the Demon World* | Cyclops, A-Sphinx |
| ぶきぼうぎょ(武器に対する防御能力がある) | Weapon Defense* | Slime, Golem |
| せんりがん(千里眼) | Clairvoyance* | Cyclops, Minotaur |
* Further details:
If the monster doesn't have enough Jin to create a weapon, piece of armor, or item, the dialog ジンがたりない (Not enough Jin) will appear.
Resistant to Water eliminates damage when walking across water. All water can be flown over.
Vulnerable to Water increases damage taken when walking across water.
Resistant to Fire defends against fire attacks. However, there are no fire attacks in the game.
Vulnerable to Fire makes that monster vulnerable to fire attacks.
Return to the Demon World will warp the party to the entrance to the Demon World. It can be used everywhere.
Weapon Defense protects against attacks from normal weapons.
Clairvoyance displays the map of the outdoors with your location indicated by a flashing beacon. It can only be used outdoors. The dialog box that appears before displaying the map states しばらくおまちください (Please wait a moment).
Until the monsters' attack power is sufficiently leveled up, you will likely find this to be the most effective way to deal damage to your opponents. The amount of damage the abilities deal is a set value, regardless of the enemy or the monster's strength. Some abilities are able to attack an enemy in the back row. When a monster reaches levels 5, 9, and, except for Skeleton, Cyclops, and Andro-Sphinx, 13, with a few exceptions, its attack abilities will all upgrade, with some becoming all enemy attacks able to defeat virtually all groups of normal enemies in the first half of the game with a single attack. At the end of battle, it will indicate that the monster learned a new ability on the line below the announcement that its Attack Power leveled up with the text あたらしいこうげきののうりょくをてにいれた (Obtained a new attack ability) -- it does not state what the new ability is. Below are the abilities that each monster has when it has reached the required Attack Power level. (BR) denotes an ability that can attack a back row enemy. (AE) denotes an all enemy attack. The number after the hyphen is the damage dealt to each enemy.
| Level 1 | Level 5 | Level 9 | Level 13 | |
|---|---|---|---|---|
| オーク Orc | Does not have any abilities. Only acquires abilities via merging. | |||
| スケルトン Skeleton | ボーンブーメラン Bone Boomerang (BR) - 30 | フライングハンド Flying Hand (BR) - 70 | ミサイルボーン Missile Bone (BR) - 150 | ミサイルボーン Missile Bone (BR) - 150 |
| G.スネーク Giant Snake | スネークファング Snake Fangs - 60 ニードルテール Needle Tail - 60 | ブロンズファング Bronze Fangs - 100 クラッシュテール Crash Tail - 110 | アイアンファング Iron Fangs - 170 デストロイテール Destroy Tail - 200 | ブレイドファング Blade Fangs - 255 デストロイテール Destroy Tail - 200 |
| ハーピィ Harpy | ウイングカッター Wing Cutter - 40 ビーストボイス Beast Voice (BR) - 45 | ウイングブレイド Wing Blade - 90 ファントムボイス Phantom Voice (BR) - 85 | バーストウイング Burst Wing - 150 バンシーボイス Banshee Voice (AE) - 190 | ドリルウィング Drill Wing - 255 バンシーボイス Banshee Voice (AE) - 190 |
| ガーゴイル Gargoyle | ガーグクロー Garg Claw - 30 ウイングカッター Wing Cutter - 40 | ブロンズクロー Bronze Claw - 80 ウイングブレイド Wing Blade - 90 | アイアンクロー Iron Claw - 150 バーストウイング Burst Wing - 150 | ダイアモンドクロー Diamond Claw - 255 ドリルウィング Drill Wing - 255 |
| ゴブリン Goblin | Does not have any abilities. Only acquires abilities via merging. | |||
| サイクロプス Cyclops | ライトニングアロー Lightning Arrow (BR) - 50 | ライトニングボルト Lightning Bolt (BR) - 100 | サンダーアロー Thunder Arrow (AE) - 240 | サンダーアロー Thunder Arrow (AE) - 240 |
| スライム Slime | ボルトショック Bolt Shock - 50 セルショット Cell Shot (BR) - 35 | デッドボルト Dead Bolt - 95 セルボンバー Cell Bomber (BR) - 80 | ボルトアシッド Bolt Acid - 160 ミサイルセル Missile Cell (BR) - 170 | メルトアシッド Melt Acid - 255 ミサイルセル Missile Cell (BR) - 170 |
| ゴーレム Golem | ストーンボール Stone Ball (BR) - 45 | ストーンアックス Stone Axe (BR) - 90 | ストーンクラスター Stone Cluster (BR) - 170 | ストーンストーム Stone Storm (BR) - 255 |
| ミノタウロス Minotaur | バッファローホーン Buffalo Horn - 30 | ブロンズホーン Bronze Horn - 80 | アイアンホーン Iron Horn - 130 | ダイヤモンドホーン Diamond Horn - 255 |
| ドラゴン Dragonewt | ニードルテール Needle Tail - 60 ファイアーボール Fireball (BR) - 40 | クラッシュテール Crash Tail - 110 ファイアーボム Fire Bomb (BR) - 90 | デストロイテール Destroy Tail - 200 ファイアーブレス Fire Breath (AE) - 150 | デストロイテール Destroy Tail - 200 ファイアーストーム Fire Storm (AE) - 255 |
| A・スフィンクス Andro-Sphinx | ダークフォッグ Dark Fog (BR) - 70 ビーストボイス Beast Voice (BR) - 45 | デッドフォッグ Dead Fog (BR) - 150 ファントムボイス Phantom Voice (BR) - 85 | デッドフォッグ Dead Fog (BR) - 150 バンシーボイス Banshee Voice (AE) - 190 | デッドフォッグ Dead Fog (BR) - 150 バンシーボイス Banshee Voice (AE) - 190 |
Defense abilities are passive. Some of them level up when Defense Power reaches level 10. At the end of battle, it will indicate that the monster learned a new ability on the line below the announcement that its Defense Power leveled up, with the text あたらしいぼうぎょののうりょくをてにいれた (Obtained a new defense ability) -- it does not state what the new ability is.
| Monster | Base Ability | Upgraded Ability |
|---|---|---|
| オーク Orc | N/A | N/A |
| スケルトン Skeleton | N/A | N/A |
| G.スネーク Giant Snake | ブロンズスケール Bronze Scales | フロストスケール Frost Scales |
| ハーピィ Harpy | ウイングストーム Wing Storm | フェザーストーム Feather Storm |
| ガーゴイル Gargoyle | プロテクトウイング Protect Wing | ウイングバリア Wing Barrier |
| ゴブリン Goblin | N/A | N/A |
| サイクロプス Cyclops | レストグレア Rest Glare | N/A |
| スライム Slime | アシッドプロテクト Acid Protect | N/A |
| ゴーレム Golem | N/A | N/A |
| ミノタウロス Minotaur | N/A | N/A |
| ドラゴン Dragonewt | アイアンスケール Iron Scales | ファイアースケール Fire Scales |
| A・スフィンクス Andro-Sphinx | スティールボディ Steel Body | N/A |
Each parameter gains experience based on the actions performed during battle. The enemy has no bearing on how much experience is gained. For actions that deal damage, the more damage that is dealt, the more experience that is gained. However, the experience gained is capped at what is needed to advance to the next level, meaning a monster cannot gain multiple levels of a parameter in a single battle. A monster that is Dead at the end of the battle will still gain the experience from its actions during the battle. The amount of experience needed for a parameter to level up follows a set pattern of the next level requiring 40 more points than what it took to advance to the current level. The Overall Level requires 7 times the experience of an individual parameter, as there are 7 parameters that gain experience. The maximum level is 99. Descriptions for each parameter are given below the list.
| Japanese | English | Battle action(s) that gives experience |
|---|---|---|
| たいりょく | Health | Auto-battle, Melee Attack |
| まりょく | Magic Power | Magic |
| こうげきりょく | Attack Power | Auto-battle, Melee Attack, Special Ability |
| ぼうぎょりょく | Defense Power | Defend, Take damage |
| きりょく | Vitality | Auto-battle, Melee Attack |
| あくうん | Bad Luck | Successfully escape battle |
| びんしょうせい | Agility | Auto-battle, Melee Attack |
| ぶれいんしすう | Brain Index | N/A |
| こうきしん | Curiosity | Brain Index components |
| さつりくど | Degree of Slaughter | |
| じこけんじよく | Self-revelation | |
| ざんこくど | Cruelty | |
| りかいりょく | Comprehension | |
| そうごうけいけんち | Overall Experience | All |
For all parameters except Brain Index, when a parameter is selected, the following will show:
[Parameter selected]
レベル -- Level
あたい -- Value
けいけんち -- Experience Points
つぎのレベルまで -- To the next level
Health's value is the monster's maximum HP.
Magic Power's value is the monster's maximum MP. As this levels up, spells will increase in strength and new spells will be learned. For attack magic, the more damage a spell does, the more experience is gained.
Attack Power grants new Attack Abilities as it levels up. The more damage dealt, the more experience is gained.
Defense Power grants new Defense Abilities as it levels up.
Vitality gives the monster a chance of defeating the enemy with a hidden power when it's on the brink of death, according to the manual.
Bad Luck's level is the number of HP the monster will have after one of the random natural disasters. The manual claims that it affects the chances of running from battle.
Agility determines the order of attack. The higher the value, the faster the monster.
Brain Index represents the monster's intelligence, per the manual. The manual states that it mainly takes effect during events. It will always be 100 and has no bearing, that I can tell, on the game. Selecting it will show what percentage of the monster's brain is devoted to various characteristics, hence why it is always 100.
Overall Experience's value is the sum of the 7 parameters' experience points. Therefore, it gains experience from all battle actions. The overall level appears to have no bearing on the monster's ability. Its only role seems to be to determine when the monster will evolve and merge.
Because the spell names appear to be made up words, I don't see a reason to translate them into English. The only thing I would be doing is giving their Romaji, which only serves the purpose of indicating how to pronounce them. Spells are learned as the monster's Magic Power levels up. Each spell, except the few that are only cast outside of battle, has three levels of power, with the icon next to the spell name changing color to indicate its power level, following the same Gray, Red, Yellow convention the items use. After the 2nd power up, almost all of them then become either all enemy or all ally spells and then level up another 2 times. Each level does have its own animation (and I'm being pretty generous with the use of the term "animation"). For every power up, the cost of the spell goes up by 1. If it becomes an all enemy/party spell, for almost all spells, its cost increases by 3 and then another 1 per level up. At the end of battle, it will indicate that the monster learned a new spell on the line below the announcement that its Magic Power leveled up with the text あたらしいまほうをてにいれた (Obtained new magic). It does not state what the new spell is. This line does not appear when a spell upgrades. Unfortunately, you can't rearrange the list of spells in the game, and a monster's list of spells grows by adding the newest spell(s) learned to the bottom of the list. The only thing that is standard is that the non-battle spells are always at the bottom. If you try to cast an outdoor spell without enough MP, the message まりょくがたりない (Not enough magic power) will appear.
Below is the list of every spell in the game, broken up by the types described in the manual. The spell cost is the range from the lowest power level to the highest.
| Attack Magic | ||
|---|---|---|
| Spell (All Enemy) | MP Cost | Description |
| レパ(クレーパ) | 16-18 (21-23) | Meteorite Shower |
| キラ(キララ) | 14-16 (19-21) | Energy Arrow |
| ユマ | 17-19 | Tornado, does not upgrade |
| マイキ(フォスマイキ) | 2-4 (7-9) | Fireball |
| ビブ(ビブレア) | 15-17 (20-22) | Ice Storm |
| ジャギ(ジャギラス) | 3-5 (8-10) | Electric Shock |
| リッジ(リッジーナ) | 10-12 (15-17) | Kamaitachi* Attack |
*A kamaitachi is a spirit in Japanese folklore
| Attack Assist Magic* | ||
|---|---|---|
| Spell (All Enemy) | MP Cost | Description |
| ダチ(ダチスン) | 1-3 (7-9) | Poison |
| ドゥ(ダドゥム) | 5-7 (10-12) | Decompose (Drain HP) |
| ザホム(ピエザホム) | 2-4 (8-10) | Petrify |
| タラ(タラス) | 2-4 (7-9) | Sleep |
| デカ(デカダン) | 1-3 (6-8) | Silence |
| メロ(リメロ) | 17-19 (22-24) | Seal Magic |
| メイヤ(アメイヤ) | 1-3 (6-8) | Paralyze** |
| ノーイ(スノーイ) | 3-5 (8-10) | Charm |
| ネア(ネアラ) | 6-8 (11-13) | Insanity |
| キュラ(ダキュラ) | 7-9 (12-14) | Halve Defense |
* If the Attack Assist spell has no effect, no experience will be gained. Robotic and mechanical enemies, as well as all bosses, are immune to all Attack Assist Magic except メロ(リメロ)(Seal Magic) and キュラ(ダキュラ)(Halve Defense).
** Paralyzed enemies can cast the earthquake spell.
| Defensive Magic | ||
|---|---|---|
| Spell (All Allies) | MP Cost | Description |
| ヘッヂ(ヘッヂユーロ) | 4-6 (9-11) | Barrier* |
| ヌバ | 3-5 | Invisibility, does not upgrade |
| ベク(ベクト) | 16-18 (21-23) | Split** |
* Barrier blocks enemy attacks
** Split makes it difficult for the enemy's attack to hit
| Recovery Magic* | ||
|---|---|---|
| Spell (All Allies) | MP Cost | Description |
| アド(レアド) | 2-4 (7-9) | Cure Sleep |
| コプ(コプラタ) | 3-5 (8-10) | Cure Stone |
| ニナ(ニナーゲ) | 5-7 (10-12) | Cure Mad |
| エル(エルサノ) | 4-6 (9-11) | Cure Silent |
| キース(キーウッズ) | 4-6 (9-11) | Cure Poison |
| ジェロ(ジェロニカ) | 4-6 (9-11) | Cure Paralyze |
| シェル(シェルキー)** | 4-6 (9-11) | Recover HP (Upgrade recovers more HP) |
* Recovery Magic does not grant experience.
** シェルキー is a single ally spell.
| Other Magic | ||
|---|---|---|
| Spell | MP Cost | Description |
| ピド | 2-4 | Escape battle |
| ピンウッド | 20 | Warp out of dungeon |
| グランドチャコ | 0 | Read indecipherable characters* |
| イレーヌ | 25 | Return to the Demon World** |
* Automatically used when needed
** Can only be used outdoors
AE = All Enemies
AA = All Allies
| Attack Magic | |||
|---|---|---|---|
| Spell | Description | Damage Dealt* | Learned by (Magic Power Level) |
| レパ | Meteorite Shower | 354, 387, 414 | Minotaur (12) |
| クレーパ | Meteorite Shower (AE) | 447, 477, 510 | Minotaur (15) |
| キラ | Energy Arrow | 181, 198, 208 | Gargoyle (12), A-Sphinx (8) |
| キララ | Energy Arrow (AE) | 222, 240, 256 | Gargoyle (15), A-Sphinx (11) |
| ユマ | Tornado | 226, 244, 260 | Dragonewt (12) |
| マイキ | Fireball** | 41, 82, 125 | Dragonewt (1) |
| フォスマイキ | Fireball (AE)** | 164, 203, 248 | Dragonewt (4) |
| ビブ | Ice Storm*** | 357, 387, 417 | G. Snake (12) |
| ビブレア | Ice Storm (AE)*** | 450, 480, 510 | G. Snake (15) |
| ジャギ | Electric Shock | 34, 61, 91 | Cyclops (4), Minotaur (1) |
| ジャギラス | Electric Shock (AE) | 123, 155, 184 | Cyclops (7), Minotaur (4) |
| リッジ | Kamaitachi Attack | 118, 136, 148 | Gargoyle (8) |
| リッジーナ | Kamaitachi Attack (AE) | 165, 178, 195 | Gargoyle (11) |
* The three values correspond to the damage dealt for each level of the spell. For spells that attack all enemies, the damage dealt is to each enemy, not the total damage dealt. No enemy can reduce the damage dealt.
** Fireball at any power level will deal up to 4000 damage to a ゲラミズ (found on floors 1-3 of the Tower of No Return) and up to 59820 damage to a プエル (found outdoors on the planet's surface and in the School, Church, Police Station, and Hospital).
*** Ice Storm at any power level will deal up to 4000 damage to a グジリム (found on floors 4-7 of the Tower of No Return) and up to 19360 damage to ヒューマン (found in the Control Tower).
| Attack Assist Magic | ||
|---|---|---|
| Spell | Description | Learned by (Magic Power Level) |
| ダチ | Poison | Skeleton (1), G. Snake (1) |
| ダチスン | Poison (AE) | Skeleton (4), G. Snake (4) |
| ドゥ | Decompose | Slime (4) |
| ダドゥム | Decompose (AE) | Slime (7) |
| ザホム | Petrify | Golem (1), Minotaur (1) |
| ピエザホム | Petrify (AE) | Golem (4), Minotaur (4) |
| タラ | Sleep | Gargoyle (1), Cyclops (8) |
| タラス | Sleep (AE) | Gargoyle (4), Cyclops (11) |
| デカ | Silence | Slime (1), A-Sphinx (1) |
| デカダン | Silence (AE) | Slime (4), A-Sphinx (4) |
| メロ | Seal Magic | Golem (12) |
| リメロ | Seal Magic (AE) | Golem (15) |
| メイヤ | Paralyze | Orc (8), Goblin (1) |
| アメイヤ | Paralyze (AE) | Orc (11), Goblin (4) |
| ノーイ | Charm | Harpy (1) |
| スノーイ | Charm (AE) | Harpy (4) |
| ネア | Insanity | Harpy (4) |
| ネアラ | Insanity (AE) | Harpy (7) |
| キュラ | Halve Defense | Golem (4) |
| ダキュラ | Halve Defense (AE) | Golem (7) |
| Defensive Magic | ||
|---|---|---|
| Spell | Description | Learned by (Magic Power Level) |
| ヘッヂ | Barrier | Dragonewt (1) |
| ヘッヂユーロ | Barrier (AA) | Dragonewt (4) |
| ヌバ | Invisibility | Cyclops (1) |
| ベク | Split | A-Sphinx (12) |
| ベクト | Split (AA) | A-Sphinx (15) |
| Recovery Magic | |||
|---|---|---|---|
| Spell | Description | HP Restored* | Learned by (Magic Power Level) |
| アド | Cure Sleep | Gargoyle (4), Cyclops (12) | |
| レアド | Cure Sleep (AA) | Gargoyle (7), Cyclops (15) | |
| コプ | Cure Stone | Golem (1), Minotaur (8) | |
| コプラタ | Cure Stone (AA) | Golem (4), Minotaur (11) | |
| ニナ | Cure Mad | Harpy (8) | |
| ニナーゲ | Cure Mad (AA) | Harpy (11) | |
| エル | Cure Silent | Slime (12) | |
| エルサノ | Cure Silent (AA) | Slime (15) | |
| キース | Cure Poison | Skeleton (4), G. Snake (4) | |
| キーウッズ | Cure Poison (AA) | Skeleton (7), G. Snake (7) | |
| ジェロ | Cure Paralyze | Orc (4), Goblin (8) | |
| ジェロニカ | Cure Paralyze (AA) | Orc (7), Goblin (11) | |
| シェル | Recover HP | 16, 32, 48 | Dragonewt (8), A-Sphinx (1) |
| シェルキー | Recover More HP | 64, 80, 96 | Dragonewt (11), A-Sphinx (4) |
* The three values correspond to the HP recovered for each level of the spell.
| Other Magic | ||
|---|---|---|
| Spell | Description | Learned by (Magic Power Level) |
| ピド | Escape battle | Orc (1), Skeleton (1), Goblin (4), Slime (1) |
| ピンウッド | Warp out of dungeon | Skeleton (8), Slime (8) |
| グランドチャコ | Read indecipherable characters* | Gargoyle (1) |
| イレーヌ | Return to the Demon World | G. Snake (8), A-Sphinx (4) |
* A monster that merges with Gargoyle does not learn グランドチャコ.
The level refers to the monster's Magic Power Level.
AA = All Allies
AE = All Enemies
| Level 1 | Level 4 | Level 7 | Level 8 | Level 11 | Level 12 | Level 15 | |
|---|---|---|---|---|---|---|---|
| オーク Orc | ピド Escape Battle | ジェロ Cure Paralysis | ジェロニカ Cure Paralysis (AA) | メイヤ Paralyze | アメイヤ Paralyze (AE) | ||
| スケルトン Skeleton | ダチ Poison ピド Escape Battle | ダチスン Poison (AE) キース Cure Poison | キーウッズ Cure Poison (AA) | ピンウッド Warp out of dungeon | |||
| G.スネーク G. Snake | ダチ Poison | ダチスン Poison (AE) キース Cure Poison | キーウッズ Cure Poison (AA) | イレーヌ Return to Demon World | ビブ Ice Storm | ビブレア Ice Storm (AE) | |
| ハーピィ Harpy | ノーイ Charm | スノーイ Charm (AE) ネア Insanity | ネアラ Insanity (AE) | ニナ Cure Insanity | ニナーゲ Cure Insanity (AA) | ||
| ガーゴイル Gargoyle | グランドチャコ Read Indecipherable Characters タラ Sleep | タラス Sleep (AE) アド Cure Sleep | レアド Cure Sleep (AA) | リッジ Kamaitachi Attack | リッジーナ Kamaitachi Attack (AE) | キラ Energy Arrow | キララ Energy Arrow (AE) |
| ゴブリン Goblin | メイヤ Paralyze | アメイヤ Paralyze (AE) ピド Escape Battle | ジェロ Cure Paralysis | ジェロニカ Cure Paralysis (AA) | |||
| サイクロプス Cyclops | ヌバ Invisibility | ジャギ Electric Shock | ジャギラス Electric Shock (AE) | タラ Sleep | タラス Sleep (AE) | アド Cure Sleep | レアド Cure Sleep (AA) |
| スライム Slime | デカ Silence ピド Escape Battle | デカダン Silence (AE) ドゥ Decompose | ダドゥム Decompose (AE) | ピンウッド Warp out of dungeon | エル Cure Silence | エルサノ Cure Silence (AA) | |
| ゴーレム Golem | ザホム Petrify コプ Cure Stone | キュラ Halve Defense ピエザホム Petrify (AE) コプラタ Cure Stone (AA) | ダキュラ Halve Defense (AE) | メロ Seal Magic | リメロ Seal Magic (AE) | ||
| ミノタウロス Minotaur | ジャギ Electric Shock ザホム Petrify | ジャギラス Electric Shock (AE) ピエザホム Petrify (AE) | コプ Cure Stone | コプラタ Cure Stone (AA) | レパ Meteorite Shower | クレーパ Meteorite Shower (AE) | |
| ドラゴン Dragonewt | マイキ Fireball ヘッヂ Barrier | フォスマイキ Fireball (AE) ヘッヂューロ Barrier (AA) | シェル Recover HP | シェルキー Recover More HP | ユマ Tornado | ||
| A・スフィンクス A-Sphinx | デカ Silence シェル Recover HP | デカダン Silence (AE) シェルキー Recover More HP イレーヌ Return to Demon World | キラ Energy Arrow | キララ Energy Arrow (AE) | ベク Split | ベクト Split (AA) |
Equipping a weapon does not visually increase a monster's stats. Therefore, without access to the source code, no strength value can be given. I simply assume the more Jin needed to create the weapon, the stronger it is. Most monsters cannot equip weapons prior to merging with one that can. Weapons are listed in the order they appear in the Create Weapon menu.
| Japanese | English | Cost | Who can equip it |
|---|---|---|---|
| ストーンクラブ | Stone Club | 2000 | Orc, Golem, Cyclops |
| アイアンクラブ | Iron Club | 5000 | Golem, Cyclops |
| ワイルドクラブ | Wild Club | 30000 | Golem, Cyclops |
| マッドアックス | Mad Axe | 1000 | Goblin, Orc, Skeleton, Minotaur |
| ウォーアックス | War Axe | 6000 | Goblin, Orc, Skeleton, Minotaur |
| サタンアックス | Satan Axe | 30000 | Minotaur |
| メガハンマー | Mega Hammer | 1000 | Goblin, Orc, Skeleton |
| ヘルハンマー | Hell Hammer | 2000 | Goblin, Orc, Skeleton |
| ゴーストサイズ | Ghost Scythe | 5000 | Goblin, Orc, Skeleton |
| バトルスピアー | Battle Spear | 3000 | Goblin, Orc, Skeleton, Minotaur |
| ダークスピアー | Dark Spear | 6000 | Goblin, Orc, Skeleton, Minotaur |
| アサシンダガー | Assassin's Dagger | 100 | Gargoyle, Goblin, Orc, Skeleton |
| キラーソード | Killer Sword | 500 | Gargoyle, Goblin, Orc, Skeleton |
| ブルソード | Bull Sword | 1000 | Gargoyle, Goblin, Orc, Skeleton |
| ブレイクソード | Break Sword | 5000 | Gargoyle, Goblin, Orc, Skeleton |
| ブラッドソード | Blood Sword | 10000 | Gargoyle, Goblin, Orc, Skeleton |
| デスソード | Death Sword | 30000 | Skeleton |
| アークソード | Arc Sword | 40000 | Gargoyle, Goblin, Orc, Skeleton |
| シルバーソード | Silver Sword* | 50000 | Gargoyle, Goblin, Orc |
| ハイドソード | Hyde Sword* | 3000 | Goblin, Orc |
| イビルスタッフ | Evil Staff | 10000 | Goblin, Orc |
| アゾット剣 | Azoth Sword* | N/A | Goblin, Orc |
* Notes:
The Silver Sword cannot be created by a party that includes Skeleton or a monster merged with Skeleton.
The Hyde Sword can only be equipped when Gauntlets are equipped. Unequipping Gauntlets will also unequip the Hyde Sword. The Hyde Sword can be equipped along with another weapon.
The Azoth Sword is not created, but is found. It is not equipped and appears in the Shared Item inventory. It will be automatically used during battle by Goblin and Orc, but not monsters merged with either of them. Goblin and Orc can still equip other weapons.
As with weapons, equipping armor does not visually increase a monster's stats. Most monsters cannot equip armor prior to merging with one that can. Armor is listed in the order they appear in the Create Armor menu.
| Japanese | English | Cost | Who can equip it |
|---|---|---|---|
| ビーストアーマー | Beast Armor | 500 | Goblin, Orc, Skeleton |
| ウォリアーアーマー | Warrior Armor | 1000 | Goblin, Orc, Skeleton |
| クラストアーマー | Crust Armor | 2000 | Goblin, Orc, Skeleton |
| ニードルアーマー | Needle Armor | 5000 | Goblin, Orc, Skeleton |
| ガイルアーマー | Gail Armor | 10000 | Orc |
| バルキリーアーマー | Valkyrie Armor | 20000 | Goblin, Orc |
| ジャイアントメイル | Giant Mail | 30000 | Cyclops, Minotaur |
| ブラックアーマー | Black Armor* | 50000 | Goblin, Orc |
| バロールアーマー | Valor Armor | 60000 | Goblin, Orc, Skeleton |
| ベルゼブアーマー | Beelzeb Armor | 70000 | Goblin, Orc, Skeleton |
| バーサーカーヘルム | Berzerker Helm | 1000 | Goblin, Orc |
| ダークナイトヘルム | Dark Knight Helm | 2000 | Goblin, Orc |
| マーズヘルム | Mars Helm | 5000 | Goblin, Orc |
| バンデットシールド | Bandit Shield | 1000 | Goblin, Orc, Skeleton |
| シャドーシールド | Shadow Shield | 5000 | Goblin, Orc, Skeleton |
| ソルジャーシールド | Soldier Shield | 10000 | Goblin, Orc, Skeleton |
| ハデスシールド | Hades Shield | 30000 | Goblin, Orc, Skeleton |
| ビランガントレット | Villain Gauntlets | 3000 | Goblin, Orc |
| ローグガントレット | Rogue Gauntlets | 8000 | Goblin, Orc |
| ウィザードマント | Wizard Cloak | 10000 | Goblin, Orc, Skeleton |
* Black Armor recovers 1 HP per minute while exploring.
For the items that start with "DIS", there are three levels of power. The cheapest to create will cure a single monster with a chance to fail. The middle tier will cure a single monster with no chance to fail. The most expensive cures the entire party with no chance to fail. The color of the item's icon indicates its strength. Items are listed in the order they appear in the Create Item menu.
| Item | Cost | Effect |
|---|---|---|
| DISPOIS | 100 | Cure Poison |
| DISPOIS | 300 | Cure Poison |
| DISPARA | 80 | Cure Paralyze |
| DISPARA | 240 | Cure Paralyze |
| DISTONE | 120 | Cure Stone |
| DISTONE | 360 | Cure Stone |
| DISMAD | 80 | Cure Mad |
| DISMAD | 240 | Cure Mad |
| DISLEEP | 60 | Cure Sleep |
| DISLEEP | 180 | Cure Sleep |
| DISILEN | 60 | Cure Silence |
| DISILEN | 180 | Cure Silence |
| HEALUP | 60 | Restore 10 HP to one ally |
| HEALUP | 180 | Restore 30 HP to one ally |
| MAGICUP | 60 | Restore 10 MP to one ally |
| MAGICUP | 180 | Restore 30 MP to one ally |
| SPIRIT | 2550 | Revive a Dead ally |
| DISPOIS | 1000 | Cure all allies of Poison |
| DISPARA | 800 | Cure all allies of Paralyze |
| DISTONE | 1200 | Cure all allies of Stone |
| DISMAD | 800 | Cure all allies of Mad |
| DISLEEP | 600 | Cure all allies of Sleep |
| DISILEN | 600 | Cure all allies of Silence |
| HEALUP | 600 | Restore 30 HP to all allies |
| MAGICUP | 600 | Restore 30 MP to all allies |
| PSYCHO | 2000 | Restore 50 HP & 50 MP to all allies |
These items appear in the Shared Item inventory.
| Japanese | English | Use |
|---|---|---|
| IDカードパーツA | ID Card Part A | Combine all four parts to make ID Card |
| IDカードパーツB | ID Card Part B | Combine all four parts to make ID Card |
| IDカードパーツC | ID Card Part C | Combine all four parts to make ID Card |
| IDカードパーツD | ID Card Part D | Combine all four parts to make ID Card |
| IDカード | ID Card | Gain entry into Spaceship |
| CDディスク | CD Disc | Used at CD Player in Spaceship |
| ガルマのかぎ | Garma Key | Gain entry into Tower of No Return |
| ブレスのかぎ | Breath Key | Opens 1F door in Tower of No Return |
| ゴールドのかぎ | Gold Key | Opens 2F door in Tower of No Return |
| セルのかぎ | Cell Key | Opens 3F door in Tower of No Return |
| ボースのかぎ | Boss Key | Opens 4F door in Tower of No Return |
| チタムのかぎ | Chitam Key | Opens 5F door in Tower of No Return |
| ハルフのかぎ | Half Key | Opens 6F door in Tower of No Return |
| メシャのかぎ | Mesha Key | Opens 7F door in Tower of No Return |
| ぶっしつてんいき | Material Transfer Device* | Warp between surface and underground |
* The Material Transfer Device is the only Shared Item usable via the Use menu. All others are automatically used when needed.
No status effect will dissipate naturally during battle, or it takes an extremely long time to do so. Only Sleep will go away after battle by itself. Therefore, you will need to either use an item or spell, or visit the Demon World, to cure any monster so afflicted. Only the Dead condition prevents a monster that can fly from doing so. Also, the only way to get a Game Over is for all members of the active party to be Dead. All conditions will be cured by visiting the Demon World. If a monster is Dead when the active party changes, it will not be revived while the party is idle.
| Status | Effect | Spells to cure |
|---|---|---|
| GOOD | Healthy and have no problems | N/A |
| DEAD | Dead | N/A |
| POISON | HP will decrease* | キース or ドキーウッズ |
| STONE | Cannot do anything | コプ or コプラタ |
| SLEEP | Cannot do anything | アド or レアド |
| PARALYZE | Can only use magic | ジェロニナ or ジェロニカ |
| MAD | Lose control in battle** | ニナ or ニナーゲ |
| SILENT | Unable to use magic | エル or エルサノ |
* A poisoned monster will lose 1 HP per round in battle and 1 HP per minute while exploring.
** Mad only affects melee attacks. You will continue to give a mad monster commands. If a mad monster is set to physically attack, either by Automatic or Melee Attack, it will either attack a random enemy or do nothing. It will not attack its allies, defend, cast a spell, or use an item.
There are two times when a monster will merge with another monster. There is no option to do this or not, it will happen. When it reaches Overall Level 17, it will be given three monsters to merge with. When it reaches Overall Level 34, it will be given two monsters to merge with. When it merges, it will acquire the Special Abilities, Attack Abilities, Defense Abilities, and Spells of the monster it is merging with, as well as the ability to equip weapons and/or armor if applicable. While it will show the current form of the monsters it can merge with, the abilities it acquires from that monster are what it has at Level 1. Merging probably isn't the best description of what occurs, as the other monster isn't affected. It's more like if the monsters are thought of as classes, and when a monster reaches the needed level, it simply gains all the abilities and characteristics of the new class. In the chart below, the first four monsters are the base form and its three evolutions, occurring at Levels 5, 9, and 13. Then, the three monsters it can merge with at Level 17 followed by the name of the merged monster. Finally, the two monsters it can merge with at Level 34 followed by the name of the merged monster.
| _A・スフィンクス__ | シルプレース
| | A-Sphinx | Silplace
| _ハーピィ______ | ガープリス__ | |
| | Harpy | Garpris | |
| | | |_サイクロプス_____ | ルポルクス
| | | Cyclops | Luporx
| |
| | | _スケルトン_______ | ローケルグ
| | | | Skeleton | Lokelg
| ガーゴイル__ | バルログ__ | デビル__ | デーモン__ | |_オーク________ | グルローク__ | | |
| Gargoyle | Balrog | Devil | Demon | | Orc | Gururorc | |
| | | |_ゴーレム_________ | グラッツ
| | | Golem | Gratz
| |
| | | _G.スネーク_______ | ゴルネイグ
| | | | G. Snake | Gornage
| |_ミノタウロス__ | リゴレイグ__ | |
| Minotaur | Rigoreig | |
| |_スライム_________ | リグレーム
| Slime | Rigrem
| |
| _G.スネーク__ | ルブネク
| | G. Snake | Roobneck
| _A・スフィンクス__ | ニルボフス____ | |
| | A-Sphinx | Nilbofs | |
| | | |_ゴーレム____ | ボルゴム
| | | Golem | Borgome
| |
| | | _ガーゴイル__ | ガルゴレッド
| | | | Gargoyle | Gargored
| ゴブリン__ | ホブゴブリン__ | バグベア__ | グレムリン__ | |_ミノタウロス______ | ソルブレット__ | | |
| Goblin | Hobgoblin | Bugbear | Gremlin | | Minotaur | Solbret | |
| | | |_スケルトン__ | ブレールド
| | | Skeleton | Breld
| |
| | | _ドラゴン____ | ポークラゴン
| | | | Dragonewt | Polkragon
| |_サイクロプス______ | スポークリン__ | |
| Cyclops | Sporklin | |
| |_ハーピィ____ | ハープクリス
| Harpy | Harpkriss
| |
| _ドラゴン_________ | スカルゴラ
| | Dragonewt | Skullagora
| _G.スネーク__ | ケンスカール__ | |
| | G. Snake | Kenskull | |
| | | |_サイクロプス_____ | クロスケード
| | | Cyclops | Crosscade
| |
| | | _ミノタウロス_____ | ログダルク
| | | | Minotaur | Roguedark
| オーク__ | オグレ__ | トロル__ | トロット__ | |_ゴーレム____ | ログオーク____ | | |
| Orc | Ogre | Troll | Trote | | Golem | Rogue Orc | |
| | | |_スケルトン_______ | ロゲルトン
| | | Skeleton | Rogelton
| |
| | | _A・スフィンクス__ | エルフィクス
| | | | A-Sphinx | Elfix
| |_スライム____ | エルオーク____ | |
| Slime | Elorc | |
| |_ガーゴイル_______ | ルガルク
| Gargoyle | Lugark
| |
| _ハーピィ______ | エルピアー
| | Harpy | Elpiah
| _G.スネーク__ | ガードエンズ__ | |
| | G. Snake | Guardenz | |
| | | |_ミノタウロス__ | アルターエン
| | | Minotaur | Altaren
| |
| | | _スケルトン____ | アリグトン
| | | | Skeleton | Arigton
| ドラゴンニュート__ | ワイバーン__ | ブロンズドラゴン__ | ロイヤルドラゴン__ | |_ガーゴイル__ | ガリグノード__ | | |
| Dragonewt | Wyvern | Bronze Dragon | Royal Dragon | | Gargoyle | Garignode | |
| | | |_スライム______ | ガリグレム
| | | Slime | Galigrem
| |
| | | _サイクロプス__ | オルグプス
| | | | Cyclops | Orgups
| |_ゴーレム____ | ゴールグ______ | |
| Golem | Gorg | |
| |_ゴブリン______ | オーブリン
| Goblin | Orblin
| |
| _G.スネーク_______ | ケルトネーク
| | G. Snake | Keltonake
| _ゴブリン______ | ケルトリン____ | |
| | Goblin | Keltrin | |
| | | |_ハーピィ_________ | ルハープ
| | | Harpy | Ruharp
| |
| | | _A・スフィンクス__ | ノーツィング
| | | | A-Sphinx | Notzing
| スケルトン__ | ナイトスケルトン__ | デュラハン__ | リッチ__ | |_ミノタウロス__ | ノーツトロス__ | | |
| Skeleton | Knight Skeleton | Dullahan | Lich | | Minotaur | Notestros | |
| | | |_スライム_________ | スルーツイム
| | | Slime | Slootsim
| |
| | | _サイクロプス_____ | オグラプス
| | | | Cyclops | Ograps
| |_ガーゴイル____ | オグリグス____ | |
| Gargoyle | Ogrigs | |
| |_ゴーレム_________ | メルゴリーズ
| Golem | Melgreze
| |
| _ガーゴイル_______ | クレグレーグ
| | Gargoyle | Kregraig
| _ゴーレム______ | ネークレム____ | |
| | Golem | Neclem | |
| | | |_ドラゴン_________ | ネルグラグ
| | | Dragonewt | Nelgrag
| |
| | | _A・スフィンクス__ | アクルクス
| | | | A-Sphinx | Akrux
| G.スネーク__ | ストアウォーム__ | ヒドラ__ | キングヒドラ__ | |_サイクロプス__ | ネークロプス__ | | |
| Giant Snake | Stoor Worm | Hydra | King Hydra | | Cyclops | Neclops | |
| | | |_スライム_________ | スレムラー
| | | Slime | Slemler
| |
| | | _ミノタウロス_____ | ループロン
| | | | Minotaur | Loopron
| |_ハーピィ______ | ケループ______ | |
| Harpy | Keroop | |
| |_スケルトン_______ | クルプレト
| Skeleton | Kluplet
| |
| _ドラゴン______ | リムラオグ
| | Dragonewt | Limraog
| _オーク___________ | レムゴール____ | |
| | Orc | Remgore | |
| | | |_サイクロプス__ | スクレッグ
| | | Cyclops | Skregg
| |
| | | _G.スネーク____ | リクネスク
| | | | G. Snake | Riknesk
| ゴーレム__ | クレイゴーレム__ | リビングスタチュー__ | タロス__ | |_A・スフィンクス__ | リスクフィン__ | | |
| Golem | Clay Golem | Living Statue | Talos | | A-Sphinx | Riskphin | |
| | | |_ガーゴイル____ | ガーグリフス
| | | Gargoyle | Garglyphs
| |
| | | _ハーピィ______ | オルヒーパ
| | | | Harpy | Orhipa
| |_スケルトン_______ | ゴーリンスク__ | |
| Skeleton | Gorinsk | |
| |_ミノタウロス__ | リングトロス
| Minotaur | Ringtoros
| |
| _G.スネーク_______ | ウラプネーク
| | G. Snake | Ulpanake
| _スケルトン__ | クロプシー____ | |
| | Skeleton | Cropsey | |
| | | |_ゴーレム_________ | クログプート
| | | Golem | Crogput
| |
| | | _ガーゴイル_______ | リクプゴス
| | | | Gargoyle | Rikpugos
| サイクロプス__ | ティタナクロプス__ | クレアボワンス___ | アルゴス__ | |_スライム____ | スリクプス____ | | |
| Cyclops | Titanclops | Clairbowans | Argos | | Slime | Slikapus | |
| | | |_ゴブリン_________ | ブリプラー
| | | Goblin | Bleepler
| |
| | | _オーク___________ | ゴアクォード
| | | | Orc | Gorequode
| |_ドラゴン____ | ゴアクロプス__ | |
| Dragonewt | Goreclops | |
| |_A・スフィンクス__ | スィンプラー
| A-Sphinx | Swimpler
| |
| _サイクロプス__ | パクロクース
| | Cyclops | Paclocuse
| _A・スフィンクス__ | イーパクス__ | |
| | A-Sphinx | Epox | |
| | | |_スケルトン____ | イスケルパ
| | | Skeleton | Iskelpa
| |
| | | _ガーゴイル____ | パラゴネル
| | | | Gargoyle | Paragonel
| ハーピィ__ | グレートハーピィ__ | グリフォン__ | フェニックス__ | |_G.スネーク________ | パスネーク__ | | |
| Harpy | Great Harpy | Griffon | Phoenix | | G. Snake | Pasnake | |
| | | |_オーク________ | パネオルガ
| | | Orc | Paneorga
| |
| | | _ゴーレム______ | ハブゴレム
| | | | Golem | Hobgolem
| |_ゴブリン__________ | ハブリン____ | |
| Goblin | Hoblin | |
| |_G.スネーク____ | リブネード
| G. Snake | Libnado
| |
| _ゴーレム_________ | ブリーグド
| | Golem | Breagdo
| _ゴブリン______ | ブリームス__ | |
| | Goblin | Breams | |
| | | |_ドラゴン_________ | ブリムゴン
| | | Dragonewt | Breamgon
| |
| | | _スケルトン_______ | アムレプス
| | | | Skeleton | Amreps
| スライム__ | ブラックプディング__ | グレイ・ウーズ__ | シャンブルマウンド__ | |_サイクロプス__ | サムロプス__ | |
| Slime | Black Pudding | Gray Ooze | Shamble Mound | | Cyclops | Samropes | |
| | | |_ハーピィ_________ | ロアサーピ
| | | Harpy | Roasarpy
| |
| | | _A・スフィンクス__ | リムスヒーク
| | | | A-Sphinx | Limsheek
| |_ガーゴイル____ | スリムイル__ | |
| Gargoyle | Slimeal | |
| |_ゴーレム_________ | スリグレード
| Golem | Surigrade
| |
| _ゴブリン______ | フィラグリン
| | Goblin | Filaglin
| _ドラゴン__ | フィラゴン____ | |
| | Dragonewt | Filagon | |
| | | |_G.スネーク____ | ラゴネーグ
| | | G. Snake | Lagonage
| |
| | | _スケルトン____ | ケルゴーア
| | | | Skeleton | Kelgor
| A・スフィンクス__ | スフィンクス__ | マンティコア__ | キマイラ__ | |_オーク____ | スィンゴーア__ | |
| A-Sphinx | Sphinx | Manticore | Chimera | | Orc | Singor | |
| | | |_ゴーレム______ | レリゴリム
| | | Golem | Lerigorim
| |
| | | _サイクロプス__ | クロサロップ
| | | | Cyclops | Crosalop
| |_スライム__ | スクリム______ | |
| Slime | Scream | |
| |_スケルトン____ | ミルノラス
| Skeleton | Milnolas
| |
| _オーク___________ | グロトーカ
| | Orc | Grotoka
| _ドラゴン____ | ソルトオーグ_ | |
| | Dragonewt | Soltorg | |
| | | |_サイクロプス_____ | スポトラド
| | | Cyclops | Spotrad
| |
| | | _ガーゴイル_______ | ルクトゲル
| | | | Gargoyle | Luctogel
| ミノタウロス__ | ハンババ__ | ゴーゴン__ | D・ゴーゴン__ | |_スケルトン__ | トルケルス___ | |
| Minotaur | Humbaba | Gorgon | Dispell Gorgon | | Skeleton | Torkels | |
| | | |_G.スネーク_______ | スネクレット
| | | G. Snake | Sneklet
| |
| | | _ゴブリン_________ | トアーブリン
| | | | Goblin | Torblin
| |_ハーピィ____ | ルトアープ___ | |
| Harpy | Rootarp | |
| |_A・スフィンクス__ | エストルップ
| A-Sphinx | Estroop
| |
As with the spells, other than the final three bosses (Woman, Virus, and Human), their names appear to be made up words, so I am not giving the Romaji for them. All bosses only have one special ability, other than the final boss, which has no special ability. There isn't any real strategy to defeating any of them besides the final boss, which will be mentioned in the walkthrough (it's an extremely simple strategy). At most, you'll have to create some curative potions before the battle. The monsters' Special Attack Abilities should be enough to defeat the bosses in the game's 1st Half, while having created Arc Swords and/or Silver Swords should make quick work of all the bosses, except the final boss.
| Name | Location | Can Inflict |
|---|---|---|
| グベストス | Southwest Alien Base | Poison |
| ドムルスクス | Alien Base north of Fang Gate | Sleep |
| トゥムーラ | Southeast Alien Base | Paralyze |
| ナズマイム | Alien Base on isthmus | Stone |
| ネルアージ | Skull Gate in mountains | Poison |
| ラグレン | Spaceship | Stone |
| モストラソ | Tower of No Return, 3rd Floor | Stone |
| ヴィガス | Tower of No Return, 7th Floor | Paralyze |
| キューボック | South of Tower of No Return on Surface | Sleep |
| ラムジフ | Slate Factory | Sleep |
| ウーマン | Fantasy Land Castle, 3rd Floor | Stone |
| ウィルス | Control Tower, 4th Floor | Poison |
| ヒューマン | Control Tower, 17th Floor | N/A |
The Game Over screen is worth seeing at least once.
There are no shops that sell anything. Therefore, except for the Azoth Sword, all weapons, armor, and items will need to be created by the parties.
There are no items to find, other than the Azoth Sword and Material Transfer Device.
You only have one chance to read the contents of the 108 slates scattered across the land. After viewing a slate, examining it again will always only show the slate's number.
Examining some of the slates after reading its message will damage the party.
You can move much faster by holding the RUN button. Moving while holding RUN will also cause time to advance at around half speed.
You will not be attacked by standing in place and not pressing the I button. The random natural disasters will not occur. You will also not take damage from water or the area in the spaceship that inflicts damage while walking.
Holding the I button while stationary will cause time to move much faster, but you can be attacked while doing so. The random natural disasters can occur. You will also take damage from water and the area in the spaceship that inflicts damage while walking.
When indoors, time flows at the same rate as on Salvan's Crushing Day.
The calendar appears to match the Gregorian Calendar, i.e. 31 days in Jan., 28 in Feb., etc.
Entering the Demon World will cause 24 hours to pass, but only for the daytime and night parties. The Salvan Day party can visit it repeatedly and time will not pass. If you want to use the Salvan Day party to give them battle experience and need several days to pass to do so, the quickest way is to repeatedly enter the Demon World until the last day of the month and then advance time normally or by holding the I Button until midnight, since if it's 23:00 on the last day of the month and you enter the Demon World, it will still advance time 24 hrs and be 23:00 on Salvan's Crushing Day.
Natural disasters will occur randomly when you are exploring the outdoors. There is no way to predict them and no way to avoid them. They will reduce all members of the active party to the number of HP equal to the monsters' Bad Luck level. Holding down the II Button will skip the cutscene.
Each party's inventory and store of Jin are theirs alone and cannot be transferred between parties. Shared items, however, are shared across all three parties.
Fully leveled Attack Assist Magic spells appear to work 100% of the time, unless the enemy is immune to it, e.g. a robotic enemy being immune to poison.
When your monsters reach a certain level, enemies will stop using their status effect abilities, even bosses.
After a while, the enemies will begin to increase their attack power. This avoids a stalemate situation where your party is completely incapacitated and the enemies can't damage them, which would cause a never-ending battle.
When your party begins to merge, after about 4 rounds of battle, the enemy will cast an Earthquake spell that does 184 points of damage to all members of your party, unless all the enemies are unable to act, are silenced, or have their magic sealed (robotic and mechanical enemies, as well as all bosses, are immune to the Silence spell). This damage cannot be reduced. All enemies can cast the spell.
It seems that when any party member has a parameter that has reached Level 17, an enemy will cast the Earthquake spell if it is paralyzed.
Inventory limits are 3 weapons, 5 pieces of armor, and 8 items. This includes equipped weapons and armor. Since there are no shops, unless you can transfer items to another monster, the only way to free up inventory space is to discard unwanted items.
If a monster can't equip an item, it can't carry it. This also prevents an item from being created if the monster chosen to carry the item can't equip it.
I found having everyone defend for the first round of every battle to be an effective way to raise their Defense Power enough to where, rather quickly, they were suffering 0 damage, even against bosses.
If you're leveling up everyone's Defense Power, you shouldn't need to worry about creating anything but the most powerful (meaning most expensive) equipment.
The cheapest status effect curing potions have a high rate of failure. Even at 3x the price for the more expensive single ally curing potion, it's worth it to be guaranteed to work.
Because of the level cap, if you focus too heavily on magic or special attack abilities, you run the risk of not learning or fully leveling up all the spells or special attack abilities of the monsters your party merges with.
For fast and easy grinding, when you are able to survive the underground's eastern continent, go to the Skull Gate and continuously get into battles. While on the gate, press the I button to initiate a battle.
The Fireball (マイキ/フォスマイキ) and Ice Storm (ビブ/ビブレア) spells become extremely useful during the 2nd half of the game.
A fully leveled ピド will always succeed at escaping random battles. It does not take effect until the end of the round. All experience from other actions performed prior to escaping are still gained, but you will not receive any Jin, even if you defeat all the enemies. This is the best way to increase the Bad Luck parameter.
One of the first things you will notice when you start the game is a ring of small rectangles around where you start. Walking into them will bring up an image of a large stone tablet with words chiseled into it. Just about everywhere I've looked calls these Lithographs, with the lone outlier calling them Stone Tablets. From my understanding of what a lithograph is, this seems to be an inaccurate description. After the first time you examine one, examining it again will indicate which one it is, such as せきばん98. Two possible kanji for せきばん are 石板 and 石版. All three online translation tools I used translate the first kanji to "Slate" and the second to "Lithograph". There is only one stone tablet that includes the word, and it uses 石板. I also found several screenshots from other versions of the game, and all of them use the same 石板. Even though the images from the PC88 version that I could find with the word use 石板, all instances of the word on the site I used that transcribed all the text used 石版. Without having access to the entire game, there's no way for me to know if this was merely a mistake in the transcription. Since every image I've seen of text from other versions uses 石板, as well as simply looking at the images of the item, I've decided to use the term "Slate".
Part 1: The Underground
Map with important locations only
Map with all slate locations
The first three tasks can be done in any order.
[W101] 108 Slates
You start the game at the entrance to the Demon World, which the slates call the Fang Gate, with 10 slates surrounding you. Entering the Demon World will fully restore the HP and MP, as well as curing all status effects. You must be walking in order to enter it. Pressing the I Button while standing at the entrance will also cause you to enter. If the day or night parties are active, 24 hours will pass by entering. There are 108 of these slates scattered across the land, but you are only required to view the 12 red slates. After viewing what's written on one, examining it again will only ever give you the slate's number. The red slates are numbered 1 through 12. Other than a hint about how to raise the Bad Luck parameter, the Black Armor recovering HP, a mention of the burning Basque Tree having a legendary sword, and the importance of the spells ビブ (Ice Storm) and マイキ (Fireball), the only truly important pieces of information on the 108 slates are that you need to view the 12 red stones, get a phantom key that's found in a ship that descended from the sky, and the 12 slates that tell where each monster's event you will need to visit in Part 2 is located. There is no need to immediately visit all of them. There are no slates on the icy island at the northwest corner of the map, in case you think you just aren't seeing them. If you're inclined to immediately visit all 108, be aware that the enemies on and around the southeast island will probably be too tough for your monsters.
There are 3 alien bases on the landmass you start on and a 4th on the isthmus connecting the two large landmass. Walking into them (they can be flown over) will automatically start a battle against a boss. As mentioned in the Boss List, they all have one special ability in addition to a physical attack.
| Base Location | Boss | Can Inflict | Item Received |
|---|---|---|---|
| SW corner | グベストス | Poison | ID Card Part A |
| North of Fang Gate | ドムルスクス | Sleep | ID Card Part B |
| SE corner | トゥムーラ | Paralyze | ID Card Part C |
| Isthmus | ナズマイム | Stone | ID Card Part D |
They do not have to be defeated in order. When you get the 4th ID Card Part, they will be combined into the ID Card. The bosses can be repeatedly fought.
This dungeon is optional, but it will be the best source of Jin at the beginning of the game. On the icy island in the northwest is the Cold Sleep Room. The monsters in here might be a bit too tough if you haven't been increasing your monsters' Defense Power. Don't be too concerned if anyone gets inflicted with the Mad status effect, as it shouldn't cause you any real trouble. All text in here is in English, with directions to the Cold Sleep Room written on the walls. There are three rooms to visit.
Go up the very long corridor with "WELL COME TO CS ROOM" on the floor, then go through the north doorway in the area west of the corridor. A little to the east is the door to the Message Room. Inside, step on the black stripe (it's a little hard to see) just in front of what looks like a poster on the north wall to view a message, which tells you to not lose interest in your path, as the thirst for knowledge has built eras.
Go back to the area right after the long corridor and you will see directions to the Cold Sleep Room on the wall. Follow these directions to the room -- the gray stripe on the floor will also lead you most of the way there. When you get to a horizontal hall with a gray stripe on the floor and 3 doors, take the west door. When you exit this room, you'll see "CS ROOM" written on the floor to the west. In the Cold Sleep Room, examine the flashing item that looks like a medical chart to view a scene. The night party must be active to view the entire scene, since it requires Gargoyle's ability to read indecipherable text. The mummified human is holding a diary to his chest. Gargoyle reads the final entry, which states that the Cold Sleep Room will allow the humans to sleep until the Earth is revived.
Leave the Cold Sleep Room and head east along the hall where you will see directions to the stairs (UP STAIR) on the wall. In the first large room, ignore the two doorways and take the northwest path. Ignore the next doorway and take the northeast path. Continue directly north through the door -- going east will just circle you back here. The east opening in this corridor will lead you to the stairs to a section of the 2nd floor with nothing in it, so take the west opening and then the stairs up (you should see arrows and "CD ROOM" on the wall to the east of the stairs). Head through the door south of the stairs and continue all the way south and enter the southern room. You will see three dots on the floor in front of the northernmost wall (you might have seen them if you walked up against the southern wall when you exited the north room). Stepping on any of the dots will start the scene. This requires Goblin's high curiosity, so the night party must be active to view the entire scene. Goblin finds a disc titled "History of Ruin". Unfortunately, the disc player is broken, so Goblin takes it. You now have the CD Disc shared item. There is nothing else in this dungeon, so leave.
The northern half of the large eastern landmass has a ring of red mountains that you can't fly over. Southeast of the isthmus connecting it to the western landmass is a gate that looks like a skull. Entering the skull gate in the mountains will automatically begin a boss battle against ネルアージ, which can inflict Poison.
Defeating it allows you into the interior of the ring of mountains. The boss gets replaced by random enemies for every subsequent time you try to cross (this is probably the best spot if you need to grind, as you can immediately initiate a battle by pressing the I Button). There are a handful of gray slates in this area. Before entering the spaceship in the northeast corner, find some jagged white rocks due east of the skull gate and follow them east to a dark spot in the mountains. Walk, don't fly, into the dark spot to find the burning Basque Tree. Stuck in the tree is the Azoth Sword (see the note in the Weapons section), which will be pulled out automatically by either Goblin or Orc. The Salvan's Crushing Day party will not be able to pull the sword from the tree, although Golem will try. Getting the Azoth Sword is optional, but extremely useful, as you'll discover the first time Goblin or Orc melee attacks.
Since you have the completed ID Card, you can enter the spaceship. The first intersection after heading north immediately after entering gives you an option of a short or long path to your destination. The short path is east and will send you across a very large room that will inflict a massive amount of damage by walking across it, as it deals about 5 points of damage per step (you can walk along the south and east edge of the room without taking damage, but you'll still take a lot of damage making it to the southern wall). Unless you want to spend a lot of Jin making HEALUPs, head all the way north. After the short zigzag path, you will begin seeing small bobbing balls in the path. These do nothing, so don't worry about them. A little before reaching the first bobbing ball, you will see a hole in the south wall. Walk through this and head east. You will start seeing groups of balls as you progress along the correct path, first a group of 2, then of 3, then of 4, and finally of 5. South of the group of 5, you'll be in a small area that looks like a building. In the only room in here, there is a circular structure on the floor that does nothing if you step on it. This is actually the destination of a teleporter much further in. You can ignore all the teleporters until the end of your journey through the spaceship. Go through the building and continue southeast until you arrive at the door into another building-like area.
Go through the door just before the room with 14 teleporters to find a working CD Player for the CD Disc. The night party is required to use the CD Player. Gargoyle pops the disc into the player and a female voice pleads for the viewer of the disc's contents not to repeat humanity's mistakes. The entire history of the world has been preserved in the Tower of No Return and the Garma Key is required to enter the tower.
After viewing the contents of the CD, continue through the building-like area until you arrive in a room with a book sitting on a table. This is the Book of Garma. Examining the book, you will be told that the Garma Key has existed throughout history, changing its appearance to one that symbolizes the era. It then says to take something worthy of being the symbolic key of the time and hold it over the book. That item will then be transformed into the Garma Key. The party then speaks of a legendary era when their ancestors coexisted with humans. After arguing amongst themselves about whether they should believe that the Garma Key is created by thought, the party puts the ID Card on the book and it does indeed transform into the Garma Key. Before heading off to the tower, there's one last optional thing to do in here.
Go through the door right next to the Book of Garma and follow the west path until you arrive at a small room with red floor tiles in front of a screen on the wall. As soon as you enter the room you will find yourself in a boss battle against ラグレン, which can inflict Stone.
After defeating it, step on the red tile to receive a message from an alien. The alien congratulates you for making this far. Of course, they could easily kill you here, but they want you to go to the tower to die. Go through the door next to the screen and there will be a teleporter in the small room. Stepping on it sends you back to the first one you came across, if you took the long path, cutting out quite a bit of travel. There's nothing else to do in here, so leave.
If you haven't viewed all 12 red slates, you will need to find the remaining ones in order to enter the Tower of No Return. With all 12 red slates viewed and the Garma Key in hand, you can now enter the tower on the southeast island. Once inside, you can only exit by casting ピンウッド or using the ability Return to the Demon World. You can also exit with the Material Transfer Device found after making it through this tower, but there's no reason to return here when you acquire it. Each floor represents an era in Earth's history. On each of the 7 floors, there is an exhibit you can view and an orb, which is actually a crystal ball, that will transform the key you're carrying into the one needed to advance to the next floor. You do not need to view the exhibits. The dialog for the crystal balls are all almost identical, requesting you present the key you imagined and then transforming it into the key required to go to the next floor. Opening the door to the next floor plays a cutscene. As stated in the Odds and Ends and Tips section, there are no items to find, so don't worry about fully exploring each floor.
1st Floor - Dinosaurs Map
For the first 3 floors, the exhibit looks like a mural. Also on the first 3 floors is one tan enemy that is virtually immune to physical attacks. It is extremely vulnerable to the Fireball spells, マイキ and フォスマイキ, but not the Fireball special attack ability, and it will be defeated by a single casting of either Fireball spell at any power level.
At the first intersection you come to, head west. After the path turns south and then west, take the door on the north wall, and then the door just to the west. Heading north through the room will put you directly south of this floor's exhibit. The exhibit says the era was one of survival of the fittest and the first rulers of the planet, the dinosaurs, were born. The dinosaurs were wiped out by an Ice Age.
Go back through the same two doors and head west and then north. Take the southern of the two extremely long paths east, passing by many windows, and when it wraps north and back west, go south when you run into the wall. Take the first narrow path north and you will be in a room with two large statues on the north wall and a crystal ball in the center of the room. Examining the crystal ball, a humanoid figure will appear in the crystal ball and transform the Garma Key into the Breath Key.
Back outside the room, continue west at the intersection and take either of the two western doors. Go west, then north in this room and take the door there. Head all the way to the east end of the long corridor, ignoring the first 9 doors you'll pass, and take the easternmost door. Take the eastern door in here and it's a direct path to the door to the 2nd floor. When you open the door, between the two statues that are identical to the ones in the room with the crystal ball, with the Breath Key, the narration says the true history of the dinosaurs was discovered in 2053AD, which shocked mankind. It then goes on to talk about how whoever it's speaking for grew tired of living a repetitive life, wanting to destroy those who were stronger than them. But, a child was born, and destroying the strong became impossible until the heavens heard their plea. They then learned of the ultimate idea of living and of emptiness and began to walk the path of ruin. Walking into the room will send you to the next floor. On all floors of the tower, the spot you'll need to walk onto is a few steps into the room, directly north of the door.
2nd Floor - Noah Map
As soon as you emerge from the starting point, the exhibit will be on the wall a little to the west. The exhibit says humanity depended on the existence of God and that this era was long after the birth of humanity, and that there was a fool named Noah.
After viewing the exhibit, go back east and follow the hall south and east. Take the first door and when you finally arrive in a room with two doors, take the east door. Two rooms up is where you will find the crystal ball, which transforms the Breath Key into the Gold Key.
Go back to the exhibit and follow the path until it ends in a corridor with four doors. You could take any of the four doors or the one immediately east of the exhibit, but what is described is the easiest for giving directions. If you take any of the other doors, look for bronze colored orbs in the wall to point you in the right direction. If you take the westernmost door, simply head north through the open areas and rooms, arriving in a larger room that has an opening on its east wall. This leads you to the door to the next floor. Opening the door, Noah is the narrator. He tells about how God said the flood would come and Noah would be saved by building a boat. Noah is extremely selfish and only wants to save himself, so he doesn't tell anyone about what he's doing. His family finds out and he's forced to allow them on, as well as taking on animals for food. The flood came as God foretold and they were saved. It ends by saying that humans learned selfishness during this era.
3rd Floor - Napoleon Bonaparte Map
This floor's layout is almost the exact same as that of the 1st Floor. At the first intersection, head east. Go through the only door, and it's a straight shot north through a couple more doors to the crystal ball. The crystal ball transforms the Gold Key into the Cell Key.
Head back through the same three doors and take the path all the way west, ignoring the door that leads to where the exhibit on the 1st floor would be. The path will turn north for a very long straightaway with the same two paths with windows heading east across the entire floor. This time, take the northern path. When it circles back north, west, and south, go west and take the second narrow path north to enter a large room where you will find the exhibit. The exhibit says Napoleon was too strong, and wanted to reform the era through his repeated looting and campaigns.
Leave the room and continue all the way west and then north to the same long corridor with 10 doors. Take either of the 2 westernmost doors. As you move along this path, you'll go through two more doors north, then one south, and another north. When you emerge into the next room, which has the door to the 4th floor, you will fight the boss モストラソ, which can inflict Stone. You can actually avoid this battle by walking around it, as the boss is actually on the center tile.
The boss is in a patch where you will enter a random encounter every time you start to move. If you always move east after a battle, after two or three of them, you will clear the patch. Opening the door, the narration is of an entry from Marie Antoinette's diary. The diary entry is about how Napoleon wears tall shoes and a grandiose hat to hide his shortness, and that he's the embodiment of a complex that hates those taller than him, which is the reason behind his many invasions. After the entry, the normal narrator says humanity learned shame in this era.
4th Floor - Adolf Hitler Map
For the top 4 floors, the exhibit is a very noticeable lighter colored section of the wall. Similar to the first 3 floors, there is a red enemy that's virtually invulnerable to physical attacks, but this one is vulnerable to the Ice Storm spells, ビブ and ビブレア, with a single casting of either at any power level defeating it with a single casting.
Start by going west and take the door after the path wraps north and back east. Take the west door, then the east door and this will lead you to the crystal ball. The crystal ball transforms the Cell Key into the Boss Key.
Go back to the starting point and take the east path and go through the door after the path wraps north and back west. Then take the east doors in the next two rooms and you will be in a large room with the exhibit. The exhibit says in this era, humanity has embraced chemistry, which provides a shortcut to extinction, and that the single-minded genius, Adolf Hitler, lived during this time.
Go back three rooms and take the west door in this very wide room, then take the east door. After the room shaped like a backward C, head all the way west and wrap north and back east. Through the door is a very large room. Opening the next door, Heinrich Himmler is the narrator for this scene. He says Hitler was a great man and he was aware of what Hitler was trying to do. However, being in a hurry, defying nature with the destruction he had planned to carry out was too difficult. Himmler finishes with saying it was unavoidable that they would become the era's symbol of evil, but he had no regrets being Hitler's right-hand man. The tower's standard narrator then says that humanity was now able to accept the possibility of its destruction, and it's no wonder that Hitler recognized the formula for that destruction, and finally that humanity learned despair in this era.
5th Floor Map
Take the east path and it will zigzag north and then circle back south. When you emerge from the narrow path at an intersection, take a few steps south, then east, then take the 2nd path south. Go west until you run into the wall, turning north and then west as soon as you can. Go south until you hit the wall, turn west and go through the door you should come to. Follow this path and take the first narrow path north to find a room with the exhibit. The exhibit says a prophet wrote about mankind's destruction, the era was peaceful and everything was enjoyed as leisure, and humanity had become the embodiment of self-revealing desire.
There are two ways to get to the crystal ball, and they're about the same distance. Take the door a little east of the narrow path to the exhibit and when you hit the north wall, the door a little to the east takes you to the 6th Floor, but you can't open it without the key. Therefore, go west. When the narrow path opens up, head east along the north wall to enter another narrow path. This spirals around to a door. Beyond that door is a room with the crystal ball. The crystal ball transforms the Boss Key into the Chitam Key.
You now have the key to that door, so go back there. Opening the door, the narration says the Great Terror came in the year 1999. The Great Terror was a demon invasion. It then says everyone thought their destruction would be at the hands of a nuclear war or some pathogen. This shocks the party and one of them is incredulous, given they've been living underground. Another thinks there's something fishy about the tower, as if it was built in anticipation of them coming here. The narrator then finishes off the scene saying humans weren't destroyed, mankind wanted to die and be destroyed, humanity learned foolishness in this era, and history is about to end.
6th Floor Map
This floor consists of two nearly identical halves, each with a grid of columns and two rooms. Simply go straight north and enter the room with the crystal ball. The crystal ball transforms the Chitam Key into the Half Key.
There's no identifiable way to get to the exhibit and door to the next floor. A little to the northwest of the northwest corner of the column in the 2nd to bottom row and 2nd to left column is a square that will teleport you to the east half of the floor, depositing you in the same relative location.
The exhibit is on the outer wall of the room with the crystal ball. The exhibit says humanity never forgot the word hope and hope is all that remains. Entering the room where the exhibit is located will teleport you back to the west side. The teleport spot is actually a couple steps into the room, so if you go around the spot, you can get to the crystal ball, which will transform your key if you didn't visit the crystal ball on the other side.
Opening the door of the north room on the east side of the floor, the narration says humanity wasn't quite wiped out and prays that the next ruler won't repeat the mistakes of the past. It then goes on to say the monsters were created by humans' imagination and the gods will crush the monsters. The narration ends saying the true enemy that destroyed humanity is upstairs. The party then questions their own existence.
7th Floor Map
The south half of this floor is a maze of connected columns. Go east, and starting where the narrow path begins, for the shortest trip, take the 7th path north. It will be the first one that doesn't dead end within about a dozen steps. Regardless if you take this column or ones further east, always move west and you will eventually exit the maze. You should see the exhibit to the west as you exit the maze. The exhibit says the origin of humanity's destruction is on this floor and this is the end of the museum.
Head east and take the 2nd to last path north. Ignore the narrow path east and you will arrive at the crystal ball, which transforms the Half Key into the Mesha Key.
Go back to the main corridor and go all the way west. Head north and at the end of the path is the final door. In front of the door is the boss ヴィガス, which can inflict Paralyze. Like the 3rd Floor boss, this battle can be avoided, since it is actually in the center tile of the hallway. So, if you hug the north wall, you will not have to fight it.
Just like with the 3rd Floor boss, you'll have to fight encounters every time you start to move. Opening the door, a bright light is seen. A voice is heard from beyond the light. After congratulating you on a job well done making it here, it then says that evolution is the root of destruction. The demons weren't who destroyed humanity, but rather the devil in mankind's heart materialized and caused a war that destroyed humanity. After telling the monsters that they learned of fear, an emotion mankind had forgotten long ago, it finishes by telling the monsters to go to the real world and see the true surface of the Earth, where it hopes they won't make the same mistakes mankind did. When the monsters see a vast vista that is the actual surface, they realize that they had been in the underground and that the Tower connects the underground to the surface. A large stone monument is then seen, much like the slates you visited, and it states that Earth is in the Chilius star system, which is also mentioned in the intro movie. The monsters then wonder if the surface was already occupied by the aliens before realizing the aliens played them for fools, making them think they were on the surface.
And so ends Part 1.
Do NOT return to the Demon World via the ability or the spell イレーヌ until you acquire the Material Transfer Device. Without the Material Transfer Device, the only way back to the surface would be to go through the Tower of No Return. However, when you emerge on the surface, you cannot move and therefore would have to restart the game if you saved.
The next task you must perform is to find 12 events, one for each monster, that reveal their true forms. If you haven't used the Salvan's Day party much, you'll probably want to go to the Slate Factory before visiting any of their events, as they likely won't be able to survive without a lot of luck. There is one enemy that deals enough damage to almost kill a fully healed monster at max Health level with one hit. This enemy can be defeated with a single Fireball spell, マイキ or フォスマイキ, at any power level.
Two steps south of the Tower of No Return is the boss キューボック, which can inflict Sleep. If you take one step south and then move east or west, you can avoid this boss. This boss can be fought repeatedly.
Because you can cause the above situation of needing to restart the game, head south through the mountain pass and then a little southwest. This will lead you to a large sectional building. This is the slate factory. The note on the door in the cutscene says that no one may enter. But since the door's open, you walk right in. You'll notice "E-1" on the wall at the end of the entrance hallway. These mark the sections of the factory, which match the factory's exterior view. As you progress, the number will ascend, going from E-1 to E-8. Also along the way, you will occasionally see green lights next to paths and above doors. These indicate the correct path or door to take.
Go west at the first intersection. After it wraps north and back east, ignore the opening to the north and go through the door at the end of the hall. Take the east door and go through the room and another door. Go east and the hall will wrap north and back west. Take the west door and you should see another "E-1" on the north wall, and then "E-2" on the wall at the end of the wide corridor. Go through the easternmost of the 5 doors, and then through a few rooms. Go east and when you emerge in a large room, you'll see "E-3" on the north wall. Take the first narrow path south and then the narrow path at the southwest corner of this large room. The path will lead you to section E-4. Go southwest through this spacious area and it'll eventually turn east. Take the narrow path north and you'll see a large stone tablet in a room. Examining it, this is the machine that made the 108 slates. Either Harpy or Gargoyle (or presumably someone in the Salvan Day party) reads the paper on the opposite wall, which is a sort of bullet point list. Slates are made once a month on the first day of the month. They're made by absorbing atmospheric components from the surface and underground, which makes this the cause of the extremely hazardous Salvan's Crushing Day. The slate is then placed where someone with the highest probability of becoming the next ruler of the planet is.
Leave the room by the northeast path and you will be in section E-5. Take either path south and then the easternmost path north. Continue along the path, and when it circles back west, take either narrow path north. The wide corridor north will put you in section E-6. Take the eastern of the three narrow paths north and you will be in a small room with a table inside. If the night party is not active, examining the table will advance time so it is. Slime picks up the item on the desk. The directions on the back says that the buttons allow for an object to move back and forth between the surface and underground. Slime thinks it's useful to have, so he takes it. You now have the very useful, and likely necessary, Material Transfer Device. This is the only Shared Item that can be used. It will warp you between the underground and the surface, depositing you at either the entrance to the Demon World or the surface exit of the Tower of No Return. You can use it everywhere.
Continue north and the path will put you in section E-7. Ignore all the rooms and take the path to the south, putting you in section E-8. This section is just a simple square path around its perimeter, so go either direction. When you finally arrive at the southern end of the path and head back to the center of the section, take the only narrow path north. You will arrive at a room with an object in it. Approaching the object starts a boss fight against ラムジフ, which can inflict Sleep.
This is another boss that is in a patch of encounters. Fight through the few encounters and examine the object, which is Slate 109 in the middle of production. Time advances so the Night Party is active in order for Gargoyle to read what's written on it. It states that there's a place called Fantasy Land where the few surviving humans are living, and it is forbidden to enter unless you have the heart of a human. Walking into what looks like a pipe grate in the wall north of Slate 109 sends you out of the factory.
Head back to where you emerged from the mountain pass south of the Tower of No Return and continue northeast. You will shortly arrive at a school, where you will find three events. Each event is triggered when you step on an item on the floor. Unless you want to possibly waste a good amount of time, you'll want to save before stepping on them. When you step on the object, time will automatically extremely quickly advance until the required monster's party is active. Encounters do not occur while this happens. The three events in the school are for Cyclops, Golem, and Andro-Sphinx. Unless the Salvan Day party is already active, you might want to save the events for Golem and Andro-Sphinx for later. All events are on the ground floor, so don't bother heading upstairs.
Go through the shoeboxes (the large area you start in) and head north. At the four-way intersection, go east and at the end of the hall, you'll find the infirmary. In the infirmary, you'll find a book on the floor, which is Cyclops' event. The book is a photo album of humans turning into monsters. Cyclops' doubts about humans deepens as he flips through the book and this awakens him to the fact that humans kill each other while also wishing for peace. He then realizes that he's one of them. The scene ends with him becoming aware of kindness and love, and that humans aren't perfect.
Whether you do the next events now or return after getting the other 7 non-Salvan Day party events, at the four-way intersection, go north until the hall ends. Go west and in the lab you'll find a doll on the floor. Golem picks up the clay doll and the narration says humans defeated God and tried to make people with their own hands. Golem was created from their despair when they realized it couldn't be done. The feeling of pity arises in his consciousness, which is kindness and love.
Back at the 3-way intersection, enter the library immediately east of the intersection. In the northeast corner you'll find a photograph lying on the floor. Andro-Sphinx picks up the photo of the Great Sphinx and Pyramid. Seeing her own image, her lost past rushes back to her. In order to show off their abilities, humans must create something other than themselves. This causes her to pity mankind, which awakens kindness and love.
Leaving the school and continuing northeast, the path ends at the church. Inside are the events for Gargoyle, Giant Snake, Skeleton, and Harpy. Go straight north until you reach the altar. Go through the east doorway and after the path turns east, take the first door south. This leads to a room with an item on the floor. The item turns out to be a broken statue that looks exactly like Gargoyle. He wonders why humans made a statue of him. After all, weren't they hated by humans? It turns out that they were once deemed important by humans, but at some point the humans' values changed, which caused the humans to view them as demons. Kindness and love are then awakened in Gargoyle's consciousness.
Back at the intersection, continue east all the way until the hall ends and go through the door to the north and then through the next small room. You'll see a mural on the north wall. Giant Snake unconsciously stares at it, which the narration says depicts a snake-shaped god being attacked by another god, while people are prostrating themselves on the ground and praying to the snake. Part of what must have been a much larger mural has been destroyed. The reason the narration doesn't match the image is because they didn't alter the PC88 version's script, which matches the image in that version. Giant Snake's consciousness then sees the past when humans were holier, and his consciousness gradually becomes controlled by some power. After being in contact with the will of many humans, he's guided back to the present by that power, wondering if everything was created by humans. Kindness and love have been born in Giant Snake.
Back at the hall, heading back west, take the second door to the north. At the end of the corridor is a large room with the church's bell on the north wall. Examining it, it suddenly starts to ring. The ringing of the bell sends a shock to Skeleton's consciousness along with a light, which Skeleton marvels at. The regret of a human who died without his dreams coming true gave birth to Skeleton. Skeleton then feels that regret, which is kindness and love.
Finally, go back to the altar and then go through the doorway to west. A small room has a statue of a woman holding a child. Examining it, Harpy sees the statue move. While it's in the middle of rubble, the statue itself is unscathed, as if by some miracle. The statue of a mother and child causes Harpy's consciousness to be filled by a light that had been suppressed by her demonic nature. Kindness and love then return to her consciousness.
Go back to the Slate Factory and continue east to a large open area with a ruined city. You will find the police station in the northernmost part, easily identifiable by the word POLICE in English on its roof. If you want to leave the Salvan Day Party for last, skip this and come back later. Inside, the outer path circles around the floor. The east path is shorter. Go whichever way you want, ignoring all the doors, and take the stairs. On the 2nd floor, go west, then south, and then west at the intersection. At the end of the hall, take the north door and then the door directly north. In the southeast corner of this room you will find a piece of paper on the floor. Dragonewt picks it up, and it appears to be part of some official documents. Written on the document is something about the author having repaid his sins by doing his best for those left behind. The word "sin" really disturbs Dragonewt's consciousness, giving him a terrible feeling. Guilt is then resurrected in his consciousness. The narration then says that Dragon was originally a human and he was the embodiment of selfishness, thinking only of himself. As a result of his selfish acts, which almost brought about the extinction of humanity, he became detested by all of mankind and was turned into a demon called Dragon. He became ashamed of his sins and turned into the Basque Tree. To atone for his sins, he created the Azoth Sword. Because the Azoth Sword awakens his guilt, Dragon fears it -- this could be why the Salvan Day party can't use the sword and can't pull the sword from the tree. The revival of this guilt, and the heart that tried to atone for its sins, gives birth to kindness and love. Left out of this version, the PC88 version ends by stating the Azoth Sword became known as the Dragon Slayer.
Leave the police station and take the northeast mountain pass to arrive in the eastern open area. In the southern part of this area is the hospital, a very large building identified by a red cross on its roof. There is one event on each floor, starting with the 2nd floor.
Since there's nothing on the 1st floor, simply hug the left wall until you arrive at the stairs. On the 2nd floor, go east, south, and then take the hall east all the way to the end and enter the last patient room on the north side of the hall. Inside, you will find a book on the floor. Slime starts flipping through the book and stops at a pair of pages that show a scene from human history of their polluting the environment. A light goes off in his consciousness as he realizes that he is that waste. He finds it foolish that in exchange for advancement, humans created something that is harmful to them. Kindness and love are then awakened in his consciousness.
Go back to the stairs and head up to the 3rd floor. Go west and then south until it ends. Inside the only room here, you'll find another book on the floor. Goblin picks it up, which is a book of fairy tales, and turns to a page with an image and story about a red demon. The story is a mirror image of Goblin, which causes him to sympathize with humans, and this awakens kindness and love in his consciousness.
Go back to the stairs and head up to the 4th floor. Go east and follow the hall as it turns south. It'll bend west then south again at some vending machines. Go west and enter the first room on the north side of the hall, where you'll find a photograph on the floor, which Orc notices. It seems to have just now blown in here on the wind and is in pristine condition. The photo is of a human family, which Orc gets enraged about, throwing the photo away in disgust. A light then appears in his consciousness and he becomes terrified. This sensation dissipates, and kindness and love are awakened in him.
Go back to the stairs and head up to the 5th floor. Take the western of the two doors directly south of the stairs. Take the first hall east and in the only room here, you will see something like a canister on the floor. What Minotaur sees inside causes him to regain his lost memories of himself. The deformity he sees was caused by drugs humans were using. He pities the act, and kindness and love arise in his consciousness.
Take the mountain pass east of the hospital to enter the winding path. Head for the round piece of land in the southwestern part of the map and you will find Fantasy Land set into the mountains. If you've viewed all 12 events, the emotion sensor will acknowledge the party and you can enter. This town acts like a dungeon, so the spell ピンウッド will warp you out. The enemies in here are immune to all Attack Assist Magic except Seal Magic メロ(リメロ) and Halve Defense キュラ(ダキュラ). The enemies also don't drop Jin when defeated. Once inside, you will see three shops. Entering any of them will advance time so the Day Party is active. The narration for the first time, and any subsequent time, you enter any of them is the same, so don't worry about which shop to enter. Your party will ask how they survived when humanity was supposedly wiped out, but the shopkeepers will only repeatedly ask how they can help you. After that, the shopkeepers just ask how they can help you. None of them will sell you anything. When you enter the northern half of town, time will also advance to when the Day Party is active. You will be stopped by a party of human warriors and they will demand you return the princess and tell them where the Demon King's castle is. Unable to convince them that you aren't their enemy, they will attack. The battle is against a random selection of 8 of the human enemies you've been fighting in here. Since this is a scripted battle, you can't escape from it. Upon defeating them, the party mentions that this world is just like the legendary era when they coexisted with humanity and they realize that this isn't a town of humans. Head to the western part of town where you should see a building with a bed icon above the door. Enter for another cutscene. After the receptionist asks how she can be of assistance, the party opens the door to the back room. A robot in the back room will speak of a command from the king. The party then decides to visit the king in the castle, even though he's also likely a robot, figuring they might discover something there.
The final stop in Fantasy Land is the castle, which is at the north end of an unmarked path between two rows of trees. You must approach the castle gate on foot. As you ascend the steps to the castle gate, the party will mention how, during the legendary era, humans would repeatedly attack the demons and quip how it's funny that the roles are now reversed. On the 1st floor, simply head due north to the stairs. On the 2nd floor, head either direction as it goes around the perimeter of the floor and when you reach the middle of the south corridor, go north through the opening and straight north to the king. The king will ask the party to rescue his daughter from the Demon King. Toying with him by saying they're actually messengers of the Demon King, the king continues unphased and begins to speak of a 100 gold reward before being abruptly cut off. The party then thinks something in the castle must be controlling all the robots.
Take the stairs behind the king. As you enter the room on this floor, the boss ウーマン (Woman), which can inflict Stone, will attack. Defeat Woman and examine the object on the north wall of the room, which is the Main Computer. After telling the party to return to their designated posts, the party asks if she created this place. She then realizes that they're not part of some program. She's flustered that they have the emotions that humans lost long ago and asks if they're from the past. She confirms that she runs this city and the humans left behind a dream when they perished. It's her mission to see that this dream comes true and this world is the realization of that dream. After asking her if humanity's dream was really to live a repetitive life of doing the same routine tasks day after day, she says she doesn't know and is only going off of data from the past, having concluded that that's humanity's dream. Cutting her off, either Giant Snake or Slime (or presumably someone in the Salvan Day party) slashes at the computer causing an electrical storm to engulf the computer. She then says humanity came to entrust everything to computers. Humans came to the realization that they could do nothing more and, thus, determined their evolution had peaked, at which point they wished for their own destruction. They then hid underground, leaving behind their last words. They wanted her to protect this town until someone with their lost emotions arrived, which she did from the Command Tower. The party fits the bill, which signals the end of her mission, as they are humanity. The computer then shuts down, printing out a piece of paper telling them to report to the Command Tower and deeming them the rulers of the next era. It concludes by giving the number 85419 on the piece of paper. You can now enter the tower at the end of the winding path to the east.
Leave Fantasy Land and continue southeast. At the north end of the winding path that runs along the eastern edge of the land, you will arrive at the Control Tower. After typing in the number from the piece of paper the Main Computer printed out, the party will say whoever is behind everything is inside. Like the Tower of No Return, you can't exit, except by using the same means. If you exit by way of the spell ピンウッド, you will be sent to the Tower of No Return's surface exit, rather than just outside of the tower. The first 4 floors are pretty extensive mazes.
1st Floor Map
Take the east path and go north at the intersection. Go west when you hit the north wall. When this path ends, go east, ignore the two paths north, and go south at the next intersection. You should arrive in a small room with a door between a couple statues. Go through the door, then east and take this path until it ends. Go north a few steps and then east at the intersection. Take the first path north and then north again at the first intersection. Go west and follow this path until you arrive in another small room with a door. Go through the door, then west and then north at the first intersection. This path will lead you to another room. Go through the door and then walk into the black orb in the wall at the end of this path to get sent to the 2nd Floor.
2nd Floor Map
Exit the starting room and go either direction and through the first door you come to. Both will open into a wide hall leading north. Go west at the 4-way intersection (the first intersection you come to), then east at the next intersection. Go north and then south at the first intersection. You'll arrive at three paths leading south. Take the center path and you will arrive in a room with a door. Walking onto the black orb beyond the door will send you to the northeast section of the floor. Directly north is the black orb to the 3rd Floor.
3rd Floor. Map
Exit the starting room and go through the southwest door in this hall that encircles the starting room. Go through the next door directly south and then take the eastern of the two paths going south. When this path ends, go south a few steps, then west. At the 4-way intersection, go south. Through the door is a large room with the black orb to the 4th Floor.
4th Floor Map
If you fall off the narrow path, regardless of where you fall, you will land at the starting point of the 3rd Floor. A couple steps north of where you start, you will fight the boss ウィルス (Virus), which can inflict Poison.
If you fall off the path, you will have to fight Virus again when you come back (it will respawn if you go south through its location, so you don't need to fall to fight it again). You can go either way at the intersection, as this part is just a mirror image. If you go west, at the first intersection, go west again. Take this path north through the castle walled section and when it ends, go east (if you took the east path, go east at the first intersection, then west at the second intersection). At the first intersection, go north through another castle section and at the 4-way intersection, go east. Go north at the next 4-way intersection, and the black orb is on the platform.
5th through 14th Floors Map
I don't know if this is supposed to be a single floor, or if each section is its own floor. You will need to walk into the correct letter on the wall (except for the floor with the "I", which has an orb to walk onto) to advance to the next floor. If you pick the wrong one, or fall off the path on the lone floor/section where you can, you will be sent back to the starting point. The correct sequence of letters is BRAINGRE and then what looks like a pillar of fire. Most of the floors have no choice or a few. The N is in the 7th room (3rd from the end) and the pillar of fire is in in the 7th room to the right of the starting room (the hallway wraps around). If you failed and get sent back, all the doors that you opened will remain open, unless you've reloaded. After another straightforward floor, you will be on the 15th floor.
15th Floor Map
This is a maze of rooms. Take the easternmost door. Go 5 rooms north, then the east door. Go 3 rooms north, then all the way west and through the south door. Go all the way east and through the south door. In the 3rd room south, go all the way west. Through the north door is the black orb to the 16th Floor.
16th Floor Map
All four directions have the same layout with three of them having a room that will send you back to the starting point of this floor. Take the west path and it should be simple enough to find the orb.
17th Floor, Final Boss and Ending Map
The final boss, ヒューマン (Human), is waiting a few steps in front of the door. Human has no special abilities and can only physically attack. One casting of ビブ or ビブレア (Ice Storm) spell will defeat Human. If you've been leveling up your magic, Giant Snake, or a monster merged with Giant Snake, should have learned Ice Storm. As a result, this battle can take about 5 seconds from start to finish.
Go through the door and into the black space and the final movie will play. As you enter, everything turns to nothingness. The Shaman's Jar (where the monsters stay while not active) falls to the ground and shatters, releasing the other two parties to join. Something causes everyone to get an intense burning sensation and collapse. After some time, everyone awakens and has transformed into humans. Earth appears below them, which they feel an intense nostalgia for. A voice is then heard out of nowhere, and it's the voice of the final boss. This appears to be the same alien from the opening movie and the message in the spaceship. Now that the monsters have regained their human emotions and bodies, he explains how their monster forms were the shells of their minds. When humanity learned of its impending destruction, they came up with a project to restore the emotions they'd forgotten long ago. This involved separating their minds from their bodies and then having the two fight against each other. If the body could remember those lost emotions during battle, the body and mind would be reunited and a new humanity would be born. The monsters were the body, while the aliens were the mind. Mankind named the spirit of understanding everything and the carrying out of the project "God", while the devil is what they called the body that became a mass of hatred. Being like a simulation, there is no actual demon world or underground world, and all that the monsters went through happened in a mental image. Asking him what will happen to them when they become one again, he tells them that all of their memories will be forgotten because the past is an obstacle to opening a new world. If they go astray again, God and the devil could be created from mankind's subconscious and they will become mankind's tentative forms. The monsters indicate that they're ready and bid farewell to the past. An image of a lush, green landscape is shown, and then they awaken to the warm sunlight in an endless meadow. After commenting on the lovely weather and how there are a lot of things that need to be done, they name the land Earth. And so, the history of Earth begins. The end credits then roll.
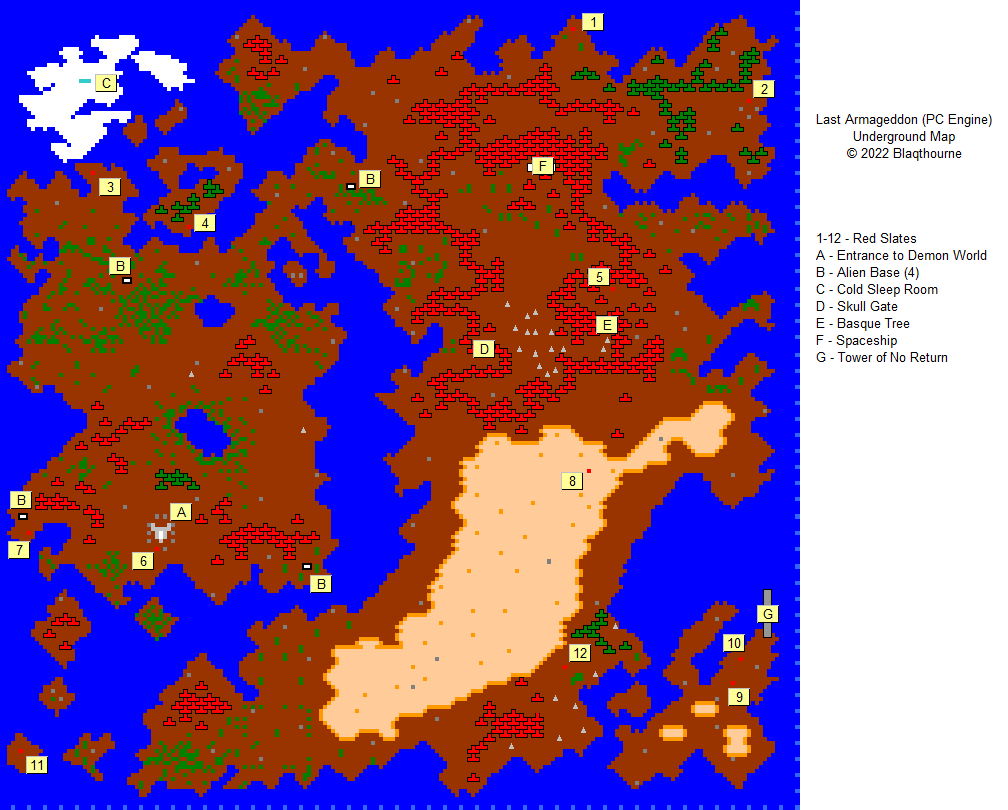
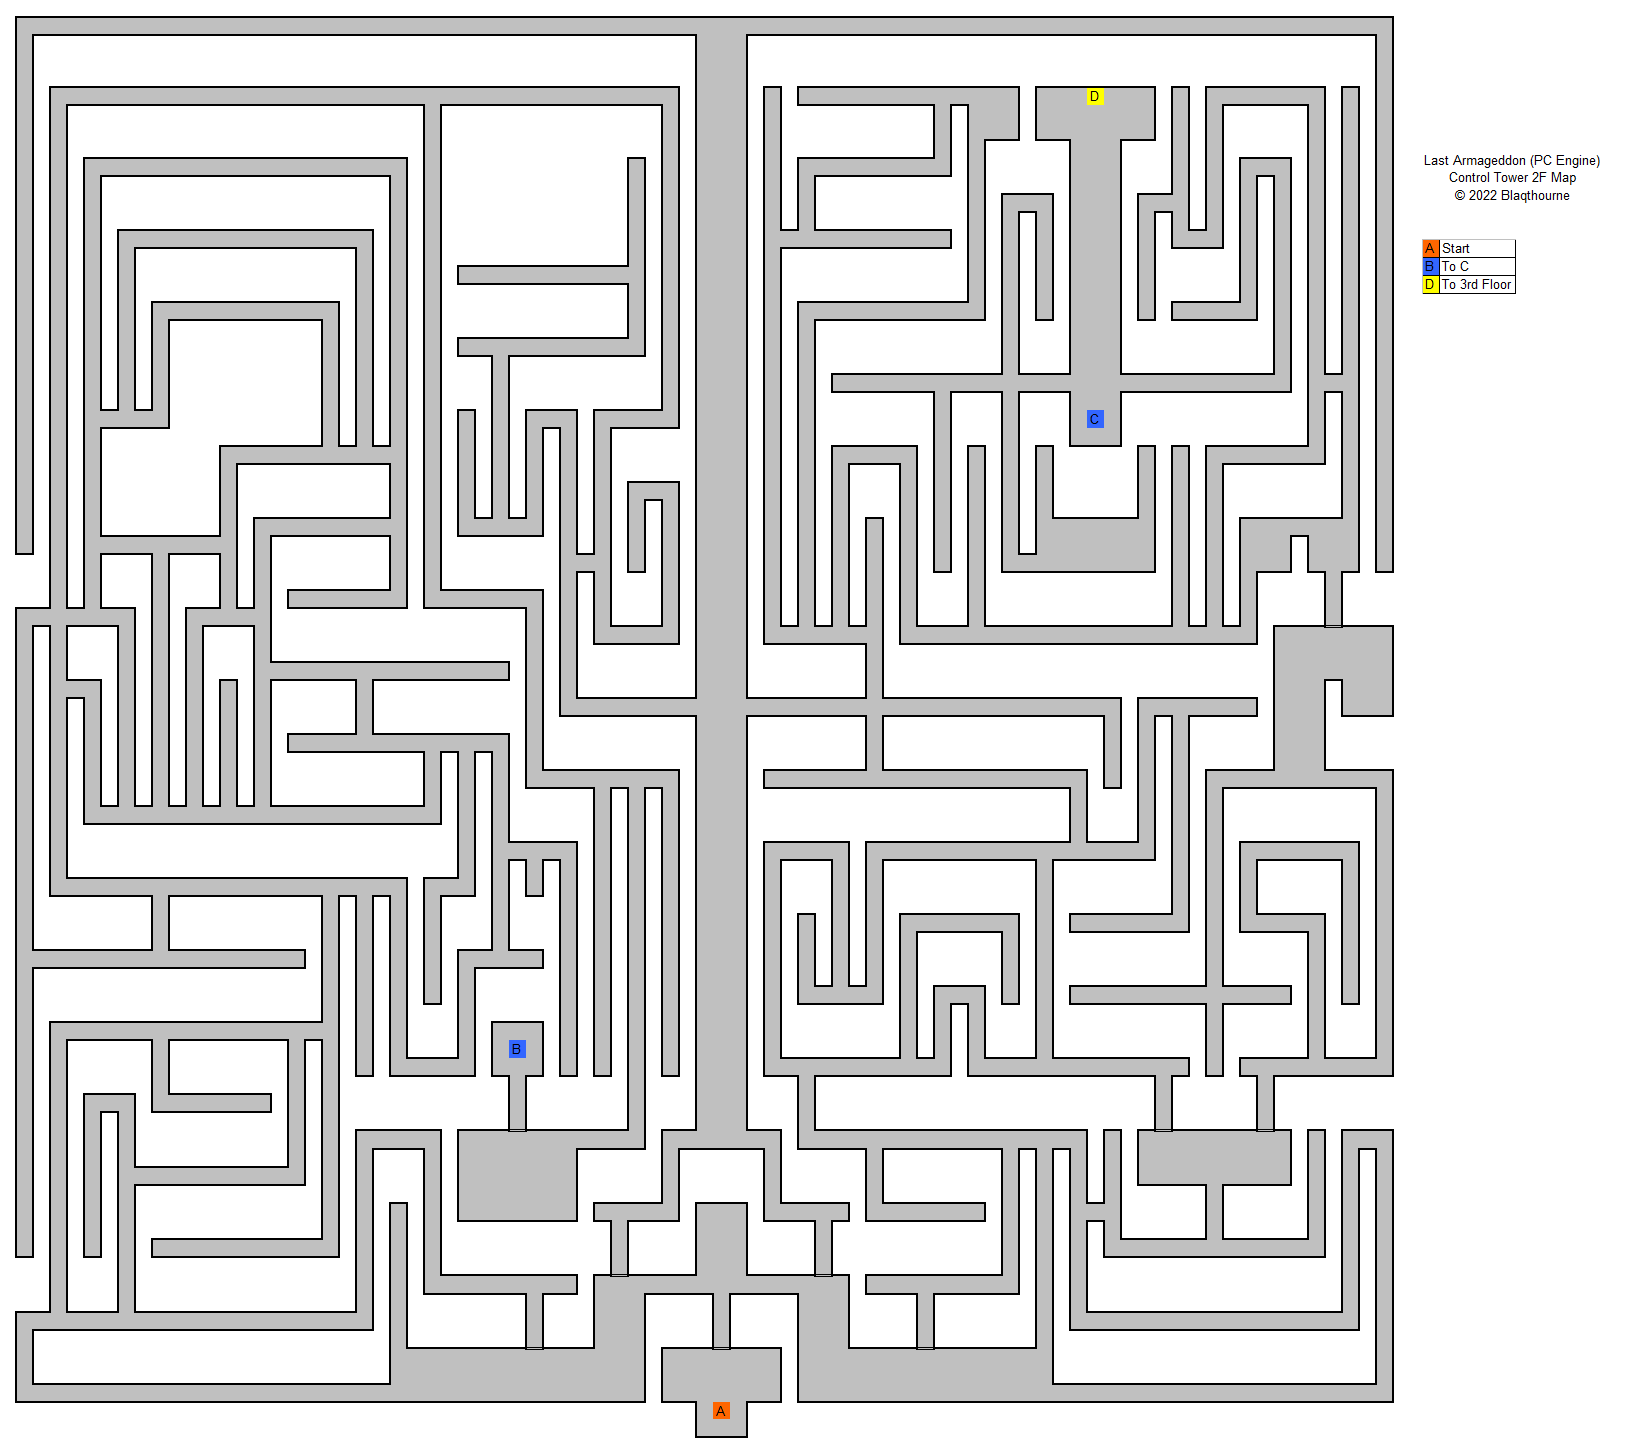
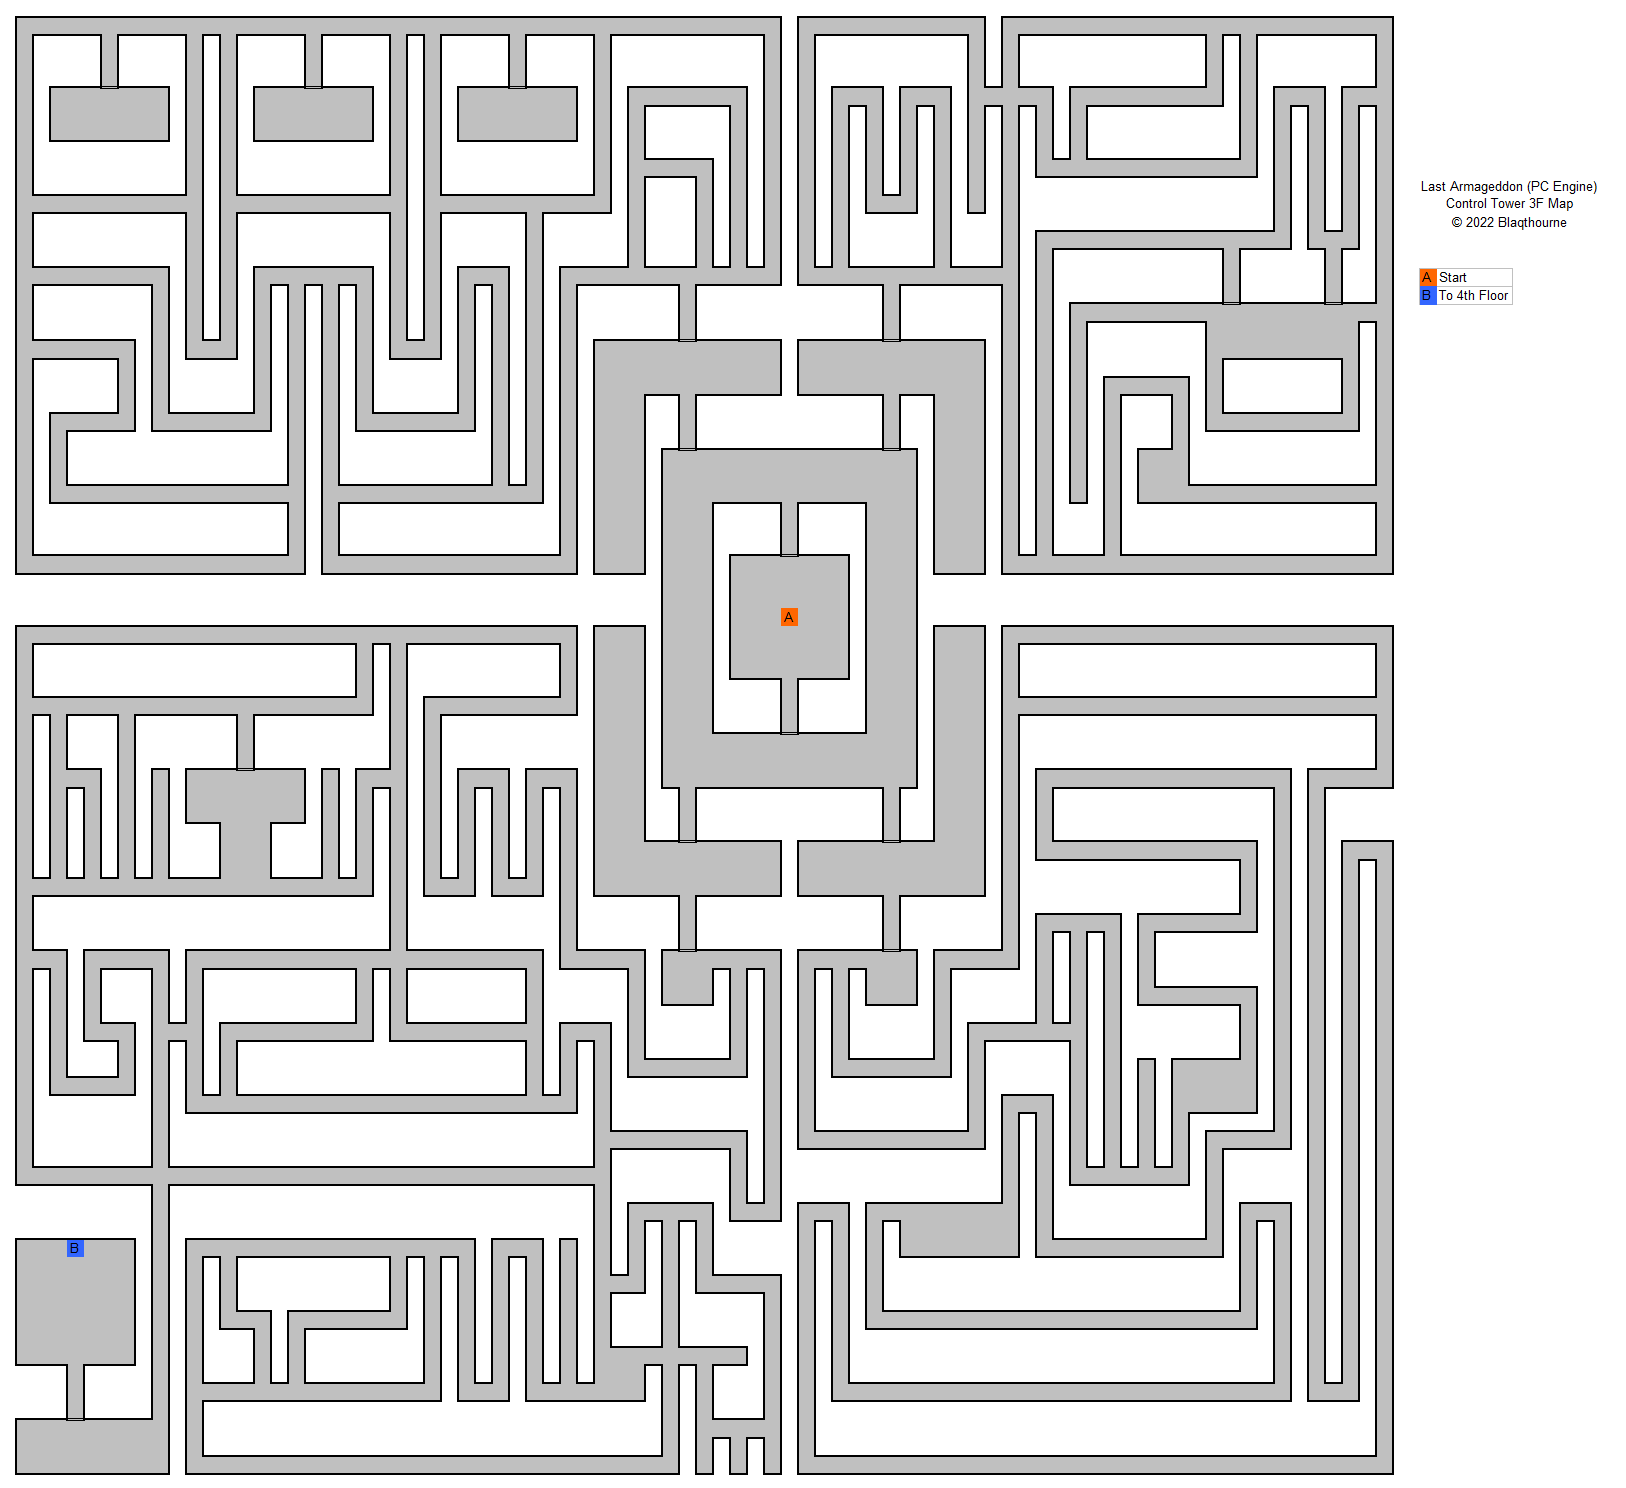
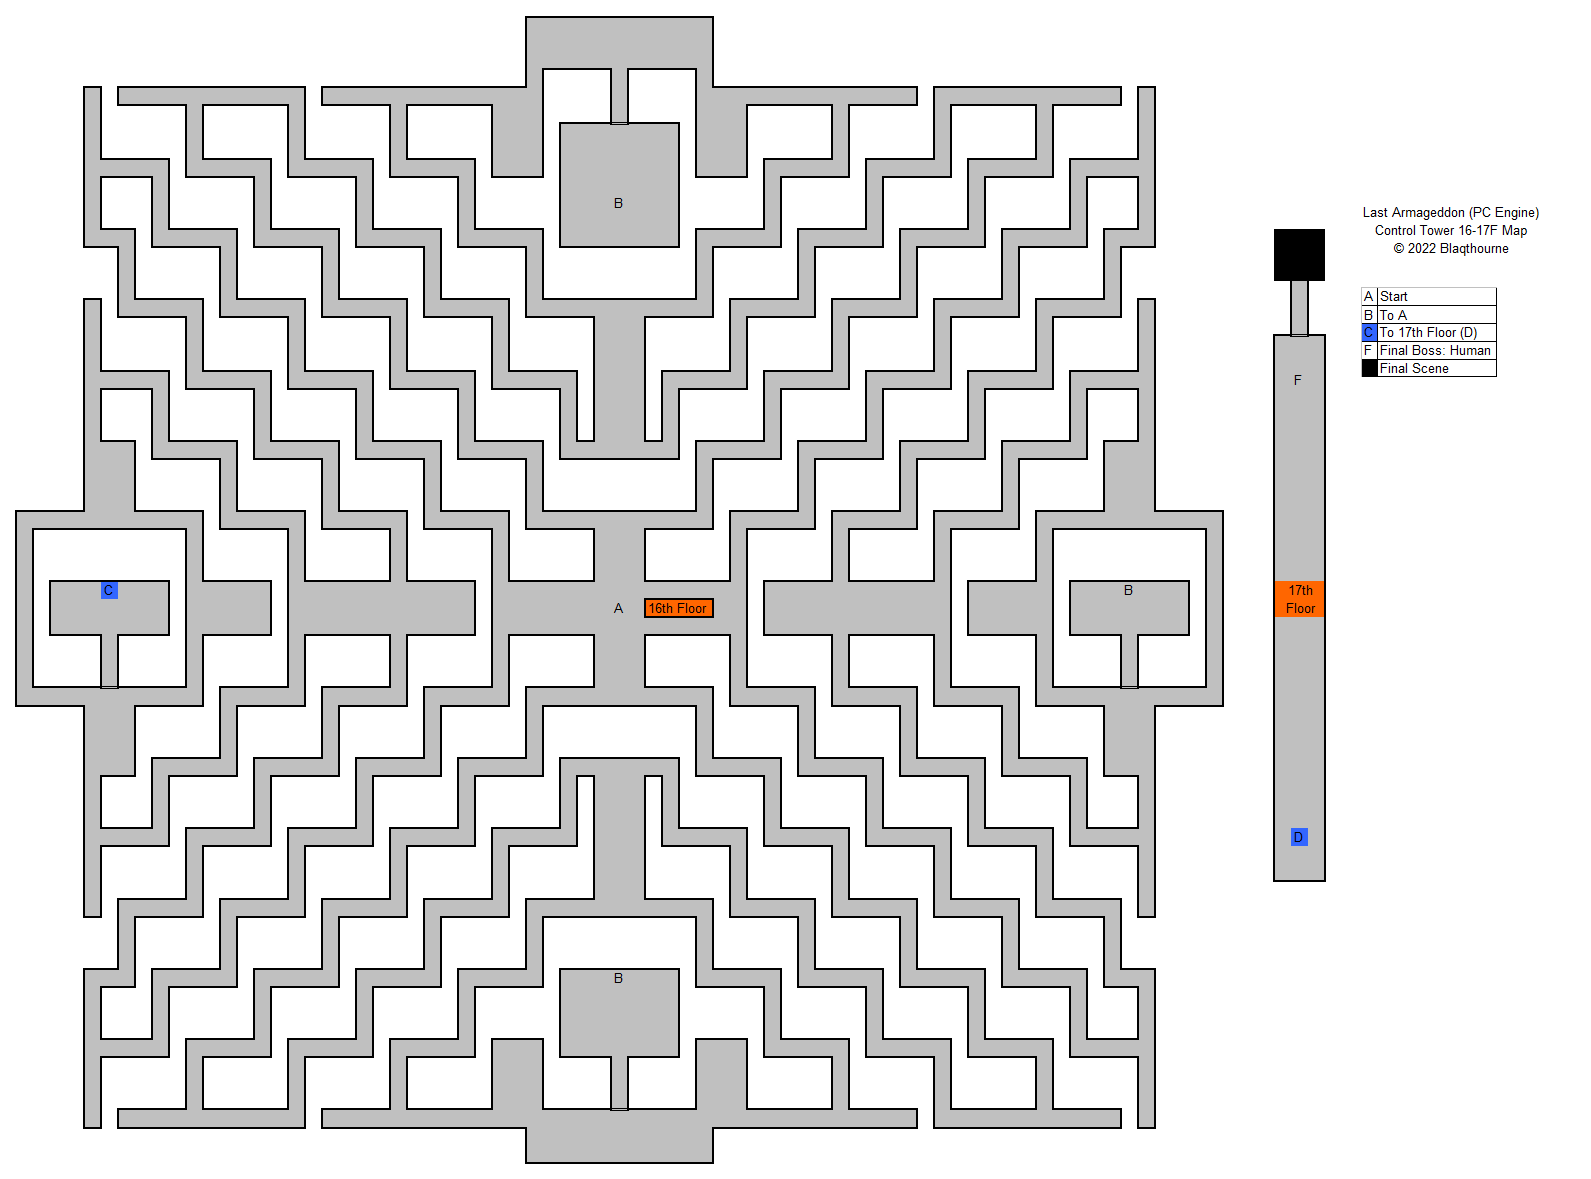