Good gracious, what have I gotten myself into? I've decided to finally tackle one of my import games for my relatively new toy -- a TurboDuo-R. I've had it since last March and the only game I've put any amount of time into is the pretty crappy Implode, which is 3 mediocre-at-best games.
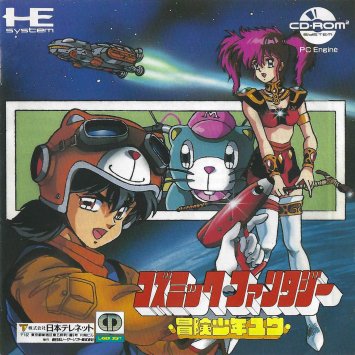
The title translates to Cosmic Fantasy: Adventure Boy Yuu (or as MobyGames lists it – Cosmic Fantasy: Adventure of the Boy Yuu, but I would think there would need to be the possessive "no" in the title to be translated that way). This is the first of a series of 4 RPGs, with the 4th game broken into two chapters. The second entry is the only one localized, and by Working Designs. So I've been wanting to play the first game before finally opening that (a new copy was either a couple dollars more than used or actually cheaper back when I bought it on Amazon).
Since my Japanese language knowledge consists of a single semester of Japanese taken in college over 20 years ago, I'll be relying on the Google translator and a couple other online resources, along with the textbook I kept, which just serves as a refresher for hiragana and katakana. I'll only be translating the text, so all the scenes with voice only will be mostly having me blankly staring at the screen, picking out a word here and there that I recognize. So, this is going to be extremely slow going. I wouldn't be surprised if the game is in the area of 20 hrs to complete and it'll end up taking me well over 100 hrs.
I translated the manual, and some of the things in it (if my translation is accurate) really have me looking forward to playing it.
Watching the intro movie, after some credits, it says "Planet Norg". The little green guy is apparently a sentient motorcycle. I believe the name of the woman on the screen is Mother. The guy at the controls is our hero, Yuu.
After a major hiccup getting this project off the ground, thanks to thinking my first copy I'd bought was bad, requiring a return and a re-purchase from an online seller based in Japan, I finally get to start playing. The game would lock up after the opening movie, which I think is because the Duo's capacitor that holds save data had fully discharged due to the system being unplugged for so long, and the memory needed to be formatted (something I didn't think of until my replacement copy had the exact same issue).
The first order of business was translating the two menus. The manual used kanji for the menu options, while the game uses hiragana. One menu (by pressing Select) gives the options to view Character Stats, toggle some sound on/off during conversations (but I have yet to discover when this actually does anything), reload the current save file (without a confirmation, which could be extremely maddening if I accidentally choose it), display the world map, and (what really intrigues me) speak to party members. If this does what I'm hoping it does, this would mean that it predates Phantasy Star IV by about 4 years as being the earliest RPG I've played to feature this.
The other menu (by pressing the I button) shows Yuu's level, HP and MP, along with the options to talk to someone in front of you, use magic, use a tool, examine what's in front of you, equip items, or use the Monmo command that returns you to any place you've been before -- another great feature if my translation is correct.
That done, I can actually start doing stuff. I start out in a building with walls that look like electrical circuitry. After scratching my head for a bit, I figured out that a Knife was sitting in my inventory unequipped. Equipping that gives me a +2 to attack power. Other than that, the only thing I do, since I got a bit burned out translating the menus, is look at an item on a table that turns out to be a photo of Yuu with his recently deceased parents. The photo is shown full-screen with voice-over, probably of Yuu's heartfelt remembrance of his parents.
Ok, so it turns out that I start out inside the spaceship that crash-landed, as seen in that video, which explains the circuitry motif. At the front of the ship, at what I'm guessing is the ship's console, Mother gives the obligatory "make sure you equip the weapons and armor you're carrying" piece of advice. Actually leaving the spaceship, with my sentient motorcycle, Monmo, in tow, there's a town very close to where I crashed. Before heading there, it's time to check out the battle system, and go about translating that. Rather than Magic, this game has Psychic, and choosing that gives me a major bug. Since I don't have any Psychic attacks, I can't exit that menu and have to reset the system (at least I can do a soft reset).
Ok, back to the game. It is a bit annoying that you have to skip through the opening movie just to get to the Load screen, as opposed to it being on the Title Screen. Now that I know to avoid Psychic, I start going through the other battle options and see what Tools I have available to me to use. I have a Portable Barrier and a Handgun. And the Handgun just destroys the Kobolds (or as the game lists them, Kobolts) and Monster Eggs I'm fighting. It takes two attacks with the Knife to kill them, but one with the Handgun. Getting into enough battles to Level Up, I'm happy to find out that my HP are fully recharged, thus saving me money to rest at an Inn. The battles are very brisk, almost shorter than the load times to enter and exit. The text goes by too fast for me to write it down as it automatically goes through the 3 screens of text. I am able to pick out that after what I'm guessing is "You won" text, it then gives the Exp and Gold gained. It doesn't say how much each stat went up when you Level Up.
Now that Yuu has leveled up, mostly just to translate the level up text, we enter the nearby town, either "Bane Village" or "Spring Village" if you want to use what Bane translates to. I'm going with Spring Village. It is a rather small little village, consisting of an Item Shop, Inn, and two houses. The only thing of consequence that we're told is that the villagers appear to be getting attacked by the kobolds in the nearby forest and some Kobold King is controlling them. So, I'm guessing their aggressive behavior is out of the norm. After speaking to the handful of people standing outside, as well as the lady in the house in the northwest (who suggests we talk to everyone again after an event), we head to the Inn to save. That done, we check out the Item Shop (which only sells Herbs and Antidotes), then make our way to the remaining house in the northeast, where the village elder lives. The only thing he says is that he's worried since the kobolds have been attacking the villagers, and someone needs to exterminate them. With nothing else to do, we leave his house and are promptly attacked by a Monster Egg. Making short work of it, the elder comes out of his house. Being so impressed with our power, he asks us to use that power to defeat the kobolds and save the village. Since we can't refuse, literally, he gives us a whopping 50 Gold and we get 10 Exp. Off to the Border Forest in the northeast to slay us some kobolds.
Now that I've been to a location other than the Spaceship, I tried out the Monmo command, and it's just what I thought, sending me back to Spring with a still image of Yuu riding Monmo and Monmo going “da da da da da da da da da!” which made me chuckle. Leveling up again while trying to write down the battle messages, Yuu learns his first spell: Burn. Saving, just in case, this now eliminates the lock up issue with Psychic as I got into a battle just to test it out.
Entering the Border Forest, there's a new musical theme. Getting into battle, we run into the first palette swapped monster, an Elite Kobold. Almost thought it locked up again, but there were a couple battles that took an extended amount of time to load, so long that the music came to a stop and it gave every indication of being locked up. With the Elite Kobolds and Great Spiders, I'm getting dangerously close to death and don't think I'll make the next level up. So, back to town to rest at the Inn for the affordable 8 Gold price. Well, that sucks, it didn't restore any MP, so Yuu can't use Burn. Oh, yeah, he can't use magic except during specific events or something. Trying to use it gives the message along the lines of "Yuu’s Psychic activates with love and courage."
Spotting the first treasure chests of the game, we pick up some gold, herbs, an antidote, and a leather shield. Woohoo! Finally some armor! Also found a new weapon, a broadsword. Yes! Which is, 1 attack better than a knife... ONE? Well, that's certainly, um, different. After clearing out the chests in three of the four spokes of the swastika-shaped level of the forest, we approach what I'm guessing is the Kobold King. Much like the Spring Village Elder, he gets a voice-over.
Accidentally getting into a battle with him thanks to thinking answering "No" would get more dialogue, we pretty easily defeat him. Begging for mercy, we refuse, and he tries buttering us up with 100 Gold. Again refusing, he gets angry again and we get a short cutscene movie and a new character is introduced. That was completely unexpected. I think I'll reload to see what the other options give me. But that will be for tonight.
Back at the Kobold King, I answer Yes this time to the first text, which seems to be him arrogantly brushing us off as a slight improvement to what he's faced. It also starts up the battle. After defeating him, answering Yes to whether we will forgive him simply makes him call Yuu a fool, along with the same short FMV of him starting to attack a startled Yuu only to be cut down by Sylph, who introduces himself like before. Well, since nothing changes, there's no reason not to collect the 100 Gold by not forgiving him, so I reload again. This time collecting the money, I decide to forgive him, which just has him call me a fool and attack, same as if I don't forgive him when he calls me greedy. That done, we head back to Spring Village.
Back in the village, everyone either thanks us or mentions something about the neighboring village of Peneto. The elder also simply thanks us for getting rid of the Kobolds in the forest. I guess the preemptive reward was enough. It seems Peneto Village has also been attacked. There's also a poet there with information about something. Nothing specific, just something. So, I've got my next destination.
Crossing through the little forest of lollipop trees (which remind me of the old spherical Lego trees), it is now just a very short path, which means if you missed any of the treasure chests before, you've missed those items and gold. Checking out the new fauna, we run into some goblins and giant lizards. Exploring around the area around Peneta, there's a cave to the northeast that I'll avoid for now. Oh, dang, the giant lizards have a poison attack, which does damage every round and every few steps taken. Good thing I picked up an antidote in the Border Forest.
Entering Peneto Village, this is quite a bit bigger than Spring Village. The innkeeper says the exact same thing as the one in Spring, except that it's 13 Gold to stay here. If all inns have the same dialog, that'll make my job easier. Same with the shops. This town has a weapon and armor shop. Woohoo! Picked up a set of leather armor. Interesting, I didn't notice that the broadsword lowers Quickness/Agility. It's actually 2 better than the knife, but my agility lowered to where my attack only went up 1. Talking to the townsfolk brings mention of the monsters in cave to the north becoming violent and there being a trap inside. An old man gives what I think is the good old "If only I was younger" speech. One person also mentions a mysterious stone that sealed a monster long ago. A boy's father also headed into the cave and hasn't come back, making him sad. Heading into the bar, a friend of one of the patrons is also in the cave. Another patron gets a nice little FMV telling of what looks like someone slaying a mighty demon, but it's all voice, so I can't make it out. It should come with a major epilepsy seizure warning. I think this might be the poet mentioned in Spring. He then mentions that if I manage to defeat Logudaru, to come and see him. Another citizen mentions the immortal Loguradu is in the cave, won't offer his aid, but tells me I'd better stop it. Gee, thanks!
Entering the final house in the village, we meet Redil, the wife of the leader of the village. Like the elder in Spring, she gets a voice over. Believing Yuu to be on a journey (I think), she asks to make a side trip to the cave to look for her son, Amur, who went to help his father and hasn't returned. Of course refusing, Monmo then chides Yuu. Since I'm forced to accept her request, Yuu gets a nice 20 Exp. With a purpose in the cave we saw earlier, we head off to save a kid and deal with an apparently immortal monster.
Checking out if anything has changed in the command to Speak to companions, nothing has.
I think I'm going to continue on with this serving as kind of a rough draft for a possible walkthrough, so there will be a lot of details about treasure chests and other stuff.
Wow. I just checked the Visual Debugger (accessible by a code at the Title Screen) and there are 31 Scenes viewable there, and they seem to be in the order you'll watch them while playing the game. You can also listen to 4 pieces of music here.
A short trip northeast to the cave we saw before, north of the entrance, we spy a treasure chest behind a closed grate. Heading down the south path are the skeletons of the villagers killed by Logudar. We get treated to a short cutscene of what appears to be Yuu becoming angry at the sight and his aura growing. The aura actually represented Yuu gaining his Psychic Powers. So he can now cast magic! Woohoo! It also recovered all his HP, but he just leveled up after fighting a skeleton, so slight bummer there. It appears that the monsters are going to be the more traditional monsters found in RPGs set in a fantasy setting, as we're running into skeletons and hobgoblins in here. Now that Yuu can cast spells, I tried out Burn. No magic animation, darn. Heading down the remaining path west of the entrance stairs, the first set of stairs to the next floor we pass by are behind another closed grate. Continuing down this path, we encounter another boss.
There's no banter this time, as speaking to what looks like a bigfoot-like creature begins the battle. Oh, hey, he actually gets battle animation. Attacking it with physical attacks does no damage, which isn't surprising since Yuu gained his Psychic Powers. After a couple rounds, Monmo cuts in and suggests we run away for now. With no say in the matter, we're instantly teleported a ways back down the corridor. Heading back to the boss's little chamber, he has disappeared. Reloading to try magic against him, being able to make out the boss's name this time, this is the Logudar we'd heard about. Pummeling him with a couple Burn spells for 40 points total damage, Monmo still steps in after the 2nd round. Good thing Yuu is close to leveling up as he's about to be in critical condition.
With Logudar gone missing, we head back to the entrance. Maybe the grates have opened. The one in front of the stairs hasn't. Just before reaching the entrance, we meet a boy, whom I'm guessing is Redil's son. Pleading for help, he introduces himself as Amur (Emil?). I guess he was hiding in the crack in the wall. He even gets voice work when talking to him again. He carries an amulet given to his family a long time ago which protects against evil, and he owes his safety to it. He then joins the party, but can't fight. Since neither grate opened, I guess it's back to Peneto to speak with his mother. I guess the amulet only works in the cave. While wandering around in the cave, we were never attacked, but three steps outside and we get into a random encounter. On our way back to town, we got in just enough battles to level up to Level 7 and learn Ice Wave 1.
Nobody says anything different except for Amur's mother, who is relieved he is safe and thanks Yuu. Amur then pleads for us to rescue his father from the cave. His father is carrying a blue stone that sealed the demon. Of course, unable to refuse, we head off to save his father, receiving 30 Exp points for accepting. Amur leaves the party to stay by his mother's side. So, back to the cave to save Amur's father (Robin/Laban, I believe).
Back in the mountain cave, the grate in front of the chest to the north is open, while the grate in front of the stairs is not. Trying to open the chest triggers a trap door and we get to see a still image of Yuu falling with him screaming. We're deposited in a small chamber with a man. We can't leave the chamber as the grate is closed. Approaching the man, he asks if we're okay, then introduces himself as Laban of Peneto. He then tells us we fell into a trap (duh) and are in an underground jail built by the monsters. After that, he mentions that if you have two demon stones, you can nullify Logudar's immortality. A cutscene shows Yuu showing Laban the stone in his possession. Monmo then steps in, so to speak, and brings up a good point: How do we escape the jail cell? Laban is no use for this. The Red Stone Amur gave us didn't do anything at the grate, so let's see if Laban has any new ideas. He says if we can destroy the grate, we can escape. Gee, really? Let's try our handgun on the grate. Well, that just gives me how many bullets I have left and how many it can hold. Not surprisingly, the Portable Barrier doesn't do anything, either. Hmm...
Aaaand, it ends up being the wait, or wander around for a while until our savior shows up, game. Our rescuer is the interstellar trader Nyan, who is an anthropomorphic cat. After laughing at us, and knowing who Yuu is (I'm guessing there's a backstory to that somewhere), we get another little cutscene. He then offers us a Laser Knife that cuts through steel for the bargain basement price of... all of our gold. Since we have no other option, goodbye to all our gold. Laban asks if we know Nyan, and Monmo exclaims that Nyan always shows up forcing him to buy things whenever he's in trouble. I got a chuckle out of that sequence. Using the Laser Knife to gain our freedom, Nyan takes his leave, heading back to the town of Tikal, and Laban joins us. We head down the lone corridor and run into Logudar, who is camped out on the staircase out of here.
Speaking to Logudar, Lagan yells at Yuu to use the stone. Yuu and Lagan throw the two stones at Logudar and he is no longer immortal. No cutscene for that, just text. The real boss battle with Logudar then begins. Yuu is able to damage him with physical attacks this time. Logudar hits pretty hard, but after about a half dozen rounds, he goes down. And Yuu's Psychic Power goes away since his vengeance for the slain villagers has been fulfilled. Makes sense. Aaaaaaand the cave starts to collapse. Rather than needing to rush out ourselves, we're instantly back at Laban's house in Peneto. Laban thanks you for saving the village and gives Yuu 100 Gold to help out with travel expenses. Along with the 100 Gold for defeating Logudar, my purse is decently healthy again. Laban leaves the party to stand by his family.
Several people in town mention the port town of Tikal, which seems to have some sort of disease affecting its townsfolk. Of course, it also seems that we won't be able to board the boat there. Heading to the important fellow in the bar, he's headed to meet the king of Olmec Castle. Regardless if we want to join him, he joins the party. While he never gave us his name, his name is Ruid (Reid?). Since Olmec Castle is on the other side of the river that we have yet to find a bridge across, it's south to Tikal.
On the way, we shortly come across a guard post at the mountain pass. Of course we need the king's permission to pass. Ruid just happens to have the king's permission, so the guard allows us through. I guess I need to rest after the battle with Logudar as tarantulas are just about as strong as he was and I got defeated. Losing in battle just reloads the game with a message from Monmo. Speaking of Monmo, since he's a free ride back to any previous town, there's really no point in the inns charging different rates since all you have to do is ride Monmo back to Spring Village, get the cheapest rate, then ride Monmo back to the most recent town. Wow, tarantulas are powerful at this point. It took one less round to defeat than the most recent boss. Ignoring the bridge to Olmec Castle, we head to Tikal on the east coast.
Entering Tikal, we walk around to get a lay of the town and it's laid out pretty annoyingly with trees blocking paths, causing it to be a serpentine layout to visit all the buildings. Seeing Nyan standing in the open, we talk to him and he has quite a few items for sale, most of which are too expensive for us to buy right now. If his prices are comparable, I'll need to conserve those bullets as he charges 2000 Gold for an E. cartridge (ammo). Winding our way around to the Tool Shop, an old woman on the way mentions that hepatica (which is a real life flower) is effective against any disease, but can't remember where to find some. Making it to the far Tool Shop, the man inside mentions an Elf girl, Pippo, that lives in Ren Forest west of town. I'm guessing she'll either have the hepatica or will know where to find some. Accepting the job, he gives us 1000 Gold! That's more than what I had when I had to get out of jail. And 100 Experience to boot. Heading to the port, there are a few ships docked. Speaking to the men in front of them, one will lend me his for a mere 1 million Gold. One just says we'll get it dirty. And one says that it can't leave for a while because of monsters that have come out in the sea. Just ticking off the standard events found in JRPGs here. With everyone talked to and our next task in hand, it's off to Ren Forest (which is labeled as Pippo's House on the map in the manual) to find an Elf girl and some hepatica. Before we do, we pick up a nice weapon upgrade with a long sword.
Arriving at Pippo's house in the forest, she says that she's out of hepatica and demons have settled in the Island of Herbs, which is just off the coast to the south of her house. So, off to slay some monsters and get some herbs. Being a very small island, a large plant stands out like a sore thumb. Heading to it, we speak to it and get into a battle against the plant. It's a bit too strong, so it looks like I'll have to grind up a level. Hopefully, only one level.
Not having luck against the Druff (?) plant boss, I check out using Herbs to heal. That pretty much treads water as it does just slightly less damage than the herbs heal. Maybe we can go to Olmec Castle first. The bridge over the river to Olmec Castle has a guardhouse and we can't pass until the infection in Tikal is taken care of. Well, Nyan sells something that heals HP, MP, and cures poison for 515 Gold (Herbs cost 8). Maybe that'll work. Heading back to the Island of Herbs, I use the Ban Pesticide (yeah, seems an odd name to me, too) when Yuu gets down to being one hit from death. It fully restores HP, and a couple rounds later Yuu takes down the Druff. It is worth 160 Exp, which is more than double what Logudan's 64 Exp. Stepping onto where it was growing, we pick up some hepatica and head back to town.
Back in town and at the Tool Shop, the shopkeeper gives us a tent as thanks, while Pippo stays behind to make the medicine. Leaving the shop, we get a new town theme. Everyone is instantly healed. Since the port is still on lock-down thanks to the monsters, it's off to Olmec Castle. With the disease taken care of, the guard lets us pass.
I really need some better armor since the standard enemies are doing so much damage that I can get in 2, maybe 3 battles against the great apes and wood golems found here before I have to go back to an inn to rest. A hydra is 1 battle, then rest. That 1000 Exp needed to level up to Level 10 is quickly shrinking, though.
Making a beeline to Olmec Castle, we save and upgrade our equipment, buying a Buster Sword and a much needed Bronze Shield. The Buster Sword definitely slows Yuu down, knocking 6 off his Agility. So far, Yuu has attacked first in every round of every battle, so we'll see if that actually does anything. We talk to the people in the castle town. An old man basically tells us to "Get off my lawn, ya damn kid!!" A man thinks the strange clouds forming is a bad omen. There's a songstress in the bar who, of course, has lost her singing voice. The king is looking for a brave warrior. There's mention of the country of Nimrud beyond some fortress. And finally, one kid thinks Monmo is a tanuki motocycle, and we find out Monmo is a momonga.
Before heading into the castle, with the new equipment, I head back out to do some exploring, which was too dangerous to do before. Survival in the surrounding area is much easier. I tried out the auto-battle, and holy crap does it go fast. North of Olmec is the little village of Siris. Other than free rest, which now renders inns pointless unless you don't want to sit through the two pretty short stills of Yuu riding Monmo, the mention of Lady Saya is the only thing of note right now. So it's back to check out Olmec Castle.
Whatever the guards in the castle are supposed to be wearing looks like it would be quite uncomfortable. It looks like plate mail with bare arms and legs. With nothing but the standard complaints about being on guard all day and the clumsy maid who drops dishes, we head upstairs to the throne room. Approaching the king, Ruid, who turns out to be part of the imperial guard, announces his return. The king asks if Yuu is the warrior that will save the planet that he's been looking for. Ruid assures him that Yuu definitely qualifies. Somehow, the king sees through Yuu's clothes to see a mark on his chest, which I guess signifies that Yuu is a cosmic hunter. The king then tells of a legendary witch, Morgan, who has been revived and is going to invade the planet and asks if Yuu will dispatch her. Of course, unable to turn down his request, Yuu gets a whopping 10k Gold and 1k Exp. Ruid then mentions that the descendants of the legendary hero Titanis, who slayed Morgan (which we saw in the epileptic-seizure-inducing cutscene earlier), are in Siris Village. Ruid then stays behind to protect the castle. So, it's back to Siris.
Before heading to Siris, there's a bridge to the west, and just like one of the guards said, we need the king's permission to cross. Back in Siris Village, which consists of a whole three houses, the old woman says Saya is in the house next door. Heading there, no one is home. The lone boy in the village tells us Saya has gone to the lake. Heading to the lake in the village, we cue up a cutscene where Yuu catches Saya completely naked in the lake. The water only comes up to her knees, so if you like seeing naked anime butts, this is for you (of course, her arms are crossed across her chest when she's shown from the front, with the image ending just above her waist). She does the standard anime scream and then the males get some explosive spell cast on them, which only serves to singe them. Dressed and back at Saya's house, Yuu must have done some fine 'splaining because she apologizes, thinking he was a peeping tom. With Yuu having such an important task, she decides to help out and joins the party. Considering she has stats, I'm guessing she will be staying for the long haul. Unfortunately, she can't equip anything currently in our possession. She does start with a healing and a fire spell, though.
Heading back to town, Saya can't survive the first battle, but being knocked out only leaves that character unable to fight as she still gets the Exp points. Not only that, but the Exp gained doubles as both characters now get the full Exp. Nice. This is going to be some fast leveling up for Saya. Holy cow! She went from 0 defense power at level 1 to 13 defense at level 2. That's almost half of Yuu's 28, and he has armor and a shield while she has nothing. Neat! It now shows both Yuu and Saya on Monmo, with Saya riding sidesaddle behind Yuu, when you ride him back to a previous location. Heading to the Bridge Guard House, we still don't have the king's permission to pass. So, back to the castle.
Entering the castle, we get treated to a new theme. Everyone still says the same thing on the ground floor. Heading to the throne room, Ruid now mentions that one Gaia is one of four kings/gods under Morgan and is waiting at the border fortress. The king says that we've carelessly misplaced the papers (that we never received) granting his permission to cross the bridge, and gives us a Passport. Ok, so if Yuu dies in battle, it's game over. Geez, with Saya now in the party, we can get attacked by 3 monsters, which is making it extremely slow going as we get in 1 or 2 battles, then have to go back to rest. Lovely, banshees have a special attack that makes a character unable to act (I think it's sleep), and it doesn't seem to wear off. Moving north, we arrive at the border fortress, which has some pretty upbeat music. Moving along the leftmost path, we find a chest with some kitsuke gusuri, which restores MP. Taking the center path takes us to 4 chests with a Life Water and Herbs, along with two empty chests (bummer). Along the right path is a dying soldier who tells us Morgan's forces have taken over the fortress, killing all the soldiers. He then gives us a necklace to give to Flora in Olmec. He also says something about if it doesn't work before breathing his last breath. We then get a short cutscene where Yuu gains his magic power.
Ascending to the second floor, the left path has a treasure chest with a Staff of Defense (which has no defensive power that I can tell), which Saya can equip! Winding around to the southwest corner, we get an Elixir. Another chest north of that gives us more herbs. Saya leveled up to 11 and picked up Rana 2, which heals twice as much as Rana 1 for the same amount of MP. Awesome! Since it simply replaces the original Rana, this makes sense that it wouldn't cost more as you can't choose which strength to use. Hmm, Rana 2 just healed 77 HP (while Rana 1 heals 30). Maybe it fully heals? Taking the final path, we wind our way around to Gaia. After introducing himself, and telling of our impending death, we get into battle. Easily dispatching him thanks to Burn 2, Yuu's psychic power again disappears. Aaaaaaand the fortress starts to collapse. As with the cave that collapsed, we're instantly transported outside. With the fortress still in our way, we try to go through and get a short cutscene with some apparition (maybe the dying guard we got the necklace from?) flickering and telling us something. Well, since we can't proceed with the cutscene blocking our way, we head back to Olmec. We also have that necklace to give to Flora in Olmec.
Back in Olmec, not much has changed. Bringing the necklace to Flora, she thanks us and gives us Lorelei's Ocarina, which can supposedly calm a spirit. That spirit hanging over the collapsed fortress seemed pretty agitated. So, back to the border fortress. Back at the fortress, Cain's spirit appears again. Saya plays the ocarina, which dissolves into nothingness after playing the tune, and Cain's spirit moves on, thanking us as he disappears. Having comforted his spirit, like the Border Forest, the fortress becomes a short screen of trees with a path that you pass through, meaning whatever chests you didn't open in the fortress before are gone forever. Heading west around the mountain range, to the south, we enter the tiny Tina Village, which consists of an inn and a tool shop. The town of Maas is mentioned as well as a very skilled female warrior that lives there. With this just being a rest and supply stop, it's off to Maas. So Rana 2 actually heals 80 HP.
Heading west to the river, the guard at the post mentions that this is the site of the ruins of Adonis Castle. Not blocking our path, he kindly tells us to pass through. Heading north through some tough enemies, we make it to the town of Maas. The first thing we hear of is that a Gill of Fire has kidnapped the princess of Nimrud Castle. Depending on who you talk to, Gill is either a runt or really huge. There's a boy who wants to build a huge casino on an island when he grows up. Such vision! There's a Rosa living at the mansion of a rich man, and she apparently keeps the monsters from attacking. She's said to be extremely strong. And I just discovered that Saya could have used the equipment Yuu no longer uses, except that you can't transfer items between characters, and you can't equip items in the other character's possession. Aargh!! Major oversight there. Since we're awash in Gold, we dip into our 37k+ purse and buy everything we can, leaving us with 34k+ Gold. Finally checking out the, er, mansion in the middle of town, we talk to Rosa, the only person in the house -- doesn't seem very luxurious inside to me. She reiterates what we've already heard about a Gill of Fire in a castle beyond the cave to the north, and then automatically joins. With Rosa in tow, we head north to the volcano cave and to the second of Morgan's four underlings.
Shortly upon entering the Volcano Cave, we're set upon by some nasty Flame enemies. We shortly thereafter encounter a soldier who seems deathly afraid of Rosa, and then promptly disappears. Heading down the counterclockwise path around the lava, we exit on the other side of the mountains. Since there's a staircase down visible from the exit stairs, we head back in. It looks like Flames are the only enemies in this cave, and they pack a wallop. Descending downstairs, heading south and then west, we find a chest with Magic Water. Going back and this time taking the east corridor finds us in a little chamber with four chests. The SE chest holds Elixer, SW holds Sword of Sleep (which we already bought for 2500 Gold, so can't take it with us), NW is empty, and NE holds Water of Intellect. Going back to the basement's hub, we take the NE corridor to find a chest with another Elixir. The north path has a Water of Power in its east chest and its west chest has a softball (ooookay). Heading down the NW corridor, we find a chest holding a beer bottle. Finally, in the west corridor is a Life Water. With all these treasure chests, I've found out the inventory limit is 9 items for each character. So, it looks like I'll head back to town to save, then try out some of these items to see what they do and sell some herbs and antidotes I don't need anymore. The various waters permanently increase stats (nice). Elixir fully restores HP and MP. The Softball and Beer Bottle don't do anything.
Now with room in our inventory, we collect the couple treasures we couldn't before. BTW, being a supposedly strong warrior, why the heck isn't Rosa fighting alongside us? Making our way through Volcano Cave, it's a short hike to what I'm guessing is Gill's castle. In the area between the cave and castle, Monmo can't be ridden back to any previous location. Yeah, this area is brutal. We get to fight harpies, complete with nipples. Saya learned Rana 3, which should help out a bit with survival. Getting nearly 1000 Exp from each battle could make this area doable since leveling should start happening just as we're getting close to being wiped out. With a little emergency supply of MP replenishment items, we explore the castle.
Heading around to the SW corner, we ascend several flights of stairs and get to a chest with a Feint Cloak. At the top of the NW tower (I'm guessing they're supposed to be towers) is a chest with an Elixir. Avoiding the center stairs, the SE tower holds a Fire Staff. Not only does it get a standard attack, it then shoots flames at all enemies (which is actually effective against fire based enemies). Very nice! The NE tower holds an Aurora Stone, which replenishes MP and can be used multiple times, possibly infinitely many. With all the towers looted, we head up the central stairs. Going around to the only chest on this floor, we get 1500 Gold. I have a feeling we'll be getting enough gold from battles. Taking the south stairs, we eventually reach a chest on the 4th floor with 1500 more Gold. Heading back down to the 2nd floor, we take the north stairs. Moving around the wall and taking the far east hall gets us some kitsuke gusuri (MP replenisher). Going back and taking the first path south, we get another Elixir at the end of the short hallway to the south before the stairs. Taking the stairs to the 4th floor, the easternmost path gets us a Moon Drop, which cures petrification. Heading down the path we passed, going around the wall leads us to an empty chest. We then head back south and to the stairs to the 5th floor. Taking the west path brings us to a chest with herbs. Ignoring the center path, since I can see what looks like the boss's chamber, the east path nets us another Elixir. Taking the center path, sure enough, there's Gill.
We get a cutscene with Rosa yelling something and a cloak being dramatically pulled aside to reveal Jill's masked face. I wasn't sure if it was going to be male or female up until now. Jill seems to be crying. Yuu asks why she's done what she's done, and Jill answers that she hates beautiful things. We then get into battle. Quickly defeating her, thanks to our new toy, the Fire Staff, we only manage to knock her mask off. After a brief cutscene where we see her ugly mug, we re-enter battle. Ooh, she can attack and cast a fire spell this time when she gets down to critical health (I'm guessing, since she only did it on her final 2 attacks). Finishing her off for good, she of course questions how it happened since she thinks she was stronger than anyone. We get another short cutscene introducing a fetching Lina, who joins our party, with Yuu commenting on her beauty. Saya doesn't seem too pleased about the situation, though. Yuu insists nothing has swollen (at least that's what Google says he says). Of course, the castle collapses and we instantly teleport out. Hmm, Rosa seems to have been replaced with Lina.
We head back to Maas to see what's changed. So, that cutscene was supposed to be Rosa revealing herself to be Jill? Ah, Lina was the figure that was crying. It makes sense now. Lina is the princess of Nimrud that was kidnapped. That also explains why the guard in the cave was so afraid of Rosa. With nothing of consequence here, we head to Nimrud to return Princess Lina. On our way, Sylph (remember him?) is blocking our path. A cutscene plays and there seems to be some animosity between Sylph and Yuu. We then battle Sylph, who turns out to be Morgan's Wind underling (based on his enemy name during battle), with his cloak flapping in a pretty stiff wind. Unable to hurt him physically, Saya busts out Badome (a fire spell) and does some good damage. It looks like this is an unwinnable battle, as he casts something that wipes out Yuu and he makes the "Now is not the time to fight. I won't go easy on you next time" speech. Yuu gets fully healed and it's just a short trip to Nimrud Castle. Exploring a bit, there's what looks like a rocket ship to the SW, which is actually a lighthouse, according to the map in the manual. Taking a peek into the castle, Monmo can now just be ridden back to Nimrud. I guess he can't zip through the cave. Dang. Well, the lighthouse has monsters, so we won't be exploring it.
Heading into Nimrud, the king has fallen ill with Lina's kidnapping. Oh, hey, Nyan's here with better items we won't be buying. The weapons shop has Steel Armor and Shield, so Yuu gets an upgrade. It seems since the king has fallen ill, he's left the kingdom completely in the hands of the regent, Doran. We also hear of an ex-noble, Baron, who is apparently a Robin Hood figure now. One boy hints at someplace with a bunch of warps.
Heading into the castle, it's rather tiny, being only one floor. There's one guard outside the castle walls to the east that cannot be reached. A couple guards mention something about a big bat in the castle. Talking to the king, he mentions that Duke Doran is seriously considering a marriage proposal to, I'm guessing, Lina. Finally talking to Doran, who looks a bit like a vampire (which would explain the mentions of a large bat), we get voice work, so he must be the person we need to talk to to advance the game. He mentions how he's been governing while the king has been ill over Lina being missing, and then proposes to Lina. Lina hedges, sadly laughs, then leaves the party, instantly teleporting to her room. Speaking to her, we get tasked with delivering a letter to Baron, whom she decided during her childhood to marry.
After a very short jaunt, we enter Baron's Lighthouse, and get another new musical theme. We also get a new battle background. Just great, a Medusa turned Saya to stone, and Yuu doesn't have any Moon Drops to cure her. At least her sprite looks like a statue. The lighthouse is a simple three-story building where we just circle around to the stairs leading to the next level and repeat. On our third attempt (the closest town that sells Moon Drops is on the other side of the Volcano Cave, so that would be a tedious trip), no one gets turned to stone and in the center of the third floor, we walk into a trio of werewolf-like creatures with a human leader. The leader threatens to slaughter us for daring to defy Morgan, and we enter battle. We first take care of a medusa and killer roc, which actually wipes out all three of his hench-creatures.
He then apologizes, not knowing what came over him that caused him to attack us. This is the Baron we were looking for, and it seems he was searching for something the princess lost. Saya then tells him that the king is trying to marry Lina off to Doran, and that he should save the woman he loves. Baron has a short burst of bravado, only to then become docile and suggest that he should just give his blessing to Lina and Doran. Yuu then asks him to tell his story. His family had closely served the king for generations, which is why he was a childhood playmate of Lina. He also mentions that the king became a bad person after losing his wife. This is why he became a chivalrous thief. Being a Robin Hood, he can't show his face in the castle and will just have to suffer Lina's marriage to Doran. Saya then berates him, asking how he can sit by while Lina marries a man she doesn't love. This reignites Baron's flame, and he musters up the courage to tell Lina his true feelings. He then joins our party and we're off to Nimrud Castle. Not taking a chance with the medusas, Saya casts Ushuto to teleport us out of the lighthouse.
Back in Nimrud, it seems everyone suddenly always knew that Doran was suspicious. It also seems that the princess has been kidnapped again. A little girl saw a big bat flying away from a palace window (most likely carrying Lina). One guy mentions the holy sword Grand Caliber, which I'm guessing we'll need to defeat Morgan. Entering the castle, the king has collapsed and we're instantly teleported into the throne room. If he collapsed, he doesn't seem affected as he's still sitting on his throne. Of course, we won't be checking on the king, but rather talking to everyone else first. Other than mention of the big bat, as well as Lina and Doran being unsurprisingly absent, we head back to the throne room. The king tells us what we already know: that Doran's true form is a huge bat monster, and he's taken Lina. Asking where we can find him, the king tells us of Doran's Mansion to the north beyond the ocean cave. He asks us to save the princess, and then says he was wrong about everything and apologizes to Baron. So it's north to the ocean cave and then to Doran's Mansion.
Heading north around the mountains, we come to the Ocean Cave entrance to the west and a guard post to the east. Of course, Doran has ordered than none shall pass through the guard post. So, off to the Ocean Cave. Fighting through some giant bats, which look like they might be the only monsters residing here, we come upon 2 treasure chests. The SE one holds a softball and the NW one holds a Silver Bracelet for Saya to equip, which has a 30 Defense as opposed to the 10 for her currently equipped Bronze Bracelet. Wow. Following the single zigzag path, fighting some nice exp yielding giant bats along the way, we exit on the NW island with Doran's Mansion immediately visible. Unlike the Volcano Cave, the spell Ushuto works in this cave, even though it also has two exits. Monmo can't be ridden on the island. After seeing what monsters are on this island, we enter the mansion and get treated to another new theme. We're greeted by a 3 by 2 grid of rooms with 4x4 checkerboard floors and a statue of a hand on each checkerboard. Approaching any of the hands teleports us to another room.
Getting methodical, the upper left room deposits us where we can see Doran, but can't reach him. The path here leads to a chest with an Ice Staff. I wonder if it's better than Saya's Fire Staff. Um, yeah. It summons a snowstorm that does 40 damage to all enemies on top of the physical damage. Awesome! Taking the upper center room takes us through a series of corridors with a teleporter at each end. We eventually end up in a room with two chests. The north chest is empty, while the south chest holds Water of Quickness. Ha! I've already maxed out Gold at 65535. Taking the upper right room eventually leads us to a chest with an Elixir. Heading to the SW room, the chest immediately by the teleport we arrive through holds a Water of Strength. This path eventually leads to Doran, so we'll head back and take the final two paths first since I have a feeling the mansion will collapse after defeating Doran. Taking the lower center room leads us to another room with two chests. The left chest holds a Magic Spell and the right chest holds a Medicine of Remembrance. Taking the SE teleporter, a chest directly south holds a beer bottle. This is the only complex path as the next room has a choice of teleporters. The closest (center) one takes us to another room with two teleporters. The right one in this room leads to another room with two teleporters. Taking the center one, we arrive at a chest with a Water of Intelligence. Heading back one room, the left teleporter takes us to a chest with an Elixir. Heading back to the second branch and taking the left teleporter, we get a Magic Water. Finally going back two rooms to the first branch, the left teleporter takes us to a chest with Moon Drops. With all the chests looted, we head to Doran's chamber.
Approaching Doran, with Lina tucked away behind him, he laughs, er, sinisterly (?) and tells Baron that he'll have to fight him to get Lina. Lina then screams for Baron to save her and we enter battle with Doran. Of course, Baron not being an active party member, Saya and Yuu will do his dirty work for him. After pummeling him for a bit (is he a duke or a marquis?), he reveals his true form and we re-enter battle. Dispatching his second form (he's now called Lacuard (almost Alucard, but now quite)) with ease, he mumbles about how easy it was to control Nimrud, yet... We then get a short cutscene of Baron and Lina's wedding ceremony and are back in the room Doran originally was in inside Nimrud Castle, with the happy couple standing in front of us. Huh, the mansion didn't collapse. Baron tells us that Morgan's castle is across the eastern sea, and the border guard has been informed about us. We also receive 500 Exp points. Lina thanks us for making the wedding possible, and we get rewarded with another 500 Exp points as well as a useless 7000 Gold. Speaking to the king, he's decided to vacate the castle and work among the people as an apology for what he did. Leaving the castle and returning, the king is gone, and Baron and Lina are now king and queen. Talking to the people of Nimrud, we just get a bunch of thanks and Huzzahs for the new king and queen. Since I'm maxed out and gold is ultra-plentiful, Yuu upgrades his Handgun to a Laser Rifle. With nothing else to do here, we'll continue on our way, passing through the border checkpoint.
Looking at the map, it appears to be a hike to the next town, Ziggurat Village. We should pass by the Water Tower on our way. Other than running into the same monsters as on the island with Doran's Mansion, there is just an empty plain between the border checkpoint and a bridge crossing a river. Saya got turned to stone by a cockatrice, so out of curiosity, we ride Monmo back to Nimrud. But, she looks just fine and dandy in the image of us riding Monmo! Well, resting doesn't cure stone, but she did regain all her HP & MP. I guess I'll use some Moon Drops. We make our way across the bridge and to the village of Ziggurat. It seems a legendary jewel, the Maiden's Tears, has been taken, which brought a curse on the town, drying up its lake and fountain. We'll need to retrieve the jewel in the Luxor ruins. Also in the ruins is apparently a legend of Titanus defeating Morgan -- something we've heard before. It's also mentioned that we'll need a boat to cross to the neighboring continent. So, off to Luxor to retrieve a jewel.
Heading southeast into the desert, we first see another guard post at the southern pass through the mountains. Talking to the guard, Monmo instead asks if Yuu is abandoning Ziggurat. A little to the NE of the guard post are the Luxor ruins. Entering the ruins to yet another new musical theme, the first thing we see is Sylph. Approaching him, we get a decent-sized cutscene. Sylph again taunts him, finishing with the standard "Don't die before we meet again" line. Circling up and around the right path, we find a chest with a Gold Shield, a nice upgrade for Yuu. Heading back and taking the stairs at the end of the left path, other than a large hole in the floor in the center path, there's nothing on this level, so we continue down the stairs at the end of the left path. At the end of the short corridor on this floor is a chest with Maiden's Tears. That was pretty simple. Checking the hole in the floor, nothing has changed. I'm guessing we'll need to come back here. The sound effects tend to get messed up in the ruins. Back in Ziggurat, we talk to the mayor who says the village is saved. The dry well behind him is now filled with water, as is the river that cuts through the village. Everyone thanks us, except for the people talking about the boat we'll need. We're told to head to the town of Luxeil to the south of the Luxor ruins if we want a boat. So, off to Luxeil.
Quickly arriving in Luxiel, it seems that the tower that we could barely see earlier was only recently built, and ever since, it has been raining constantly. This has really depressed several of the townsfolk, and what else is there to do but to constantly drink? Heck, yeah! Someone mentions that a Hain has recently died and his wife has been downtrodden ever since. Hain turns out to be the owner of the boat we were told about, and it being a memento, his wife won't let us use it. One person says a water witch has taken up residence in the tower. Talking to the mayor (who does not get voice work, just like the previous mayor), he begs us to defeat the witch living in the tower, who has caused monsters to run rampant outside of town. So, we have a witch to kill. We were told that there's a cave beyond the western pass, and a traveler just happened to lose a raft in it. Time to head west, but not before upgrading Yuu with a Flame Sword and Gold Armor.
Heading south and then west around the mountains, the path forks. North is a dead end, so we head down the west path to another fork. The west path is a dead end, so taking the north path, we reach the cave we were told about. Taking the first path to the south in the cave, we reach a pair of chests, with the north one holding a Wind Robe, which has a 35 better defense strength than her Silver Bracelet. The south chest holds a Flame Sword, which we already bought. Heading back to the fork and taking the west path and then the west path at the next fork takes us to a chest with a Magic Spell. Heading back to the second fork and going south, taking the east path at the next fork leads us to a chest with some Magic Water. Heading back to the fork, the south path takes us to the exit onto the island with the Water Tower. Ushuto works in this cave.
Now for a walkthrough of the tower, which will be a very dry read.
Entering the Water Tower, the river flowing through it prevents our passage. Hmm, I wonder where that raft is in the cave. Aha! Just before the island exit is a crack in the wall, and searching it, we find the raft. With raft in hand, we head back to the Water Tower. Walking onto the stream, our sprites are replaced with an empty raft. Heading north on the river, then disembarking to the east after the first wall, in the SE corner is a chest with Gold Armor (which we already bought). Heading to the chest in the northern cubby, we get a Medicine of Remembrance. Finally, in the area NW of the tower's entrance, a chest holds a panacea. Ah, so that's what the Ban Pesticide actually was that I bought from Nyan way back when I fought the plant monster on the Island of Herbs. Three sets of stairs are on this level. Taking the one near where I am, NW of the entrance, it turns out that it doesn't matter which we take since none are blocked off.
Heading to the SW corner, the chest here holds a useless Beer Bottle, which I believe damages one enemy and prevents it from using its special ability the next round. A little NE of that chest, in another little room, is a chest with an Antidote. Really? What's next, Herbs? The chest near the NE corner holds another Medicine of Remembrance. Lastly, in the SE corner by way of the NE corner, a chest holds Moon Drops. Again we have a choice of stairs up.
Ascending the SE stairs, we can see two chests. The one in the SE corner holds a Water of Might. The one just north of it is empty. Keeping to the east wall and finding three more in the NE corner, the one south of the one in the far NE corner is empty, as is the one in the far NE corner. The chest SW of the one in the NE corner holds a nearly useless Softball, which damages one enemy and prevents it from attacking for one round. Passing the one a little west of this chest, since we'll have to circle around, a chest near the NW corner holds a truly useless 596 Gold. Circling around and back to the one we couldn't reach, it holds some Herbs. Woo. Hoo. With all the chests on this floor looted, we head to the SW corner and snake our way to the only set of stairs up.
Now on the 4th Floor, a chest east of us holds another Water of Might. A little east of this chest is a narrow corridor leading north with a chest holding a Water of Intelligence. Just west of this chest is another chest with some Magic Water. Circling around, continuing looting the chests in a westward order, just to the west of the previous chest is one holding a Water of Quickness. Lastly, the far west chest holds a Medicine of Remembrance. Since I have a feeling the witch is on the next floor, it's time to head back to town and maximize those Waters (each gives a random 1-3 point boost). Ushuto actually sends us all the way back to the cave entrance closest to Luxeil, rather than just teleporting out of the tower. That taken care of, we head back to the Water Tower. Heading to the SE corner of the 4th Floor, we take the hallway north to the stairs to the 5th floor, a lo and behold, there's what I'm guessing is the witch standing in the center of the floor. Well, that sucks -- there's an opening in the south wall that sends you out of the tower. I guess it'll come in handy after defeating the witch (assuming that the tower doesn't collapse upon her demise), but now it's just an annoyance, as we have to rescale the tower. The lone chest on this floor holds a Robe of the Sun, which is a slight upgrade for Saya.
Aw, the witch doesn't get voice work. She introduces herself as Nina of Water and says that Morgan will plunge the world into darkness. Calling us fools for fighting Morgan, Yuu gets mad, yelling he'll never give up, and his psychic power is awakened again. The battle with Nina then commences. Wow! Thunder 2 just did 120 damage to her (Yuu's normal attack does around 40). Psychic Bomb does 130! Well, that made quick work of her. And his psychic power goes away. Aaaaaaaand, the tower collapses, instantly teleporting us outside. Unsurprisingly, we can't ride Monmo back to town from the island. But we can simply enter the cave, cast Ushuto, and then ride him back to Luxeil.
Back in Luxeil, with the tower gone, the rain has stopped, people are rebuilding the completely undamaged town, and the drunkards are getting back to work. The mayor simply thanks us, and we are given full use of the boat, since Hain's wife says Hain would be pleased if we used it. Heading to the nearby dock, we board the boat and explore the high seas. Checking out of curiosity, Monmo cannot be ridden back to town while sailing. Landing can only be done at docks. There's a decent sized island to the east of Luxeil, which appears to have zero monsters on it. Even though the map in the manual shows this large lake having an outlet to the sea at its eastern end, there is none, but rather a dock next to a cave entrance.
With the outer sea inaccessible, we head to the dock north of the island, arriving in the village of Bahari. This village has the almost requisite hot springs, along with the pervert hanging out behind a wall on the edge of the hot spring. Entering the spring behind the inn treats us to a shot of Saya, from her cleavage up, soaking in them. In addition to the eye candy (which you get every time you enter), the hot springs heals the party. It appears that there's another water witch wreaking havoc here -- I think the person near the entrance from the dock tells us that the town had been frozen by a witch in the past. Nyan has made it here ahead of us, and we're forced to share a room with him at the Inn. After a decent sized cutscene with Yuu and Saya stepping outside in the middle of the night with a shooting star (I'm guessing there's some bonding going on here), the Inn becomes free to stay at, since Nyan told the innkeeper that we're saving the planet. In the morning, Nyan then opens up shop right outside the inn and has some pretty powerful firearms that attack all enemies and barriers that have a high percent chance of nullifying enemy attacks. His items are also pretty pricey, so much so that it's literally impossible to buy the best pair of items at one time. With no real direction, other than the area east of town being very cold, we head out of town and check out the surrounding land.
In this little area surrounded by mountains, to the east is a stone structure and a bit further east is a guard post keeping us out of a snow-covered area. Momno logically can only take us back to Bahari. Out of curiosity, we head to the cave by the remaining dock. Trying to enter, we're prevented from doing so by a curse. Since no where else is accessible, or has anything of note, we enter the stone structure, which must be Temple Ramseum, where the water witch is rumored to be living. I think I might have gotten "water witch" wrong, and it's actually "ice witch" since the kanji for water and ice are very similar (I can't go back and check, since the dialog has since changed).
The temple is a definite spike in difficulty. Like in the Luxor Ruins, the sound effects while outside of battle sometimes get messed up in this temple. The only thing on the ground floor is a blue cylinder. Examining it, the cylinder turns out to be a monitor and we get a cutscene with what I'm guessing is the witch we're after introducing herself and getting quite mad. We then get a never-ending series of battles against Bloody Knights and Fire Devils. The nice thing about this sequence is that you get experience from every individual battle, so you can level up and string this sequence along for quite a while (possibly as long as you want if you're conservative about healing with Saya since you regain all MP upon leveling up). You just can't heal up between battles, as the next one instantly starts. Finally getting defeated, we get another cutscene with our heroes (even Monmo) laying on the floor and the aquamarine-skinned witch coming through the monitor, grabbing the unconscious Saya and disappearing. Just before fading out, Sylph is seen stepping out of the shadows.
Yuu then comes to in a house in an unknown village (looking at the map in the manual, this must be the town of Nineva). Ah, so the fellow by the dock in Bahari actually was saying Nineva was frozen by the witch as opposed to Bahari being frozen during its past. Monmo is out of service and can't even tag along right now, and Yuu is walking around with 0 HP. Talking to the kids in the house, it seems that a witch came through town freezing everyone, but the kids weren't affected because they were playing in the house. We also find out that we were brought back to town by Sylph. Upstairs, Yuu is able to heal for free and save. Exiting the house, everyone is frozen stiff. The ground is also mostly frozen over preventing our entering any other building. Since examining the townsfolk will probably trip the next flag, I leave town to see what happens. Nothing prevents me and the outside is also covered in snow, or maybe ice. Unlike in town, I am able to walk around on the snow/ice. Unfortunately, the monsters are too tough for Yuu to survive without the benefit of Saya's healing magic. Defeated and back in town (whew, it was just a bad dream (or so Yuu says when the file is reloaded)), speaking to any of the frozen villagers (I guess those kids were the ONLY people indoors when the witch cursed the town) makes Yuu sufficiently angry for his psychic power to activate. Looks like Yuu will have to explore this new area by himself, but now with the aide of his own magic, er, ESP.
Ok, for as strong as the Death Cyclops is, it sure isn't worth much in exp and gold. Heading west, my guess was right as I can see Temple Ramseum. Seeing if I can pass through the guard post, the guard has moved aside for some unknown reason, allowing me to pass through. Just making sure, Monmo cannot be used as he's back in Nineva. Rather than venture into the Temple, or anywhere else around Bahari, I set off east of Nineva. Nearing the eastern shore, there is a bridge to the south. Being the only option, I cross it and start heading back west and spy a tower-like building with what looks like a bridge near its roof, which connects the tower to a castle across the river. According to the map, this is the Ice Tower. A little south of the tower is a bridge I can cross, which leads to a small area surrounded by mountains and water with the lone lollipop tree in this entire area that isn't covered in snow/ice (this has to be significant). Being this far away from the nearest town, I highly doubt I'll survive the trip back, since Yuu's only means of healing, Meditation, takes a third of his max HP, and he only has one casting remaining. Surprisingly, I do make it back as I only had 2 encounters during the rather long trip. Since it's such a long way to the Ice Tower, I guess I'll see if anything changed back in Bahari and Temple Ramseum. Momno being out of order is making this a bit of a challenge.
Heading into Temple Ramseum, the monitor is gone, so there is now absolutely nothing to do here, except take some serious damage from monsters. I have a feeling the witch teleported in from that castle connected to the Ice Tower. Heading into Bahari Village, the hot springs still heals Yuu, but the Saya eye candy is obviously gone. This does cause Yuu to repeatedly enter the hot spring and give the healing dialog box until you hold down left on the D-pad while confirming the text. While it doesn't restore MP, the inn is free, so a quick stop there and Yuu is good to go. Nothing has changed in the village, so let's try that island with nothing on it and the cursed cave before tackling the Ice Tower alone. The island is still completely uneventful -- this place has to serve some purpose since they went to the trouble of putting a dock on it. I just noticed that the in-game map does not show an outlet to the outer sea from this lake like the manual's map does. No luck at the cave, as it is still cursed. So, off to the Ice Tower with fingers crossed. Yuu is nearing a level up, so maybe I can use the fully restored HP & MP upon level up to my advantage.
The tower will be another long, detailed walkthrough.
Making it to the Ice Tower relatively unscathed, hopefully, there aren't many floors to it. Well, there's a type of genie I'd never heard of -- a marid. I get to fight Ice Cube in here (ok, it's actually the ice variant of the Cube enemy). Directly ahead of the entrance is a chest with a Medicine of Remembrance, which actually might be useful. Taking the stairs in this chamber leads us to a chest with an Elixir -- again, probably useful with Saya being kidnapped. Heading back downstairs and around the right path to the stairs here, we get another Elixir. Ascending the next set of stairs to the 3rd floor, taking the first path south leads us to a room with a couple chests, the north one containing an Ice Shield (a nice upgrade with no Quickness penalty for Yuu) and the south one holding a smoke cylinder. Heading back to the fork and continuing west, then south and around to the visible chest, Yuu gets a panacea. Arriving at the bridge, we head back down to the ground floor and take the remaining stairs at the end of the path around to the left. On the 2nd floor, heading around the path, the far west path is a dead end. Going south at the remaining path takes us to a chest with a Beer Bottle (yay) which I'll be throwing at the first enemy I run into. The chest in the short path to the north holds another smoke cylinder. With all the chests looted in the tower, it's back to the bridge.
Arriving in the castle, a few inaccessible chests are seen on my way to the stairs down. A couple more chests are seen on my way to the next set of stairs down. Heading north, on the other side of the wall, I can see what looks like what will probably be where we fight the witch. In the NW corner, I can finally open a chest, receiving an elixir. Continuing along the hallway to the east, what looks like Saya frozen in that monitor-thingy from Temple Ramseum can be seen in the likely final room. Continuing down the hall, a couple flights of stairs later, we reach a chest in the SW corner of the 3rd floor, containing another much needed elixir. Continuing east, the first chest we come across has a Water of Quickness. Taking the west path from here and circling around, the north chest here holds a smoke cylinder. This path has the next stairs, so we head back to the southern hallway and continue east. The chest at the end of this path holds a Dragon Shield, which is worse than the Ice Shield for defense, but gives a boost to Quickness. Since Quickness doesn't seem to do anything but slightly affect defense, I'll be keeping the Ice Shield on him. Heading back to the stairs, back on the 2nd floor, heading west, we quickly find a chest with a smoke cylinder. Going back and taking the east hall, the chest here has an Ice Sword, an upgrade from Yuu's Fire Sword. Heading back around the wall to the chest just west of the last one, this holds an elixir. The final chest on this floor, just before taking the next set of stairs, holds a suit of Dragon Armor, which, like the Dragon Shield, is worse than Yuu's Gold Armor, but with a Quickness boost. He'll be keeping the Gold Armor equipped.
Taking the stairs down, we finally arrive in the main chamber. I think I'll use that Tent Yuu's been lugging around for all this time to save here. Well, that sucks. You can't use a tent here. Approaching the tube-like object, we get a nice cutscene where we see Saya suspended in it. The witch then appears, says something, then Sylph arrives slashing and wounding her. Yuu's psychic power is activated, even though it already was active. Hmm, maybe if you didn't speak to any of the villagers in Nineva and were able to survive, this would make sure Yuu could use his ESP? Yuu then enters battle with Nina of Ice. Well, at least activating his already active psychic power restored all his HP & MP. Pounding her with repeated Thunder 2 spells, she goes down rather easily, simply emitting a death scream. Yuu again loses his psychic power. We then get another cutscene with Saya being freed from her encasement and falling into Yuu's arms. The brief cutscene ends with Sylph saying something to Yuu. Since Saya rejoined the party before the experience is awarded, she also receives the 5000 Exp points. Nice. With Saya back in commission, we begin the long trek out of this place. But, what's that?! Gee, whiz! The castle's collapsing!! And we're instantly teleported back to the house in Nineva with Monmo, which saves a ton of time.
Monmo is finally alright, so he rejoins. Unfortunately, the girl upstairs is no longer a free inn. Stepping outside, as one of the children said, everything's back to normal. The people are walking in place and the ground is no longer iced over. The innkeeper doesn't seem so gracious as he's charging the town's saviors to stay the night. Everyone else is extremely thankful for freeing them from their frozen tombs. We're told of an old wise man that lives to the south, as well as a dragon, and that the curse on the cave has been lifted. So, back to Bahari to board our boat and set off for that cave. Nothing in Bahari has changed, so I was wrong about not being able to check on the water/ice witch dialog as I just assumed that it would have. It actually is ice witch and not water witch. Checking the large island again, still nothing has changed. So, it’s off to the cave on the eastern shore.
Now that we can enter, it turns out to not really be a cave but rather simply a short corridor with brickwork, maybe a tunnel? Exiting on the other side of the mountain range, we follow the path out of the snow-covered land and very quickly see a house off to the west. Heading to the Sage's House and talking to the old wise man, he tells us that the brave Titanus' holy sword, Grand Caliber, is the only way to defeat Morgan and that it is protected by a family of dragons living in this valley. The sage also acts as a free inn. So, off to find us some dragons! Before leaving, he gives Saya a Lightning Staff. Pretty good for just popping by for a visit. Venturing back out and getting into a battle, the Lightning Staff does 80 damage to each enemy, on top of physical damage. Wow! With a serious boom stick in hand, we head back to the path and follow the narrow, winding road through the mountains. At the first fork, we take the north path and zigzag until we reach a creature that looks like a minotaur. Since he can be reached by two paths, we backtrack to the fork and take the east path. The east path is a dead end, but we can see that the minotaur-like creature is actually blocking the path.
Back at the minotaur and talking to him, it turns out that it's really a human wearing a horned helmet. He introduces himself, rather vociferously, as Maisen, a Knight of the Dragon Tribe sworn to protect the holy valley, and will not allow us to pass. Saya tells him that she's a descendant of Titanus and needs to get the Grand Calibur to defeat Morgan. Maisen then challenges her to battle to prove it. We then enter battle. After doing enough damage to Maisen, he starts to transform into a silhouette of what looks like a dragon. After exiting the battle so the game can inform us that he did indeed transform into a huge dragon (maybe the battle system can't handle changing forms within battle?), we re-engage against a very nice looking red dragon. As a dragon, Maisen does a pretty devastating 80 points of fire damage on top of his normal attack, relegating Saya to always healing. Well, at least for the first 5 or so rounds as Maisen stops his fire breath attack. I guess he needs to recharge as after a few rounds, his breath attack is back (actually, after redoing the fight, there's just a chance he might use his fire breath attack each round). After a handful of attempts, we finally defeat him. As promised, he allows us to pass, telling us that his tribe's elder is in the cave ahead, and to ask the elder about the holy sword. He then disappears, clearing the path.
Braving the basilisks with their petrify special attack, a short ways past Maisen is the entrance to the Dragon Cave. Morgan's Castle is now the only place on the map we haven't been to, so the end is very near. Entering the Dragon Cave, a couple steps from the entrance is a dragon, who turns out to be the elder. The elder tells us, with voice work, that the holy sword is in the back of the cave and that it chooses its master. Looking us over, he believes we may have the qualifications to possess the sword. On the other side of the wall next to the entrance, what I'm guessing is the Grand Calibur can be seen protruding from a stone. An uneventful trip around to the chamber with the sword in the stone, we examine it. The sword is glowing, and of course Yuu is able to pull the Grand Caliber from the stone, filling the cave with light, as well as receiving 10,000 Exp. Excalib-- er, Grand Calibur is a very nice upgrade over Yuu's Ice Sword. Returning to the elder, he is very pleased that the sword chose us. He'll then call on Maisen to aid us and together we might be able to defeat Morgan and save this star!
Maisen is now just outside the cave and greets us as we exit. He apologizes for his earlier conduct and offers to guide us to Morgan's Castle, joining the party. Maisen then transforms into his dragon form and flies us towards the castle. This is shown in a nice cutscene showing Red Dragon Maisen flying toward the castle, which looks to be surrounded by some sort of barrier, followed by a conversation between Yuu, Saya, and Monmo. Unable to reach the castle, we're flown to Bahari Village. I was able to pick out Monmo mentioning Nyan, so I'm guessing he suggested that Nyan might have some way to get past the barrier, hence heading back to Bahari, where Nyan last set up shop.
Appearing in front of the inn in Bahari, entering the inn automatically progresses the game to a point I don't want to be at without saving. So, reloading and going through the Maisen battle and Grand Calibur acquisition again, we instead ride Monmo to Nineva and save. With the game saved, we head back to Bahari. It seems monsters attacked and took Nyan, which explains why he no longer is outside the inn. Talking to the pervert by the hot springs, he says that they're not really hot springs, but something else, trailing off before saying what they actually are. Hmm... Entering the inn, it turns out that before being taken by the monsters, Nyan left a panacea as down payment for coming to his aid. Yuu then asks Monmo if he can sense where Nyan is and Monmo senses him in a cave on a small island south of Olmec. We're then instantly teleported to said tiny island south of Olmec Castle with only a cave on it. Absolutely destroying the few monsters we run into on the island, being monsters found around Olmec Castle that we fought way back when, we make our way into the unnamed cave.
Heading down the west path, a little offshoot to the south gets us a chest with a Water of Quickness. Since there are stairs over here, we backtrack to the entrance and take the south path. At the next fork, we take the north path to reach a chest with an Elixir. Back at the fork, the south path splits, with each direction taking us to a set of stairs down. Taking the west path, the stairs lead to a branch with a chest holding another elixir. The other branch has another staircase going down. Taking these and heading north at the fork, we find a chest with a panacea. Heading back an south at the fork, we head down to B3. As soon as we arrive, we can see Nyan behind some beetle-looking figure (or maybe someone wearing a helmet). This path simply heads around to them, so since there are two other sets of stairs to investigate on the ground floor, we backtrack all the way there.
Back on the ground floor, we take the SE stairs and circle around to get the chest just NW of the stairs for a Life Water. Up in the NE corner is a chest with an Aurora Stone. Passing by the stairs going down that we can see to the north on our way to the NW corner, there are stairs up to the remaining set of stairs on the ground floor. Heading back, we take the stairs down to B2, which only has stairs down to B3. The south path has a Dragon Shield -- I guess just in case you didn't get the one in the Ice Witch's Castle. The north path has an Elixir. Now with all the chests looted, except for the Dragon Shield that we can't pick up since you can't have duplicate pieces of equipment, we make our way back to where Nyan is being held captive.
Approaching whatever it is that's guarding Nyan, we instantly get into battle with a black bull-like being with orange hooves, gold horns, and a nice head of red hair. Now in battle, the monster name tells me that it's a gorgon. Since the gorgon only has a physical attack, it's a very easy battle. So, why isn't Maisen fighting alongside us? Monmo cuts short Nyan's excitement at seeing us and asks him if he has an antigravity barrier-neutralizing beam -- now that's optimism. Unfortunately, he doesn't have one. But he picks up our urgency and thinks of another way of going about neutralizing the beam, asking us to guide him there. We then get a decent cutscene with Red Dragon Maisen flying toward Morgan's Castle with Nyan in his spacecraft flying off our starboard side. Nyan then flies his craft into the barrier, parachuting out before impact. Maisen then catches Nyan, and as he tries to fly through the hole Nyan's craft made in the barrier, he takes damage to his wings and we land in a small clearing in the mountain range with a cave a few paces to our north. As soon as we start moving, Maisen says he can't go on thanks to the injury to his wings (even though he's now in human form), and Nyan stays back to be his nurse and gives us an infinite number of panaceas. Nyan then serves as an inn, and then will give us another infinite number of panaceas. Back to just our standard trio, we're off to take down Morgan.
Entering the cave, we can see what looks like Sylph just hanging out. Approaching him, he tells us that we'll die if we proceed. Of course, that won't stop us, so Sylph decides to join up to see just how well we fare. Speaking to him via the Select menu, he makes it clear that he's not an ally, but rather doesn't like the way the enemy operates. Either I'm getting bad luck with the encounters or this place has a really high encounter rate. At least the monsters here, with the exception of Death Cyclopes, are worth a good amount of Exp. Circling around the magma to the south and then taking the path to the SW corner, a chest holds a Medicine of Remembrance. Ignoring the two sets of stairs in the NW corner, the chest reached by taking the eastern fork in the NW corner holds a Camp Capsule, which functions like an inn, and is supposed to work anywhere. Heading back to the starting point, the eastern path leads to another set of stairs we'll ignore for now. The NE path also leads to stairs, so since we've fully explored this level, we'll take them. These stairs lead to a simple straight hall with a chest with... 5963 Gold. Um, unless we can get back to a town, Gold serves absolutely no purpose anymore. Back on the ground floor, the SE stairs lead to another simple straight corridor with a chest with a Medicine of Remembrance. The stairs at the end of the western path is another simple path to a chest holding a Magic Spell. I have no idea what this item does since it doesn't work during or outside of battle. Looks like we did the stairs in the most efficient order for looting purposes.
Taking the final set of stairs in the NW corner (the stairs just on the other side of where we entered the floor) takes us to the little room with a chest on the ground floor that we couldn't reach. This chest contains Armor of the Sun, which only has a slight improvement in Quickness over Yuu's Dragon Armor. Heading back up, we take the stairs up to the 3rd floor. Heading around the wall and up the right side of the magma, we find a chest with a Beer Bottle. Um, yeah. Going back around the magma and ignoring the stairs in the middle of the magma, since I have a feeling that's the important staircase, taking the stairs down at the end of the hall east at the fork, we find a chest with a Gold Armpit. LOL, what? Oops. I drew the wrong kanji. It's a Gold Bracelet, a very nice improvement over Saya's Silver Bracelet. Back on 2F and taking the western branch, we climb a set of stairs, which leads to the exit by Morgan's Castle. Well, back into the cave to take those stairs that I thought were the important ones. This takes us to an area shaped like a capital E, except with five prongs. Heading south, the chest in the top prong holds a Medicine of Remembrance, the one in the next prong holds an Aurora Stone (now that I've found 3 of them, I'm guessing they're not infinite use), the one in the next prong holds a Feint Cloak (another item that doesn't do anything in or out of battle), and the final chest in the lowest prong holds an elixir. Well, that was disappointing. With everything explored, Saya casts Ushuto and we are warped out next to Nyan and we save. Quickly traversing the cave again, the Tent can't be used outdoors near Morgan's Castle. Grrr.
Now in Morgan's Castle, which has a new musical theme, two chests are seen on either side of the corridor walls. Heading up and around to the west one, it contains a panacea. Ignoring the stairs over here, we instead head to the east chest to receive a Camp Capsule. Since we're on this side of the symmetrical floor, we take the stairs. The chest here holds another Aurora Stone. Testing it out, it looks like they're good for 5-10 uses (I didn't count) before they crumble. Ascending the stairs just south of this chest, this looks like our target area. Taking the east hall, we reach two chests right next to each other, both holding panaceas. Back to the ground floor, the west stairs lead to a single chest with a Medicine of Remembrance. That done, we trek back to the west path we ignored on the third floor. This leads to a large chamber with a large statue of what looks like a queen. Well, since there are no more stairs up, or other methods of egress, I'll use one of those two Camp Capsules to save as this has the definite feeling of being the end game to me.
Approaching the statue, we hear a disembodied voice telling us that it's foolish of us to throw our lives away opposing the beautiful legendary princess Morgan, and that she (it turns out it's Morgan speaking) will teach us a lesson. This infuriates Yuu enough to activate his Psychic Power. Yuu then raises Grand Calibur over his head, sealing her powers. Morgan then yells at Sylph about betraying her. Sylph responds with being unable to accept his life as it is. We then enter battle against the statue of Morgan. The statue has a pretty strong electron beam attack, in addition to its standard attack, that does 100 points of damage. Thunder 2 again being really useful, after a good amount of rounds, the statue starts cracking up and eventually crumbles. It turns out the statue was... a giant robot!!! Awesome!!! An eerie voice is then heard echoing through the castle. We then see the true appearance of Morgan and are told to take a good look before sending her to the depths of Hell. Nice. We then reenter battle against the actual Morgan, which, I must say, is a pretty gruesome visage. Yeah, having all these panaceas makes this ridiculously easy since they fully restore the HP and MP of both Yuu and Saya. You just need to stay healed. Making short work of her (hey, I thought her statue crumbled), she wonders why she was defeated, again falling to the holy sword. We're then treated to a cutscene with Morgan screaming her last, Yuu thanking Sylph, Sylph giving Yuu a heartfelt speech before fading away, a shot of Nyan and Maisen watching the castle start to collapse, and Yuu and Saya riding Monmo through a corridor of the collapsing castle. We're then outside the cave to the castle. Maisen has recovered so he can fly us away from here.
Not quite done with the game yet, we get another lengthy cutscene of Maisen flying away from the crumbling castle and a conversation among Yuu, Saya, Nyan, and Monmo. Some blue-skinned fellow decked out in military garb then appears in front us in a projection emanating from what looks like a large warship on the water, laughing gleefully about something. I pick out him saying cosmic hunter (maybe a sort of Pizza the Hut coming to collect?), then mentions Norg. A beam then shoots out and hits Maisen, forcing an emergency landing. The elf girl Pippo, from quite a while ago in the game, notices our plight and we land outside her house. I believe Pippo says she had a dream about a dragon falling from the sky and her nursing it back to health. Yuu leaves Maisen in her hands. We then get another cutscene with Yuu calling his craft's on-board computer, Mother, from his wristwatch. Apparently she's repaired the ship and it's shown with Yuu back at the helm flying towards the structure amidst laser fire. He then crash lands on the warship (man, his piloting skills are not being featured in a positive light in this game, or maybe he got hit even though the beams went well above the Aljernon during the cutscene). I take control of Yuu, Saya, Nyan, and Monmo, now onboard the Aljernon. Mother says that this will be the final battle. She also says that the physical recovery device has been restored, so talking to the main console at the front of the ship serves as an inn.
Exiting the Aljernon, we're inside what kinda looks like another spaceship, since the walls have the same electrical circuit motif. Heck, yeah! We're fightin' some Space Ninjas! Heading around the path, the west chest holds a panacea. The first chest east of that one has an Aurora Stone. Heading around the wall to the easternmost chest, it contains an elixir. Climbing the stairs to the 2nd floor, heading south and around the wall to the west, the chest just west of the stairs we climbed up contains a panacea. Taking the next hall to the west, the center path to the north has a chest with another panacea. Cycling back around, passing by the path to the south that leads back to the stairs we came up, the east path heads to a chest with another panacea. Going back to the south part of this floor and taking the east path, we make it to a wolf-like figure standing by the stairs to the next level. Approaching it, we enter battle against a Mecha Kobold. Having an electron beam attack (half as powerful as the Statue of Morgan's was) makes it a little bit tough, but defeating it simply clears a path to the stairs. It was actually worth more Exp than Morgan.
As we get to the bend in the hall on the 3rd floor, what looks like another Mecha Kobold is seen on the other side of the wall, guarding the next set of stairs. Winding our way around the single path, we arrive at the next mid-boss, this time a Mecha Ogre. The battle is the exact same as the one with the Mecha Kobold, complete with electron beam, just with a little more HP on the baddie. Easily dispatching it, we head up the stairs. Just in case, for some strange reason, you needed some help, a chest on this floor holds a panacea. Guarding the next set of stairs is a Mecha Gorgon. It doesn't have the full head of hair, but it does have some nifty electric blue horns. Again, it has the electron beam attack. Moving along, the next floor is a straight shot north to a figure standing in the middle of the room. I'm pretty sure this is going to be the end boss. Speaking to him, a cutscene shows the blue-skinned guy saying something to Yuu that is of much concern to Yuu. It then has sepia-toned flashbacks to the graveyard where Yuu's psychic power first activated, Cain's spirit, and a shot of Sylph. We're then fully healed, juuuuuust in case, and we enter battle against Bacchus. Like his mecha minions, he has the same electron beam attack. Easily defeating him, he then transforms into his true form. Oh, no. Back in battle, he's now called Bio-Bacchus. He's lost his military garb and looks like a blue demon with eagle-like wings and possibly goat-like legs. Well, at least he has the decency to still be wearing pants. Ok, now this is actually a tough battle since on top of his normal attack, he gets two attacks that do 100 points of damage each. Considering Yuu's Max HP is about 250, that can pretty much wipe him out, meaning game over. Not expecting an actual fight, we set up our remaining Camp Capsule just before Bacchus on our second attempt.
Using up our entire supply of panaceas (I guess the plethora of panaceas you get end up actually being needed), since Saya had a bad case of getting knocked out, I know I was on a do-or-die attack when we defeat Bacchus. A short cutscene plays with him laughing at us from the floor as he gasps his last breath, spitting out his purple blood, and he is no more. Heading out of the room, the wall at the end of the short corridor has closed, blocking our way. Thanks for telling us that, Nyan. That wall blocking our path just wasn't obvious enough. Yuu then apologizes to Saya for getting her involved in his affairs. Saya tells him it's not his fault, that those guys were trying to conquer this star and Yuu saved the star. Monmo thinks he hears space pirates coming. Saya's happy to have met Yuu. *sniff* Yuu thanks everyone. *wipes tear from eye* Nyan wants to see his wife and kittens. Yuu finally suggests we should look for an escape route. No need for that, as a cutscene shows a healed Maisen in red dragon form melting the door with his fire breath, followed by the screen panning to show several of the incidental characters we met along the way. We're then in what looks like the main hall of a castle (I think it's Olmec).
Speaking to everyone in the castle (all of which have voice work), besides everyone thanking Yuu, Saya fumbling over her words, and Ruid promising to continue putting the moves on Pippo, there's nothing of note here. Heading up to the throne room on the second floor, the king delivers a very long speech. He thanks Yuu for bringing peace to Norg, destroying the bewitching princess Morgan and the evil space pirates' operations, bestows the title of Norg's savior on Yuu, and promises that Yuu's name and actions will be passed down for as long as Norg exists. The 31st and final cutscene follows where Yuu boards Aljernon while Saya gets teary-eyed at their parting. Yuu has feelings for Saya, so brings her along. Nyan, I guess without a backup means of leaving the planet, chases after the Aljernon as it's taking off. Yuu sees this and lowers a winch with a hook, bringing Nyan along. The Aljernon leaves the planet and the credits roll over a cast photo, finishing with a bill of sale from Nyan.
It then has a Character roll. We get to see Yuu surprised in the shower, followed by his stats (14 years old, from Earth, 156cm tall, 48.5 kg, special skills of firearms and psychic). Then a pan up of Saya in the middle of changing clothes, then her stats (16 years old, from Norg, 165cm tall, 47 kg, 87-56-86 (cm)). Monmo gets a photo of him getting a tune up or some sort of diagnostic work done to him, followed by his stats (model year of 2101, manufactured on Earth, 1535 cm in length, 96 kg, features automated repair and biological radar). We then get a shot of Nyan holding the camera and winking, followed by a picture of the four of them together and they seem none too pleased with Nyan. Unable to avoid the shutter himself, Nyan is photographed wearing nothing but his hat, but no stats for him. It then gives the code to view the Visual Debugger followed by information regarding a contest where the first 50 people to finish would receive a promotional item for Tomomi Nishimura's "Tomorrows" (she sings the opening theme song) and how to apply for the gift.