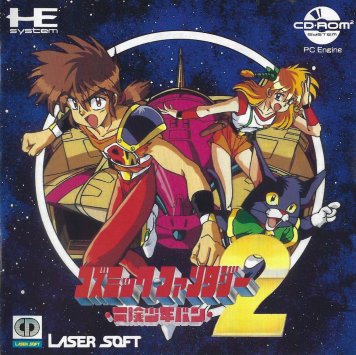
I’m going to play through both the Japanese and US releases of this game “simultaneously”. And by that, I mean I’ll play through a section of the Japanese release, then play through the same section of the US release, noting what Working Designs changed in their localization. Since I am no where near fluent in Japanese, I'll be using a few online translators: https://translate.google.com/, http://www.bing.com/translator, and https://j-talk.com/convert, and comparing their outputs. Starting with the packaging, I can’t say I’m a fan of whatever artwork WD decided to use for the outside box. As for the CD art, unless they make an appearance, I’m stumped as to why WD used Yuu and Saya, the lead characters of the first Cosmic Fantasy. As for the manual, unlike their later releases, other than the front and back covers, WD’s manual is in black and white, which really washes out some of the screenshots. The Japanese manual is in full color from cover to cover. I’m guessing since they put the game’s story on the back of the outer box, WD decided to remove that page from the manual. The removal of the cast page is understandable. WD did add a couple pages simply listing what the item abbreviations are, as well as 3 pages for notes. Other than that, WD’s manual uses the exact same layout. Starting up, WD removed the couple black screens with credits before the title screen. They also simply removed the vocals from the opening theme.
Interesting… WD’s release creates two save files when you start a game, while the Japanese release creates one. The Japanese version also simply starts a new game if you choose to load a game file that doesn't exist, whereas WD’s release gives an error. The opening cutscene is rather disappointing to me compared to the first game’s, but it does introduce our hero, Van. On to the game, and WD’s manual is incorrect stating that you start the game outside Shura when you actually start in the town. Oh, look! Some of the townsfolk actually move in this installment! And you can walk diagonally, too! Hmm, looks like they reused the shopkeeper images. The inn is free right now. Oh, hey! I found an antidote in a dresser. Items were only purchased, given to you, or found in treasure chests in the first game. Other than a girl wanting me to take her to Wam Village to play, and a couple people complaining about how Van doesn’t do any work, there isn’t anything to do in the starting town. Leaving town, Van automatically walks to a big tree in a clearing and the first cutscene of the game plays showing a flashback to his childhood and him showing off to Larla how he carved his and Larla’s names into the tree. The names are in English, so her name is Larla, not Laura, as in WD’s release. After the short flashback, we see an explosion off in the distance, which I’m guessing is in Shura. After searching the tree, not surprisingly, it’s the guardian tree of Clan Island. So, it’s back home for Van. Nothing seems amiss in Shura, so that explosion happened elsewhere. Rewatching the scene, I did make out him mentioning Wam.
Saving at the inn in Shura, I switch to the US release to see if it loads with the antidote in my inventory and the cutscene visited. If it does, I’ll have to restart the game to see how they translated the cutscene. Well, he has the same inventory, including the antidote I found. The cutscene flag is also tripped, which means it looks like I can just use one save file, play through a section on the Japanese version, don’t save, then reload it with the US version and replay that section.
Ok, so I figured out how it treats the save files when starting, and WD really jacked it up. So, both releases allow for two save slots. With the WD release, when you choose to start a game, it wipes both files and creates two new game files. So, if you want to start a 2nd game, DO NOT choose Start Game, but rather Load the other file, which will be at the beginning of the game. If you have two in-progress games and want to start a new game, well, you’re screwed if you want to keep one of the other in-progress files as you’ll have to lose both files to start a new game. Trying out the Japanese version, that version is still bad, but not to the same degree. Starting a new game on it automatically chooses slot 1, wiping out that save file. So… if you have the Japanese version, and if you have more than one person who might want to play it, you’ll want to save to slot 2 first (you’re always given the option of which slot to save to), just in case the 2nd person chooses the Start Game option, thereby deleting slot 1 (yeah, I know, it’s crazy to think someone would start a new game by choosing the option to start a new game). The other option is to just always choose Load Game from the start. I could kinda see this if it was the first game, but the first game worked just fine in this regard. How can you then mess this up with your 2nd entry? They also removed any indication of file contents -- the first game showed Yuu’s level for each file on the Load File screen. This issue is even more egregious with Working Designs. Unless it works correctly on US TurboGrafx systems, how do you mess up something as basic as the save system THAT badly? Ok, with that figured out, it’s back to the actual game.
Differences in Shura:
The little girl in the NW says Wan (not Wam) is safe instead of wanting to go there to play.
Van’s uncle busts out the infamous “Is that a spear, or are you just happy to see me?” line as opposed to asking Van if he’s going hunting with his spear.
All but one of the chickens say, “Find peace within you.” as opposed to just cackling.
Uba is renamed to Abel.
Leather Clothes is now Cloth Armor.
Spear is now Small Spear.
Knife is now Butter Knife.
The weapon and armor descriptions are very basic.
Fruit of Response is now Bingleberries.
The aforementioned change to have LARLA be LAURA carved into the tree. Van also doesn’t mention Wan Village in the cutscene.
Moving along, exploring what I can, there are no encounters in this area. Other than the entrance to a cave and the dock by Shura that’s just decoration, there’s only a burned down town a little SW of the Tree of Shura. I’m guessing this is Wam Village. Talking to the villagers, Galam’s army suddenly attacked, destroying the town. One woman begs for her husband to be returned. It turns out their target was the princess of Idea (the planet this game takes place on). Of course, she turns out to be Larla, as Van is told by the mayor’s daughter that the princess wears a royal pendant, which we see Van recall Larla wearing in a short flashback cutscene. It seems the surrounding area has suddenly become dangerous, so the mayor gives Van some herbs. And if you keep talking to him, he seems to have an unending supply of them. And, yep, there are now monsters roaming the area. To battle! Instead of having area-specific backgrounds like in the first game, this one just overlays the monsters on top of the current screen. Good thing I got a bunch of herbs from the mayor, since you can get into battles against up to 4 monsters. I got into one such battle and used up just about all of the herbs he gave me, causing me to go back for more. You now have to advance through all the text, whereas in the first game, everything automatically advanced, which does slow down the encounters just a hair. Oh, and the map shows points of interest in this game.
Back in Shura Village, the music has turned rather upbeat. After Van’s uncle tells us that Uba and Larla were taken by some people, more monsters attack. I guess I should have bought some better gear earlier. I guess I’ll buy that shield on my US playthrough of this section. After speaking to a guard outside Uba’s house, who is the head of the army corps, he attacks. I like the boss battle music. Being weaker than a few of the monsters we’ve already fought, he goes down pretty easily. But he gives no gold or experience!! What?!? And the music changes again. That’s a nice touch.
After finding Uba safe in the house the chief was guarding, he tells Van that Larla has been taken to the harbor. Van rushes to that previously inconsequential dock in a short cutscene that shows Larla held hostage on a ship while a mysterious figure phases in, blocking Van's path to the ship, and suddenly Van’s in battle with the figure, who turns out to be named Wisdom. An odd name, but that clears up the dialog about the wizard among Galam’s forces that destroyed Wam being called Wisdom. Now THAT’s how you do an unwinnable battle. I scratch her, and then she wipes me out with one hit. After another brief cutscene with Wisdom laughing at my sorry butt, Van wakes up back in town in Uba’s house. Remembering he needs to save Larla, Uba fills in Van about something in a comparatively lengthy cutscene. Uba tells Van that he raised Larla as his daughter in this small village in order to hide her identity. He then tasks Van with telling the king of Remlai about what happened, giving him a coin that is Proof of Shura, which should grant an audience with the king. After that, Van will need to then travel west of the castle to meet a Darba, who he says will grant Van great strength. Van’s uncle mentions a ship heading to the continent that’s leaving from the port of Sarai, which is through the cave I saw earlier. After receiving another free herb from one of the villagers, I save and switch to the US version.
The only significant change in Wam is that Wisdom is renamed Wizda.
As for monsters:
What I think is supposed to be a Gail is called a Plasma Slime.
Kobold is renamed to Gargoyl (there’s not enough room in the monster name box for the “e”), which makes no sense since they don’t have wings.
So, if you get defeated, it reloads file 1, even if you are playing on file 2 (I’m using file 1 for the Jpn version and file 2 for the US). Back in Shura, nothing is significantly different… until I fight what is called simply the Captain. They definitely beefed it up, making it deal 10 points of damage on every attack and giving it quite a bit more HP. They also added receiving 20 Exp for defeating it.
So, according to WD, it is said during the lengthy cutscene that Larla’s dormant awesome power will manifest itself when she turns 17 and whoever marries her will have that power bestowed upon him. The Proof of Shura that Uba gives you is called the Writ of Shura, and is listed in your inventory as Crest. With a save, it’s back to the Jpn version.
Checking out Wam Village, there’s just talk of rebuilding the town and the woman who lost her husband is thinking of moving away. So, it’s off to the southern cave. Finding a single herb in the cave, which is quite disappointing, I fight through the same monsters as found outdoors and emerge, visiting the town I first come across. Other than a man hiding from his wife in a well because he seems to be cheating on her, and the men seemingly being afraid of fighting the monsters around here, there’s nothing to do here but rest at the inn, which is also free, and save. Both shops have locked their doors, so I can’t upgrade any equipment. It seems Van has been here before as the mayor and his granddaughter both know his name. Let’s see what WD has to say about this town.
Visiting Wam, there are just some differences in dialog. I think the old man says he is ready to die in the Jpn version, while in the WD version, he’s happy to be alive. The woman who lost her husband changes from moving because of the sadness the town brings her to moving because it’s dangerous, which seems less appropriate. Crossing through the cave to the village, the man in the well is still hiding from his wife because he’s having an affair. The mayor isn’t going bald because of the monsters in WD’s version, but rather has a bad case of hemorrhoids. Um, yeah. So, it’s back to the Jpn version to see the king.
Heading due north, I reach the port town of Sarai. At least, I think it’s Sarai since there is absolutely no indication of what the place is called. I miss the signs at each place’s entrance that state what the name of the place is that are in the first game. And, shockingly, monsters are preventing the ships from sailing. There’s also the requisite lady that is stuck in this backwater place and must get back. The shops are open, so I can upgrade Van. And there are a couple amulets for sale, which are a new equipment type for this game. The inn is free again. Maybe inns are always free everywhere? Ok, those stairs in the lone multi-story building are really easy to miss since they hardly look like a staircase. Well, all the sailors are drinking since they can’t go out sailing, so there must be a bar, and it’s pretty busy. A few people mention a ghost in the warehouse, and a captain of some ship tells of a legend of an underpass that connects the island to the continent. That’ll be useful since we can’t sail there. He also tells me to see him when there aren’t any monsters. Heading to the warehouse to see if we can catch sight of that ghost, there’s now a girl in one of them, and it turns out to be a pink-haired sorceress in training named Annie, who happens to also need to get to the continent. So, I pick up my first traveling companion, and she conveniently has the key to the underpass. Nice. She starts with the basic heal and antidote spells, in addition to single- and all-enemy sleep spells. Heading to the shops to spend a bunch of money on equipment. While I believe the description says women can’t wield the tomahawk, Annie is perfectly capable of equipping it. Lovely, after trying out all the equipment, loading the file caused my system to crash hard. Luckily, it didn’t corrupt the file. But after deciding on what equipment to go with and saving, it loaded just fine. This is a good place to change to the US version.
Changes to US version:
In Sarai Town, the lady that desperately wants to leave instead jokes about opening up an Alcoholics Anonymous (AA) chapter.
The woman on the dock makes a Gilligan’s Island reference.
While I would think Fire Orb is a more apt name for the item that casts the low level Fire spell, it’s a Fire Ball in WD’s version.
The bar workers’ dialog is a bit different, with the dancer now making a joke that’s a play on MADD. The dancer also isn't identified, where only generic “Man”, “Woman”, “Child”, etc. hadn’t been up to this point.
Van tells the captain that Idea’s future depends on him making it to the mainland as opposed to needing to save Larla.
What I translated to be the Ghost Plume that Annie starts with is now Holy Cape.
Iron Shield is now Steel Shield.
Their description of the Tomahawk says women are less able with it, but it has the same stats when both Van and Annie wield it.
Back to the Jpn version. With the key to the underpass in hand, we head north around the mountains and east to what I’m guessing is our goal. Now with two party members, battle becomes a little cumbersome, but it’s actually turn-based instead of round-based, which is a definite plus. It looks like anyone can act in any order. It’s a little annoying that it doesn’t automatically choose the remaining character when everyone else has acted. After a rather terrible sounding door opening sound effect, we enter the underpass, losing the key forever. Yay! New monsters! And I face a green ball with a mouth, simply named Vore. Well, it’s about time Van learned a spell, and it’s a fire spell. I don’t like how they removed it telling you when you learn a spell. Hmm, I wonder what this Magic Feather Duster does. Taking the first stairs up we see, it’s actually the exit and Annie takes off to Darba’s, thanking Van and giving him a Rito Orb. Dangit! I hadn’t fully explored the underpass yet! Heading back in, I only missed one empty path.
Checking out my map, it’s now of the new continent. I was expecting it to have expanded to include both Amur Continent and Clan Island, but this is better, being more detailed, although I kinda have to guess where I am since it doesn’t show my location. And more new monsters, including a gargoyle, which makes me wonder what WD named it since it already renamed the kobold to gargoyle. Heading off after Annie, and towards where Darba should be, we make it to the first point of interest and find nothing. It’s nice that these town rats do 0 damage to Van. Moving along to the next point of interest, there’s what looks to be a town right next to a church, or maybe a castle. Let’s check out the town first.
Yay! A sign with the town’s name on it! I’ve arrived in the castle town of Setoa. What? A strange forest that sends you back to the beginning? Never! Talking to the townsfolk, it seems the king is a bit under the weather. People also keep mentioning a grandpa Jose. Finding a few items in what turns out to be Jose’s house, I run up against the inventory limit of 12 items. Speaking to Jose, who is an old friend of Uba, after trailing off, Van shows him the Proof of Shura. Jose instantly recognizes it and apologizes for doubting Van. Van then tells him what happened and Jose leaves to talk to the guards. Hmm, I guess I should have gone to the castle first to see what would have happened, so I reload and head there before talking to Jose. Two guards block the entrance, telling me that the king is not feeling well and I should try back some other day. With Jose off to speak to the guards to presumably allow me in, I switch to the US version.
Changes to US version:
Monster Egg is now Pedra Pod.
Vore is now Hungry Pod.
I’m surprised they translated the Magical Duster to almost the same thing I did, being a Magic Duster. I still don’t know what it does (the same item came up in the first game that I translated to Magic Spell; but with an image to go with it in this game, Duster is more appropriate). As with the Fire Orb, they went with Ball of Lito, while I went with Rito Orb. Heading to Remlai Castle, I’m interested in the monster translations.
Devil Eye is now Evil Eye.
I went with Dual Dog since the sprite is a canine with two heads, while WD just pretty much went with the Romaji, with Duodoc.
The one I was waiting for, they just hyphenated Gar-goyl (but don’t hyphenate it in the battle dialog box), I guess to differentiate it from the Gargoyl that’s actually a Kobold.
I went with Town Rat, they went with Garrat. It still doesn’t damage Van.
For the seaweed-like monster, I really didn’t know what to go with for what Romanizes to Uddii, using Udi. I was fully expecting them to go with Woody, but they went with Swamp Thing.
Arriving in Setoa, the sign makes no mention that I’m on Amul Continent, which WD went with Amor. They removed the first bit of dialog from three of the people roaming around the town, as well as the mayor, unless their dialog changes depending on if you’ve gone to the castle. Dangit! Now, after I finish the game, I'm probably going to end up replaying it (I saved after I visited the castle) up to this point to see. Buying a Target (a shield), I switch back to the Jpn version.
Oh, I just realized that the sign has “Youkoso” (Welcome) visible on it. Since you can’t carry more than 3 of any type of equipment, and you still can’t trade equipment between party members, there’s absolutely no reason to keep old equipment, so I sell everything off before heading back to Remlai Castle. As soon as I arrive, the guards move aside to let me through. One of the maids is infatuated with some John fellow, who is supposedly the best swordsman in the kingdom. Cleaning up a bit of translation, and backing up WD’s translation, it seems the king is without an heir. If I hadn’t become flush with Gold on my trip here due to the rather high encounter rate, that long sword I found might have been useful. Now it’s just something to sell. It’s mentioned that people have been disappearing in the waterfall to the north. Possibly due to the king being under the weather, rather than having an audience with him in the throne room, it’s instead held in his bedroom. If he hasn’t produced an heir by this point in his life, the odds are pretty good that his family’s line ends with him. Of course, Larla is actually the princess that the maid said died shortly after birth. After imploring me to rescue Larla, he gives me the royal family’s sword, then summons John to join me. Yay! Another seemingly temporary party member!! And he starts out pretty decently leveled with some nice equipment. Now it’s off to find this great magician, Darba.
Seeing if there is anything at that point of interest on the map I passed on my way here, there still isn’t anything. Boy, does John take a lot of damage from these monsters, so back in Setoa, we drop the 250G on a Target for John. And might as well rest since it’s free. Hmm, the monsters seem to have mysteriously become stronger, dealing around twice as much damage. Checking out the waterfall first, there’s just some voice coming from it saying the area is under construction. We can bypass the bridge to the south by simply wading across the river here. Checking to see if the bridge is an event, we wade back across the river and head down to it. It’s not, so we head north to the point of interest a little west of the waterfall, entering a village that doesn’t appear on the overworld. The sign says it’s Fog, the Village of Forgetfulness. Trying to leave, it turns out we’re stuck in here for now. This must be why we were warned in Setoa about the western forest that someone got lost in. Talking to the people here, this village is stuck in a time warp, and only sometimes appears in the outside world. Time also doesn’t pass in the village. We’re also told about a demon living in a cave to the north of the village. Paying no heed to that warning, we try to head north to the cave but are blocked by a woman (I think?) named Sarah. She’s looking for a way out of the village, so we team up and try heading north, hopefully to find some clues about this village’s predicament in the cave. This seems to be a good spot to switch to the US version.
WD went with Jan, I went with John.
One of the guards says the girl (I’m assuming Sarah) that was resting here was traveling north, as opposed to west in the Jpn version. Since Fog is actually northwest of Remlai, either direction works.
The royal sword King Remlai gives you is now the Sacred Sword, although it appears in the inventory as R Sword and the manual lists it as Royal Sword. He says it will aid in battle, but it’s not equippable.
WD called Fog the Village of Oblivion.
When you try to leave, instead of saying you can’t go outside, it says “The exit is blocked”, which doesn’t seem as mystifying to me.
The chickens say “Thank you Thighmaster!” Remember those?
The roaming woman gives a name to the demon living in the cave -- Amon-ta.
The mayor delivers his first dialog like the opening to a Twilight Zone episode. He does say about the same thing as in the Jpn version, though.
The woman in the mayor’s house isn’t sorry for us straying into the town, but rather acts as though she’s under Amon-ta’s influence, and she’s happy we got lost here.
Sarah is now Lyle -- considering she looks more like a male, that seems a more appropriate name, even though it’s no where near what the Jpn name is (Sara).
Back to the Jpn version. That chicken made it a bit easier to find the path through the trees to the cave. Oh, I like the lizard monster with two human heads. The only useful treasure in here is a tomahawk for Sarah. We eventually make it to a gate that John’s immense strength can’t budge, and it has no keyhole. Sarah thinks Fog’s mayor might know something, so with this place fully explored, except for what’s behind the gate, obviously, we make our way back out. Speaking to the villagers, the mayor is responsible for the village’s predicament. Talking to the mayor, he tells of how, long ago, the region was ravaged by war and a plague, which almost destroyed Fog. To protect the village, he summoned the demon in the cave and made a deal with it. And this is how the demon protected the village. In order for Van and company to defeat the demon, we need a way to get by that gate, so the mayor hands over the Contract Book he used to summon the demon. Before leaving, the mayor mentions something about what will happen if the demon is defeated, talking about their fate before trailing off. So, we have ourselves a demon to slay.
Arriving back at the gate, the Book does break the seal. After threats get hurled back and forth about each side killing the other, rather than fighting the demon, it summons first a few generic monsters that are normally found in the cave. Brushing those aside, the demon decides to really get serious and summons… a single gargoyle… Ummmm, oooookay. With the standard “How can these humans be so powerful?!?” line, he then up and disappears rather than fighting us itself. Aaaaaaaaand, the cave is collapsing. Automatically running out of the cave, we’re back in Fog, and all the chickens have disappeared!! Most of the villagers have also disappeared. The fellow from Setoa thanks us and says he’s able to leave. So, I guess the demon up and leaving was enough to break the curse. So the people (and chickens) who were originally in the town when the deal was made have been sent to the great beyond, leaving only those who stumbled into the village afterwards. Time to switch to the US version.
Holy crap! I decided to try out Van’s starting fire spell, Bagudo, and it costs 30MP! He has 52 MP at Level 9. They did add animation for it, though -- the first game has no spell animations.
Changes to US version:
For monsters, Dryad is now a Druid, and they went with Lex while I went with Rex.
Instead of saying the mayor is the reason for the curse, the lady in the SE house says the mayor blames her.
The man in the NW house refers to the little girl as his girlfriend instead of just a child.
Amon-ta’s dialog is a bit different, but the only somewhat significant change is that he doesn’t mention that he’s the guardian of the time stream. WD also added that Amon-ta dies after the second round, rather than simply disappearing.
Switching back to the Jpn version, we were told to head north to Tista Village, then west to Darba’s temple. When we leave Fog, Sarah thanks us for helping and we get 400 experience points. Sarah then leaves the party. Making the rather short trip north, we spot the town of Tista. Well, it looks like Sarah is actually a man and his wife, Rita, was quite upset that he didn’t return home. So, since Sarah is a man, I think I’ll switch to calling him Sal. There’s more talk about girls being kidnapped. Playing an extremely short game of hide-and-seek with a girl gets us a Fruit of Response. Heading to Sal’s house, his parents thank us for helping Sal out and his mother gives us 1000G as thanks, which at this point in the game is a pretty hefty sum. It also turns out that Sal’s wife, Rita, is pregnant, so Sal feels it’s better to stay with her until she gives birth rather than traveling with us. With nothing else to do here, we max out our equipment, save, then head west to Darba’s temple.
After a decent trek, we end up at the temple. Upon entering, John has completed his duty and returns to Remlai Castle. And it’s back to just Van. Taking a couple steps into the temple, I’m greeted by Annie. Making my way across the completely empty temple, I speak to Darba. Without even telling him, he knows that Galam has taken Larla. It’s also learned that Galam was once Darba’s pupil. The first cutscene in a while shows what I’m guessing is Galam sinisterly looking at a miniature of the planet he holds in his hand. Of course, Darba rues not nipping Galam’s ambition in the bud. With that bit of back story out of the way, Van accepts Darba’s tutoring and Darba tells of the goddess Selam who made some transgression and as penitence, sealed herself away in a cave, transforming into a statue. If Van can revive her, she will grant him some great power with infinite possibilities. He also mentions two caves, but he used his power to block off the one leading to the north to keep Galam’s forces at bay. He then informs me there’s a healing fountain in the temple’s basement -- well, that’s useful. Annie mentions that a scholar living in a village to the south may know something about the goddess. As I leave, Darba has Annie join me on my travels. Yay! I’m back to two party members! But… she’s back to her starting level, losing all the experience she previously gained. She also lost all the better equipment as well as any items she gained. Which means that keeping her alive is going to be a chore for until we can make it to a town. First thing’s first, since I don’t know exactly where this Tolua Village is, we head back to Tista to upgrade Annie’s equipment and save. Ok, so a character faints at 0 HP, and can be revived with a simple healing spell. Making it to Tista thanks to surprisingly few encounters, this is a good time to switch to the US version.
Changes to US version:
They went with Darva instead of Darba. They also call it Darva’s Palace, instead of a temple.
The chickens in Tista say “Bored, eh?”
The girl I have as playing hide-and-seek calls it “contagious disease tag”. She gives the same reward when you find her again.
The only item they renamed was the Cloak to Cloth Cape.
The elder isn’t identified.
Lyle’s (Sal’s) wife isn’t named.
Darva doesn’t mention knowing Galam took Laura.
Instead of Darva commending Van on knowing his own strengths when you decline his offer for training, he says Van “wussed out” by declining.
Tolua Village is Toruano -- which would be just eliminating the first space in "Torua no Mura".
They went with Clasco to my Krasko.
They went with Cerum for the goddess, I went with Selam.
Using the healing fountain gives the message “Calgon, take me away…”
For monsters:
Valkyrie is misspelled as Valkerie for some reason.
Aqua is a Water Bomb.
I kept close to the romanization with Naya, they slightly altered it to Neya.
Another romanization I went with a slight alteration of is Sharu, since I couldn’t find any mythical creature that matched. I was expecting WD to go with Siren, but instead they went with Mad Hayro.
Back to the Jpn version. After outfitting Annie with a Broadsword and Target, we head back to the temple and then south to find this Krasko fellow in Tolua. With a quick detour north, we find that the cave is indeed sealed tight. Heading towards Tolua, a path through the mountains takes us to the other cave Darba mentioned. Since we’ve been told nothing about this cave, other than that it exists, we just check out how strong the monsters are (they are slightly more powerful than what’s outside) and exit. When we get an objective for here, we’ll return. Continuing south, we arrive in Tolua and hear talk about some ideal town. The musician Viola is also mentioned again here, and she apparently hails from that ideal town. Someone also mentions an artist heading to the eastern mountains with a woman. Finding Krasko in his farmhouse in the middle of town, we ask him about the goddess Selam, and he informs us that she’s the goddess of love and her sister, Celes, is the goddess of battle. He then tells us to seek out Viola, who lives above the bar in the town of Kusuta to the south, to hear the legend of Selam. Unfortunately, there’s no better gear here, so it’s off to Kusuta.
After a short trip, we make it to Kusuta. Talking to the townsfolk, it seems there’s something going on in the town of Elba to the north. The sea route also seems to be shut down. For another bit of spookiness, one woman warns us of a valley of no return in the eastern mountains. I’m guessing that has something to do with the artist that we heard about in Tolua. Heading to the bar, the bartender allows us to see Viola after we tell him we’re Darba’s pupils. Heading upstairs, we ask Viola to sing the song of Selam. The music changes to a somewhat sad tune and Viola relates the very long tale of the twin goddesses Selam and Celes. A long time ago, Selam and Celes watched over everyone. Eventually they all started bickering trying to get the goddesses’ blessings for themselves. This conflict caused them to suffer and die, so Selam granted them immortality. This didn’t end the conflict, but only caused their suffering to now be eternal. This saddened Selam, so she transformed herself into a statue, thus, I guess, breaking the gift of immortality. Celes was saddened by this and enshrined Selam underground, then returned to the gods’ kingdom. The tale ends with mention of a teardrop from Celes falling to the ground and becoming a fountain. While that’s all fine and dandy, it doesn’t tell us how to revive Selam. Viola doesn’t know how to do that, but suggests we visit Harp, who taught her many songs. So, we’re now off to find this Harp fellow in the east, which I’m guessing will be in that valley of no return. But before that, let’s see what WD changed.
Changes to US version:
Viola is Viora, which seems odd not to go with the musical instrument theme for minstrels’ names that they seem to be setting up.
The chickens say “Bored, are we?”
I went with Celes for the goddess of battle, they went with Saylis.
We’re told we can only get to Elba by ship, while I believe in the Jpn version, we’re told we can NOT get there by boat.
For the name of the bar, I went with Songstress’ Pavilion, they went with the Singing Princess Restaurant, treating each kanji separately.
WD’s translation of Viola’s long song is pretty close to what I got, with nothing significant changed. So, back to the Jpn version.
Before leaving for the eastern mountains, we max out our equipment, which is starting to get expensive. About halfway up the path through the mountains, we enter Viola’s house. The only thing in here is the fairy that the kid in Kusuta mentioned as sometimes being with Viola. We can rest here if needed. Exiting the other side, we finish the short trip to a cave. Having fun with all the teleporters, which isn’t all that tough as there is only one spot with more than one teleporter, we don’t find any useful items in here and exit the other side to end up in an area I can’t find on the map. We enter what looks like a temple and Viola immediately goes on ahead to talk to Harp. Actually, she just goes and stands on the other side of the temple, since she doesn't actually enter the temple. We find a few artists and musicians here that call it Harp’s Hamlet (or Village, although the only structure is a temple-like building), and learn that this place is where the chosen people live (all 8 of them) and is cut off from the outside world. Entering the temple, Harp is waiting for us and had been filled in by Viola about our quest to revive Selam. He gives us some ancient documents and tells us that the documents state that we need to purify Selam’s statue with the tears of Celes, which can be obtained from the Fountain of Celes. Now we just need to find this fountain. Viola can no longer live in this hamlet because the outside world is more beautiful to her and leaves for her house. Well, there goes a chunk of money I won’t be getting back.
Heading back, it seems that this area has no encounters. Passing through Viola’s house, she doesn’t rejoin, but says she wants to sing a song about Van. So, it’ll just be Van and Annie for a while. Using the Ancient Documents, its description states that Darba can read them, so we have our next destination. Stopping by Kusuta and Tolua along the way, and, other than Klasko asking if Viola said anything about him, nothing changed. Darba commends us on learning why Selam turned herself into a statue and reveals that the fountain in his temple’s basement is the Fountain of Celes and gives us a vase full of Celes’s Tears. He doesn’t say where the statue is, but the only place we can get to that we haven’t really been to is the cave we briefly set foot in earlier. So, I’ll catch up with the US version before heading there.
Changes to US version:
The fairy/elf at Viola’s house isn’t named.
The empty chest in the cave to Harp’s Hamlet contains Bingleberries.
Oh, hey, WD calls it a Hamlet, too.
They removed two periods from Viola saying “……….” Inexcusable!!!
The last part of Harp’s dialog where she says we need to find the fountain is now spoken by Van.
Now that I visited Harp’s Hamlet, WD calling the guy that went there a painter, instead of an artist, seems less appropriate.
Darva gives us some direction as to where the cave is, but doesn’t mention that Celes’s Fountain is the one in the temple’s basement.
For monsters:
Undine (which is an actual mythical creature that I had never heard of before (Yay! Learning!!)) is changed to Wyndeen.
Wizball (I was thinking of going with Wizard Ball) is changed to Plasma Ball.
Switching back to the Jpn version, since it appears that monsters have elemental attacks, and we’re flush with money, we pick up a couple Zelts from Kusuta, which are supposed to protect against fire, wind, and water -- the amulets’ descriptions state they protect against magic, but so far, no monster has cast a spell, and the seemingly water-based monsters were doing 0 damage against Viola, who was equipped with the water-protection amulet. With that done, we journey forth to the cave we hadn’t explored much. Again finding nothing useful in the chests, thanks to already buying Round Shields for everyone, we eventually make it to Salem’s statue. Using the Tears by simply examining it, Salem is revived and thanks us by bestowing 1000 exp points and giving us a Goddess’ Staff. The music also changes to the Song of Salem, which I really like. I’m taking a chance by giving the staff to Annie, hoping she doesn’t lose everything again if she leaves the party. It’s a slight upgrade over the great sword and seems to have no special ability. Returning to Darba’s temple, Darba is amazed that we revived Salem so quickly, and after sending Annie away, seems to imply that he’s about to die. He gives a final wish for Van to use his power to save people from their suffering. He then gives Van a Stone of Noruty (whatever that is) and 500G, and undoes his seal on the northern cave. And Annie does in fact leave the party again, meaning Van is flying solo once more. I guess I’ll have Van take the Staff in my US file, but if it is merely has a slightly better attack rating and nothing else, by the time she rejoins, I’m guessing the Staff will simply be something to sell. She does promise to be a better magician the next time we meet, so maybe it does save all her progress and items. Since that dungeon took a while, I’ll change to the US version.
Changes to US version
The Goddess’ Staff is a Venus Staff, which seems to be a really odd decision.
I couldn’t find anything on the flower enemy, so I went with Kuris Flower while WD went with Chris Flow.
They shortened Minotaurus to the standard Minotaur.
There were a couple bits of dialogue that were giving me trouble, but the WD translation gave me the general gist of them. Pretty much everything matched up. So, back to the Jpn version. Checking out the Stone of Noruty, it is a recovery item as it says that I don’t need to recover -- well, that’s a positive that it doesn’t waste a use. Making my way through the cave with nothing in it other than some slightly tougher enemies, made even tougher by traveling solo, I make it to the port town of Elba. Talking to the people roaming around the town, I find out that some guy named Deagan turned traitor on the king, joined up with Galam and invaded the town, sinking all the ships. That would explain why none had been arriving in Kusuta. There’s also some Alan, who’s supposedly really good with a bow and arrow, but was too afraid to fight and hid out in the bar. In one house, I hear a couple people arguing during which they mention of someone named Gigi as well as a warp device that was installed in Deagan’s fortress. Determining that the guy trying to kill the old guy is working for Galam, demanding to know where Galam is promptly causes the assassin to attack me. I still hadn’t visited the bar, so I reload since this seems to be the important event in this town.
Heading into the bar, Alan’s the only person in it, other than the bartender, and talking to him, I find out that he was friends with Deagan’s soldiers, so he couldn’t bring himself to fight them when they attacked the town. He also mentions some girl named Loris that he seems to be protecting by laying low. Now, back to the assassin, and the battle is against randomly chosen monsters. Easily brushing aside the monsters again, the old man, Joshua, tells me that he was tricked into building the warp device, which can send an entire army anywhere in the world instantly. He says if I can defeat Deagan, he’ll let me use the device, which he says is on the top floor of Deagan’s fortress, to send me into Galam’s Tower. That seems promising. It looks like the town extends to the west with a beach and some stairs, but trying to enter that area just sends me out of the town. Well, that’s everything I can do here, so I’ll switch to the US version before trying to find Deagan’s fortress.
Changes to US version:
I went with Deagan, they went with Digin (which is just the romanization of the name).
Galam’s hideout is now on Clan Island, not Zars Island. Must be pretty well hidden if it’s on Clan Island, unless they built it in the short amount of time I’ve been away from there.
The old man by the docks says Deagan betrayed the king, while WD has him say that Galam betrayed the king. But, the bartender still says Deagan betrayed the king.
Joshua is shortened to Josh, although one lady calls him Joshua.
As for monsters:
The Land Turtle (I’m going by the first game since it’s just L. Turtle in this one, same as with the Elite Kobold (E. Kobold) and Monster Egg (M. Egg)) is changed to Snap Turtle.
Galam’s Soldier is Thug.
Guard (or possibly Guardian) is Night mare.
Ant is expanded to Army Ant.
Back to the Jpn version and I make the somewhat short trip to the tip of the peninsula and enter what I’m guessing is Deagan’s Fortress, which isn’t marked on the map, as it’s the only structure over here. Most of the fortress is inaccessible, but I do find Alan’s bow in a treasure chest. I’m guessing that, since Alan was pals with the soldiers, he knows of a way to access the rest of the place, so I head back to Elba. I’m able to equip the bow, which surprised me, and it has a special attack that does 60 points of damage if it does that attack, which is actually weaker against some enemies than its standard attack. Back in the bar, I give Alan his bow, reassuring him that he’s not a coward. Alan plucks up his courage and decides to settle the score with Deagan and Galam himself. Van quickly talks him out of going on alone, and Alan joins Van. Alan then mentions a secret passage to access Deagan’s room. Back to the fortress and we find and take the secret passage, quickly arriving at Deagan himself. After Deagan taunts him with Alan’s sweetheart Loris being with Galam, we enter battle against him. And his battle sprite looks exactly like the one for the Army Corps Chief that was guarding Uba’s house in Shura, way back at the beginning of this adventure. Perhaps they actually are the same person, since defeating it gave no experience (well, at least in the Japanese version it didn’t)? While Deagan did deal enough damage to Alan in one attack to require healing, he quickly goes down after a few rounds, and we get 300 experience points and Deagan’s Key, which looks more like a card. Not lasting in our inventory for long, we use it to open the door that’s about 3 steps beyond where he was standing. Making our way up, there’s a big glowing drawing on the floor that does nothing by walking around on it and a pedestal with what looks like a black orb on it. Examining it, it just says something like “Is this the warp device?” So, it’s back to Elba to talk to Joshua.
With Deagan defeated, Joshua joins up and we head back to the orb. There are no more enemies in the fortress, making this a quick trip. Joshua activates the device and we’re instantly teleported to Galam’s Tower… But due to getting the coordinates messed up, we’ve landed inside the prison in the tower. Alan’s sweetheart, Loris also happens to be in here and he’s relieved she’s safe. Joshua is able to send Van and himself back to Deagan’s fortress, if I so desire. After Van inspects the cell door, Joshua’s able to open it. For some reason, Joshua is referred to as Jose now. Jose was the old man in Setoa -- did they get their characters mixed up? Loris mentions someone looking like Larla being taken by a creepy woman. Alan offers to go with Van, but Van wants him to stay here to protect Loris and Joshua. So, it’s back to just Van once again. Making my way up the tower, I run into Wisdom again. She is suddenly pathetically weak, only doing 1 point of damage per round, and going down in 8 rounds. Continuing along, we make it to Galam himself. After a cutscene showing Larla by Galam’s side, and under some sort of mind control, Galam attacks. Just like the first battle against Wisdom, Van scratches Galam, then gets destroyed with one hit. A very lengthy cutscene follows showing Galam laughing over Van, then expelling him from the tower. The scene continues with 20 years passing and we’re now on board a space ship. After a short shower scene of the female captain, Lim, she then lands on Idea and begins an investigation of some sort. Luckily she starts with a handful of herbs as she starts out equipped pretty weakly. I manage to make it to the nearest town of Triun and save. With all that over, I switch to the US version. I’m interested to see how WD handled the shower scene and Lim flipping the bird.
Changes to US version:
Unlike the Captain in Shura, Deagan/Digin didn’t seem to be beefed up.
Loris says someone called Lola was being taken, not Larla. Not sure why they translated it to Lola.
I’m not sure if they beefed up Wisdom/Wizda, but at one level lower, each round she was doing 7 points of damage instead of 1, and Van was dealing 21 points instead of 25.
They didn’t cut out the shower scene, but they did edit out Lim flipping off the ship’s computer, Dandy, giving her a closed fist instead. I find what they actually edited and what they left fully intact to be hilarious.
Speaking of Lim, she’s now Babbette, which is shortened to Babs in the menus.
They also changed the shipboard computer guy’s name from Dandy to Robert, as well as giving him an outrageous French accent.
For monsters:
The Mail Devil is a Demi devil.
I went with Muddy since it looks like a mud-man while they went with Maddy.
I went with Giant Bat, they went with Big Bat.
As for what happens in the long cutscene, according to WD’s translation:
After getting defeated by Galam, rather than finishing off Van, he sends him 20 years into the future to witness him ruling the entire world firsthand. Fast forward the 20 years, and Lim/Babbette’s space ship picks up a distress signal from Idea. With Lim/Babbette being only a Cosmic Hunter cadet, the shipboard computer, Dandy/Robert, says that headquarters should handle it. Itching for adventure, Lim/Babbette overrules him with a threat and decides to investigate the planet herself.
Back to the Jpn version. Triun is quite the sprawling town, now that I’ve explored it beyond finding the inn. Talking to the townsfolk, the lord of the town, Zillah (I looked up possible names for what it could translate to and came across a maid from the Bible named Zillah) has not been seen lately. Zillah is rumored to be a master swordswoman, which would explain how she’s able to protect the town from the monsters. One person thinks he saw her kidnap a girl. Playbills outside the outdoor theater advertise for Cosmic Fantasy 3, which makes me think the 4 chapters referenced in the story section of the manual actually refers to the 4 separate games, not that there are 4 chapters in this game. That’s pretty confident to think people were going to buy the next 2 games (well, actually 3 since CF4 itself is broken into two separately sold chapters). In one house, Lim pulls a Jon Lovitz when asked if she’s from another town, starting with replying that she’s from another star, then changing up with a sort of “Yeah, I’m from another town. Yeah, yeah. That’s the ticket.” I actually wouldn’t be surprised if WD did pull this reference out, as I would definitely be tempted to. So, looking up Jon Lovitz to see if he did that bit before the game was localized (and those sketches were from the ‘80s, so they could have), I came across a recurring SNL character of Nora Dunn’s called Babette. So, if they do in fact use that Tommy Flanagan, the Pathological Liar reference, was changing Lim to Babbette a reference to that? Anyway, back to the game.
She’s then asked to help out, and, automatically agreeing, is led to the bed where Zillah is laying unconscious. Zillah’s sister Sheila then explains the situation. I’m going to have to pay close attention to the names here since the only difference in the sisters’ names is the “ on the first character (ジーラ vs. シーラ). Zillah mysteriously fell unconscious and Sheila asks Lim to find some medicine to awaken her sister. She then mentions the place of a man named Marla to the south where the medicine is supposed to be. Making the very short trip south to Marla’s house, he realizes the gravity of the situation, but doesn’t have the medicine. Of course. But the medicine only has one ingredient, which is found in the northern forest. So, heading back the way I came, I pass by Triun and cross the river, finding the needed Trem Leaf among some lighter colored trees. Back at Marla’s place, he quickly whips up a batch of awakening medicine and I head back to Sheila in Triun. She administers the medicine to Zillah and then mentions her attendant, Florie, went to their house to retrieve Zillah’s Sword of Lettle, but hasn’t returned. Lim volunteers to investigate, but without Zillah’s permission, she won’t be able to enter the house. Not to worry, since Sheila mentions a secret path into the house from one of the tombstones at the church.
Of course, the order in which I searched ended up having the target tombstone be the last of the 30 or so in the yard. With Lim’s rather weak equipment, she barely makes it into the house. The sword was easy enough to find, but Florie is no where to be seen. I was expecting to find some herbs here, but nope. The two soldiers guarding the front door don’t seem too surprised that some stranger is inside the house, with one mentioning that Florie hasn’t been there today. Hmm… I would have thought they would have kicked her out. Since I have to go back through the secret passage, and used up all my herbs, I’m unable to survive more than a couple battles. So, I stock up on Herbs this time, redo the entire section, this time also using her lone attack spell to do some good damage for a relatively low MP cost. The sword also is a major upgrade, plus it can do a special attack, and I’m able to now defeat monsters in one hit. Making it back this time, Zillah is now awake, and Lim hands over the sword. And it’s a good thing she’s now awake, as monsters have suddenly overrun the town. Lim offers to help, and Zillah and Sheila both join up. That was a nice stretch, so I switch to the US version.
Changes to US version:
Again, the sign at the town entrance doesn’t mention the continent I’m on.
They went with Jiela for Zillah, and Ciela for Sheila.
They actually do advertise for Cosmic Fantasy 3 to be Coming Soon on the playbills. Well, that didn’t happen.
Yay! I called it! It’s not the entire Pathological Liar bit, but she does say, “that’s the ticket…”
They added that Zillah was cursed by Galam.
The medicine of awakening is now called Marla’s medicine.
They went with Flora for the maid/attendant, I went with Florie.
The guard doesn’t mention Florie not coming to the house today.
The only new monster, the Giant Centipede was renamed to Ultra pede.
Back to the Jpn version, and there don’t seem to be any monsters roaming the town. Everyone has moved to the theater, and on the stage are Zillah and Sheila imposters urging the townsfolk to follow Galam, as they claim he’s the only way to assure their safety against the, apparently nonexistent, monsters. With the real McCoys now here, they’ve been exposed and attack us. Ummm, all they are are a couple run of the mill weak zombies, which we dispose of with extreme ease for a nice 1000 exp. To repay the favor (I really don’t think they needed Lim’s help for that), Zillah remains with Lim to search for Galam while Sheila stays behind to protect the town. Finding their attendant Florie back in the house where Zillah was sleeping, I really was expecting to be needing to find her. There’s nothing else to do here, so not having any direction, we head back to Marla’s house. Marla’s completely consumed in studying spells, so we head to the next spot on the map, which is an unnamed town.
There’s talk of a bunch of people with weapons roaming around the mountains. The major calamity is the girl Serena has gone missing at the southern mountains and her father has been laid up in bed with worry. Picking up a whip for Lim and Warrior’s Cloaks for both Lim and Zillah, we make the extremely short trip to a cave at the base of the nearby mountains. The Banshees in here do some heavy damage to Zillah, so it requires a few trips to survive the first level. At the end of the ground level, a blue-skinned old woman mentions something about a woman’s scarf, which has Serena’s name embroidered on it, having fallen. The lower level is also rather lengthy and before we make it halfway, we exhausted our supply of herbs, requiring another trip back to town. Now stocked up, and at a level higher, we’re able to make it to someone standing next to what looks like a human-sized frog. The frog (or maybe gecko) just says “Gecko” a few times. What is this, Pokemon (5 years before Pokemon)? The person behind the monster pleads for us not to fight it as it healed her. Figuring out that this must be Serena, we tell her how her father has become bedridden worrying about her and we should return. But she can’t leave the frog behind. Zillah thinks that maybe the frog had been changed into its current form by dark magic. The old woman from earlier then enters and calls us fools for defying Galam and with both the lord of Triun and an apparent member of some resistance in one place, decides to try to destroy both. And, it’s another fight against random generic enemies rather than a boss fight. Brushing them aside and thus defeating the old woman, her spell on the frog is broken and it transforms back into a man named Jack. He says he’s part of the resistance fighting to overthrow Galam and then escorts Serena back to town. We’re then instantly teleported out of the cave and Zillah leaves. Making the short trip back to town alone, I’m told to avoid the town of Pirin as there is a kidnapper there. I do get 500G and 1000 exp from Serena’s now healed father. With nothing else to do here, and before heading the direction Zillah took off to, I switch to the US version.
Changes to US version:
Since everyone in Triun took shelter in the theater, I didn’t translate it to the town being evacuated, like WD did.
Back at Marla’s house, suddenly the maid has an accent and is how referring to Marla as a she.
It’s not directly mentioned that Serena went to the southern mountains.
Serena says she’s going back to Tryun (I went with Triun) rather than her unnamed village.
They changed a couple item names: Whip to Bullwhip and Warrior’s Cloak to War Cape (I already picked up a Warrior’s Cloak a while back but didn’t note the change).
Back to the Jpn version and I’m off to follow Zillah and possibly find Jack. I make my way to another unnamed town, where a merchant named Nova that arrived at some point is kidnapping all the girls -- which means this must be Pirin. The girls are being offered as tributes to Galam. Along with Nova, several unsavory soldiers (I believe one catcalls Lim with that stereotypical construction workers hanging out type of setup) have also shown up. With the soldiers there, he’s able to control the town under threat of the soldiers massacring the townsfolk if he’s disobeyed. All the girls have been taken to his villa at the base of the northern mountain, so I know what my task here will be. There’s also a story of a cat in the northern forest that can speak human. This would be the Nyan equivalent character for this entry. The cat apparently was also abducted by Nova. Speaking to the soldier in the center of the trio, who turns out to be their chief, they almost surround Lim and a boy, whose name is something like Beegee (where are his brothers, or had he gone solo by this time?) runs in and gets her to follow him to the basement of one of the houses. Waiting until nightfall, I escape the town and head to Nova’s villa.
On my way to the villa, I pass by the iron ship that the bartender spoke of, which turns out to be a downed spaceship. This would be the source of that distress signal Lim’s ship received. Making it to the villa, I can’t pass by the two guards as I don’t have any business here. So, back to Pirin. Talking to the guards causes me to fight a battle against, again, standard monsters, and fighting their chief nets me a Letter to Nova. I’m pretty sure this will grant me access to his place. Before doing that, I switch to the US version.
Changes to US version: None.
Back to the Jpn version, and back to Nova’s villa. With letter in hand, I show it to the guards and they move aside to let me pass. Immediately upon entering the mansion, a woman’s scream is heard and I find a woman surrounded by a couple soldiers who seem to be intent on raping her before handing her over to Nova. I’ll be very interested to see how WD handles this dialog. Lim steps in and defeats the monsters that take the place of the soldiers. The woman just so happens to be Bijee’s (that’s the best I could come up with, and WD went with Bigie) sister, Emily. Not wanting to risk Nova’s wrath on the town, she says she can’t escape, so I guess I’ll just have to have a little chat with the fellow. Heading into the basement, there’s about a half dozen women locked up behind bars. Needing the key, I head back up and eventually to the second floor. This place is pretty tough going, requiring a trip back to town as I used up all my healing herbs before making it to Nova. After the shopping trip, I make it to some black figure on a table, which is the cat that I was told about. Speaking to it cues a cut scene.
During the cut scene, Nova appears, says something, then I get to fight him in monster form. What!? An actual boss fight?!? Nova hits hard and I’m unable to survive. This time, I fully stock up on herbs and head back for attempt #2. I’m able to defeat him this time, but it left me with 8 HP and one herb. I collect my 1000 Exp as well as the Jail Key and the cat, Piku, joins up. Unfortunately, he comes with no equipment and no items, as would be expected since Nova had him locked in a bird cage. Hmm, I really should have left that Warrior’s Cloak in the treasure chest so he could equip it -- stupid inability to trade equipment. I’ll be leaving that for Piku during my US playthrough. So, since he has no equipment, he quickly gets wiped out. Luckily, Lim is able to survive the trip back to town. Healing at the inn and fully outfitting Piku, along with buying a handful of herbs, we head back and have little difficulty making it down to the imprisoned ladies. Unlocking the cell, we’re immediately transported back to the edge of Pirin. Before seeing what changed in Pirin and most likely having what I’m guessing is Piku’s downed spaceship as my next destination, I switch to the US version
Changes to US version:
They were very vague with the exchange between the guards and Emily.
Babbette somehow knows Emily is Bigie’s sister, even though he never told her his sister’s name. In the Jpn version, Lim first asks if she’s Emily.
Instead of it saying Nova reveals his true identity, it says “Nova is pissed!”
I went with Piku, they went with Pico.
Back to the Jpn version. Everyone’s thankful for being rescued and Nova being defeated, and the mayor has a renewed sense of purpose in protecting the town. Bijee rewards us with 1000 Exp. So, it’s off to Piku’s spaceship. Or maybe not, as leaving town starts up a cut scene, and then it’s back with Van. I purposely avoided the spaceship after Piku joined up, but I saved after tripping the flag (which I’m guessing is talking to Bijee). I could see that tripping up some people wondering how to advance the game if they didn’t think to talk to Bijee. Luckily, I have my US save from before talking to Bijee, so I load that up (it is nice that you can load data from either version) and head out to the spaceship. All that happens is Piku saying it’s his ship and space pirates destroyed it. So, I guess I won’t be finding Jack. Reloading the Jpn file, Lim’s ship gets attacked in space by the space pirates’ battleship, seemingly zooming away in retreat leaving her stranded on Idea. It then switches to Van waking up in some house.
Not knowing what’s going on, the woman that found him when he was transported into the future, whose name is Mora, mentions that Galam’s forces are based on Clan Island and there are no more towns there. She relates how Galam wiped out the monsters that overran the people and was made king of the entire land, thanks to him being their savior. She also mentions that her son, Milan, left the village a couple years earlier. She’s then so kind to fully outfit Van with some pretty good equipment, which is a good thing because this town, which I soon find out is called Toto, doesn’t have an equipment shop and Van lost all his gear and items. Luckily, he didn’t lose all his experience as well. Other than a woman’s sweetheart leaving town to find success elsewhere, there’s nothing of note here, so I leave for the next spot on the map. The monsters are doing a bit more damage, but are also giving a LOT more experience. I shortly arrive in the next town of Bura, which has a big statue of Galam right in the middle of it.
Near the base of the statue, Piku is flanked on either side by soldiers. I’ll just leave him for now and explore this town, which has TWO bars! I come to find out that the members of the rebellion have all been arrested and sent to the Dallas Fortress in the northern snowfield, and the fortress is headed up by a Colonel Zan. Maybe I’ll find Jack there. Lim is nowhere to be found in town, so I’m guessing she’s also at the fortress. Everyone seems to be leery of being turned in to Zan, so no one trusts anyone here. Yeah, laugh all you want about the town being a tribute to Galam, Mr. Mayor, while I take this nice 1000G from your cabinet. With nothing else coming to light, I finally talk to Piku. After a blusterous, “What’re ya gonna do about it, brat?” comment from the soldiers, I wipe the walls with the generic monsters and Piku joins up after a brief cut scene. Piku is actually a level higher than when we left him and Lim. Of course, he lost all his items and gear, though. This is easily remedied with how much gold I get from battles. Ooh, love the unicorn on the pink Knight Shield.
With Piku now in tow, we’re told of the master ski-maker, Valas. Out of curiosity, I head to the snowfield to the north and can’t even enter it due to the deep snow. Since skis are needed to reach Dallas Fortress, Galam has banned them from being made. Valas has returned home now, and seeing the determination in Van’s eyes, he decides to make a pair of skis for Van. But, of course it will take some time, so he gives Van a letter to take to some Peter fellow. Finding Peter, who has also now returned home, he seems a bit sketchy, and after reading the letter, leaves, presumably for Valas’ house. Back at Valas’ place, people are overheard talking about a secret passage and that one of them trusts I’m not one of Zan’s spies. Of course, it turns out to be Peter and Valas talking and it turns out that they’re also part of the resistance against Galam. The skis are ready and Valas hands them over. Before taking off, Peter mentions a tree in the fortress’ perimeter that conceals a hidden passage into the fortress. With skis in hand, it’s off to Dallas, but not before catching up in the US version.
Changes to US version:
Sally doesn’t introduce herself, making that link to the drunk in the bar a bit harder to connect.
It’s almost definitely referring to the Bobby McFerrin song “Don’t Worry, Be Happy” when Babbette responds to one woman, but it flows pretty well if it isn’t.
They expanded the old man’s dialog to add a little ditty along the lines of ding, dong, the witch is dead from The Wizard of Oz.
Upon waking up, Van doesn’t mention Laura.
Van only mentions he’s from Clan Island, leaving out Shura Village.
I went with Mora, they went with Morla.
Mora says Galam’s fortress has been on Clan Island for 18 years instead of it being 20 years since any towns or villages were on the island.
Even though they list it as Leather Armor, in this instance they called it Laser Armor (and it’s Leather Armor when I go to sell it).
It’s not mentioned that Toto was a fishing village.
The old man calls Morla a man, when Morla is quite obviously a female sprite.
I went with Bura for Galam’s Town, WD went with Bara.
They gave the soldier wandering around town a name, Haig, but he doesn’t try to butter me up with the promise of money if I snitch.
They changed Colonel Zan to Major Payne. And that movie was still three years away from release! Now, THAT’s topical!
One of the soldiers in the bar is also named Haig because they have the exact same dialogue.
They messed up and have the Sareem Stone’s description stating it recovers HP instead of MP.
The soldier on Piku’s right is at 3 bottles of “100 Bottles of Beer on the Wall” instead of saying he’s sure Piku is the cat that was with Lim.
The soldier on Piku’s left says basically what the right soldier said instead of about how the cat speaks human.
For monsters:
Ice Hydra (like before, I’m going with the names from the first game since in this case, it’s I. Hydra) is Iron Hydra.
Bones is Byorn -- come on, it’s a skeleton!
I went with Cold Demon, they just used the romanization of Coldee (well, it would actually be Koldii).
Ice Angler (see Ice Hydra) is Iron Angla. Not sure why they shortened that, since Angler would fit inside the text box.
Back to the Jpn version, we head off to Fort Dallas to free the wrongfully imprisoned and hopefully find Lim. The fortress seems to be the point of interest in the middle of the snowfield, so we first head to the other spot at the southwest edge. It turns out to be a cave, but the entrance is blocked by snow. So, we head back and enter a smallish tower. The entrance is locked from within, so we start looking around the area in front of the fortress. Rather obviously, the lone separated snow-covered tree hides the secret entrance and we plummet down a shaft and find ourselves behind a soldier. This could be bad, as he’s blocking the only path. The soldier turns out to be Peter in disguise and he’s keeping an eye out for the actual guards. He hands over the key to the prison. He then goes to open the gate so we can access the upper part of the fort while we head down to open up the prison cell. Speaking to the people in the cell, a girl had just been taken to the torture room on the top floor. Since we haven’t seen Lim, I’m guessing she’s the girl. Time to make our way up to the top floor and most likely have a battle with Colonel Zan. Having opened the cell, Peter has now opened his gate, so we can proceed. The two basement floors have no monsters, but that changes as soon as we reach the ground floor. Since I don’t want to risk possibly losing to Zan, and being able to go through the front door now, we head back to Bura to rest up and save.
Back at the fort, we make our way to the third floor and to the torture chamber where there’s a man in green in front of a girl hanging from the wall. A short cutscene confirms it’s Lim, and Colonel Zan is also introduced, decked out in military garb. At the end of the scene, we get to fight his monster form, which is a nice purple gargoyle wielding a scythe. He does some decent damage to Piku, but does the same piddly amount of damage to Van as normal monsters do. Only needing to heal Piku once, we make relatively easy work of Zan and Lim is freed. In addition to the 1200 Exp received during the spoils part of the battle, everyone receives another 2000 Exp. Nice. Lim joins up and having three party members now makes battles extremely non-threatening. It also helps that Lim is suddenly three levels higher than when we left her. Back in town, all the soldiers have disappeared, and we’re advised to make a hasty escape before Galam’s forces come after us. We’re told that that cave that was blocked will lead us to Gruba Continent. We’re also told that Galam has a castle on Amur Continent to the south. With Zan defeated, the weather has gotten warmer, which means that the entrance to that cave has probably melted. Before we head back there, I switch over to the US version.
Changes to US version: None.
Caves don’t have doors, so why would you translate it as “Snow blocks the door”?
According to WD, during the cutscene after defeating Zan/Payne, Lim/Babbette gives Van a protector plate to wear, which doesn’t actually do anything outside of appearing in the cutscene.
Back to the Jpn version, and we’re off to commandeer a ship from Galam’s forces. Passing through the thawed out entrance to the snow cave, this place features a level with pitfalls that drop you into one of several chambers below. That explains Valas’ warning to watch our step. Galam’s Soldier B packs a wallop and gives very little reward. I really like the effect they pulled off, showing the level below through the clear floor. There’s actually a useful piece of equipment found in here: an Ice Shield! Exiting the other side, I can’t figure out where on the map I am, but soon enter the village of Ayn, so named for having the temple of the Goddess Ayn in it. It seems Galam has sent his army to find the sacred treasure located in the underground temple here in order to discover how to get to the goddess. I guess we’ll just have to beat them to it. We also learn that there are five goddesses: Celes, Salem, Sareem, Ayn, and Nolty. The only mention of Nolty I've run into is that Nolty Stone I received quite a while back. Again, there are armed people wandering around a nearby mountain range. Apparently, it’s also easy to get lost along the mountain path.
Entering the temple, we accept the goddess’ trial and descend into the lower part. On the bottom level, there are three narrow corridors between each section with two of them triggering battles. This is what the old man in the village was talking about with the guardians protecting paths. Easily making our way to the end, we find a map in a treasure chest. Van then hears a voice in his head telling him that the goddess’ cave’s entrance is hidden in a mountain in a valley to the north. With no more monsters down here, we quickly head out and one of the priests in the temple notices we passed the trial and tells us that the mountains that hide the entrance to the goddess’ cave are to the north of a waterfall. Before heading to the goddess’ cave, I switch to the US version.
Changes to US version:
They went with Ein, I went with Ayn.
The woman who says Galam is coming to have an audience now says he’s going to destroy us soon.
The Staff of Protection is now a Shadow Staff.
For monsters:
Galam Soldier B is Agile Thug.
Cerberus is Kelvelos.
Winter is Winterror.
Great Eagle is Ultra Eagle.
Giant Scorpion is Big Scorp. Scorpion would not be able to fit in the text box.
I went with Wormshell, they went with Warm Shell.
I went with Shellface, they went with Silfes.
Holy Knight is Death Angel.
They misspelled Harpy as Harpie.
Angler is Angla, much like with the Ice/Iron variety.
Having caught up, it’s back to the Jpn version. I did finally figure out that exiting the snow cave starts you out off the map to the east. Now knowing that the entrance is hidden north of the waterfall, searching the mountains brings us inside the Goddesses’ Cave. Inside the cave, each staircase leads down to a statue of one of the five goddesses. Leaving the one that leads the furthest down for last, the statues of Ayn, Nolty, Celes, and Sareem each bestow 1000 exp, while the final statue, Salem, yields 2000 exp as well as a Fire Staff and Spirit Plume (the same thing Annie was wearing). While the Fire Staff is an upgrade over the Battle Axe, unfortunately its fire attack does significantly less damage if it decides to do that instead of a normal attack. The Spirit Plume is also a downgrade from the Breastplates everyone is wearing. With this place cleared out, it’s back to Ayn Village. That was a rather lengthy cave, so I switch to the US version.
Changes to US version:
They made it so you don’t have to search for the Goddess’ Cave, but rather can just walk into the side of the mountain to enter.
The armor Spirit Plume (which I originally went with Ghost Plume) is now called a Wind Wedge, which they originally called a Holy Cape. It’s also listed as Holy Cape in inventory and when you go to sell it.
For monsters:
Crab Spider (it’s actually a C. Spider, but the first game has a Crab Spider) is just Spider.
Galam Soldier C is Scary Thug.
Cockatrice is misspelled as Kocatris. Maybe they thought they would run into a censorship issue if they spelled it correctly.
Back to the Jpn version. Everyone in Ayn has the same dialog and the priests in the temple have reverted to their pre-trial dialog, so out of curiosity, we head back downstairs and are able to pick up the map again (it leaves your inventory after visiting all five statues). The corridor guardians are gone. With another map in hand, we head back to the Goddess’ Cave to see if just maybe all the statues have been reset to get some more easy experience. There are no monsters in here now, making this trip extremely speedy, and the statues did not reset. For some reason, I don’t think that sequence was supposed to be able to happen. Well, since nothing changed in the village, it’s time to investigate that mountain road.
Like the woman in Ayn told us, it’s pretty easy to get lost since it holds a network of 13 cave entrances, with 11 of them teleporting to another of the entrances. The remaining two are entrances to actual caves, albeit very small caves. In one of them is a red door that can’t be opened. In the other cave, we find a man who has been attacked by monsters. Lim tends to his wound and he turns out to be another member of the resistance, who was supposed to meet up with the resistance from the Gruba continent. We all make our introductions, and he’s that Milan person we heard about from his mother in Toto. He then joins the party, mentioning the (not at all) hidden door blocking the exit. Making the short trip back to the other cave section, he opens the door and we’re instantly at the resistance’s camp.
In the camp, we find the green-haired Jack (the guy that was turned into a monster a while back), and he learned how to grow healing herbs from Serena, so he has an endless supply of them. He also mentions that Lim helped him out near Yasuka, which gives a name to that heretofore-unnamed village. A deserter from Galam’s army is also found here. We also run into Zillah again, as she’s decided to join the resistance. She, too, was ambushed by monsters, having the rest of her group wiped out by them. After we talk to the leader, we have a forced rest in Milan’s tent, and are attacked immediately afterwards by the sprites that represent the Galam soldier and the spiky-haired guy who had lost everything to Galam’s forces. The attackers are some new ones, which are a bit tougher than what we’ve run into so far and take a few rounds to defeat, but they still don’t do much damage.
With the assassins taken care of, we suddenly can’t leave the camp, by decree of the leader. A few of the rebels were killed in the sneak attack, cutting down on the number of people to talk to here. We learn from the soldier that deserted that the attackers were directly under an Admiral Ivad. Now everyone thinks there’s a spy in their midst and don’t trust anyone. Acting extremely quickly, the traitor has already been captured and is being held in one of the tents. The leader says it’s the Galam soldier that deserted. Jack is suspicious of this claim, since he thinks the spy would have escaped with the remaining attackers from the other night. Milan also somewhat mirrors that sentiment, and we talk to the leader to try to convince him to let us find the true traitor. Of course, that’s preposterous as the spy must be the soldier, and the leader will let us leave the camp after the traitor is executed. We still can’t get by the guy guarding the tent with the prisoner, so we spend the night at the old lady’s tent. We’re now allowed in to speak to the soldier, and after a bit of dialog, he hands over a letter to Admiral Ivad that a soldier he sliced up was carrying. Reading the letter, it’s from the leader of this camp, Rudo, mentioning that his plan was to get the rebels to start distrusting each other, and it was working out splendidly.
With the incriminating letter in hand, we confront Rudo along with his lackeys. After some threats about them killing us, Zillah enters the tent, joining up for the battle. It’s now a 4-on-1 battle against Rudo, as the other two guys are nowhere to be seen. Rudo hits hard, doing about 100 points of damage with each attack. Good thing we’re all in the 250-300+ HP range. Having a full party of four, Rudo goes down pretty quickly, only requiring one healing spell, and we collect our 2000 exp. Zillah stays in our party, and she has advanced 8 levels since we left her, and has some really nice armor to boot. Jack now mentions wanting to go back to Yasuka Village on the continent of Bagra. We’re also told that if we can get a ship from the port town of Borla to the south, we can then attack Galam on Amur Continent. The camp has decided to make Milan their new leader, and talking to Milan, we get another 3000 exp as thanks for our help. We can finally leave the camp again! Heading to the eastern shore, on an unreachable island we can see something that looks like a beaver standing on two legs. Ooookay. We make it to the next town of Reza, which according to the sign is ruled by the Knights of St. Turk. Well, that was a pretty long stretch, so I switch to the US version.
Changes to US version:
What I got as Milan not being hurt seriously, they have him being badly wounded.
As soon as we enter the camp, Milan gives the leader’s name of Lud, something that isn’t found out in the Jpn version until you read the letter.
They added a prune joke to the old woman’s dialog when you wake up after resting.
I went with Admiral Ivad, they went with Admiral Ibad.
They removed Zillah’s foreshadowing of what was in the letter.
After the capture, the traitor and soldier are now being referred to in the plural form.
When talking to the soldier during his imprisonment, Lim’s line is delivered by Van.
St. Turks is now Tulook, no St. is mentioned on Reza’s sign.
They fixed the issue with some spells that have multiple levels taking up multiple slots when the higher level spells should instead replace the lower one, like how the healing spell Rana takes up a slot in Van’s list for Rana 1 & Rana 2 (Rana 2 does get replaced by Rana 3, but you’re always stuck with Rana 1 taking up a slot). They also have some spells being learned at levels when characters previously learned no new spells. This is easily the biggest gameplay change they made so far.
Even with knowing where to go and whom to talk to (although I still talked to everyone), that stretch still took about 2 hours. Back to the Jpn version. All the talk in Reza is about robber knights that have begun living in an old castle outside of town, which used to be that of the ruling Turks long ago, and are attacking the town impersonating knights with the equipment found at the castle. At least one time, the knights must have been ghosts of the old Turks, as one woman claims to have seen them casting no shadow. Ignoring the warnings to avoid the castle, and since there’s nowhere else to go, we head to the castle. Apparently they got their east and west mixed up as everyone but the guy who said to hug the southern mountains tells us that the castle is to the west. The only thing to the west is the coast. Heading southeast, we come to the old castle that’s completely blocking the pass between the mountains.
Entering, we spot some ghosts floating around. They’ll stop as if to talk, but no dialog box pops up. Exploring around the place, we stumble across a few teleportation tiles. The tiles having no indication of being there makes this a bit of a bother to explore. The only potentially useful item found in here is a Nightmare Sword, which has the same attack power as the Crystal Staff everyone’s equipped with, but due to what I have to believe is another screw up, it has a much weaker special electrical attack that replaces the normal attack -- I can either deal 100+ guaranteed damage on every attack, or do 40 damage if it pulls off its special attack. I’m guessing these special attacks are supposed to be in addition to a normal attack, like they were in the first game. We eventually make it to the throne and we can talk to the stationary ghost, who turns out to be the leader of the Turks Knights, Lodoss III. He is taken aback by our accusing him of stealing, saying he’s just doing his duty and collecting taxes. I’m not sure if he’s supposed to be unaware that he’s dead, but he attacks us by means of a few normal enemies. We’ve gained quite a few levels wandering around this castle, trying to explore the entire thing, so the enemies are a cakewalk. Zillah, again bringing up Galam’s dark magic, implores us to defeat him soon, before ghosts overrun the world. Lim doesn’t want to hang around here, so we’re teleported out of the castle and it now is just decoration on the map as we can walk right through it.
Back in town, everyone’s happy the thieves have been dispatched, and we’re told that Admiral Ivad is holding a party in the port city of Borla to welcome a delegation from Amul Continent. So that party that lady couldn’t get to because of the knights in the castle actually is important. One of the townsfolk turns out to be a member of the resistance, and he mentions that the various resistance armies are ready to enact operation “Blade of Celes” and make a simultaneous attack on Galam’s army, and they’ve assumed Van will aid in it. Before heading off to Borla to try to capture one of Galam’s army’s warships, I switch to the US version.
Changes to US version:
The updated sign in Reza now makes a Ghostbusters reference.
Rather than one of the townsfolk ruminating on how man’s desires are ultimately meaningless, he wonders if the Tulooks/Turks turned into ghosts because “Maybe they watched ‘A Passage to India.’” I’ve never seen that movie or read the book, and after looking it up, am wondering just how this reference fits.
They renamed the Nightmare Sword to Horror Sword.
As for monsters:
Skull Knight is Scale Knight
Genocide is Blood Lord
Death Doll is Chucky
Sand is Mr. Sand
Back to the Jpn version. Passing by the old castle, we make it to the port city of Borla, which we find out from the welcome sign that it’s being ruled over by Admiral Ivad. The only thing going on is the party Ivad is hosting at his house. We can’t get in since we don’t have an invitation. The lady waiting around at the entrance simply gives us her invite as she has work to do, and then walks off. I’m guessing she works in Ivad’s house. Lim gets excited, saying we could get lost in the party and then nab a ship. With the invite in hand, we’re allowed access to the mansion grounds, but more soldiers are blocking our path to the harbor, so we’ll probably have to fight our way to the ship. Eventually making our way to Ivad, he tells us that the party was setup as bait for us and immediately attacks! Err, some generic monsters immediately attack!
After easily defeating the monsters, and just before expiring, Ivad cues the real party of death (I’m pretty sure we’re going to be the only ones dealing any death during this party) to begin where everyone in the mansion and in town now attack us when we talk to them. Well, everyone but the shopkeepers and the one lady that started to warn us about something. That lady now tells us that everyone in town are Galam’s lackeys and, I think, Ivad kidnapped all of the actual townsfolk. Everyone does respawn if you save and reload. We can now attack the soldiers that were blocking the entrance to the harbor where we once again run into Ivad. He tells us the other Ivad was a body double and this time attacks us for real. He reveals himself to be a purplish dragon with tentacles instead of arms. He does some pretty good damage, but with upgraded healing spells, he quickly gets put down after a few rounds. We now have access to a boat. Woohoo! This cues a cutscene where Yuu, Saya, Nyan, and Monmo from the first game are introduced. Monmo has been modified from a motorcycle into a hovercraft of some sort. I wonder if WD changed Saya’s hair from purple to red to match the disc artwork. Piku is shown on their ship’s monitor from when Lim’s ship was attacked by space pirates, and my guess is that Piku is one of Nyan’s kittens, based on Nyan’s reaction. With the cutscene over, we’ve arrived in the town of Elba on Amul Continent where we can join up with the resistance. We have a welcoming party as a group of soldiers have blocked off our entrance into town. What I’m guessing is the leader, a man named Barlock threatens our lives and we find ourselves in another boss battle. He hits about twice as hard as Ivad did, doing over 200 damage, which is right around what our healing spells recover. Seeing as how it’s 4 on 1, it’s an easy thing to stay healed up and last the handful of rounds. This seems like a good place to switch versions.
Changes to US version:
The sign says Borla is “Ibad’s party town” not that he governs the town.
They added different dialog for each of the three soldiers blocking the way to the harbor.
Everyone now has unique dialog after you defeat the fake Ivad.
Instead of saying something simple about Ivad revealing his true form, they have “Ibad is out of the closet”.
For monsters:
Stone Golem (it’s just S. Golem, but there was a Stone Golem in the first game and it does look to be made of stones) is just Golem.
Toad is Tippy Toad. Not really sure where they got the Tippy from.
I went with Wizell, they went with Weasel. The monster is kinda like a male harpy, which is why I decided against going with Weasel.
They stuck with Admiral Ibad during the battle, even though it would be Monster Ibad (it’s actually misspelled during the battle in the Jpn version, as his name is イバド in all the dialog, but during the battle it’s イバト).
They did not change Saya’s hair color during the cutscene, and they agree with my hunch that Piku is Nyan’s kitten. Being 5 or 6 levels lower than in the Jpn version made the Barlock battle quite a bit longer since he dealt more than half of the HP of whomever he attacked, so Zillah spent the entire battle healing. Back to the Jpn version.
In the 20 years since last visiting this place, the equipment sold sure has improved. On the other hand, this planet does not have inflation. Other than the shops and one building, no one is around, not even in the bar. In that lone building, an old man is being trapped by a couple of Galam’s soldiers. Easily defeating them, the old man tells us that everyone was taken by Galam’s army or killed, except for the elderly, who are being held captive… somewhere. He then rewards us for saving him with his trusty spear. Oh, gee, thanks. That’s just another 20 gold to add to our 250k+ we have on us. Seeing as there’s nothing to do here, we start to leave, only to be stopped by Dorba, who’s a member of the resistance. He had tried to slip into town and warn us about the ambush, but was too late. Dorba tells us that their leader really wants to meet Van, so Zillah offers to guide us to their camp south of town. Since we’re back on Amul, out of curiosity, we see what’s changed, and Deagan’s Fortress is no longer there. Heading back past Elba, we make it to a staircase that is the resistance’s camp.
Once in camp, Zillah takes her leave in order to head up operation Blade of Celes. This has to mean Annie will finally be rejoining. We’re warned about Hargen, who used to be a member of the resistance, but is now the head of the palace guards at Galam’s castle. Zillah acts as an inn, without save capabilities, and gives us a Wing Edge, which is another broken weapon with higher attack power but does much less damage when it pulls off its special attack. Heading into the leader’s cabin, the leader turns out to be John, the best swordsman in Remlai Kingdom, from long ago. Van still won’t join up with the resistance, wanting to take care of Galam himself (well, with some combination of three others, I’m guessing). John then mentions that Annie is at Darba’s Temple and would like to see Van, and that his daughter, Claire, will guide us there. Now with the green-haired Claire in our party, we’re allowed past the soldier guarding the southern exit. The soldier does mention that most of the towns in the southern part of the continent, beyond this passage, have been reduced to ruins by Galam’s army. So, I’m hoping there won’t be much left to do before the final battle.
A quick trip through the passage and across a small stretch of land, and we’re back at Darba’s Temple, which has seen better days. Approaching the staircase down to the healing fountain, a very well-developed and grown-up Annie appears. She mentions that Darba predicted Van’s trip into the future and that he would return some day. She also says that he died protecting her from the monsters summoned by Galam with his last magical power and that his will is contained in the crystal ball she led us to. The only thing of note in Darba’s message is that the power to break Galam’s immortality is also held by Larla. With the crystal now able to save and the healing fountain down here, this serves the same function as an inn. Asking Annie if she knows what can break Galam’s power, she responds by recalling that Larla always wore something. Of course, that something is that royal pendant. She then relates a legend told to her by Darba about how the Remlai family are descendants of gods and every few hundred years, someone is born into the family with a mysterious power. Now that we know how to seal Galam’s power, it’s off to find Larla. Claire then mentions that she is supposedly being held captive in Galam’s castle. Well, she IS his wife, so I should think she’d be there. Then Claire takes off to inform her father about what we learned. Well, there goes another party member that came and went in the near blink of an eye. But, with her gone, this leaves a spot open for Annie, who promptly joins up. In those 20 years, she gained 16 levels and several spells. Time to catch up with the US version.
Changes to US version:
They misnamed the Cape of Raxa (I went with Rasha’s Cloak) that you find a Holy Cape, but it’s correctly named in your inventory and when you sell it.
I went with Sylph’s Shield, going with the mythical creature, they went with Shield of Silfas.
I went with Claire, they went with Clea.
Annie asks Van if he knows of something Laura had that Galam drew power from, instead of about what she always wore. I’m not sure how he would instantly connect what Galam drew power from to the pendant.
For monsters:
Troll is Tayla for some reason.
Flame Hydra (F. Hydra, but there was a Flame Hydra in the first game) is just Hydra.
Witch is Warlock, I guess since it’s a male sprite.
Black Urchin (B. Urchin, but there was a Black Urchin in the first game) is Artee.
Lich is Riche. Again, not sure why they wouldn't use a standard monster name.
White Snake (W. Snake, this is a new enemy for this game) is Viper.
Ice Turtle (I. Turtle, but there was an Ice Turtle in the first game) is just Turtle.
Necrome (not sure why they shortened it from Necromancer for this game) is Nalcome.
I went with Hoar, they went with Halle.
Back to the Jpn version. Exploring Amur Continent, the village of Tista is gone. Heading back south through where Fog village was, we search that waterfall that had construction going on 20 years ago, and find the hidden village of Laser (presumably named after Laser Soft, the game’s developer). The town is a copy of Pirin. The inn and shops are open, but nothing happens. Most of the people are named after people that worked on the game, and what they say are mostly attempts at humor. One of them is a member of the SM Club (yes, that SM). One plugs the upcoming Valis 3 release, also developed by Laser Soft. I think a character from a future entry in the series makes an appearance, a space pirate named Captain Umanamini. The only thing of any note here is that an old man asks you to find a forbidden floppy disk in the town, and if you do, it gives you what’s needed to enter the contest to receive some item, which is similar to the one in the first game. While searching for the floppy, you can find a dirty book, so that should fall right in Working Designs’ wheelhouse. Leaving town, we continue east to Remlai Castle, which is now Galam’s Castle. The castle gates are closed, so we enter the nearby castle town of Setoa.
Most of the people in town are soldiers from Galam’s army, and that’s because the townsfolk were all sent to an internment camp, except for those who take care of the soldiers. A boy says he saw a ship that looks like a whale descend from the sky. Entering what was Jose’s house the last time we were here, his brother Dobie now lives in it. After being told to leave his house, we’re surrounded by some soldiers led by that Hargen we were warned about. The silent boy from the bar walks in and, after magically changing his cloak from white to brown, promptly takes care of Hargen’s troops with Psychic powers in a short cutscene. I’m guessing this is Yuu. The boy and Hargen then wander off. Lim has a suspicion about who the mystery boy was. With nothing else to do here, and nowhere else remaining on this landmass, we ask Dobie if he knows a way we can sneak into Galam’s castle. Dobie says today is when the castle gets its shipment of sake and we can hide inside the box in his house.
Hopping in the box, a short audio only cutscene later and we’re in the cellar of Galam’s Castle. None of the maids in the castle seem too concerned about us being there, and we’re told that Larla has fallen ill and returned to her hometown on Clan Island. There’s actually some useful equipment in here as we pick up a couple Holy Shields, which are currently the best we’ve run into, and a Rare Queen sword that does 90 damage to all enemies if it does its special attack, which is a major upgrade for Annie since she’s doing under 50 damage against most enemies. Eventually we make it to a large room where we overhear a couple people talking about the fortress on Clan Island nearing completion, as well as turning the entire planet into a fortress for the space pirates so they can start their conquest of the entire galaxy. They turn out to be Hargen and a blue-skinned fellow named Vega. Hargen then attacks us. While he hits hard, we have little trouble with him, being a 4-on-1 battle. After defeating him, a short cutscene where Yuu (who was the kid in Setoa) reappears plays. He then joins us (kicking Lim out of our team), and we next get to fight Vega, who is in a large mech. Again, he goes down with no issues, after which he runs off. Yuu then introduces himself, and instead of chasing after Vega, we head to Yuu’s spaceship, the Aljernon.
Onboard the Aljernon, Yuu, Saya, Monmo, and Nyan are there, and Monmo is back to being a motorcycle. Lim’s little unauthorized foray onto Idea did make the space pirates’ plans known, so the federation can now move to action here. As we’re formulating a plan to hunt down the pirates on Clan Island, Claire rushes in and says Galam’s army made a sneak attack on the resistance’s fort. Annie and Nyan volunteer to provide support at the resistance’s fort. Yuu sends Monmo with Nyan. Piku wants to go with Van to Clan Island, but is rebuffed by his father, Nyan, being told to stand guard in the Aljernon. Just before Annie leaves, she gives us a couple pointless amulets. With everyone splitting up, Yuu and Saya join up with Van and Lim to make what I’m guessing will be the final party. The Aljernon then submerges and after a 3 second long cutscene of the ship cruising under water, we land in the southern part of Clan Island. The shipboard computer, Mother, serves as an Inn, and I’m finally able to save again. Man, that was a lot of dialogue. Time to catch up with the US version.
Changes to US version:
Laser Village is Dullard Town.
Unsurprisingly, almost all of the townspeople’s dialog has been changed (a couple bits that aren’t personal messages from the staff were kept pretty much intact), as well as all the names of the people that worked on the game being removed (except for the Game Designer, Day Shiona). What is surprising is that they didn’t keep the SM Club dialog intact.
They added a Hairclub for Men reference.
They replaced the lewd books you find after accepting the hunt for the forbidden floppy with a joystick, bathing suit, TurboPlay, and the Hitchhiker’s Guide to the Galaxy. Again, surprisingly they removed the humor that they normally add.
Rather than being shown how to enter the sweepstakes for the prize, you receive 5000 exp for finding and returning with the floppy.
They decided to change the name of Setoa to Setore. They also call it the capital of the empire, instead of just the castle town for Galam’s castle.
For monsters:
Giant Lizard is Big guana.
Killer Roc (because there is a mythical bird named a roc) is Killer Rock.
I went with Gold Cube, since there was one in the first game, they went with G Cube, which is how it appears.
Vega Machine is Vegabot.
They renamed all the returning characters from the first game: Yuu to Cobra, Monmo to Marley, Nyan to Nayan, and Saya to Sayo.
Back to the Jpn version. Wandering around trying to figure out where exactly I am on this island, since the map has points of interest that aren’t there and doesn’t show where the Aljernon is, we finally head into the only other place here, which is a cave. Once inside the cave, it’s actually a clean futuristic looking place with a bunch of teleporters. The monsters in here do some decent damage to Yuu and Saya, so finding some Jewel Armor for Saya really helps out. We eventually make our way to Vega, and we make relatively quick work of him, finally defeating him for good. A nice Saber for Saya is waiting in the chest next to him which does 120 ice damage to all enemies as its special attack. Passing by where Vega was, we exit and relatively quickly reach a house just south of the Tree of Shura. A woman named Aru greets us and tells us that Larla is there, but can’t see anyone while she’s ill. We’re then told to kindly leave. Van then requests Aru to tell Larla that he came to see her, at which Aru is excited since Larla had been telling her about Van. A cutscene with Van and Larla reunited shows Larla giving Van her pendant. With the way to nullify Galam’s immortality in hand, it’s finally on to his stronghold, the creatively named Death Castle.
We make the short trip to Death Castle, which sits on where Shura Village was. This place is just a near carbon copy of the Turks’ Castle with a couple paths changed. No useful items are in any of the chests, so we confront Galam standing in front of his throne. Holding the pendant overhead, Galam’s immortality is nullified and we can set about defeating him. He does last a little while, but we’re easily able to withstand his single attacks with the help of the healing spell Rana 3. Somehow I actually stunned him for a couple rounds, I’m guessing by using one of the Super Bombs, but I wasn’t able to replicate it. He then shows us the true power of dark magic and transforms into Monster Galam. This battle lasts a lot longer, and those Ampoules actually come in handy, being that they fully restore HP & MP. Just before expiring, Galam says something about Larla not being able to go home. After the battle, a cutscene shows what I’m guessing is a space pirate ship rising out of the ground, and then Lim’s ship finally coming back and the shipboard computer, Dandy, shooting a single laser cannon shot through the ship, instantly destroying it. Unfortunately, the game crashes when Van reaches Level 50, and with Galam giving 50k exp for some reason, and level ups only requiring about 16k with Van being at Level 48 at my last save, this means it’s literally impossible for me to beat the game on my Jpn save file. Luckily, he’s 7 levels behind on my US save, so I’ll just have to load that one up and hopefully there aren’t any more battles after Galam. So, back to the US version to get to the save point at where Larla is.
Changes to US version:
They fixed the Level 50 crashing issue.
Aru is renamed to Mary.
For monsters:
Decarabia is Carvia.
Iron Golem (I. Golem, but there was an Iron Golem in the first game) is just Golem.
Iron Scorpion (I. Scorpion) is Steel Scorp.
Basilisk is Balisk.
Baldhead is Byrd. The sprite is a bird.
Curse Mail is Cayrs Mail.
They misspelled Guard as Gaurd for the Guard Robot.
Space Pirate Vega is just Vega.
Back to the Jpn version, and I have a 4 level cushion before it would crash after defeating Galam, so I should be able to see the Jpn ending. Taking a bit longer on Galam due to being a half dozen or so levels lower, he still goes down without any issues due to him only being able to attack one character per round thanks to enemies NEVER casting magic. Back at the house where Larla was, it turns out that she actually died a year earlier. That explains Galam’s final comment. So did a year advance during that battle? Aru gives Van a letter from Larla, as per her final wish and a cutscene plays with what I’m guessing is Larla reciting the contents of the letter and Van back at the Tree of Shura with the pendant. After a short segment back at Remlai Castle where you talk to Annie and various incidental characters, during which Aru suggests that what Van saw was a vision left by Larla’s strong feelings, the final cutscene plays with Van leaving the planet with Lim and Piku (I’m guessing Lim suggests Van would make a great Cosmic Hunter), as well as all the returning characters from the first game. I guess without Larla, Van has no reason to remain on the planet. After that, the end credits roll. Time to finish off the US version.
Changes to US version:
They don’t state that Galam transforms.
The pointless 50k experience for defeating Galam is gone.
Larla now died last week instead of last year.
They actually recorded the end theme with English lyrics.
For monsters:
Death Mail is Dark Knight.
Log Face is Mutant Heads.
Griffon is Griff.
Thunder Roc (T. Roc) is Super Shriek.
Ayl (which they earlier went with Ayrl when it was a white canine) is a Death Mask to match the new sprite for the same named monster.
Monster Galam is Galamzilla.