Tackling another Japanese import, I'm moving into a more “adult” game, which I picked up at a local store shortly after buying a system and was getting just about any game I came across, especially if it was an RPG. I'll be machine translating the game's text as I play (I am nowhere near proficient enough to do it myself, nor to do the cutscenes if there aren't subtitles), so this will take a long time. I'll be running the text through translate.google.com, www.bing.com/translator, and nihongodera.com/tools/kana-converter with the last site giving word by word translations. If those all match, I think I can be pretty sure that it's a decently accurate translation.
As with the prior imports I've done, I first translated the manual. The general gist of the game's story is that it takes place on Earth after a world war. The world has fallen into turmoil and decadence. Women have gained control of the world, led by the five magic-using Aurora daughters who mentally control the men. The men are called Otaku-chan. There's a group of cross-dressing men called the Macau that unsuccessfully rebelled. You play as a man who's lost his memories, rises up, and becomes determined to challenge the Aurora daughters. There isn't anything gameplay-wise from the manual that looks to be groundbreaking. About the only thing of note is that in order to use magic, I'll need to get a Force Gem to go with a Force Necklace. At some point, I'll be able to play blackjack, and the rules are given in the manual. About a third of the nearly 30 page manual is dedicated to item and spell tables.
Starting up the game, an intro movie shows the five Aurora daughters, but only from their noses down or from the back for some reason, on a spacecraft discussing something. After this, they fly down to Earth and the Title Screen is displayed. Upon starting a new game, another cutscene plays, I'm guessing with a narrator describing the world's current state, and then the hero apparently showing his newfound determination. Gameplay starts with me coming to in the disco shown in the cutscene. Speaking to the bartender, it seems that he found me collapsed in front of some Transmission Center a few weeks ago, and brought me here. He asks me if I'm going to try to gain acknowledgment from the Aurora daughters. Regardless of if I answer yes or no, he then tells me that a couple people will help me: Neketsu and the leader of the Macau, Jonjon. One of the disco's patrons tells me that Neketsu is in the bar that's east of the disco.
Leaving the disco to explore the town, I find out that the Transmission Center is used to transport you between the floating cities everyone has moved into, but the machine there is out of order thanks to a monster. Also trapped in the Center is Jonjon. Since this is the obvious place I'll need to end up at, I leave it for last. A few of the Macau are walking around in dresses, distinguishable from the women by their 5 o'clock shadows. One of them says he's dressed as a woman in order to show little girls a model of what they should become. Inside the clinic is a KOTOBUKI-1 computer that needs a Golden Disc to operate. The hotel guest tells me that Jonjon has a Force Necklace. The armor shops in this game are boutiques. Since I start with 0CT (money), I can't buy anything. With the town explored, except for the Transmission Center at the north of town, I enter the bar and find Neketsu alone at the bar. Speaking to him, he tells me that he is studying magic, that Jonjon is trapped by the monster in the Transmission Center, and that Jonjon has a Force Necklace, which is needed to use magic. Unfortunately, he doesn't join up, so it's off to the Transmission Center by myself, unarmed and with no armor.
Upon entering the Transmission Center, a man named Kotobuki Goro comes up to me and tells me that in order to get to the floating city controlled by the Aurora daughters, I'll need to use the transfer device in here, but it's been disabled by a monster. With a “But thou must” moment, he asks me if I'll kill it. Telling him that I will, he raises my level to 1 – yes, you start out at Level 0. Venturing further in, I fight through a couple large bat-like monsters, not taking too much damage, and quickly arrive at a large stone statue of an eagle with someone behind it. Since there's nothing else in here, it must be Jonjon. Jonjon (I now know it's him as his name is given in the dialogue box) then telepathically communicates with me, telling me to quickly get out of here. While I hesitate, the statue attacks. After a few misses, I defeat the Devil's Eagle with one hit. While it's only worth 3EXP, it does drop a nice 600CT. The Eagle then flies off and Jonjon is freed from petrification. I then receive a Golden Disc. Jonjon thanks me and tells me that he was looking for his friends that had disappeared in here. I fill him in on what's happened. He's amazed with what I'm going to try to do and joins up. Jonjon comes with some extra equipment that I can use. Heading back out, Kotobuki Goro is impressed and thinks I might have a chance at being acknowledged by the Aurora daughters. If that happens, they will show their power. He then gives me an Aurora Pendant, which I can't use right now, but I can equip it for +1 to defense.
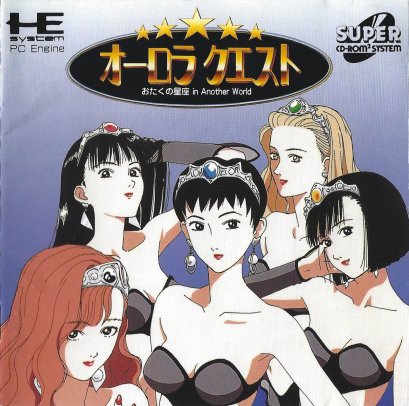
Another cutscene plays introducing the Aurora daughters individually, this time decked out in the outfits seen on the game's cover, rather than the business attire and sweater/skirt combo in the pre-Title Screen movie. Kotobuki Goro then tells me that Neketsu is waiting for me, and that I'm to return here after seeing him. Leaving the Center, I find out the name of the town is Jupiter. After being thanked by the couple Macau outside the Center, I head to the clinic to use the Golden Disc. The computer gives a decent amount of backstory, as well as summaries of equipment types. The paranoia are the synthetic life forms created by fusing humans with other organisms. There were people who managed them, but after a world war, those people disappeared, which led to the paranoia attacking the normal people. This caused everyone to flee the Earth's surface to the floating cities. On the surface are people called Bio Hunters that hunt the paranoia.
Back at the bar, it seems Jonjon knew nothing about the Force Necklace he's had since a child. After Neketsu tells him what the necklace does, he joins up. Before heading back to Kotobuki Goro, we go around town to see if anything's changed. The only thing of note is that we're told that the managers of the live houses (I think these would be like dance clubs) will help us out. Back in the Transmission Center, Kotobuki Goro tells us the only transfer device working is the one that connects to Floating City Balkan, and that there's a Yan's Disco there – Yan is one of the five Aurora daughters. He then phases out. Odd. Heading in, the dense greenery blocks the paths to several other devices. Stepping on the only available device, we're teleported to the Floating City Balkan.
Our quick trip plops us in our destination's live house. Speaking to the man behind to counter, this turns out to be the establishment's manager, Manager No. 1. He says he's been waiting for us. Maybe Kotobuki Goro teleported here of his own volition before we got here and alerted the manager to our arrival. With another “But thou must”, we'll be defeating a paranoia that has taken up residence at the town's flower shop. After we do so, the manager will tell us how we'll be able to be get into Yan's Disco. Speaking to people around town, we learn that, appropriately, the paranoia in the flower shop have merged with flowers. We're also told that we won't be able to get into the interior of the flower shop. In the northwest corner of town, there's an out-of-place trash can which can be interacted with. It simply states that there's something suspicious about it. A woman says she has the feeling she was being peeped on when she was in the boutique's changing room, and a customer in the weapon shop says the clerk at the flower shop made a tunnel for peeping. Now that I have some money, I do a little shopping at the boutique for armor. There's another computer in this clinic, the KOTOBUKI-2. The Golden Disc also works on this one, so I'm guessing it'll work on any more I come across in the future. This one is much less informative. It just has a map of the floating city. So, the “floating cities” are more like floating islands, as there are two cities and a cave on this one. The city we're currently in is Zipangu. The only other info is there's a rare crystal rose that blooms every 100 years that's cultivated here and there's an antique shop in Metro, the other city on Balkan. With nothing else of note, we save at the inn and head to the flower shop.
Inside the flower shop's atrium, the manager seem to be delirious. The manager locked the door to the shop's interior to prevent the paranoia from getting out, and he has the key. So, there has to be another way in. One of the two clerks tells us that there's a tunnel that leads into the shop's interior, and the other end is hidden beneath that suspicious trash can. Heading back to the trash can, we can now remove the lid. In addition to the stairs being revealed, we also take the trash can lid, which can be used as a shield. Nice. Descending the stairs, we find a short straightforward tunnel. There's a ladder in here with a small locked door at the top. I guess we'll be coming back here later. Taking the antidote from the lone treasure chest in here, we fight through a few battles and climb the other set of stairs and find ourselves in the flower shop's interior. While winding our way through the store, which is setup like an Ikea store, we pick up another antidote as well as a Restorative A. The antidotes come in handy, as the enemies can inflict poison. As we near the other side of the locked door, the monster that is on-screen rushes up to us and we get into battle with a dokudami and two dokudami ko buns. The translators return the flower houttuynia cordata for “dokudami”. This battle is the one pictured on the back of the games packaging. They can both poison and hypnotize us. Without much trouble, we dispatch the flower people and receive a Hand Blaster B for our troubles.
The manager, seeing we killed off the paranoia, snaps out of his stupor, opens up the door, and rewards us with a crystal rose. The shop also now sells them. The clerk that told us about the tunnel then gives us a Peeping Key to use at that ladder in the tunnel, saying it's worth a year's salary. Might as well give it a try. Heading back to that ladder, we use the key and get treated to still images of a couple ladies (one for obvious comic relief) in their dainties changing – no nudity. Heading back to the live house, the manager tells us that in order to get into Yan's Disco, we'll need an admission ticket. But to get an admission ticket, we'll need to collect three vouchers, which are held by the three managers in this floating city. Being one of them, he gives us Voucher 1. With nothing else to do here, we leave town and head north to Metro.
Completing the somewhat short journey to Metro, we find ourselves in a pretty simple town with a single street going east to west. All the shops are on the north of the street, so the large building that takes up just about the entire south side must be the antique shop. Speaking to the handful of people walking around town, one of them mentions a Shining Diamond that's supposedly worth 1 million CT. Of course, the antique shop is closed due to a paranoia infestation. The only other thing of note is some unnatural cracks in the area above the live house. The KOTOBUKI computer has the same information as in Zipangu. The clinic customer mentions the manager from Cave being here, but hasn't been seen recently. Ah, so the “Cave” on the map is actually another town. Well, in that case, I'll start calling it Cabe. In the various establishments, we're told that the Shining Diamond is in the antique shop, the antique shop sells jewelry, the manager of the antique shop has a mirror that can detect a place hidden by illusions, those cracks are supposedly a cave, and there's a Force Gem somewhere in town. Gee, I wonder where the Force Gem could be. The antique shop can't have EVERYthing. Talking to the live house's manager, Manager No. 2, just by making it here, he gives us Voucher 2. He then asks us to help out the antique shop. It's not like we have a choice. He then calls up the shop's manager to open the door for us. Heading over to the shop, its manager says he'll give us the Mirror of Truth if we defeat the paranoia inside.
There must be some invisible barrier keeping the paranoia at bay, as the area around the front desk is safe. The Salary Samurai enemies from the manual are found in here. That's become one of my favorite enemy names. On the ground floor, from treasure chests, we pick up a Restorative A and 500CT. As we head around the floor, the boss paranoia can be seen on the other side of a wall, which makes sense as the shop is actually two connected buildings. On the 2nd floor, while crossing over to the other half of the shop, we pick up 2 Tekabita Ds and some Iron Clogs, which is useful as there hasn't been any foot armor for sale up to this point. On the ground floor of the east half of the shop, we get another Restorative A before approaching the boss. Just like in Metro, the paranoia rushes us and we're in battle with... an Arch-Idiot, which is a normal enemy we ran into somewhat rarely in here. While it does have an electric shock attack that does some decent damage, we easily “send it back to its hometown”. With the boss defeated, the music changes to the normal town theme and there are no longer any enemies in here. Heading back to the manager, he's true to his word and gives us the Mirror of Truth. He tells us to use it in front of those cracks. While we could enter the cave now, instead we talk to Manager No. 2. He congratulates us on a job well done and then tells us that Manager No. 3 has gone missing, having gone into the cave when Manager No. 2 said a Force Gem was in there. Hmm, I guess that Mirror is pretty pointless. He then asks us to find Manager No. 3. I guess once you initiate any of the conversations that lead to needing to help, there's no way to actually decline. At the cracks, we hold aloft the Mirror of Truth and a set of stairs appears. Rather than head in, I think we'll check out Cabe first to see if there's any interesting dialogue with the manager absent.
Making the short trip west to Cabe, the talk of the town is the Disco. The weapon shop clerk asks if we're aliens. Odd. We're told that Yan is seeking kindness. The only mention of Manager No. 3 is one person saying he hasn't returned from Metro. The clinic has another KOTOBUKI-2 computer. My guess is that all the towns on a floating city have the same computer version. Blackjack can be played in the hotel. It doesn't allow you to split or double down, which makes it a rather poor version. The table has “Insurance Pays 2-to-1” written on it, but during my brief playing session, that possibility didn't come up. If you win a hand, you have the option to double your money by picking if the card drawn is higher or lower than a 7. When you stop playing, it tells you how many times you got Blackjack and then gives you an item. I got a Tetsujin Bomb. Heading in to Yan's Disco, we're told we need either an Admission Ticket or 3 Vouchers to get past the two women blocking entry into the disco proper. Since we've been getting a decent amount of money from the battles, we upgrade our armor and then head back to Metro.
Back in Metro, we head into the cave, or Secret Tunnel as it's called. We pick up a Restorative A and Tekabita D, as well as 200CT from the chests on the first floor. One of the stairs in here leads down and then back up to an isolated room with a chest with a nice Hand Blaster C. Taking the other set of stairs leads us to a chest with another Restorative A and then to a roaming paranoia, which is another Arch-Idiot. After easily defeating it, Manager No. 3 appears out of thin air, thanks us for defeating the paranoia, which I think he says had the gem, and then gives us Force Gem A and Voucher 3. He gives a little information about magic, and then tells us to try inserting it into the Force Necklace we have. This allows Jonjon to use magic. Jonjon had already gotten to level 4 (he's actually at level 5), so he immediately learns the healing spell, Iyasu. Manager No. 3 immediately disappears again. Emerging from the cave, it turns out that Manager No. 3 actually died. We're told that legend has it that the goddess' eyes (this must be the goddess of light, Maya, featured in the manual) are like shining diamonds. I guess that Shining Diamond we were told about will play an important role of some sort. The antique shop has reopened, and its manager will sell us the Shining Diamond for half price. Yeah, we don't have the 500k for it right now. There's nothing else to do here, so we head back to Cabe.
With the 3 vouchers in hand, we're allowed into Yan's Disco. This is a pretty rough place, as there are random encounters in here – is “Stayin' Alive” going to start playing? Fighting our way through to the dance floor, we meet Yan with a little introductory cutscene (reminding me of Lunar: The Silver Star). She must be the first of the daughters shown on the pre-Title Screen movie, as she's wearing the same green sweater. This is the first instance where the game's voice option comes into play. With voices on, the cutscene ends pretty quickly after the subtitles finish appearing. With it off, the text stays on screen for as long as you want. She asks us to show her kindness by way of giving her a Crystal Rose. Since we never got rid of the one given to us, we give it to her. Showing a bit of vanity, she then asks us for a Shining Diamond. Umm... I hope the antique store manager will knock quite a bit more off the price when we head back there.
Back in Metro, the antique shop manager gives us a diamond since he's indebted to us. That was easy. Other than the guy outside the shop who was talking about how the diamond is worth 1 million CT now being amazed that we got one, nothing else has changed here. So, it's back to Yan's Disco. Before heading there, we play another session of blackjack in the hotel to see what you get for getting more blackjacks. Adding to how limited this version is, you are not offered insurance when that situation comes up. For two blackjacks, the dealer gives you the prize of 30 Restorative Bs. Wow. Giving the diamond to Yan, she thanks us and then attacks. Her flame spell, Achi, takes out a bit more than half of anyone's EP (I believe it stands for Emotional Power – it's effectively Hit Points). Since Jonjon's heal spell only recovers a range of around 7 to 17 EP, which isn't enough to fully heal the damage she deals with Achi, those Restorative Bs I was awarded come in very handy, as they heal enough to fully restore anyone's EP. After a good half dozen or so rounds, we defeat her on our first try. During another cutscene, which consists of a still image of her with just her mouth moving if you have voices on, not finishing her off shows our true kindness. She says she's been waiting for a man like me, that the other Aurora daughters have lost their memories of the Dark God, and I'm the only one who can get them to regain their memories and save the world. According to the manual, the Dark God is called Indra. Once all the daughters' memories are restored, they will help us. So, it looks like my hunch based on there being a spell named after each of the five daughters that we can use meaning that they aren't our actual enemies was correct.
There are no longer any enemies in Yan's Disco, and the town's music has changed to a more upbeat tune. Before leaving, since I have a good amount of money, I can make the minimum bet and be pretty much guaranteed to last long enough to find out what you get for more blackjacks. Getting 3 gets you a nice Defense Ring, and 4 gets you a Wide Power Cannon. While I'll definitely make use of the Ring, the Cannon being 2-handed keeps me from equipping it as I want everyone to have a shield equipped. Heading back to Metro and then Zipangu, all three towns have the new music. Talking to the people of Metro, the women have become nicer to the men. We get congratulated by the people in Zipangu. Back in the Transmission Center in Jupiter, the large circle on the floor where Jonjon had been trapped has changed color again and another transporter has become accessible. Nothing has changed in Jupiter, so we take the newly accessible transporter and end up in the town of Selene on the Floating City Helios.
Exploring the small town, we learn there are several caves on this floating city. The Aurora daughter Rin is in the other town, Helios. Helios also has a disco inside of a tower. There's a sake-loving old man in the cave to the south, and the live house manager here supposedly has his favorite sake. As I thought, KOTOBUKI-3 is here, and, other than the city map, it lists 3 Wears, each of which look to only be equippable by the hero and give an elemental resistance, and that there are 3 Misters in the disco (imaginatively named Mr. 1F, Mr. 2F, and Mr. 3F, since those are the floors they're found on), as well as alluding to needing to fight them. Since the live house manager has the sake needed for the old man in the cave, we ignore the live house and head to the cave. A somewhat short trip southeast and we arrive at the cave, which is named “Blink of Time”. That's an odd name for a cave. Talking to the old man in here, he sees the beauty of a true man hidden in me and asks if I want to know what makes a real man cool. He'll draw out that beauty, but I'll have to come back with sake to do so. On the other side of a locked door can be seen a red glowing tile, but the old man has the key and won't open it. So, back to Selene.
Heading to the live house, someone mentions the manager being rumored as having some Apoleon's Sake. We find out Rin believes in beauty above all else and we'll need to be very fashionable for her to recognize us, and the three Wears enhance beauty and are hidden in the caves. Speaking to the manager, he lays out what we'll need to do to meet Rin. We'll need to defeat the three Misters in the disco and the Wears will each nullify their force fields. After agreeing to defeat the Misters, he promises to give us something if we succeed. I'm guessing this will be the sake, so the old man will be left for a bit later. Before leaving town for the caves, we play a little blackjack to see what prize I get for getting five blackjacks. It was definitely worth the effort, as we get rewarded with a Samamune Blade (a play on Masamune?). This is a pretty nice upgrade over the Ceramic Saber and Titanium Blade we currently carry. The blades are all better than the firearms we have, so everyone will be wielding blades. We also upgrade our armor, finally getting to a town that sells gloves/gauntlets.
We leave town and head to the nearest cave, which is in the northwest part of the floating city. The cave is very simple. We pick up a Poison/Paralysis Agent from a treasure chest before taking on the paranoia that's guarding the only other chest in here. Easily defeating the Red King, which looks like a guy dressed in a red Godzilla suit, we take the Wear 2 from the chest behind it. It's a full-body armor and it turns out that everyone can wear it, not just the hero. Maybe it just has to be equipped by the hero for it to nullify the force fields. I'll have to test that out. The town of Helios stands between us and the remaining caves, so we stop in there before tackling them. As expected, the people here talk a lot about fashion sense. We're told Rin is on the top floor of the disco tower and the Misters on each floor wear some cool clothes. We can't enter the locked changing room in the boutique. We also get a refresher about what we need to do here. With everyone around town talked to, we head into the disco tower. If you answer no to the string of questions from the disco's receptionist, you get called an Amanojaku alien and get kicked out. Since aliens have come up a few times now, will they come into play at some point? The Aurora daughters were shown on a spaceship in the opening movie, after all. Or is it just going to be a running gag? Like in Yan's Disco, there are random encounters in Rin's Disco. Making our way to the stairs to the 2nd floor, they're blocked by Mr. 1F. Since the hero doesn't have Wear 1, which we haven't found yet, equipped, after Mr. 1F asks if we think we can win, as we were told, his force field blows us out of the tower, making us fly across town and crash through the roof of the boutique and into the locked changing room. A full-screen still image of a woman in lingerie wavers into view. Referred to as Bondage Girl, she yells at us not to stare and then demands we get out. We've done everything we can do here right now, so we venture out to the other two caves.
In the closer of the two, it's also a very simple cave, this time with a whopping three chests. The north one contains a Restorative B and the south one has a very nice Titanium Buckler, which is currently the best non-blackjack-prize (assuming there is one) arm protection. Attacking the paranoia, this one's a Uganda Bat. Luckily, it's petrification attack didn't land and we easily dispatch it. The chest behind it holds Wear 1. After a quick trip back to Helios to save, we then make our way to the final accessible cave – there's another one on a little island. Again, it's a very simple cave, with a Restorative B in the lone unguarded chest. The paranoia boss in this one is a Kodzilla. If it has any special attacks, it didn't use them. Like the other two bosses, this one posed no threat and we pick up Wear 3 from the chest. Now we can take on the trio of Misters in the disco.
Back at Mr. 1F, the hero must be wearing the Wear, as the party will be ejected if anyone else is wearing it. After repeating the Bondage Girl sequence, we head back, have the hero equip the Wear 1 and after Mr. 1F gets voice work this time, saying the exact same line, his force field is nullified and we enter battle. He has the all party Flame spell, Achii, which does some decent damage to Jonjon and Neketsu (Wear 1 gives full resistance against Flame spells, being the compliment to what Mr. 1F is wearing), he goes down pretty easily and phases out. As we were told, Wear 1 gets destroyed and disappears from our inventory. Before taking on Mr. 2F, we head back to the inn to save. Back in the disco, the 2nd floor has a couple treasure chests, holding a Power Blaster B and Missile Launcher. The Power Blaster B is one-handed, so since it gives the hero the same attack power as he's getting with a Force Blade, with the added +10 to hit rate, the hero equips it. The Missile Launcher is a two-handed weapon, so it stays in our inventory. Of course we neglect to outfit the hero with Wear 2, and we're again ejected, this time crashing through the hotel roof and into the locked room. We get treated to an image of a girl from the neck down in a bodice and panties. Jonjon ridicules her sense of style and the “See-through Girl” demands we leave.
Back in the disco, the hero puts on Wear 2 and we fight Mr. 2F. He has an all-party Earthquake spell, which Wear 2 protects the hero from. Like Mr. 1F, he's easily defeated, Wear 2 is destroyed, and Mr. 2F disappears. We're still very healthy, so we head up to the 3rd Floor. I wonder where Mr. 3F's force field will send us, since there aren't any other locked rooms in town. It turns out that we're booted out and crash through the ground by the pool outside of the inn and right next to a sunbathing girl who isn't there at any other time. The image is of her laying on her stomach reading a book with the top of her bikini unfastened. Again, Jonjon disparages her style and we're forcefully told to go away. With Wear 3 equipped, Mr. 3F goes down just as easily as the other two, just having an all party electricity attack. Heading up to the 4th floor, Rin is dancing alone on the stage. Speaking to her... Wait a second. Her sprite shows her wearing a white outfit, but in the cutscene she's wearing the same red suitcoat from the opening movie. She just says that she doesn't see an iota of sense in our fashion, and that ends the interaction.
I just remembered that according to the manual, some weapons target multiple enemies. Trying out the Missile Launcher, it targets an enemy group, while the Wide Beam Cannon targets all enemies. Nice! I'll forego the shields for that. And since you can change equipment during battle, with no loss of turn, we can swap it out for a blade whenever it's advantageous.
Doing as we were told, we return to the manager of the live house in Selene. No one around town has any new important information for us. Speaking to the live house manager, it turns out that he's the son of the old man in the southern cave. He tells us that his father will teach us the style of a true man if we bring him the bottle of Apoleon's Sake that we're now given. Making the short trip back to the Blink of Time, we agree to drink some sake with the old man and he opens the door to the rear of the cave. The red tile we could see turns out to be a teleporter. Stepping on the teleporter, we're in another cave. These caves are all extremely simple. We snag a Restorative B from the unguarded treasure chest. The visible paranoia guarding the other chest is a Sadist X. Its all party electricity spell, Bishisu, does some ok damage, but nothing worrisome. Dispatching it, we pick up a Loincloth from the chest. The other set of stairs takes us to the surface on the little island. Heading back, the old man just tells us to teach Rin a lesson. The manager has nothing new to say, so we trek back to Rin.
With the loincloth equipped on the hero, Rin is at a loss for words. Thinking we're making a fool of her, she attacks us. She must have quite a bit more magic power than the Sadist X, as her Bishisu takes out around a third of everyone's EP. While Jonjon's Iyashisu can heal the same amount she deals, it's only a single ally spell. I don't know if it's programmed this way, but during both times I fought her (once with voice on and once with voice off to translate the subtitles), whenever at least one character was damaged enough to where another Bishisu casting would KO him, she would do her much less dangerous physical attack. After defeating her, she has a rather lengthy bit of dialog where she realizes that beauty is more than just what's on someone's surface. Her memory comes back and she remembers that the reason they came to Earth was to look for a man to help with some crisis of the goddess, and that I'm that man. She then pleads with us to restore the remaining Aurora girls (I think girls is more appropriate than daughters, so I'm changing how I'm referring to them), saying only I can save the goddess from the Dark God. To help us out, she gives a Force Necklace, with a Force Gem already attached, to Neketsu, allowing him to use magic. Woohoo! Being at level 12, he immediately has about a half dozen spells at his disposal. Not being done, Rin then gives us a Bottle Ship, which will apparently become large enough to carry us when put in water. I'm guessing we'll be heading down to the surface sometime soon. That battle was so intense that the loincloth ripped during it (even though it lasted through the entire battle) and disappears. Dang it! It was the best body armor we had. Just like on Balkan, both cities on this floating city get the new town music. Other than getting props from the townsfolk and some realizing that beauty is more than just skin deep, nothing important is told to us. So, it's back to Jupiter to see where we get to go next.
Before going through the transporter to Jupiter, we see what the people of Selene have to say. As with Balkan, the girls on this floating city are suddenly kind to the men. The only important piece of info we get is that there's a famous sword used during the great war by a samurai from another planet that disappeared, but is rumored to be in the floating city of Neptune. Ok, this game seems to be using gods for the names of all the floating cities. I wasn't familiar with Helios, so I looked it up. Being the Greek god of the sun, this explains the disco tower being named the Tower of the Sun. It also explains the town of Selene, as that's the name of one of Helios's daughters. Which means Balkan is assuredly Vulcan. With my “learn something every day” moment over, we head back to Jupiter. The large circle in the floor changed again. Seeing where the newly accessible transporter is, I think the design in the circle is pointing at where you need to be, just in case you've forgotten. Out of curiosity, we make a quick stop in Zipangu to do a little peeping and see if there are any new women to check out. Nope, it's the same two.
Arriving in the live house in a city, which we'll soon learn is Ambiente, on Neptune, Neketsu won't let us leave the establishment without talking to the manager. Talking to the patrons, we learn that there's a mysterious “Ripper” terrorizing people, and the Aurora girl Yun supposedly knows something. Only a few people know the true identity of The Ripper. The stairs in the stage lead to the city of Kings, but, according to a guy that wants to go to Kings, some force supposedly prevents entry into the city. Speaking to the manager, he tells us that for Yun to recognize me, I'll need to tell her the true identity of The Ripper. He also says the cities' computers have information about it. Now that we can exit the live house, briefly venturing outside the city puts that Bottle Ship to immediate use, as the town occupies the entirety of a small island. So, maybe we won't ever go to the surface. Back in town, it looks like we get to play investigator. One person thinks The Ripper is a hit man. One thinks it might be a ghost. The Ripper seems to only be seen in Kings. It seems we'll need to go to the city computers in a specific order. Now those are some odd city names: Recipe, Plans, and Attic. In the town's boutique, we're told that the girls here love to study, and there's a lewd doctor in a tower surrounded by a whirlpool. We're told that The Ripper is rumored to appear between 9am and noon. But, there's no time convention in this game. Heading to the computer in the clinic, we're told by one of the customers that we'll need to bring a porn photo when we go to see the lewd doctor, Dr. Sukebe (sukebe means lewd). Checking out the KOTOBUKI-4 computer, other than the city map, it only gives us the information about The Ripper. The information we're given is something like “Accelerating inside and outside the crowded buildings.” Ooookay. We are then given that info as the item “Information 1”. Other than the two tunnels, the only place left in town is the disco. Before we go in there, I'm curious as to whether we can enter Kings.
Back in the live house, we head into the tunnel. The Four-Eyed Priest Boy (Yotsume Kozou) enemy in here is immune to firearms, so that ability to change equipment during battle really comes in handy. The lone treasure chest in holds a Revive. Climbing the other set of stairs puts us in a building in Kings. Inside the building we find four chests, holding two Restorative Bs, a Revive, and a Hot and Cold Hands, which is a nice upgrade to our current arm protection. The manual says the Hot and Cold Hands protects against Flame and Cold. Nothing prevented us from entering the city. Since the enemies are doing a good amount of damage, there are enemies in town, and Jonjon is quickly running out of MP, we head back to Ambiente. The monsters have been giving a good amount of CT to where we can buy everyone the best armor available, so we go on a shopping spree at the boutique. Resting up at the inn, we then tackle the other tunnel whose stairs are just outside of the inn. The first thing we come across is a ladder like in the tunnel in Zipangu. And like that ladder, there's a peephole at the top where we get to peep on one of two women changing. Unlike in Zipangu, the closing dialog here is different depending on which woman you see. This tunnel actually is somewhat complex with a couple more exits. On our way to the northeast stairs, we pick up a Restorative C and a Ray Blaster A from the chests. Taking the NE stairs puts us in the Tower of the Great Whirlpool. I don't want to be here yet, so we immediately head back down. Continuing down the other path, there's another ladder with a peephole at the top. The girl you spy on is suspiciously similar to the “See-through Girl” in Helios. I peeped about a half-dozen times, but it looks like there's only the one girl for this peephole. Continuing down the path, we pick up a MP Recovery A from a chest and arrive at another set of stairs, this one putting us in the town of Recipe. Rather than exploring the town, we head back to Ambiente.
Going to the only place we haven't been in town, we enter Ambiente's disco. Kotobuki Goro is just inside the door, and after one random encounter, we're dragged to him, where he asks us how we're doing. Depending on how we answer, he tells us to take either the left or right stairs. He then phases out. With this place having random encounters, I'm guessing we'll find Yun in here. The bartender mentions a building-destroying “Building Bomb”, which, based on the first cryptic clue we received from the computer, I'm guessing will be used to learn The Ripper's true identity. Taking the left stairs, what Kotobuki Goro told us now makes sense, as the 2nd floor is partitioned into two sections, with the left (the one to take if you aren't feeling well) being a straight corridor to the stairs to the 3rd floor. Heading back down and taking the right stairs puts us in a simple zigzag corridor to another set of stairs to the 3rd floor. Along the way are a few treasure chests holding a Panacea, Ray Blaster B, and Restorative C. Making our way to the dance floor, we meet the Aurora Girl Yun, whose sprite's outfit doesn't match what she's wearing during the voiced cutscene, in which she's shown only wearing (at least from the waist up) overalls/dungarees. She asks us if we've found out who The Ripper is. Not having done so, she simply tells us to go home. Since I'm curious what happens if you go to the towns out of order from we were told, we head back to the tunnel to Recipe.
The first thing we always try to do whenever we enter a new town is save at the hotel. This hotel has some stairs up in it. Taking them, we find ourselves in a casino where you can bet up to 500CT (as opposed to 50CT at the prior blackjack tables we came across) per hand. The cashier in here sells Porn Picture B and then a Porn Picture C for 1000CT each, both of which aren't usable items, but rather are head armor with a defense of 1 and +5 to Magic Evasion. We haven't come across Porn Picture A yet. Even though we have over 10k, we'll pass right now to see what Dr. Sukebe tells us (assuming we can meet him) without them. Since I don't feel like gambling, we leave and explore the town. We're told that Kings became deserted after a big building was built there and that The Ripper might have something to do with the building. This would make Information 1 make a bit more sense. It seems that no one, or at least no one still alive, has actually seen The Ripper. More speculation about The Ripper has it as something not living or a space alien. The computer in this city is found in an unmarked building. People in town mention firearms don't work on yokai and yurei. We pick up Information 2, which is something about the “north wind blowing from Otaky Bay to Kings”. We're told that Dr. Sukebe created that Building Bomb to be used during construction, but it ended up being too powerful to use. The tunnel we took to get here was apparently built by Dr. Sukebe for peeping, but hey, he's just a helpless old man, so nothing to worry about. Manager No. 2 in the live house tells us that Manager No. 3 from Plans appears to have been kidnapped and asks us to rescue him, surprisingly without a Yes/No prompt.
Like in Ambiente, there's a tunnel to Kings in the live house. Taking it, the lone chest holds a Restorative C. Exiting the tunnel, there's a single chest in this building with an Iron Man Bomb (Tetsujin Bomb). Since we're still very healthy, we explore the city of Kings. Entering the eastern building nets us another Iron Man Bomb from the chest. The western, multi-story, building has a single chest on each of its three floors, containing a Panacea, MP Recovery A, and Wide Power Cannon. The rooftop has a pair of viewing binoculars. Looking through them, it just says the wind swirls around the building. There a single gap between the buildings to the northern part of town, but when we try to go through it, a strong wind blows us away, dropping us in front of the southern buildings. So that's what the guy in Ambiente was talking about. Taking the remaining tunnel, we pick up a Grenade Cannon and a Panacea from the treasure chests before exiting into the city of Attic. Rather than explore Attic, we head back to Ambiente to explore the Tower of the Great Whirlpool and see if Dr. Sukebe is there. Entering the Tower through the tunnel, we pick up a Restorative A and Poison/Paralysis Agent from chests as we ascend to the 3rd Floor, where Dr. Sukebe is waiting. He just asks if we have a Porn Picture and tells us he'll give us something good in exchange for it. Taking the stairs to the rooftop serves no purpose right now. Leaving the Tower, we then go to Attic.
I guess Plans is the expected next city to visit, as we meet Manager No. 4 here. As one of the townspeople said, there's nothing much to be learned here. One person tells us that most of what we hear about The Ripper is unreliable, and we should only rely on what we get from the computers. Finding this town's computer in another unmarked building, we pick up Information 4, which states that The Ripper's true identity is created by the north wind. That's pretty much it from this city. With tunnels connecting the cities, I found out that in order for a city to populate the teleport list (either use a Teleport Beacon or cast the spell Mubuuto), you have to enter from the overworld. Also, Kings doesn't actually show up in the list. The final city to visit is Plans, which is a very short boat ride east from Attic. Before going there, since we really haven't explored the overworld thanks to the tunnels connecting the cities, we check out the unlabeled point of interest on the city map. This is the Tower of the Great Whirlpool, and moving our very swift moving ship into the whirlpool just sends us around the tower and then spit out to the north. With that out the way, we pilot the ship back to Plans.
Speaking to the people in town, in order to get close to the huge building we've heard about in Kings, we'll have to use the tunnel in the live house here. The lost sword we were told about a little while back gets another mention. We see a man that looks just like Dr. Sukebe (and the sketchy scientist by the KOTOBUKI-1 computer in Jupiter's Clinic) hanging out by a bunch of flowers. Being named Dr. Sakebe made me go back to all the people who mentioned Dr. Sukebe to make sure they all said “Dr. Sukebe” and not “Dr. Sakebe”. Dr. Sakebe tells us about a Timer that can stop time, and if we can combine it with Dr. Sukebe's Building Bomb, it'll become a Time Bomb. The problem is that the paranoia stole the Timer and hid it in the other tunnel in town. If we can recover it, Dr. Sakebe promises to give us something just as good. Since we were told that the casino in Recipe will give us something good, I'm guessing this will be the missing Porn Picture A. We try to enter the unmarked building, but it's locked. Another person suggests The Ripper might be a ninja. Entering the live house, it looks like the manager is here, which would mean he wasn't kidnapped. Speaking to the man, it is Manager No. 3 (oh, yeah, I guess being told he's No. 3 by No. 2 in Recipe should have tipped me off that this was the next city to visit). He tells us some paranoia stole the key to the information center and is hiding in the tunnel – the same tunnel where we should find the Timer. Ah, so now the online translators returning that Manager No. 3 was stolen makes more sense. I'll have to update that. Someone in the live house says that Dr. Sakebe, who we're told is Dr. Sukebe's cousin (explaining their strikingly similar appearance), has a Porn Picture, so it looks like my hunch was right.
Before we enter the tunnel north of the live house, we buy a couple Photon Sabers as our swords are starting to get far enough behind what we can buy to make it worth the expenditure. Now in the tunnel, we pick up a Restorative B, Laser Cannon B, and a Casting Ring from the chests on the 1st Floor. While the Casting Ring increases magic evasion and magic defense, I'd rather stick with the higher defense ratings of the Force Necklaces and Defense Ring we're currently equipped with. The southwest stairs down put us in the central section of the 2nd floor, where we get a Wide Power Cannon, Kochira Protector (a full-body armor), and the Timer. Since we can see the thieving paranoia, we head back out to save before engaging it. With that quick trip over, it's time to get back the stolen key. Entering battle, we get to fight a Hyper Achira and two Chicken Hags. I thought the Chicken Hags were nothing to worry about, since they'd only ever physically attacked before, and those attacks were very weak. But this time, they cast the spell Shime Nekku, which strangles a character for an instant KO. Good thing we have a couple Revives on hand. The Achira does have an all-party flame attack, but that's much less dangerous than the Hags' special. Defeating the trio gets us the stolen key.
With key in hand, we're able to get the final piece of the puzzle as to the true identity of The Ripper. Entering the Information Center, we get Information 3, which states “Create a vacuum near the entrance”. The computer then puts together the four pieces of information to give something along the lines of “the north wind blowing around crowded buildings reaches the speed of sound and creates a vacuum near the entrance”. It then gives three possible phenomena that could be the cause of The Ripper: White Crocodile, Kamaitachi, and Nishikigoi. You can just brute force your way to the correct answer, as there's no penalty for choosing incorrectly. If you know about, or look up what the Kamaitachi youkai is, you'd know this is the correct option. It then gives us Information 5, which you'll need to give to Yun, and then displays a diagram of the inside of the giant building with an X marking the spot to place the time bomb, which should destroy the building. With the major task on this floating island almost wrapped up, we talk to Manager No. 3 and are told that Yun should have an ID Card, which is needed to open the door in the tunnel between here and Kings. Going back to Dr. Sakebe with Timer in hand, as expected, he gives us Porn Picture A. He then tells us that the development of a megacity was underway, and during that time, Yun came, built the huge building, which caused some accident, after which the megacity was scrapped.
Now that we have Porn Picture A, we head back to Ambiente to take the tunnel to the Tower. Checking out the computer out of curiosity, it repeats what the computer in Plans states, going through the entire selection of the cause of The Ripper, but there's no way to exit, requiring a reboot of the PC Engine. I checked the other two towns' computers, but those allow you to exit. We make our way back to Dr. Sukebe, he's extremely excited that we have Porn Picture A and gives us the building bomb in exchange for it. Dang it! It seems there might be some different dialog if you bring either Porn Picture B or C, or both, but not A. Since we were told to go meet Yun now that we know The Ripper's true identity, we head back to the disco. She gets another voiced cutscene where she tells us the Kamaitachi makes people feel smart, possibly explaining why the girls here love to study, and that she finds single-minded boys charming. Because we were laser-focused on discovering The Ripper's true identity, she recognizes us without a fight and then wishes us the best of luck on our next journey. Neketsu and Jonjon remind me that we still have to destroy the huge building on Kings, and choosing to do so, Yun gives us an ID Card. Hmm... The music didn't change like in the previous two floating cities, yet there doesn't seem to be any random encounters in here anymore.
Back at the tunnel from Plans to Kings, the door accepts our ID Card. The first chest we come to has a Samamune Blade, which I'm guessing is that lost sword we were told about. Another chest holds a panacea. Exiting the other end of the tunnel puts us inside the huge building. Coming near to the spot to place the bomb draws us to the exact spot. Setting the bomb, we automatically run outside and then onto the bottle ship. We go a little way out to sea and watch as a large explosion goes off. Going back to survey the damage, the entire building, and only that building, has almost completely disappeared, revealing a treasure chest. Opening the chest, we find a Goddess's Book. Of course, no one can read it. Jonjon suggests maybe Yun knows something about it, so it's back to Ambiente. Yun gets another voiced cutscene, where she reveals that thanks to what we've done, the seal on her memory has been broken. She says the next transmitter has opened, which leads to the Floating City Venus. She then gives us a Plasma Saber and asks us to awaken the remaining two girls. The town music now changes to the upbeat one.
Before going back to Jupiter and then on to Venus, we check out what people in the four cities on Neptune have to say. In Ambiente, we're told that someone seems to be in control of the entire surface of the world, and the Aurora Girls appear in a 7000 year old legend about the creation of the universe. In Plans, we're told that the lost sword is indeed the Samamune Blade, which... we can also get from playing Blackjack. There's nothing of importance in Attic or Recipe. We went through the transmitter to Jupiter and then I thought to check if anything changed in Kings. Back in Kings, peering through the binoculars just states that the wind has subsided since the huge building is destroyed. Checking out the other buildings, all the chests have been refilled. Entering the tunnel to Plans, hoping to get another Samamune Blade, it turns out that only some of the chests refilled (the one with the Goddess's Book not being one was expected). Since I started keeping track of which ones refilled, I reloaded and went back. Hmm... They're all empty now. I wonder if it's the act of going through the transporter that causes them to refill. Yep, that's it. After going back to Kings and through all the tunnels, a good number of them have refilled. Doing the trip to Jupiter and back, they refilled again. So, if you want a somewhat tedious method of generating infinite money, you can just keep doing this and selling off all the items.
My guess about the large circle on the floor in the Transmission Center in Jupiter was wrong as the current design isn't pointing to the transmitter to Venus, and isn't actually something that I would consider to be an arrow. Arriving in the live house in the town of Paibi, we notice a set of stairs behind where the managers normally are. Taking them into the basement, there's a man down here. It seems both he and his son were kicked out of something by the musical group, the Three Freddie Brothers, mentioning that no musician can beat them. Back upstairs, as soon as we pass by the manager's office, we're pulled to in front of the stage where a trio, likely those brothers, are performing. The trio looks kinda like two Ed Sullivans and one Richard Nixon. After a bit, the trio phases out. Speaking to the patrons makes it pretty clear that the group performing was the Three Freddie Brothers. The patrons also say that the brothers kicked the manager out of the live house after the manager lost a “Sound Battle” to them and are now managing the place. In town, we talk to an old man who fell in love with a woman named Ms. Peeping, and that she used to be a good woman. The Freddie Brothers also used to be on good terms with the manager. So, it seems something in this city has caused people to completely change. In the various shops, we find out that a lot of boys have been taken to the PV offices, which must be that large building in town. Giving the bartender 100CT, he tells us that Ms. Peeping stole four musical instruments and they're sealed in an ice pillar in the town of Casablanca. The Freddie brothers apparently have some sort of power, and in order to defeat them, it looks like we're going to have to do so in a Sound Battle. The Aurora Girl Run is in the town of Queen. Speaking to the hotel guests, the Freddie brothers were hired by PV and PV is currently being run by Ms. Peeping. The town's computer gives a pretty lengthy legend of the creation of the world. Basically, “Chaos”, which is what humans would call God, created dimensions, then two “consciousnesses”. The two consciousnesses, which I'm guessing are the Goddess of Light and Dark God, then brought order to the world.
The large building is the last place to visit, so we head over there. Talking to the receptionist in the PV Building, her brief explanation of the company tells us that PV stands for Public Videogram. She then invites us to look around. In what looks to be a conference room, one of the men echo the sentiment of one of the townspeople, saying they don't want to market the Freddie Brothers “like that.” Having overheard him, he gives us 500CT to keep quiet. We get kicked out of the studio since we're not authorized personnel. Since there are a couple treasure chests in there and a set of stairs, I know we'll be coming back here at some point. There's also a locked women's changing room that obviously we'll be getting into. Speaking to the janitor, we find out that the Freddie brothers became paranoia after being hired by PV. Entering a room with a bed in it, it becomes pretty clear what types of videos this company produces. The boy claims he was tricked into coming here and pleads for our help. Agreeing to do so makes us enter battle against the woman in here. Elizabeth can only hit somewhat hard and heal herself, so she goes down easily. After thanking us and also mentioning the Freddie brothers became paranoia, he runs off and back to his father, Manager No. 1. Heading up to the pool on the office building's roof, the girl here just says the pool is for women only. Back at the live house, we go see the manager. After one line of dialog, the boy runs in, telling his father that we saved him. The manager then tells us that Manager No. 2 in the city of Queen got challenged to a Sound Battle by the Freddie brothers, and gives us a Letter of Introduction. It looks like we have a Sound Battle to win. Since I want to see if any dialog is different without the letter, I reload before talking to the manager and head to the other cities on Venus.
Making the short trip north to Queen, we enter an extremely small town with all of three buildings. There is only a hotel/information center, a live house, and Run's Disco. The only useful piece of information we get is that there are several tunnels in the city. Manager No. 2 just says that he's been challenged to a Sound Battle. He is obliged to do it, as one of the unwritten rules is that it can't be declined. In the disco, the receptionist asks us if we're confident in our strength. Of course we are. Well... the first battle we get into in here shows us that we might be a bit overconfident. Hightailing it out after surviving that battle, maybe the town of Casablanca has some good equipment for sale so we can survive for more than a couple battles in Run's Disco. Another short trip north puts us in Casablanca. Just like Queen, this city has only 3 buildings, a live house, a weapon shop, and one which appears to not have an entrance. Talking to the few people wandering around the town, we hear of a rumor of a boy being taken into the Casablanca Building, which is the large building with no entrance. Another person says the PV office building in Paibi is connected to this building by a tunnel. Ms. Peeping supposedly lives in the Casablanca Building. In the live house, we learn that those four instruments were in its basement, and that there's a tunnel connecting the live house to the Casablanca Building. Before heading down to the tunnel, which likely has encounters, we buy Fiber Shields for everyone. That didn't leave us with enough money to buy any weapons. Taking the stairs in the live house, a Lookout Woman is blocking the path. Telling her we're confident, she gives us credit for having guts, but that we'll regret it, and then attacks. It's another Elizabeth enemy, and just like before, we easily defeat her. She runs off and we're free to proceed. Unfortunately, all the chests down here were already cleaned out. Entering a dungeon in the Casablanca Building, Manager No. 3 is being held inside one of the jail cells. He just tells us to help Manager No. 2 in Queen. Taking the set of stairs down, after a couple flights, we find ourselves in a chamber with a half-dozen pedestals with spheres on them. Examining all of them, the top center one appears to be able to be moved, but it's too slippery to get a grip on. It then suggests that we'll need some lube. Back in the dungeon, we take the other set of stairs up. On the 1st Floor of the building, we examine what turns out to be that ice pillar and can see the instruments sealed inside. The door in here exits the building to the back, which explains why we could actually walk around the city wall. I thought I tried entering from the back, but I guess not. Either that or it actually won't let you enter the door until you exit from it. Back inside, we continue up and end up in a room with a bed and a woman. This woman turns out to be Ms. Peeping. She wonders how we got in, demands we leave her building, and then flirts with us, which repulses the hero. Automatically running out of the room, there's nothing left to do here, so we head back to Queen. Maybe we can try making our way through the disco to meet Run.
It turns out that I overreacted a bit to the one battle we got into in the disco. This time, we don't get into any battles on our way to Run, and one on our way out. The disco's bartender tells us that Ms. Peeping's power comes from a special item. That piece of information really wasn't worth the 100CT. Speaking to Run on the stage, in a voiced cutscene, she says she'll recognize me if I have more power than some very powerful people in the city. I'm pretty sure she's talking about Ms. Peeping and the Freddie brothers. With nothing else to do except advance the plot, we head back to Manager No. 1 and get the letter of introduction. Back in Queen, with the letter in our possession, Manager No. 2 tells us that Ms. Peeping tricked the Freddie brothers, turning them into paranoia and using their power to get a boy. After agreeing to defeat the brothers, he tells us that if we can get the four instruments sealed in Casablanca, we'll be able to defeat them and free them from their nightmare of being paranoia. He then gives us a Steel Pick, which is equippable as an accessory, and to make contact with Manager No. 3, who's imprisoned in Casablanca. After getting the instruments, we're to return here. Back in the Casablanca Building's dungeon, seeing the Steel Pick, Manager No. 3 tells us that we'll need a Fire Crystal to break the seal on the ice pillar and retrieve the instruments. To get to the crystal, we'll have to go to that room with the balls on pedestals. He then gives us some oil to get the one pedestal to move, which should reveal a staircase which will lead to a teleporter. He doesn't know what to do next, so we're on our own from that point. Using the oil on the top center pedestal, we move it out of the way, take the stairs down and then using the teleporter. This puts us in a grotto, which has a layout that's very similar to Pac-Man's maze. We spot some paranoia running around, but just running into them doesn't automatically engage them in battle. The center room, where the ghosts in Pac-Man would be, has another, different, paranoia, but we can't enter the room until we defeat the four paranoia running around. They seem to each have a quadrant of the maze that they won't leave, so it's just a matter of being able to “talk” to them. The nice thing is that there aren't any random encounters in here, at least not while there are the roaming paranoia (there are random encounters if you return after getting the Fire Crystal). After defeating the four outer paranoia, we enter the room and easily defeat a King Uganda, a Rotten Dokudami, and a Undabada. We collect the Fire Crystal and head to the ice pillar. Out of curiosity, we talk to Manager No. 3 through the cell door, and he just tells us to hold the crystal in front of the pillar.
We use the crystal on the pillar and the seal is broken. I was expecting it to melt the ice, but it doesn't appear to do so. We collect the Fire Bass, Wind Keyboard, Earth Sticks, and Lightning Guitar, and then head back to Manager No. 3, who just tells us to get to Manager No. 2 as soon as possible. Making the short trip south to Queen, no dialog outside of the live house has changed, so we head in there. The Sound Battle has already begun and the Three Freddie Brothers are performing on stage. Since I'm guessing there will be a non-musical battle as well, we're actually given the option to prepare ourselves by telling the manager that we're not ready. I think we're up for it, even without the best equipment on everyone. The brothers finish their set and we decide who will play which instrument. Neketsu went to the Yamaba (no, not Yamaha) drum school, so he gets the Earth Sticks. Jonjon says he's played a Heyer (I'm guessing this is a play on either a piano or keyboard maker, but I can't figure out what it would be), so he gets the Wind Keyboard. Of course the Hero gets the Lightning Guitar. That just leaves the Fire Bass with no one to play it. Never fear, as Kotobuki Goro teleports in and we have our bassist. A cutscene then plays, where it just cycles through still images with some flashing lights of each of us playing our instrument. The crowd goes wild and it looks like we've won the Battle of the Ba-- err, Sound Battle. The brothers then attack us. While they do have some spells that target everyone, they're a pushover. Defeating them breaks the spell over them, and realizing this, they give us the key to the prison in the Casablanca Building. They then tell us that Ms. Peeping's secret is hidden in the studio in the PV office building. Kotobuki Goro then tells me that I've come to understand that a real man's strength is acting with conviction and then phases out. Speaking to the brothers again, we're told that the Casablanca Building's prison's stairs lead to a tunnel that emerges inside the studio, and finding the secret records of Ms. Peeping will foil her plans, whatever they may be.
Before trying to find Ms. Peeping's secret, we stop by Run to see if she has anything different to say. Being somewhat impressed that we defeated the Freddie brothers, she asks us to show her we have the power to capture people's hearts. Making our way back to the Casablanca Building's dungeon, we free the three prisoners. They all simply thank us and leave. Taking the stairs in the cell that had always been empty, we pick up a Restorative B, MP Recovery A, and a pair of Decrees Gloves (the manual erroneously lists them as having a defense power of 6, when it's actually 7) from the treasure chests in the tunnel. Taking the northern set of stairs up, we find ourselves in that changing room we couldn't enter before. Even though we've entered the room, the still image of the scene we get to view is through a peephole. While there's only a sprite of one woman in here, one of the two scenes is of several women. The other, seemingly much less common scene, is a close up of a woman's bust with her putting her shirt on, so you get to see some cleavage and a lacy bra. The woman then screams, calls us a pervert, and runs out. Nothing has changed on the rest of the floor, so we head back down and take the southern stairs up into the secret room of the studio. Opening the two chests, we find a hentai video and a photograph of evidence of something. Speaking to the woman who would always kick us out, after telling us that the room wasn't off limits, but rather she is and will make us remember that with her body, she attacks. It's another Elizabeth enemy, and we again have no problems. She then tells us Ms. Peeping's plot to rule over Venus by taking over PV, turning the Freddie brothers into paranoia, crushing the live houses, and making a hentai video, all to gain control over some boy. With the incriminating evidence in hand, we head up to confront Ms. Peeping. Getting flustered when she sees we have both the photo and video, she summons the Freddie brothers and commands them to take care of us. Since we broke her control over them, they refuse to do anything. Coming to the realization that she no longer holds power over them, she tells a sad story of how she'll always be alone and that she doesn't have any children. She also tells of how she found a Goddess's Staff in an antique shop (I'm guessing this is the cane/staff in the Metro antique shop mentioned by the Kotobuki-2 computer back on Vulcan) and it gave her the power to do what she did. She then gives us the staff. The Freddie brothers were so moved by her story that they ask to live with her, which she accepts. We're even choked up by the story. Ms. Peeping then tells us that Run will recognize us if we have the staff and warns us that the staff makes people extremely greedy.
Other than a couple people mentioning that Ms. Peeping is quitting her job, nobody has anything new and important to tell us, so we head to Run with the Goddess's Staff. Somehow, Run knows that Ms. Peeping has reformed. Feeling the great power of the staff, she then says she'll recognize us if we can defeat her and attacks. Her Vacuum Blade (Supashu) spell does over 100 damage to one party member, which is more than half of anyone's EP, and her physical attack does close to 50 EP of damage. This is enough to actually wipe us out, giving us our first defeat, as I was trying to keep everyone healed. On our second attempt, I actually thought about it and had Jonjon start out by casing Supa Screen, which completely protects the entire party against Supa spells, and it doesn't seem to fade (or it takes a long time to fade). With Supashu being completely nullified, this doesn't faze her, as she keeps casting it with regularity. Because of this, the battle becomes very easy and we defeat her (I actually reloaded and defeated her again so I could hear the voice work after the battle). She comes to realize that just having power won't get you whatever you want. Gazing upon the Goddess's Staff causes her memory to return. She then tells us that the Four Heavenly Kings, who are the subordinates of the Dark God, are invading the Earth's surface, the Goddess of Light has been imprisoned in some dimension by the Dark God, and the Aurora Girls came down to Earth to find someone who can ward off the Dark God's ambitions. The Girls sealed away their own divinity, as this apparently was causing all sorts of trouble. We're then given the Venus Blade, which was used by a hero from long ago that had saved the world from the Dark God. The Venus Blade is actually worse than the Mega Beam Blade that we bought, so it won't be getting equipped unless it's needed to defeat the end boss or something. She finishes by saying that awakening the memory of the last Aurora Girl, Min, will allow us to open the way. To what, she doesn't say.
Before heading back to Jupiter, we check out what everyone in the towns have to say. We just get congratulated, are treated to some sake by one of the bartenders, and are allowed to use the women's only pool on the PV Building's roof, only to have the hero remember that he can't swim. Back in Jupiter's Transmission Center, the design in the circle is turning out to be a pentagram, with each new open path adding a line to the star. None of the dialog in town has changed, so we take the new transmitter to the floating city of Atlus, arriving in the live house in Melange (Melangé?). A woman is blocking the exit from the transmitter. It turns out to be the last Aurora Girl, Min. She tells us that in order for her to recognize us, we'll have to meet her in the Disco in Emuza, and those who recognized us will be blocking the way. So, a boss rush of the other 4 Girls? She then phases out. Speaking to the people in the live house, we learn that Min has created illusions in the form of other people in town, which we can't talk to, and seem to confirm my hunch, as the other Aurora Girls have come to this city to defeat us. We're told that only people recognized as real men are able to enter the towns of Diane and Emuza. The manager tells us that during the fight against Min, I'll lose those who I trust. So... it'll be a one-on-one fight? Since he asks if I'm ready to endure that, I reload, as this seems like a flag and you can't get out of the sequence without answering Yes. There are only a few people around town, and they only respond with “........” when we try talking to them. There's a disco and a tower in town, but we can't open either of the doors. Surprisingly, we can enter a couple rooms with women changing clothes, but we're simply told not to look. The computer in the clinic is currently unusable, so no city map for us to view. We are able to upgrade everyone's headgear to Rider Masks.
Leaving town to explore Atlus, there's a city just on the other side of some mountains to the south, so we head east and around them to find Emuza nestled in the mountains. The enemies out here are a pretty large step up in strength. The Bimbo Gods are a good source of EXP, better than every enemy we've encountered, including the Aurora Girls, if you can hit them before they run away. While our weapons do decent damage, Neketsu's flame spells (the Achi family) do a lot of damage. Maybe I'll try out the Flamethrower for sale in Melange. We make it to Emuza, but are blocked from entering by a couple gatekeepers who tell us only real men approved by Min can enter. But, Min said to meet her in Emuza's disco if we want her to recognize us. So, if we need to get into Emuza's disco to be recognized, but we can't enter Emuza unless we're recognized by Rin, how can we get recognized? Since we could really use a stay at a hotel, we teleport back to Melange. Venturing back out, we continue exploring and come across the city of Diane. As with Emuza, two gatekeepers prevent us from entering, saying only real men can pass. There's nothing else out here, so we go back to Melange and talk to Manager No. 1 in the live house, answering in the affirmative. This allows us to enter the disco, which turns out to be Yan's Disco. As with most of the people in town, other than the receptionist telling us that Yan is waiting for us, everyone in here has a “.......” dialog. The enemies in here are the same as the ones in the original Yan's Disco, except they're much stronger, but not so much to where they're a real danger. Making it to Yan dancing on the stage, she asks us how strong out power is and then attacks. This time around, Yan has the upgraded flame spell, Achiizo, which does around 50 points of damage to one character. We can easily withstand that as our healing spells restore at least that much. After defeating her, she says she expected as much and asks if we can defeat the next opponent. So, it's not a boss rush, like I thought it might be. The people in the disco now have proper dialog, but they don't say much. Checking around town, the dialog of the people outside of the disco hasn't changed.
Defeating Yan allows us to enter the tower, which is a duplicate Tower of the Sun, with the only difference being the lack of treasure chests. Like in Yan's Disco, the receptionist tells us Rin is waiting and all the other people have no real dialog. Rin's all party lightning spell, Bishisu, has been upgraded to Bishibisu, which makes the spell Bishi Screen a necessity. With her only real threat nullified, the battle is easily won, just requiring healing from her physical attack. The bartender here treats us to some Apoleon sake. Rin's defeat has brought the town back to normal, so we're able to talk to everyone. The only thing we're told which might be considered useful is that the Dragon God resides in the holy sword. Hmm... If you try to attack a human enemy with the Venus Blade, it says something along the lines of the holy sword not being able to hurt people. So, maybe that god is in the Venus Blade. Yan has returned to dancing on stage at her disco, but she doesn't say anything important. Since there's nothing else to do here, we head to the other two towns. Oh, wait, I forgot to check out the live house. We learn that the hero that saved the world from the Dark God 7000 years ago was named Yuima. Legend says the Holy Sword was used to defeat the Dark God. But which one? There apparently were 7 holy swords. Someone suggests that firearms might be able to defeat the Dark God. The manager says we should go to Diane next, which I figured since its gatekeepers didn't say Min's approval was needed to enter. That won't stop us from trying Emuza first, though.
Unsurprisingly, the Emuza gatekeepers won't let us through. Teleporting to Diane, we can now enter the city. Like with Melange, all the people wandering around town have the “.....” dialog. The computer here is also useless. Like in Melange, two buildings can't be entered, which obviously are going to be the Aurora Girls' discos. We can talk to the people in the live house. We only find out that Yun and Run are looking for me. Manager No. 2 just tells us to not take pity on the illusions of the Aurora Girls. Assuring him that we won't, he tells us if we can defeat the two Aurora Girls here, we'll be allowed into Emuza. The northeastern building can now be entered, and we find ourselves in Yun's Disco. As with the previous two discos, the receptionist tells us Yun is waiting while everyone else is mute. Remembering the layout, we take the short route on the left to the 3rd floor. Fighting our way to the dance floor, this time around Yun actually attacks. She only has a physical attack and a healing spell. Easily defeating her, she asks if our power is enough for the next opponent, which is pretty much the same thing as what the previous two Girls said. Everyone in the disco is back to normal, but they don't say anything important. Jonjon and Neketsu have a little banter after we exit the disco, with Jonjon still oblivious to what's happening.
With Yun defeated, this allows us to enter the big shiny building, which is Run's Disco. Rinse and repeat with everyone in this disco, and we make our way to the dance floor. Knowing Run used Supashu in our prior encounter, Jonjon starts out by casting Supa Screen. Surprisingly, she doesn't have an upgraded spell and still uses Supashu, which we've nullified. She goes down easily, and echoes the others asking if our power is strong enough for the next opponent. With both Girls defeated, the entire town is back to normal. Some interesting info is gained from the townspeople. The hero of legend was the incarnation of two dragons -- I'm guessing the two dragons shown in one of the game's opening movies. Confirming my suspicion, the circle in the Transmission Center in Jupiter will send us to the surface. Four men appear to control the surface -- I'm guessing the Four Heavenly Kings. The legendary hero, Yuima, befriended a master magician named Rakan, and the Aurora Girls also aided Yuima. With all four Aurora Girl illusions defeated, we should be able to enter Emuza, so we teleport there.
As promised, Emuza's gatekeepers move aside and let us through. Just in case the large “MIN” above the front door wasn't a good enough clue, one of the townspeople, as well as the live house manager, tells us that that building is Min's Disco. Blackjack is available here, with the max bet being 1000CT. In the bar, we're told that people who know the fate of the world have gathered in the town of Rakan on the surface. I wonder if there will also be a town named after Yuima on the surface. Having a drink here fully restores the party, so that'll save us the 120CT (or less if I want to go somewhere else) it would cost to stay at the inn. The computer here also is of no use. The weapons and armor here are pretty expensive to where we can only buy a Maneuver Shell and Maneuver Pod. While the Maneuver Shell is a full-body suit of armor, it is better in every way than the piecemeal armor everyone has. Entering Min's Disco, we tell the receptionist that we're patient and she lets us through the interior door. Taking the stairs at the end of the corridor down, we find ourselves in a bit of a maze. We employ the tried and true method of following the right wall and hopefully we'll get every treasure chest, as there seems to be quite a few of them. After opening a few, it appears that this is going to a very valuable trip with regards to equipment. In order, we pick up a Power Buster, Maneuver Shell, and a Beam Launcher. Up to this point, the Power Buster is the best weapon that hits all enemies and the Beam Launcher is the best weapon that targets an enemy group, so all three of these items get equipped. Now that I've gotten a better idea of what the dungeon is like, it has four quadrants with a horizontal hall that wraps around, similar to the Pac-Man maze, and a vertical corridor that leads to some stairs down. There are also stairs down at the end of vertical hallways off the horizontal hallway. There is nothing on the floor reached by the corner stairs, other than random encounters, with it also having a horizontal corridor that wraps. Heading back up and to the southwest quadrant, we find a Flamethrower and Rider Mask, neither of which are upgrades to what we already have. The northeast quadrant's chests hold a Beam Cannon D, Ax Tracer, Barrier Unit, and Restorative D. Only the Barrier Unit is an upgrade to what we have, as we didn't have enough money to buy Optical Barriers for everyone. In the northwest quadrant, we pick up an Optical Barrier and Copper Gloves. The King Imajin enemies in here have been giving a ton of CT, so we leave the disco and do some shopping, buying the best equipment for everyone. Everyone now is wearing Maneuver Shells, and have Star Blades for those enemies, such as the Blue Dragons in the disco, that aren't affected by firearms, and Beam Launchers for everything else. An interesting thing about combat is that if there are like enemies separated by a different enemy, such as if the enemies are ABA, they would be all treated as different groups. But if you defeat the one in the middle first, the like enemies are then treated as one group. This is very useful if you want to take advantage of weapons that target an enemy group.
Back in the disco, taking the stairs at the end of the vertical corridor puts us on the dance floor. There are some more treasure chests in here, in which we find a Restorative D, Rider Mask, Optical Barrier, and Ax Tracer. The girl on stage is obviously Min, and after saying she's the strongest of the Aurora Girls, she attacks. Having earth magic, Jonjon casts Gura Screen to nullify her magic. She does hit pretty hard, with one of her physical attacks being a double attack. Jonjon's healing magic is good enough to fully counter that, so she easily goes down. She then has a lengthy voiced cutscene, where she tells us that the Four Heavenly Kings, subordinates of the Dark God, rule the surface and are searching for the holy swords that are needed to defeat the Dark God. In addition to the holy swords we do have, there are 5 other holy swords scattered around the Earth's surface. Since we've been told that there are 7 holy swords, I'm thinking the Jupiter Blade I got way back at the beginning of the game is also a holy sword. She then tells us that we can use the computer to locate the swords. Other than getting congratulated, no one in town has anything useful to say. The computer in the clinic is now usable. It has some information on the Dark God Indra, which it says coincidentally has the same name as the Hindu god, the Four Heavenly Gods, and the holy swords. It says that Indra is trying to erase all dimensions, and in order to do so, has invaded Earth. The Four Heavenly Gods are worshipers and loyal servants to the Dark God. As for the holy swords, it shows a map of the Earth with the swords' general locations marked. Kotobuki Goro has also left a message for us on the computer. In it, he tells us that we can now use the magic that borrows from the Aurora Girls' powers, which can't be controlled with normal mental power, and that the Girls have opened the magic circle in the Transmission Center that'll take us to Earth's surface. The hero didn't receive a Force Pendant, which I was expecting to get from Min, and checking our magic, no one has any new spells.
Checking Diane and Melange, almost no dialog has changed in either city, with only a couple people now congratulating us, so we head back to Jupiter. The five Aurora Girls are waiting for us in the Transmission Center, with each girl standing on a point of the now complete star. Before talking to them, we check if anything has changed in town, and nothing has. Speaking to the girls, the only thing we're told that could be considered even mildly important is that this magic circle is the only way to travel between the surface and the floating cities. Stepping into the center of the circle begins an approximately 4 minute long cutscene with actual animation beyond moving lips. Unfortunately, it's not subtitled, so I'm unable to translate it. I did record it, so maybe I'll eventually try to translate it, but I've never been good at making out spoken Japanese to where I could easily transcribe what's said. The girls do change into the outfits seen on the game's front cover, with each of them starting to take off their current outfit, I guess leaving the rest up to your imagination. The narrator gets his first bit of voice work since the opening movies, as the Aurora Pendant we've been carrying around for almost the entire game activates, getting a close-up image with each of its five segments appearing to correspond to an Aurora Girl. The hero also loses his shades and hat, and takes on what I'm guessing would be more of a “real man” look. After the cutscene, I check and the hero can now cast magic. So, rather than getting a Force Pendant, it's the Aurora Pendant that grants the hero the ability to use magic. The hero's walking about sprite also changes, reflecting his new look. Out of curiosity, we check out the town of Jupiter again, and, nope, still no change. Once again walking to the center of the magic circle, we get transported to the planet's surface and into the Granderia Region.
Since we don't know where to go, we head west and quickly arrive in the city of Jagrane. The people no longer are referred to in generic terms, such as “Girl”, “Otaku”, or “Old Man”, but rather have actual names. We learn that there's another city far to the north called Domestic City, which is the only other city in this region. There's a Britora Palace on an island in a lake that ordinary people can't enter and apparently is only reached by means of a hover boat by the heavenly kings. I wonder if our bottle ship will get us there. We're told that the synthetic life forms are weak against electricity. We also run into a bio hunter, who says that the hero was training to be a bio hunter in this city. In the basement of the destroyed building west of the bar, we find a couple treasure chests with a Night Striker, which is an upgrade over our current weapons, and a Gene Bomb. This city actually has houses, which didn't exist in any of the towns on the flying cities. One of the people in these houses, Ren, tells us that people have gone missing around town and by the lake, as well as bemoaning the lack of scientists and martial arts tournament champions. The second floor of the hotel has the town's computer, which has some rather lengthy entries. The entry about the martial arts tournament says it's held by Britora and the winner is invited to the palace on the island. The city's history entry tells us that we're in what used to be South America prior to the great war. Echoing what one person told us, the synthetic life forms are controlled by bits of iron implanted in their heads and a strong electric shock will completely disable or severely hamper them. There's also an entry on myths and legends, which touches a bit on the source of magic, as well as the Buddhist (I believe) idea where everything, living or not, in creation has a consciousness. The final main entry is information on strikers, mystic swords, and pods. The only interesting bit in this entry is that there were no samurai on Earth until some dimensional distortion brought one, and that samurai was carrying a Murasama sword.
The building next to the inn is where the martial arts tournament is held, but they haven't started accepting applicants, so there's nothing to do here. The entrance to the room where the tournament is held is being blocked by Robocop, or more accurately Future Warrior Robo, whose sprite looks strikingly similar to Robocop. Robocop does tell us that the prize for winning the tournament is 50,000CT. The weapon shop here doubles as a boutique, and it has a number of expensive items for sale. Even with our 50k+ CT, we're only able to afford to outfit one of us. The Maneuver Shell is outclassed by the piecemeal armor sold here, so we buy a Titanium Armet, Field Barrier, Reflect Mail, and Combat Boots for the hero. The Blade Flamer is also an upgrade over the Star Blade, so we also buy one of these. While selling off the now lesser equipment does give us enough money to partially outfit another one of us, we'll hold off for now to see if we can find any equipment in treasure chests. There's a set of stairs just north of the only building we haven't entered. Taking them, we find a blackjack table and dealer. If we want to play, we can place bets of up to 2000CT here. The final building is the Kato Research Institute (a play on the Cato Institute?), which appears to be researching the pollution on the surface. The director and other staff have gone missing, and the director's daughter, Eris, is now in charge. A couple grotesque lifeforms are seen submerged in liquid in large tubes in one room. Speaking to Eris, after not saying anything important, we start to leave, only to be interrupted by a monster that crashes through a window and chases her into a corner of the room. Of course, we come to her aid and enter battle against the Bioboar. While it does do decent damage, we kill it in a couple rounds. Eris then introduces herself as Eris-Crosent. She tells us that Britora, who is one of the Four Heavenly Kings, puts on the tournament, and brings the winner to the palace to turn them into synthetic life forms. She also says that her father and the researchers were kidnapped in order to create more of these life forms. After agreeing to rescue everyone, she tells us that the lake where the palace in is so polluted that you can't swim in it and you must use the hover boat at the dock. Jonjon has the same thought I had, and mentions we've got the bottle boat. Unfortunately, Neketsu chimes in to say that its battery has died, so it's of no use to us. Eris then suggests we win the tournament, as it seems to be the only option. I'm guessing registration for the tournament has now opened, so before signing up, we venture out of the city and head north to the lake. Not too far away, we spot the hover boat's dock. Arriving there, we're turned back by a soldier, being told that only the tournament champion can use the boat to cross over to the palace.
Back in Jagrane, we head to the tournament office and get registered for the tournament. We're told to rest up next door as the tournament will start tomorrow. Resting for the night means simply talking to the man behind the counter there. With that done, we go back to the office and Robocop moves aside to let us enter the battle grounds. The tournament consists of us fighting four rounds against normal enemies that pose no real threat, with only the Rikadoya's petrification spell (Moai) in the final round being anything of concern. Luckily, Touch All (Tachi na Ooru) cures petrification -- I think it cures all status effects, but I haven't tried it out. And here I was worried when Robocop told us the monsters were going to be tough. The announcer tells us Britora has extended an invitation to us and we're to go to the pier. We collect our 50k prize and are told that these tournaments happen every month. With the nice infusion of funds, we decide to do some shopping and buy everyone the best armor. Before heading into Britora's palace, we make the trip all the way north to Domestic City. The two gatekeepers won't allow us in, saying this isn't a good time as they don't know when Britora's minions will attack. So, we head back to the dock and take the boat across to the tiny island with the palace on it.
Inside the palace, which is labeled as Britora Castle, a figure is blocking the end of the hallway from the castle entrance. This turns out to be Britora, and he gets a voiced cutscene where he extends his invitation, telling us to enjoy our time here. Aw, how nice. Oh, this will be the end of our time as human beings? Well, that's not very nice. He phases out and a couple soldiers flank us and take us further in to another masked figure. In another voiced cutscene, the figure is named Naga, and he also tells us to enjoy our stay. He then looks over Jonjon before phasing out. The soldiers then take us the remainder of the way into a room, labeled as Jail, with the door being guarded from outside. After a little bit of dialog amongst ourselves, a few soldiers enter. One of them demands the woman, the cross-dressing Jonjon, come with him. I think Naga has the hots for him. Regardless of Jonjon not being a woman, the soldiers take him out of the room. It seems Neketsu has developed feelings for Jonjon. The hero consoles Neketsu and after a little bit, some soldiers enter, demanding we come with them. I think one of them is the transformed Jonjon. Neketsu gets enraged and attacks the soldiers by himself. The battle is actually only against one enemy, and after Neketsu easily defeats the Biocommando, the soldier begs for mercy and is willing to tell us whatever we want. We learn that Jonjon has been taken to the bottom floor of the castle. So, I guess he wasn't one of the soldiers. Then I'm not sure how Neketsu knew he'd been transformed. We're also apparently told that there's an elevator that'll take us to where Jonjon is. The soldiers run out, vowing to report this to Britora. We can now exit the jail room to look for the elevator. In the area outside the jail, there are a couple treasure chests holding a MP Recovery B and a Restorative D. Since we'll obviously be going down, we first take the stairs up and find ourselves in the castle's entry area. From the chests we could see when we were led to the jail, we pick up a very nice Cyber Armet and a Revive. I'm a little bit surprised that we can exit the castle, so we take this opportunity to head back to Jagrane and save.
Back in Britora Castle, we head back down to the 1st floor of the basement and take the set of stairs down. This puts us in the Elevator Room. Huh, well that wasn't hard to find. Examining the elevator, this place consists of 10 floors, so it looks like we'll be in for a long slog. Or maybe not, as floors B2 through B9 are all just a small circle with a couple treasure chests, one on each side of the elevator shaft. The chests hold some nice items: B2 has an EP Drug (permanent EP increase) and Defense Pod (Neketsu finally replaces his Force Necklace), B3 has a Restorative D and Fool Medicine (permanent Intelligence increase), B4 has a Restorative D and a Revive, B5 has a Speed Drug (permanent Agility increase) and some Power Gauntlets, B6 has an Ion Blaster A (the best one-handed firearm so far) and a MP Recovery B, B7 has a Doping Drug (permanent Strength increase) and a Restorative D, B8 has a Cyber Armet and a Restorative D, and B9 has an Ion Launcher (the best two-handed firearm up to this point) and an MP Recovery B. B10 puts us in a hub with three branches. Taking the south branch leads us to a teleporter, which deposits us in Britora's Room, which has music with a Metroid vibe. The center path has a couple electrified barriers. Seeing how damaging they are, touching the first one is instant death. That really sucks!! Luckily, it's not too involved to get back to where we were, just having to deal with more random encounters. After picking up all the items again, we check out the rest of Britora's Room that we can and find 4 small chambers with what look like keyholes in the walls. Examining them, Neketsu surmises they are for the shield's generator and we'll need a key for each of them.
Back at the Elevator Room hub, we take the east path and find a chest with a Revive in it. At the end of the hallway are two rooms. Entering the right room puts us in the Coordination Development Section. There's a monster guarding the entrance. Speaking to it, we fight another Biocommando. After defeating it, it drops a Key of Ro. Speaking to the old man in the southeast corner, who's name is given as something along the lines of Manager Kirk (possibly a play on Captain Kirk?), he tells about the shield generator and that the guards to each section hold the keys needed to turn it off. He then gives us a Powered Shield. Another person in here, Jack, tells us that the shield will kill any human that touches it. The other white-haired researcher in here turns out to be Eris' father, Thomas. Telling him that his daughter isn't well, he regrets that she's had to help him before giving us a Barrier Suit. He also gives us something to drink that fully heals us, which means we have a nice free healing spot in here. The last person in here, Collette, will save our progress. Dang it!! Now I have to go through all this again, as I want to see what Thomas will tell us if we say Eris is doing fine. Reloading and once again going through everything to make it back here, we first save with Collette and then talk to Thomas. Aaaaand he says the same thing, regardless of your answer.
The left room is the Synthetic Life Research Section. Just like the last room, a guard is standing just inside. It's another Biocommando, so it goes down just as easily. It drops a Key of I. Hmm... Given there was already a musical bit with the Sound Battle, I think these keys correspond to the musical keys, like C Major. So, the first key would be the Key of B and this one would be the Key of A. The only person in here that has anything useful is George, who gives us a Battle Shell. He repeats the tidbit about the guards of each section holding the keys to the shield generator. Heading back to heal and save, we then take the path west of the Elevator. Another chest is found in this corridor, which holds a Restorative D. Again, there are a couple rooms at the end of this path. The left room is the Life-form Enhancement Research Section. Defeating the Biocommando guard gets us the Key of C. In here, Norton gives us a Battle Protector. Virtually the same info about the shield in Britora's room is given. The final room is the Clinical Experiments Section, and we get the Key of D from defeating the Biocommando in here. Jerry gives us a Battle Suit, and also tells us about the shield. In each Section, you can examine the computers and the tubes with life-forms in them, but all the other ones were little useless tidbits. Examining the tube in this room, however, causes the life-form to break out and attack us. It's another Biocommando, so it's no threat and is easily dispatched.
Now that we have all four keys, we heal, save, and then head back to Britora's room. Using the keys, we shut off the four electrified shields and find Britora waiting for us beyond them. Neketsu demands to know where Jonjon is. Britora laughs in our faces and says he gave him to Naga to do whatever he wants with him. He then threatens us with a holy sword. The hero then hears Yun's voice in his head and she says it's definitely one of the holy swords, but she can't sense its power. She determines that Britora isn't in control of it, and that the sword has blocked off its own power. We then enter battle against him. While he does do a good amount of physical damage, especially if he decides to do the double attack, his Kochinto (Snowstorm) spell never actually effects us. He goes down relatively easily. This isn't the end of him, though, as he's at a loss as to why the holy sword was useless. It doesn't phase him too much, as he attacks again, thinking his own power will be more than enough to wipe us out. I guess we shattered his mask in the first phase of the battle, as his now mask-less face shows some damage. His physical attacks now do about twice as much damage, which the hero can heal. Again, his spell, Spazashu (Shock Wave) this time, never affects us. So, it's really helpful when he decides to cast it. He can also buff his own defense, which only prolongs the battle. Since his physical attack takes out a little over a third of either of our EP, it's just a matter of healing any time his attack connects. Defeating him for good, he just says something along the lines of “You think you won...” and then phases out. We receive the Neptune Blade for our troubles, which is a downgrade to our current weapons. His defeat seems to have made all the other enemies in here disappear. Checking all the rooms, everyone has escaped. The cylinders with the life-forms have all shattered and the life-forms inside have all died. Hmm... I wonder what the one we fought would be like if we hadn't made it escape. I'll have to keep this in mind if/when I play through the game again. Leaving the castle, Neketsu vows to rescue Jonjon, being willing to die for him.
Back in Jagrane, the town music has changed to the upbeat one like in the floating cities after defeating the Aurora Girls. Most of the people in town just thank us. We are told that if we pass through Domestic City, we'll be in the Barenia Region, which is ruled by Naga. The tournaments will no longer be held, so the office has shut down. By defeating Britora, the monsters in the area have gotten so sparse that the Bio Hunter in Bob's Bar has left the trade and taken up normal work. All the researchers are back at the Kato Institute, but none have anything important to tell us. So, it's off to Domestic City.
With Britora defeated, the gatekeepers at Domestic City open the gate for us. Immediately after doing so, the gate and city walls are rocked by something, with the explosions killing both of the gatekeepers. Naga then phases in, saying we should pay with our lives for defying the Dark God Indra as well as taking out one of the four heavenly kings. After a bit of vanity, he says he's too merciful to kill us, but rather demands we come to his palace and offer up the holy sword we got from defeating Britora, and if we kneel before him and apologize, he'll guarantee the life of Jonjon. He then phases out. Yeah, I don't see the kneeling and apologizing happening. Entering the town, it seems it wasn't just the gate and city walls that were hit, as every person in town except one appear to have been killed, inconveniently all in front of the doors to all the buildings, thereby blocking us from entering them. Considering the city doesn't appear on the teleport list, this place may just serve as a plot point and we'll never be able to enter the buildings, none of which have any designations, such as being an inn or weapon shop. Only one person hasn't been killed, the warrior Slen. Speaking to him while he is writhing on the ground, he tells us that all the guys in the town have been taken to be laborers for Naga in order to excavate something. He then gives us his ring and tells us to take it to someone named Alicia before finally succumbing to his wounds. Unfortunately, he didn't say where we can find Alicia, but I'm guessing it will be in the next town we come to. Leaving the city by the north exit, we're in the Barenia Region. Trekking north, we're quickly in the town of Perriés.
Speaking to the people here, we're told that the people Naga took are trying to unearth a sword. We learn that a tower that existed prior to the great war is still standing between here and the city of Amodor to the north. The tower is called something like the Tower of Lamentation. One of the women here pleads with us to go to the tower and rescue the people that were taken. We're also told that the samurai that came to this world was looking for a gate back to his world. Entering the various buildings, in his house, Dr. Ein tells us that he's researching some old ruins and will sell us Death Blades. It appears that the people taken to the tower are forced to work without being given food. Well, that doesn't seem like a smart way to maintain a workforce. In the bar, we meet a man from the island of Racan. He senses the same heart of the dragon god that the hero of legend had and tells us that we'll need to collect the seven holy swords and take them to the city of Yuima. It looks like the outdoor stairs are where the blackjack tables are in the surface towns. We can bet up to 3500CT here. Heading up to the 2nd floor of the hotel, we can hear moans coming from one of the guest rooms. In the center room, we're just in time to witness a couple people leave by crashing through the windows. Lying on the floor is a samurai at death's door. Speaking to him, he tells us that he's Saburota Soma and bemoans that he's failed his family, or possibly clan. Before he dies, he gives us a Blade Casitar and tells us to give it to someone named Kenzaki. So, that makes two people we need to find, as Alicia isn't in this town. I'm guessing the computers in the surface cities will all be in a room on the 2nd floor of the hotels. Reading through the entries, the Tower of Lamentation was originally a defense facility. The Legends and Myths entry states that the battle between Yuima and the Dark God Indra was engraved on a stone plate found on Pluto in the early 25th century. So, that gives a little bit of an idea of when this game takes place. During the battle, the seven holy swords transformed into one gigantic sword, which allowed Yuima to weaken Indra enough for Yuima and his companions to seal Indra inside a dimensional gap. With nothing else to do here, we leave town. As we were told, just to the east of Perriés is the Tower of Lamentation. Unlike the towers you're used to seeing in a JRPG, this one is a really tall office building. A few steps inside, a guard is blocking our way. Approaching him causes us to enter battle against two Big Eyes. Other than having an all party snowstorm spell, they pose no real threat, and we easily defeat them. In response to the guard's demand of what our business here is, Neketsu tells him we've brought a tribute. The guard moves aside and tells us to see the manager on the 2nd floor. I don't feel like tackling the tower right now, so I reload and instead head to the city of Amodor.
Like in the Granderia Region, this region also has a castle on a little island, except there is no dock to reach it here. Considering this is supposed to be Earth, and this area should be North America, it's an extremely short walk from Perriés to Amodor, which would be a trip from around where Michigan is to northern Canada, possibly Baffin Island, north of Hudson Bay, or northern Quebec, depending on how the war altered the landscape. In Amodor, we're told that there's a Dr. Jones who is excavating something unusual. I'm guessing it's this region's holy sword. There's another Robocop, this time a Super (or Hyper or Ultra) Future Warrior Robo, in this city, and he mentions Kenzaki, saying he's a master swordsman. We're told Naga's excavation site is to the west, but it's best avoided as it's overrun by monsters. Another person tells us that there were a bunch of transporters used to travel between the regions, but Naga destroyed all of them except the one that goes to the Tuilanea Region, where his palace is located. Another person in town is also looking for Kenzaki, but he only asks us if we've seen him. With the people outside all spoken to, we start entering the buildings. Dr. Jones, who's decked out in the same outfit as Indiana Jones, complete with whip, tells us he's excavating some ruins and will sell us Fear Bringers, which he's found in the ruins. I was expecting him to say something useful, but maybe we need to clear the Tower of Lamentation first. We can bet up to 4800CT in the gambling den here. Continuing in the buildings, it seems Naga's palace has a bunch of strange statues. Hmm... I have a feeling we'll be fighting those statues. We're also told that Naga's palace is connected by a tunnel to the excavation site. As expected, the computer is on the hotel's 2nd floor. In the entry about the city's history, we learn Amodor was named after the nearby Mt. Amdo. An excavation tunnel has been dug into Mt. Amdo and this tunnel is currently under Naga's control. In the entry about Naga's Palace, it seems you can't just waltz in through the front door, but rather will need to enter via the connected excavation tunnel. In order to do so, we'll need to find the Key Card in order to use the elevator into the palace. The Legends and Myths entry isn't nearly as long as those on the prior computers. It does state that after 7000 years, Yuima is said to be still alive and searching for a man with the spirit of the dragon god in order to finally erase the Dark God from this dimension.
With everyone talked to in Amodor, we leave and make the short trip west to the excavation site. I was somewhat expecting there to be someone blocking our entrance into the tunnel, but there isn't, so we leave and head back to Perriés to save before taking on the Tower of Lamentation. Unfortunately, Amodor doesn't have a disco ball outside of town, so it's not a teleport destination. Back at the Tower, we don't get into a battle before talking to the guard, so I guess that was just a random encounter last time. From the treasure chests on the ground floor, we get a Restorative D and a 2-Way Missile from the room, and a Revive and Panacea from the other two. On the 2nd floor, as soon as we take a step into the Manager's Room, we're automatically drawn to Naga and I'm guessing the Manager. I guess we'll get to that treasure chest after a likely battle. The manager simply asks who we are, to which Naga tells him that we're the scoundrels defying them, demanding he defeat us and take the holy sword we got from Britora. Naga then takes the manager's advice to go upstairs, leaving by the other door in here. The manager then vows that this will be where we die. Yeah, sure it will be. He then attacks... Or rather a Hound, a 3-headed dog, attacks us. It's a good thing it only does a double attack, and not a triple attack, as it does some serious damage. Just healing after every just about every attack, basically leaving one of us to attack, is enough to make it through this battle. Either the manager ran off or he transformed into the Hound, as he's nowhere to be seen after the battle. The monsters in this tower all hit pretty hard and unfortunately there aren't any equipment upgrades in any of the towns we've been to, so this place is the first real rough patch. I've actually had to use some of the MP restoring items. We can now open that chest, and we find a Hyper Protector, which is some full-body armor. I think the increase in defense is worth the decrease in evasion and magic defense stats.
Heading through the door Naga took, we take the stairs and find ourselves in a room with a couple men, one of which is another Robocop character, in a jail cell and a jailer. Shockingly, we can't open the cell door. Before talking to the jailer, we snag an EP drug from the treasure chest. Talking to the jailer, he asks what's happened to the manager. Telling him he's asleep, the jailer makes a phone call to verify. I guess he's confirmed what we told him. Maybe he thinks we're also guards, as he gives us the Camp Key before running off down the stairs. Since I think we'll be fighting Naga, we try to head back to town and save, but it won't let us leave the room, with Neketsu saying we have to rescue everyone at both exits to this floor. Opening the jail cell, we're just thanked. We still can't go back down, so we take the stairs up. The next floor just has a handful of cells. None of the male prisoners say anything important. The lone female turns out to be Alicia. Neketsu must have figured out her identity from the one guy saying she's from Domestic City and her lover is missing. She notices we have Slen's Ring. After we tell her a warrior in Domestic City told us to bring it to her, she let's us keep it, saying Slen would be pleased if we could make use of it. Slen's Ring is now called a Power Ring and it is a slight upgrade over the Defense Pod, so Neketsu equips it (I'm not sure why I didn't have him equip Slen's Ring earlier, which was possible to do, as I did check out its stats). Heading up to the rooftop, after a couple steps forward, we're drawn to a divine pedestal with a sword on it. As with the prior holy sword, the hero hears a voice in his head, this time being Rin's. She say she doesn't sense Naga and that the sword is the holy sword Serene Blade. We simply take the sword and leave the tower. So, we didn't fight Naga, or even run into him again to hear him fume, as he somehow left the tower, probably by teleportation. Back in Perriés, the music has changed to the happy upbeat tune. The townspeople say everyone supposedly has returned, even though the NPCs here are all the same as before. Maybe they meant they returned to Domestic City. Well, I guess we'll find out shortly.
Heading back south to Domestic City, nothing has changed here with all the dead people still blocking the doors to every building. So, we make the one to two minute walk from Domestic City, which looks to be around the border of Panama and Columbia, to Amodor. The people here also thank us for rescuing the people from the tower. We're also told that people are being held in Naga's palace as well as there being a transporter to the Tuilanea Region in the palace. After saving, we head west to the excavation site. Just inside is a room where a soldier is stationed. After telling us that we're going to die here, he attacks. Or, rather, another Hound attacks. With both of us getting critical hits, the Hound goes down without even getting off an attack. We then pick up the Activation Card that fell from the guard. Hmm... I want to see what the dialog for whatever the card is for is if we don't have the card, so I reload and ignore the Soldier's Station. From the handful of treasure chests on this floor, we pick up an MP Recovery B, Panacea, Restorative C, Restorative D, and 1250CT. A gray panel in the northern end of this floor is a one-way door, which only opens from the other side. I went and defeated the Hound again for the Activation Card, but it's not used here. So, it's another reload. The enemies in here tend to come in a mix of types, making the launchers we currently have equipped that target enemy groups not as effective (plus, the Mad Hands aren't affected by firearms), and since they do do some decent damage, we sell off some equipment to afford a couple Fear Bringers from India-- er, Dr. Jones in Amodor. Back in the site, the opening in the wall next to the one-way door is the stairs down to the 2nd floor. With the enemies doing good damage, especially the War Apes if they decide to do their double attack, we're really starting to miss Jonjon. Looting the chests on this floor gets us an Ion Blaster C, Panacea, Restorative C, Defense Pod, and 2-way Missile. The only way down is through a hole in the floor near the chest with the 2-way Missile. Luckily, we don't take any damage from the fall. We pick up 3500CT from the chest here before taking the next set of stairs up. Back up on the section of the 2nd floor that we couldn't access before, we pick up another 2-way Missile, a Hand Missile, and a Throat Medicine (this cures Silence). Taking the next set of stairs up, we pick up some Combat Boots from the treasure chest here, which will be useful when we get Jonjon back. Taking the next set of stairs down, we get a Restorative C. The final set of stairs back up puts us in a little area with a guard blocking a door. Speaking to the guard, he calls us intruders and sics his own Hound on us. Again, we easily defeat the Hound. The guard was blocking an elevator, which is what the Activation Card is for. Taking the south path sends us through the one-way door, which is really convenient as we need to get the Activation Card and really could use a stay at an inn. Now that I know where the Card is used, we once again defeat the Hound here and pick up the Card for real. With the equipment in shops becoming pretty expensive, we head back to Jupiter to stay at the cheapest inn and save a few hundred CT. Back at the Excavation Site, like on Neptune, several of the treasure chests have refilled. Unfortunately, only the ones with healing items refilled, so it wouldn't be an easy, yet tedious, way to get expensive items to sell.
Now that we have the Activation Card, we can use the elevator, but not before fighting another Hound, as the guard respawns every time you leave the Excavation Site. Taking the elevator puts us in Naga's Palace. Looting the chests in the large room the elevator is in gets us two Restorative C's, a 2-way Missile, and a Revive. Unfortunately, we ran into a trio of Dino Skulls, which, in addition to hitting really hard, can hypnotize us, and we got wiped out. Making our way back to where we were defeated, the chests in the north room hold an MP Recovery A and a Restorative D. Entering the east room prompts a cloaked figure to appear and approach us. He's either the same man from Racan we met in Perriés or is another man from the island. He's come to help the Child of the Dragon God and fully heals us, as well as being able to save our progress. Well, that's convenient. It's too bad we didn't get to him earlier before running into those Dino Skulls. Raiding the two chests in this room gets us a MP Recovery B and 2815CT. That's an odd amount to be found. Heading through the south door puts us outside on the little island. Since there's no way to get to the mainland, this is pretty pointless. Reentering the palace and taking the stairs up puts us in a room with several statues and stone tablets. My hunch about fighting the statues was a bit off as they're all actually people who have been petrified. Upon examining the statues, we can hear the voices of the cursed people. The only useful thing we learn is that Naga's weakness is Flame and when he becomes serious, that weakness will disappear. The smaller stone tablets don't have anything useful on them, with one mentioning an Emperor of the Universe, a Dr. Neuro, from long ago, and one purporting to be the hero's tombstone. Well, we'll see about that. We also pick up Donadona's Amulet from one of them... Oh, wait, someone apparently just wrote on the tablet that they got the amulet. The larger tablet has a few petrified zombies around it, none of which say anything when examined. I guess my hunch was partially correct, as if you examine the large tablet, which speaks, and choose to recover your lost power, you get fully healed and the zombies come back to life and attack. Even though there are three zombies, we only have to fight two Hounds. The tablet doesn't say anything after the battle. If you choose not to be restored, you won't get another opportunity to enter this battle. Thinking back to the creature we killed in the test tube a while back, I reload and leave this battle for after defeating Naga. Incidentally, this floor doesn't seem to have any random encounters.
Heading up the next set of stairs, there's a set of ornate doors and we can see Naga inside the room. Rather than trying to enter, we instead go to the room off to the right. This is where the teleporter to the Tuilanea Region is, but the door's locked. Back at the ornate doors, touching them causes a light to emanate from the Selene Blade and swallow up some evil power. Hmm... I wonder what would have happened if we tackled this place before the Tower of Lamentation. Along with Naga, there are four statues in this room. Three are generic petrified people and the last one, which is facing us, is Jonjon. Examining his statue, the hero can hear Yan's voice, saying that this isn't a normal case of petrification that could be broken with a spell, but rather will need Naga's vibration (or something similar -- I can't think of a better description, maybe "aura"?) cut off in order to cure it. Speaking to Naga, who surprising doesn't get another voiced bit of dialog, he chides us for being so slow, then demands we give him the holy sword. After a bit of back and forth between him demanding the sword and Neketsu demanding he restore Jonjon first, Naga gets fed up, says he'll kill us himself, and attacks us. His first form is utterly pathetic, as he only physically attacks the hero, and does less than 5 points of damage with each attack. The Fear Bringers do some really good damage. I tried out Neketsu's lowest cost fire spell, Achi, which did slightly more damage than the blades, but with as little damage as Naga was doing, this was a waste of MP. After a handful of rounds, we defeat him with him turning to ashes -- an odd choice of text for his defeat as he definitely does not turn to ashes. He's now become angry, compliments us on how good we are, and then reenters battle. I guess we broke his mask, which I could see making him angry, although it wasn't a particularly flattering mask. His physical attacks now do some serious damage, taking out about a third of his target's EP. He also has the lightning spell, Spazash, that does about the same amount of damage as his physical attack, as well as the higher level healing spell, Iyasudi. Fortunately, Neketsu is wearing a piece of armor that nullifies Spazash, but I'm not sure which item. Just out of curiosity, I tried out Achi on him, and the statue was correct, as it had no effect. Simply healing after every time he landed an attack is enough to take him down without any real trouble. He gives the standard shock at being defeated and disappears into oblivion, at which point the key to the transfer room falls from his clothes. Rin can then be heard saying she senses the Holy Sword Helios Blade, which I guess was the weapon Naga was using. Neketsu grabs the sword and the petrification spell is broken. Jonjon thanks us and apologizes for being unable to do anything. Of course, that couldn't be further from the truth. He then rejoins the party. Yay!!! Re-outfitting Jonjon, I forgot that we'd already bought Combat Boots for everyone, so that pair we found isn't quite as useful as I thought. Speaking to all the others that had been turned to stone only gets us thanks. The people must not mind it here, as they don't take off, but rather just wander around the area they're in. The zombies are still stone, and the same sequence happens when you examine the large tablet, so we go ahead and defeat them. Unfortunately, the man from Racan no longer appears. Before we head to Tuilanea, we go back to Amodor to see what the people have to say.
About the only thing of note is the swordsman next to the bar now wonders where the samurai's sword, the Murasama Blade, is. Back at Naga's Palace, we use the key he dropped and take the transporter inside the room. Rather than arriving in Tuilanea, we end up on Racan Island. The only thing on the small island is the town of Racan. Ok, this town is annoying to walk around due to the 3D features actually being 2D, so you can't actually walk behind things like trees. Everyone walking around is wearing the same cloaks as the prior one or two men we met before. It turns out that we should have gone to Tuilanea, but the town's chief mentally redirected us here instead. We're told that after collecting all the holy swords and meeting Yuima, we'll then need to travel to the Goddess' Temple. I'm a bit surprised there's a gambling den here, with the max bet of 1000CT. Hmm... That's odd. There's a random square in the SE corner of town that we can't enter. It just blocks us from walking over it. Checking out the computer in the hotel here, it has a map of the entire Earth, and this island is in the middle of the Atlantic Ocean. Just north of this island is the island of Yuima, where Yuima is said to still be alive and living in a temple there. Yuima Island can't be reached by boat or aircraft, and only those approved by Yuima can set foot on it, which we're again told requires collecting all seven holy swords. The entry about Racan states that the descendants of Racan can use necklaces he created, but due to the war, their whereabouts have become unknown. Hmm, is Racan also still alive? The entry says he trained magic users because he could sense the Dark God would be resurrected and is waiting in the Goddess' Temple, which I think is a different temple than the one on Yuima. Checking out the weapon shop... Holy crap, is that expensive!!! In addition to selling a D Striker for 80,000CT and Mifune Armor (I wonder if this is referring to Toshiro Mifune, who played samurai in several of Akira Kurosawa's films) for 26,000CT, they also sell Samurai Armor for an eye-popping 1,000,000CT. Right now, we have less than 20k on us, and I don't think we would get the funds if we sold every single item we own. I guess if I really wanted to get the money, I could hope for a major string of luck on the high-low fool's game at the blackjack table. Entering the fancy building at the north of town, this is the chief's house. The priest to the right of the chief tells us that the holy swords' power will be able to block Indra's Arrow. Speaking to the chief, he tells us that Yuima was the reincarnation of the Dragon God, and another Dragon God dwelled in the holy sword, and that Racan and the Aurora Girls fought with him, all of which we've heard before. He then says that Neketsu and Jonjon are actually part of the Racan clan, and the fact that they can use the Force Necklaces is proof. Finally, he directs them to help the hero, the Child of the Dragon God, says we're the last and only hope to confront the Dark God, and asks if we'll overthrow the Dark God. Hmm... Let me think... Not taking "No" for an answer, he tells us to return to him when we're ready to depart for Tuilanea.
You know what, I'm going for that 1M CT armor. Maybe we can get enough blackjack prizes to get the funds. After getting 4 blackjacks, we get a Mega Blaster, which is a different prize than what we previously got for 4 blackjacks. It is the best one-handed firearm buy a good margin. Let's see what other prizes we get here. One blackjack gets you 60 Restorative Ds, which allows us to learn that you can only carry 99 of a single item. Unfortunately, you can't bulk sell, so you'd have to sell off each one individually. Two blackjacks nets us 10 MP Recovery Bs, which might come in handy. The reward for three blackjacks is a set of Mifune Armor, which is better than what we all have equipped, so we play enough to get one for all three of us. With five blackjacks, we get a Murasama Blade. Checking out its stats, it's about twice as powerful as our current weapons, so we hunker down for a long blackjack session. It also sells for 500k, so in addition to the three for us, we'll be getting a couple extra to sell to see how good that Samurai Armor is. I played long enough to get 6, 7, and 8 blackjacks, and they all get us Murasama Blades. The Samurai Armor does turn out to be an upgrade over the Mifune Armor in most respects, but the lower increase to Max EP is a bit of a bummer. Sticking with just one Samurai Armor, we head back the the village chief and he sends us to the Tuilanea Region, which would be Eurasia or maybe Europe and Africa or possibly all three current continents. Racan is a teleport spell destination, so we can come back if we really want to get Samurai Armor for everyone. Arriving in an area without a town immediately visible, we do a little bit of exploring in this new region. There's nothing on the peninsula to the south, which might be either Italy or the Iberian Peninsula, and since we landed around what might be western France, we head east and find the town of Baklans, which I'm guessing is a reference to the Balkans. Entering to simply get the town in our teleport list, we immediately leave and continue exploring. There's nothing to the north or further east, and to the south is a mountain with a structure that looks the same as the prior two Heavenly Kings' palaces at its summit. There's also what looks like a cave at the base of the mountain. The Vipers around here can cast the instant KO spell, Shime Nekku, which the hero is unaffected by. I wonder if the Samurai Armor protects against that. Not wanting to take the chance of getting wiped out by the Vipers, just in case it was a fluke that the hero was unaffected by Shime Nekku, we head back to Baklans.
Immediately locating the inn, when we enter, it automatically starts a sequence. I don't want that to happen before talking to everyone in town, so I reload and avoid the inn until last this time. The next Heavenly King is named Asura, and he's built a factory in the northern part of town that makes parts for weapons, which are then sent to the town of Grias to the southeast where new weapons are developed in the factory there. He's also excavating the Baklan Mountains to the south in search of a sword. Oh, yeah, speaking of swords, I wonder what that swordsman in Amodor will say if we show up with our Murasama Blades. I need to head back there after I finish talking to everyone here. The guard at the gate of the factory won't let us in. Speaking to Melt in her house, her father has been taken to the factory to research the holy sword. I'm guessing rescuing him will be this town's task. The max bet at the gambling den here is 5000CT. I played enough to get one blackjack to see if maybe every town gives out different prizes, and we got 35 Revives, which is different than the prior ones we've played at. I did discover a while back that the spell Touch All does perform revive, in addition to curing other status ailments, which does reduce the usefulness of those Revive items, but the 35 Revives we got is still nice to have. Before going back in the inn, we teleport back to Racan and save. The chief won't send us to Tuilanea again, so the only way to get back there is to teleport there ourselves, unless there turns out to be a transfer device somewhere. With a quick teleport back to Perriés and then a short jaunt to Amodor, the swordsman has nothing new to say, even though we have Masamune Blades that he's looking for. Out of curiosity and since we're so close, we head back through the excavation site and Naga's Palace to see where the transporter takes us. It's good to see that there is a never-ending supply of guards for the elevator. And... the transporter sends us to just outside of Racan. So... if you never enter Baklans and teleport back, it looks like you might just screw yourself over into an unwinnable situation, since you won't be able to get back to Tuilanea because Racan's chief only ever sends you there once.
Teleporting back to Baklans, before we trigger the event in the inn, we instead head to the town of Grias. We're told that there's a transport plane in the factory here, which might mean there's a new weapon. As with the factory in Baklans, we're not allowed into the one here. The guards say something like we need to have the forgiveness of Asura to enter. The gambling den here takes bets up to 6500CT. We're told that far to the south is the Grangeria Region, which is an island with a scorching desert surrounded by mountains. This would be current-day Australia. We should find the final holy sword there. In the tavern, we're told that the town was recently attacked by a monster, but due to the lack of able fighters, they were in a bit of a pickle until a samurai swam across the sea and defeated it. Roy, the tavern's proprietor, says that the transport aircraft in the factory should be able to take us to other continents. A traveling Shinto priest has taken up residence right next to the front desk in the inn, and will fully heal the party for free, admitting it's bad for the hotel. Checking out the computer here, my curiosity about what continent I'm on is answered, as Glias is in what used to be Asia. It states that the country of Hinomaru, which is the common name of the Japanese flag, just off the coast started the great war. Due to the weapons used during the war, the area around the capital sank into the sea. What remained of the nation was ahead of the other nations of the world in regards to science and production and the technologies that are still around are thought to be from Hinomaru, although information about the mobile weapons tech has mostly been lost. In the entry about the factory, it states that it was originally used by an Asian military power during the war and that Asura has repaired it. The entry on new weapons says the main weapon being developed in the factory is a multipurpose fighter-bomber. There doesn't seem to be any flag that was tripped, so we leave town.
Checking out the cave at the base of the mountain to the north, this is another Holy Sword Excavation Site. Like the one by Amodor, we're not prevented from exploring it. Since we ignored the event in the Baklans hotel, we leave and head back there. Out of curiosity, we enter the palace at the mountain's summit before going back to Baklans. A trio of guards blocks the entry corridor, preventing us from getting more than a few steps into what's identified as Asura Castle, simply telling us to leave. Back in Baklans, we enter the inn to witness the end of an argument between a Macau and one of Asura's minions. The Macau yells at the minion, saying he won't go back to "that place". After the minion tells him to shut up, Jonjon steps up, saying we need to help out his friend. The minion then, as expected, attacks us. Thanks to the Murasama Blades, we defeat the Skull Lizard before it gets to attack. The Macau thanks us, being impressed that we were able to defeat a soldier. He then introduces himself as Maggie, tells us about the hideout just to the south of the inn, and joins us. This would be the building with the Macau standing in front of the door and not allowing us to enter. Before going back there, we check out the computer in the inn. The History of the City entry states that the Baklas mountain range to the south used to be called the Himalayas, but only the upper part of one mountain still remains above ground. There are also apparently weapons and facilities buried underground in the mountain. The entry about the factory says it was originally used by a European military power. The entry on the region also mentions how Hinomaru was technologically ahead of the other nations and that it disappeared during the war due to the tectonic bullets that were used.
Talking to Silvia, the Macau barring entrance to the hideout, he notices Maggie's been injured. Maggie tells him that we saved him and Silvia moves aside and invites us in. Taking the stairs to the hideout's basement, we find the Macaus that Jonjon had gone searching for in the Transmission Center in Jupiter, way back at the beginning of my little adventure. After Jonjon tells everyone that I saved him, the others thank me. We're told that Asura isn't real thrilled with the Macaus' way of life and has forced them to work, saying it'll change their nature. Maggie then tells us that Asura regularly stops in to inspect both factories, and that he'll be at the one in Grias tomorrow. He then says if we're able to break in while Asura's not there, we'll be able to rescue his friends. After telling us that the transfer machine in Asura's castle will take us to the camp where they're being held, he invites us to stay the night, promising with a mischievous grin not to do any funny business. After waking from an uneventful sleep, Neketsu asks Maggie how he knows so much about Asura, surmising he'd been captured. Maggie confirms this and that that's how he knows everything he told us, as well as saying he'd escaped. He then rejoins the group, but not as a fighting member. Before leaving to go to the castle, we just happened to check the dressers in this room, and the right one actually can be examined. Unless there were some earlier (I gave up on checking them all quite a while ago), this is the first dresser, cabinet, etc. in the game that actually has an interaction. Looking inside, we find some flashy underwear. This prompts the green-haired Macau to scream and run up against the dresser, telling us not to look. It gives another prompt to look in the dresser, which of course we do. The hero then puts on the underwear... Um, ewww. This earns the hero the Title of Macau... or not, with a "Psych!!!" moment.
Making the short trip back to Asura Castle, now that we have a task to do, the three guards attack us after calling us intruders. This pits us against 2 Gura Worms. They can cast Guradorasu (hence their name), which is a high level earthquake spell that targets everyone. It usually doesn't affect any of us, and even when it does, it only does less than 10 points of damage. The ability they have that is concerning is being able to double their strength, after which they can do over 250 points of damage with their standard physical attack. Since it only takes 3 rounds, barring getting off any critical attacks, to defeat them, they pose little threat. All three guards then disappear, so I did do this battle three times in order to speak to each of them before the battle (they all say the same thing). The ground floor has a bunch of treasure chests in the rooms around the perimeter. Looting them, we get (in clockwise order starting with the southwest chest) a Hand Missile, Panacea, Armored Boots (which we had bought for everyone in Grias), Revive, Doping Drug, Restorative D, MP Recovery B, MP Recovery C, Restorative D and Restorative C. Taking the stairs up to the 2nd floor, the room similar to the one where we fought Naga in his castle only has a couple chests inside. Looting the chests on this floor gets us a MP Recovery B and Reflect Mail from the west room, and a Ninja Suit and Samurai Gloves from Asura's office (well, it looks like an office). Thinking the two narrow corridors at the south end of the floor look suspicious, we head down one of them and find ourselves on the castle's balcony with four treasure chests. Opening them in clockwise order starting from the SW gets us a Restorative D, Photon Buster, Reflect Shield, and Fool Medicine. The only piece of equipment from all those treasure chests that's an upgrade is the Samurai Gloves. Back inside, the eastern room, where what looks like a broken transporter is seen within, is blocked by a watchman. Speaking to him, he orders us to die and then attacks in the form of 2 more Gura Worms. Brushing them aside, Maggie tells us that this is the device, then goes around it wondering why someone would destroy it. A masked man then runs over to us. He turns out to be Asura and, after saying we won't leave here alive, attacks us on horseback. Where did that horse come from? I don't know what's in his arsenal of attacks as we defeat him before he gets to act. There's no way that's the actual Asura. In addition to being absolutely no threat, he had no voiced cutscene. Maggie then says that since the transporter is unusable, we'll have to return home. He then leaves for Grias to investigate the issue while telling us to go back to Baklans and inform those in the hideout. After Maggie takes off, Jonjon suggests we find the holy sword in this region while Maggie is looking for clues.
Before returning to Baklans, we check out Grias out of curiosity. Nothing has changed since our last visit, so we go to Baklans. Entering town, our immediate plans will need to be altered, as the town has been severely damaged. We can no longer enter any of the buildings, so we can't go to the Macaus' hideout, and there are only a few injured people lying on the ground, one of which dies after telling us that Asura destroyed the city and the factory. The other man asks us to save the workers stranded in the excavation site. The woman suggests that maybe Asura is in Grias before Neketsu assures her that we defeated him. I'm not so sure about that, Neketsu. Heading to the gambling den, the dealer's life was saved due to being underground, but he's closed up shop, so we can no longer play Blackjack. The guard at the factory gate is no longer there, so we're able to enter. No one is inside the factory, but there are a couple items lying on the floor. We pick up a Safety Helmet, which has the highest defense rating of any head wear we've come across, and a suit of Mifune Armor. Since there's nothing else to do here, and with even the inn being inaccessible, we head to Grias to save before tackling the excavation site. After selling off some useless inventory, we make the short trip to the excavation site at the base of the mountain to the north.
Not too far inside the site is a soldier's station beyond a blue door. Before heading further into that room, we instead explore the floor. A little to the right is a brown wooden door that's locked. The northern section has a couple chests, from which we pick up a Restorative D and a Fire Bringer. If not for the Murasama Blades, this would be the best bladed weapon. Speaking to the worker crouching in the corner up here grants us no useful information. Back at the main chamber, off to the left is an opening in the wall which takes us to the 2nd floor, so we immediately leave. Oh, nice, either the Flame Apes or Doom Lizards drop Hyper Armor, which is an upgrade over the Mifune Armor. The Frost Apes also drop Silver Gloves, which are better than Power Gauntlets. Entering the soldier's station, just taking a couple steps forward causes the guard in here to attack us. I actually did this battle before, so it's not a set type of enemy to fight, but the two times gave some combination of Flame Apes, Hell Ants, and Doom Lizards. Regardless of the enemy mix, it's an easy battle. In the back part of this room, we get the Key of A from the treasure chest. This is the key for the brown door, so we open the door. Since this also puts us on the 2nd floor, we head back to the western opening. This part is simply a short straight hallway to another wooden door. Examining it, Neketsu points out that there's no keyhole, suggesting a switch is likely needed to open it. Back through the other wooden door and going through the western opening in the wall, the first chest we come across has a Doping Drug in it. The other chest in this area has a Junk Pickaxe, which is appropriately named as it's the worst non-firearm we've come across. None of the miners in here have anything useful to say. Looking things up, one of them does use the "Gachon" gag work that the old Japanese comic Kei Tani used, which according to wikipedia was commonly used in Japan. Like the entrance to the Asura Castle's balcony, the door to another soldier station is at the south end of a narrow hall southeast of the last chamber we were in. The soldier in here attacks and we easily defeat the Doom Lizard and pair of Death Hands. There's no treasure chest in here, so we head back to the first room beyond the wooden door. Going through the eastern opening, we pick up a Helm with a Light and Armored Boots from the room we emerge in. The treasure chest in the next chamber holds a Silver Mattock, and the one in the further chamber has some Samurai Greaves, which is the best foot armor up to this point. Again, the miners in here have nothing useful to say. Going through the blue door in here puts us in the same soldier station as before. I guess I didn't notice the big button with an arrow pointing at it next to the north door before. Upon pushing it, we can hear the sound of a door opening in the distance. Neketsu wonders, possibly jokingly to scare Jonjon, what if it's a self-destruct button. Not being one, we head back to the locked door.
Not surprisingly, the door with no keyhole is now open. We pick up a Restorative D from the chest here. The thin wall separating this part of the floor from the section of the floor we already explored appears to be ready to crumble if enough force is applied, but just that of humans isn't enough to knock it down. This would make a nice, albeit pretty unnecessary, shortcut. We then make our way to another guard who attacks us. We easily defeat the Skull Lizards, brushing off its all-party confusion ability. In the room beyond the dispatched guard, we pick up a suit of Fire Armor from the treasure chest before talking to a man identified as a hard worker against a wall with an alcove dug out. It turns out that he's just unearthed what he believes is a millennia old weapon that shows no damage or rust. Rin's consciousness is heard, and this weapon turns out to be the Holy Sword Atlas Blade, leaving only one holy sword left to find. She then senses a huge mental wave incoming, at which point Maggie runs in. The hero then hears Min's voice in his head saying that the wave is that of one of the Four Heavenly Kings. Maggie then turns into Asura. Well, that really explains why Maggie knew so much about Asura earlier. I knew we hadn't actually defeated Asura early -- yeah, shocking, I know. After a little bit of banter, Asura attacks, once again on horseback. And, just like before, he goes down without getting off an attack. This time, however, he gives the little intermission speech before... Oh, he doesn't resume his attack. Instead, he tells us to take good care of the holy sword before saying he'll show us something and then disappearing. We don't have to wonder what that something is for long, as the entire place starts to shake from an earthquake. The earthquake killed the guy that found the Atlas Blade. It also weakened that thin wall enough for us to push it down. It's a good thing we could collapse that wall as the door into this area won't open. Checking on all the other miners, they met the same fate as the hard worker. Thanks to a Doom Lizard dropping a Death Blade, I now know that it's the Flame Ape that can drop a Hyper Armor. Well, there's only one place to go, so we head back to Grias. None of the dialog has changed, but the guards have left the gate to the factory, so we enter what's called the New Weapons Research Institute. On a table in one of the rooms is a Plasma Cannon. As we approach the aircraft, we've found our ticket to the Grangeria Region. There's only one problem, though, as the hero realizes none of us can fly the thing. Fortunately, a pilot enters, saying someone claiming to be from Yuima asked him to help us. However, it seems that this might be a one-way ticket. That shouldn't be an issue, though, assuming we can teleport back and forth. Out of curiosity, before telling the pilot we're ready to depart, we head back to Asura Castle, but Asura is not there. So, are we going to fight the last two Heavenly Kings on Grangeria?
Back in the factory in Grias, we tell the pilot we're ready and board the plane. Getting dropped off on the east coast of the island, the plane takes off, presumably back to Grias. Checking to see if this could be another possible unwinnable situation, we're unable to cast the teleport spell until we enter the town of Fay-Mardis a little to the south. I wonder if this is the same case back in the Tuilarea Region, as I never tried casting teleport before entering Baklans. Speaking to the people of Fay-Mardis, we're told of a rumor of a holy sword in the desert oasis. We also learn that there's a tunnel that connects Fay-Mardis to the interior of the island. I'm assuming that's the only way to get past the mountains, as we didn't fully explore what we could of the region. Unfortunately, monsters started coming out of the tunnel, so the priest here sealed it off. There have also been a lot of earthquakes recently. Maybe this is Asura's doing? The priest also has prophesized that the island will have a large explosion, and with one woman worrying what she'll do if the island disappears, this doesn't seem very good. The priest is also an oracle to the hero Yuima. The gambling den here allows bets of up to 8000CT. In the tavern, one of the patrons says there's a connection between the black orb the priest has and the tunnel. Fia, the girl in Phil's House, says a white giant is blocking the path in the tunnel, and we'll need some sort of proof to pass. In Slim's House, Slim seems a bit unhinged, laughing about a bomb or something he has possibly going off, and if it does, well, that's just that. Oh, hey, one of the pieces of furniture actually has something, but it's just a row of suspicious books. Checking back in Phil's House, examine the tall bookcase just gets Fia to yell at you for snooping around in another person's house. The clerk in the weapon shop actually has something interesting to say, as opposed to the standard "Welcome!" or "Welcome! Have a look around." He tells us that a sword called the Dragoon Slayer was used to defeat some dragon knight, that a monster in the interior of the island has hidden it, and if we're able to find it, he'll buy it from us. The inn here is slightly different, as it's only one story, so the computer is in a room on the ground floor, meaning there's only one guest room. So, it's more of a bed and breakfast than an inn. Checking out the computer, the only other town on the island is Locto-Mardis to the north. The History of the City entry says this island was connected to the Tuilanea Region, but got separated due to the tectonic bullets. So... it's not Australia? Other than the entry on priests mentioning that there was a religion that worshiped an evil god and there are many priests in the region, there's no really useful information on this computer. Since I was ready to go to sleep, I left the fancy looking building, which I'm guessing is where the priest we heard about lives, for my next play session.
I only had an hour or so to kill, so instead of going into the fancy building, I played some blackjack to see if any nifty pieces of equipment could be won. On the first hand, I get dealt a blackjack, so I cash in my 10CT winnings and get a suit of Kosugi Mail. Doing an internet search for "Kosugi", I'm wondering if this is a reference to Sho Kosugi, a martial artist who also played ninja in movies. Playing until I got a repeat item, everything you get is very good. After the Kosugi Armor, you get a Hyper Armor (we now have the hero wearing the Samurai Armor and the other two wearing Hyper Armor), Fire Armor (a slight downgrade from the Hyper Armor, but I'm guessing it protects against fire), Giga Blaster (the best 1-handed firearm up to now), and Garb Roto (equal defense to the Hyper Armor with different stat boosts, but will sell for 500,000CT, as opposed to the 75k the Hyper Armor sells for).
As I expected, the fancy building is the priest's house. The cloaked figure on the 2nd floor tells us that we'll need the black orb to get through the tunnel and the orb is paired with a white orb. Speaking to the priest, he relates Yuima's revelation that we'll be shown the way to the island of Yuima when we collect all seven holy swords. After saying that the holy sword on this island is about to awaken, he gives us the black orb that should unblock the tunnel. Since we hadn't fully explored what we could of the island, I reload and leave town before talking to the priest. We can't do much other than examine the tunnel, which isn't all that noticeable, and it simply says that there's a tiny opening that we can drop something into. Going back to collect the orb, we return to the tunnel entrance and drop the orb in. This causes a large rock to move aside and we can enter. Inside the tunnel, we can't exit, so it looks like we might be stuck until we make it through to the other side. At the end of the path to our right that we're blocked from, we can see what looks like the black orb. Examining the pair of wooden doors where we entered, neither will open. There's an indentation in the wall to the right of the west door that looks to need some item to be placed in it. The door at the north end of the eastern hall can be opened, and what looks like the white giant is inside. Leaving that for now, we head back to what looks like the black orb. Examining it, it is the black orb, so we pick it up. This allows us to exit the tunnel. It's also what gets placed in the indentation. Since there's nothing else in here, the proof the White Giant needs must be beyond this door. So, rather than using it at the door, we check out what happens at the White Giant. There are a couple chests in the chamber it's in, so since we can open them before interacting with the giant, we pick up a suit of Samurai Armor and a Battle Shield. That saves us 1M CT and we got an upgrade over the Reflect Shield. Nice!! Trying to walk around the giant doesn't work, as we're pulled to in front of it. It just says it won't allow anything to pass without proof and we're pushed away from it. Well, there's only one thing left to do. We go back and place the orb in the indentation, which opens the left door. After a corridor of a handful of steps, we go through the next door and find a pedestal in the immediate chamber. There's a white orb on the left section of the pedestal and an empty depression on the right side that looks to be just the right size for another orb. Jonjon tries to take the white orb, but can't. Neketsu suggests placing our black orb on the right section. This allows us to get the white orb, but we're now unable to take the black orb. At this point, we can take either orb, but not both. With the white orb in hand, we try to exit the way we came in, but the door won't open (it won't open if we have the black orb, either). Following the only path, this leads us to the other side of the eastern door that wouldn't open. So, both of these doors are one-way doors. The white orb won't allow us to leave the tunnel, so we're forced to go back to the giant. Entering its chamber, it's not there. As we start crossing through the room, the giant's voice is heard saying we have the proof needed to pass, then warning us to be careful. Making our way through the next section, we leave the tunnel. As with the other entrance, rocks are blocking the entrance and the white orb is dropped in to move a boulder aside. Ah, it just dawned on me that since you have to go pick up whichever orb you used in order to progress through the tunnel, it makes sense that you're automatically pulled into the tunnel. For curiosity's sake, the giant reappears if you don't pick up the white orb, blocking our passage back through the tunnel. Picking up the white orb, we leave through the north exit. We can spot the next town, Locto-Mardis, not too far away. The terrain doesn't make me think "desert", but as we head to the town, we walk over what looks like a large puddle of water in a narrow spot in the mountains and find ourselves in the Oasis we were told about. Wanting to get to the town ASAP, we immediately leave and continue north to Locto-Mardis.
Hanging out in this town are several soldiers. They all yell at us that sabotage is grounds for the death penalty before attacking. Every battle with the soldiers is against a single extremely weak, at this point, Killer Hornet. Leaving town causes the soldiers to respawn. There are a couple treasure chests in the walled-in area beyond two of the soldiers, so we pick up a D-Weapon (which is actually a bomb) and a Hyper Armet, which has the same defense rating as the Safety Helmet, but has additional stat boosts, so off goes the Safety Helmet. Talking to the non-soldiers, we learn the final Heavenly King is Brahma. The latest on that elusive samurai is that he went to Brahma's palace, which is to the west. A friend of the samurai is also in this town, but they've gotten separated. Once again, there's some excavating going on and the people forced to work there are being treated terribly by a Heavenly King. One guy owed someone named Paul some money. Channeling Tommy Flanagan, the Pathological Liar and saying I am Paul (yeah, yeah, that's the ticket), the guy gives us 10,000CT. If you're truthful, he asks where Paul went to, mumbling about how he has the money to repay him. You only get one shot at this (not counting reloading the game). The max bet in the gambling den is 10,000CT. There's another priest here, and he's made some prophesy, which has apparently caused several earthquakes. In the Soldier's Quarters, a treasure chest holds an EP Drug. Maybe one of these days I'll actually use all those stat boost items. Checking out the computer in the hotel, the History of the City entry tells of how the tectonic bullets (or maybe bombs, which probably makes more sense) separated this region from Tuilanea. So, maybe this is supposed to be current-day Indochina and not Australia. The entry on the Oasis states that Brahma's minions are currently stationed there and reiterates that the holy sword, which those minions are searching for, is sleeping there. Adding a bit more to the game's lore, the About Myths entry says the two dragons were born from the same chaos as the goddess and Dark God. Repeating what we already know, one of the dragons resided in Yuima, making him half-human and half-god, while the other fused with the holy sword. It also says that Yuima and the Dark God are apparently brothers. Figuring the ornate building is the priest's house, we leave it for later and leave town to fully explore the island.
Taking the few steps southeast, we enter the Oasis. There are a couple soldiers here as well as a few men digging holes. Speaking to the soldier right in front of us when we enter the Oasis, we get attacked by a couple Cerberuses (Cerberi? I don't think there's a plural, since it's a singular mythological creature). They aren't very tough, and we easily defeat them. As in Locto-Mardis, exiting the Oasis causes this soldier to respawn. The other soldier, who's blocking the door to a small building, also pits us against two Cerberus, but he doesn't respawn. No one here says anything important. Stepping into the large circle in the southeast corner, where I'm guessing the holy sword will be, just causes us to spin around, with the hero getting the feeling of someone calling him. The only thing inside the northern tent is a treasure chest with a Giga Blaster. The southern tent has the chief soldier. He doesn't have time to deal with us, so he gives us some Samurai Gloves to get us to go away, which is the best Arm armor so far. Oh, hey, thanks buddy! Entering the little building the guard was blocking, we find a Silver Sword inside the treasure chest. Since we obviously didn't trip the necessary flag, we leave and head back to town to save.
The only other place on the island is Brahma Castle to the west of Locto-Mardis. In the room immediately to the west of the entrance, we pick up a D-Striker from the treasure chest. Speaking to the man with long hair... blowing in the breeze... he turns out to be the samurai Kennosuke Kenzaki that we've been hearing about. He mentions he thinks he can return home from here before noticing the Blade Casitar we have. After handing it over to him and telling him how we got it. Neketsu tells him to say hello to his son when he returns home. I've either forgotten or completely missed how Neketsu would know about Kenzaki's son. As thanks, possibly for our concern, he gives us back the sword. Since you can sell the sword, I wonder what would happen if you came here without it. It's not like it's an extremely powerful weapon, although it was decent when we were given it. He then phases out, presumably returning home. Speaking to the soldier guarding the east room, he attacks in the form of an Ice Tiger, which goes down before being able to attack. The treasure chest in here holds a Samurai Shield, the best shield up to this point (I'm thinking all the Samurai gear is the best in the game). Ok, the encounter rate in this place is approaching the ridiculous level. The enemies in here do have some decent item drops, at least with regards to what we can sell them for. Either the Facer or Three Heads drops Silver Armor, Cerberus drops Paralyze Armor, Web Spinners drop a Dark Ring, and Dragon Zombies drop the Dragoon Slayer that weapon dealer told us about. The Dragoon Slayer isn't anything special, as we were led to believe, as we've ended up with a handful of them. Since we haven't been selling much back, we've run into the inventory limit. After a trip back to town to sell off some useless equipment and bombs, we return to finish looting the place. Avoiding the soldier guarding the stairs for now, we pick up a Revive from the chest in the northeast corner of where he is. In what looks like a board room, we pick up a Doping Drug from the chest there. Finally, in what looks like a kitchen or dining room, the chests hold a Restorative D and MP Recovery C. Going back to the soldier at the stairs, we take out another Ice Tiger in the first round of the battle. On the 2nd floor, beyond the door is Brahma's Room, and he's in it, so we step back out and take a Fool Medicine from the chest in the other room. Just in case we get into an altercation when we talk to Brahma, we head back to town to heal and save.
Making our way back through all the random encounters in the castle, speaking to Brahma cues a voiced scene. After congratulating us on making it this far, he boasts of being the strongest of the Heavenly Kings and then says he'll knock our heads off and present them as a souvenir for Indra. His physical attack takes off about a quarter of his target's EP, but it's not too bad. He can buff his own attack power for the next attack, but the dolt never actually attacked after doing so, casting it three consecutive times, which was enough time for us to defeat him. In his intermission, he decries our destroying his armor before beginning round two. Bare from the waist up, his attacks now take out about a third of his target's EP, which is about what can be healed with the best single target healing spell, Iyasudi. He also has the strongest earthquake spell, Guradoras, in his repertoire, but that only does about 40 points of damage to everyone. All in all, he's not difficult and we eventually defeat him. Admitting his defeat, he phases out. I wasn't expecting him to attack, since I was thinking we'd have to speak to likely a priest in that last building in Locto-Mardis, so I reload.
Back in Locto-Mardis, as I expected, the ornate building is the chief priest's house. There are a couple treasure chests in here, so we collect a Speed Drug and a suit of Thunder Armor. The people on either side of the priest have nothing important to say, just relaying a legend we'd heard before and the prophesy of meeting Yuima and going to the goddess' temple. Speaking to the priest, having made it this far, he thinks we might be able to defeat the Dark God. He says two kings remain and one of them is waiting at the temple of the goddess. Since we already defeated Brahma (well, technically, we haven't), this must be Asura. He then tells us that we won't be able to confront the Dark God until we eliminate all four Heavenly Kings. Defeating the kings will cause the holy swords to awaken and we will be able to reach the hero Yuima. Just in case you've forgotten, when we speak to the priest again, he tells us that the final holy sword sleeps in the Oasis. We head back to defeat Brahma again. Fortunately it's a small castle, so making it back to him isn't too tedious. Again, he goes down relatively easily. Originally, I had the Fay-Mardis weapon dealer telling us the sword was the Dragon Slayer, and since those Dragon Zombies drop Dragoon Slayers, we head back there to verify. Entering town, the music has changed to the upbeat tune. Going back to the weapon shop, the dealer does say Dragoon Slayer, but he doesn't have anything new to say, not to mention that he doesn't offer us a different amount than the shop in Locto-Martis. I wonder... I ran what the dealer says through the translators again, and a better translation would be that a monster in the interior carries it. The only dialog that's changed is in the priest's house, where the priest now tells us to go to the oasis where the holy sword is. Going back to Locto-Mardis, almost everyone here is gone, including the shopkeepers and inn receptionist. The only person here is the chief priest, who tells us that everyone took refuge in Fay-Mardis. He will save our progress, but doesn't heal us. Like the priest in Fay-Mardis, he also tells us to go to the oasis. Well, with only one thing left to do, we head to the oasis.
In the oasis, which also now has the upbeat happy tune, everyone says the same thing as before. Stepping into the circle causes the final holy sword to appear. Run's consciousness is heard in the hero's head, and she just says it the Vulcan Blade, which means we have all the holy swords. The ground begins to shake and the seven holy swords float out and start to shine. We're then teleported to Yuima Island. Like on Racan Island, there doesn't seem to be any encounters here, as we walked around the small island for a while without getting into any battles. Entering the town of Yuima, it's not a town, but a temple with the same basic design as the ancient Mayan temples. One of the Racan Men at the base of the stairs tells us they've been waiting for us and that Yuima has a story to tell us. The only somewhat important thing the people outside the temple tell us is that Racan, who fought alongside Yuima against the Dark God, is at the entrance to the goddess' temple. Inside of this temple, none of the four priests here tell us anything useful. Getting close enough to what must be Yuima, the five Aurora Girls appear behind him, completing the ring of people, and Yuima begins to tell us his tale. It turns out that our old mysterious pal Kotobuki Goro is actually Yuima. He tells us that although he won the battle against Indra, he wasn't able to truly get rid of Indra. He then drops the bombshell that the hero is a descendant of himself. Unfortunately, his body is at its limit, so he's unable to help us. After warning us to be careful since Indra is at the same level of power as he was 7,000 years ago, due to being sealed between dimensions, he tells us that there is a spaceship outside that will take us to the temple of the goddess. He says his goodbyes and disappears, leaving behind his robe. I wonder if this is a Star Wars Obi-Wan Kenobi reference. Speaking to the priests, one of them says Yuima isn't dead, but will be watching over us. Yun tells us that the goddess' temple has fallen into the hands of Indra. Min says that we won't be able to return to Earth until we've defeated Indra. Unfortunately, we can't head back to a town to save because as we approach the bottom of the steps, we automatically board the spaceship and fly off to the goddess' temple. The spaceship appears to be the same one that the Aurora Girls take from their mother ship to descend to Earth in the intro movie, just in silver as opposed to yellow in the intro.
Arriving at the base of the goddess' tower, we get dropped off and the spaceship flies away. Before talking to the cloaked figure at the top of the stairs, we look around the exterior of the temple and spot a disco ball at the end of the path to the right of him. This should mean... Yep, we can teleport back to Earth. So, Min was wrong, or at least she was according to my translation. Interesting... In the teleport destination list, if you're at the goddess' temple, its location is in hiragana, but if you're anywhere else, it's in katakana, just like every other location. As we were told, Racan is the person waiting at the top of the stairs, outside of the entrance to the temple. He simply says that he knows who I am without me saying a word, and that Yuima is watching over us. Speaking to him again, he fully heals the party and can save the game. Heading into the temple, which is called the Goddess' Palace, the encounter rate is pretty high. The only enemies in here are Flare Tigers and Ice Tigers. The Flare Tigers can drop the best head gear in the game... wait for it... the Samurai Helmet. Heading through the door at the top of the stairs puts us in an area with four doors. Taking them from left to right, through the leftmost one is a smallish room with a treasure chest holding a suit of Silver Armor. The next one has what looks like Asura, so we immediately turn around. Next is another small room with a chest holding a Silver Sword. The last room has a chest with Silver Gloves. Nothing is an upgrade to what we're equipped with. Just in case, we head back to Racan to heal and save. Approaching the man we ignored earlier, it is Asura, who still doesn't get any voice work. After saying he'll settle the score here, he attacks. He's pretty much the same as earlier, even giving the same CT and Exp. During his intermission speech, I think he makes a pun about making us hot, since he uses the Achiidosu spell, and then he says he won't run away or hide this time and the battle recommences. Like the previous Heavenly Kings, he's lost he mask and has become quite a bit tougher. In addition to Achiidosu, he also has Bishibisu, but neither does much damage to us. This time, he's defeated for good. We make use of Racan's services again and return to where Asura was.
From here, it's just a straightforward trek through a handful of rooms with nothing but random encounters against those tigers until we run into a somewhat large man sitting on a throne. This blonde fellow is the Dark God Indra. Speaking to him cues an approximately 3 minute cutscene with some actual animation. Unfortunately, it's not subtitled. After saying something, he shoots the hero right through the torso with an arrow. But, we were told that the holy sword would protect against that. As the hero is lying on the floor with a massive wound, what I'm guessing is along the lines of Neketsu, Jonjon (why is he shown with cleavage?), and the Aurora Girls giving some kind of spiritual aid, during which the seven holy swords are shown merging together. The dragon then emerges from the sword, and the only instance of full nudity is shown... a profile shot from a good enough distance to where no real details can be made out of the hero lying flat on his back. The hero is then restored, as well as his clothes. Indra gets a kick out of this, the dragon turns back into the sword, and the final battle begins. Indra has a pretty good array of spells at his disposal. His physical attack does about 100EP of damage, and the three of us each has around 450EP. The dangerous thing about this is that he also has a double attack. As for magic, during the battle, he cast Iyasudi (heals around 100EP), Rishuwaarutsu (defense debuff), Spazash (shock that hits one character), Kochintosu (all party cold), and the most dangerous Bishi Reido (all party lightning). He can also scold himself, which causes him to attack first. I don't know if this lasts for the entire battle since he tended to do it multiple times, sometimes back-to-back. This ended up being a somewhat challenging battle, with us actually needing to revive several times. We also actually used a number of Restorative Ds, as it heals 250EP as opposed to the best healing spell only healing around 100EP. He had a tendency to get critical hits, which did a little over 400EP of damage. I don't know if this was due to him scolding himself. It is possible to target a KO'ed character with a healing spell, so with us always acting in the same order, we were able to revive and heal a KO'ed character in the same round. We did defeat him on our first try, even having everyone conscious at the battle end, so it wasn't too tough. I did redo the battle in order to record the cutscene, since I couldn't remember details for this topic, and it went much smoother. Before heading into the battle, I moved the Restorative Ds and Revives up to the top of my inventory, as it doesn't stay on the last item chosen during battle, meaning I spent a lot of time scrolling through the inventory list during the first time I fought him. Since I knew how dangerous Bishi Reido is, I immediately cast Bishi Screen to nullify it. A big help this time was that he never got off a critical hit. No one got KO'ed and we only needed to use a couple Restorative Ds. With him giving 0CT and 0Exp, it was pretty obvious that there wouldn't be a second round. He sputters out something like "I am... I am..." before starting to disappear. Another lengthy cutscene plays, this one about 6 minutes long. After clutching his wound, likely saying something along the lines of never being able to be truly defeated (if it falls in line with the standard RPG big baddie fare), a huge explosion on Earth is seen from outer space. It's hard to tell for certain, as it's just a small speck, but it appears that the spaceship that brought us to the tower zooms to the desert planet where the goddess' tower/palace is. The holy sword is then shown stuck in the ground and Maya, the Goddess of Light, finally makes an appearance, appearing from the sword. After some words, she and the hero have a loving embrace, although she's nearly transparent for some reason, thanking him as the scene ends. The cutscene ends with the hero standing stoically on a cliff, presumably back on Earth, with more dialog. The end credits then roll to a song that I believe is in Spanish.
I finished the game with the hero and Neketsu both at level 41 and Jonjon at Level 39, due to Naga holding him for a good while. The manual has a spell being learned at level 90. With as little experience as the game gives, only the Heavenly Kings give more than 1000 and the most a normal enemy gives is 375 from the Ice Tiger, and leveling up takes over 5000Exp at the point I was at, I couldn't imagine how long it would take to have everyone learn every spell.
Overall, I thought is was a decent game, albeit very generic outside of the oddball enemies on the floating cities. It definitely didn't have the adult content I was expecting. It's a shame it had what it did, though, as it might have kept it from being localized. If you enjoy standard, generic 8-bit and 16-bit JRPGs, understand Japanese or are willing to deal with the language barrier, and can put up with a little bit of perverted content, I'd definitely recommend giving this game a try. I give it a 7/10.